Got a pair of sneakers on life support? Fear not. Shoe Goo is here to save the day. This magical adhesive has been a go-to for sneakerheads and DIY enthusiasts alike. But hey, how long does it take for this stuff to dry?
In this article, we’ll break down the drying process of Shoe Goo so you can strut your stuff in no time.
How long does shoe goo need to dry?
Contents
- 1 How long does shoe goo need to dry?
- 2 What is Shoe Goo?
- 3 Factors Affecting the Drying Time of Shoe Goo
- 4 Applying Shoe Goo for Optimal Results
- 5 Temperature and Humidity Considerations
- 6 Different Materials and Drying Times
- 7 Following the Manufacturer’s Instructions
- 8 Avoiding Premature Stress or Moisture Exposure
- 9 Allowing Adequate Curing Time
- 10 Conclusion
The Drying Time:
So, you’ve slathered on some Shoe Goo to fix up those worn-out kicks. Now, let’s talk drying time. It all boils down to two things: temperature and thickness. In ideal conditions (around 70°F to 85°F or 21°C to 29°C), you’re looking at about 24 hours for full dryness.
But hold up. The thickness of your Shoe Goo application also plays a role. Thin layers will dry and cure within 12 to 24 hours. Thicker layers? Well, they might need a bit more patience—around 48 hours or even longer.
Factors that May Speed Things Up or Slow Things Down:
Keep in mind that certain factors can mess with the drying process. Here are a few examples:
- Temperature: Hotter temps speed things up, while cooler temps slow ’em down.
- Humidity: Too much moisture in the air can put the brakes on curing, so find a well-ventilated spot or grab a fan.
- Thickness: Remember what we said earlier? Thin layers dry faster than thick ones. So if you’re in a hurry, go thin.
Tips for Quick-Drying Success:
To make sure your Shoe Goo dries like lightning, follow these pro tips:
- Clean it up: Give the damaged area a good cleaning before applying Shoe Goo. A clean slate means better sticking and faster drying.
- Thin is in: Instead of one thick layer, opt for multiple thin ones when making repairs. This speeds up drying time and boosts the bond.
- Patience, my friend: Don’t rush the process. Give your Shoe Goo enough time to dry and cure properly. Trust us, it’s worth the wait.
Shoe Goo is a true game-changer for sneaker revivalists everywhere. Stick to the recommended drying times, follow our tips, and you’ll have your kicks looking fresh in no time
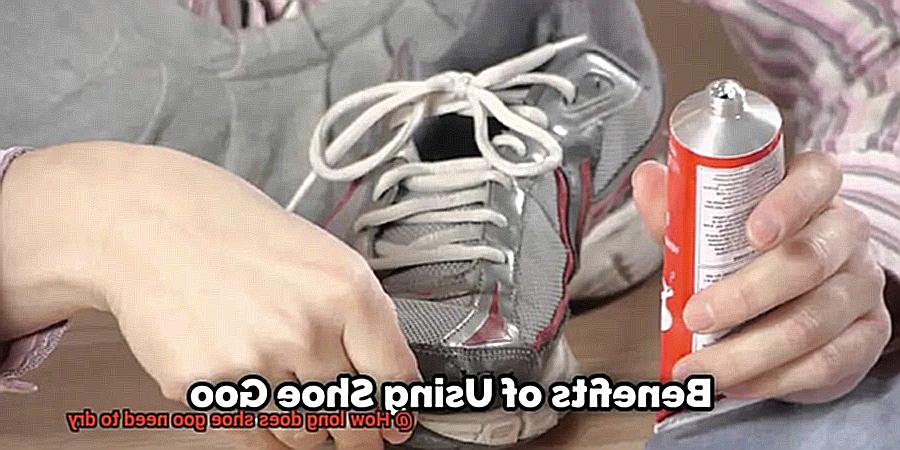
What is Shoe Goo?
When it comes to the longevity of your favorite footwear, finding the right adhesive is crucial. Enter Shoe Goo, the go-to solution for DIY enthusiasts and outdoor adventurers alike. In this article, we will explore the exceptional features of Shoe Goo and why it has become the ultimate repair solution for all types of shoes.
Exceptional Bonding Strength:
Shoe Goo stands out with its unrivaled bonding strength. Whether you need to fix a detached sole, seal cracks and holes, or reinforce vulnerable areas, this adhesive creates a durable bond that withstands regular use and movement. It adheres seamlessly to various shoe materials such as rubber, leather, canvas, fabric, and vinyl, making it ideal not only for shoes but also for repairing handbags or sports equipment.
Unyielding Flexibility:
Unlike traditional glues that can become brittle over time, Shoe Goo remains pliable even after drying. Its flexibility ensures that the repaired area can endure regular wear and tear without compromising its integrity. So whether you’re navigating rugged terrains or engaging in high-impact activities, Shoe Goo keeps your shoes intact and ready for any adventure.
Impenetrable Waterproof Protection:
Another remarkable feature of Shoe Goo is its waterproof nature. Once dry, it forms a protective barrier that repels moisture from seeping into the repaired area. This enhances the durability of the repair and preserves the overall quality and appearance of your footwear. Bid farewell to soggy feet on rainy days or muddy trails – Shoe Goo has got you covered.
Tips for Optimal Results:
To maximize the benefits of Shoe Goo, apply it in thin layers as thicker applications may require longer drying times. Speaking of drying times, they can vary depending on factors like temperature, humidity, and the material being repaired. For accurate information on drying and curing times, always refer to the manufacturer’s instructions.
Factors Affecting the Drying Time of Shoe Goo
Factors Affecting the Drying Time of Shoe Goo:
- Temperature: The temperature of the environment is a crucial factor in determining the drying time of Shoe Goo. Higher temperatures accelerate drying, as the heat helps solvents evaporate faster. Colder temperatures, on the other hand, slow down the process. Finding a warm spot for your Shoe Goo can speed up the magic.
- Humidity: Humidity levels also impact drying time. High humidity means more moisture in the air, which hinders solvent evaporation and extends drying time. Conversely, low humidity speeds things up because there’s less moisture to contend with.
- Application Thickness: Thicker layers take longer to dry as there’s more solvent to evaporate. Applying Shoe Goo in thin, even layers ensures quicker results.
- Ventilation: Proper airflow aids solvent evaporation and speeds up curing. Applying Shoe Goo in a well-ventilated area or using fans can expedite the process.
- Substrate Type: Different materials affect drying time. Porous materials like fabric absorb solvents readily, resulting in longer drying times. Non-porous materials like rubber dry faster since solvents don’t penetrate as deeply.
- Product Age: As Shoe Goo ages, it becomes thicker and stickier, requiring more time to dry. Always use fresh Shoe Goo for optimal performance and drying time.
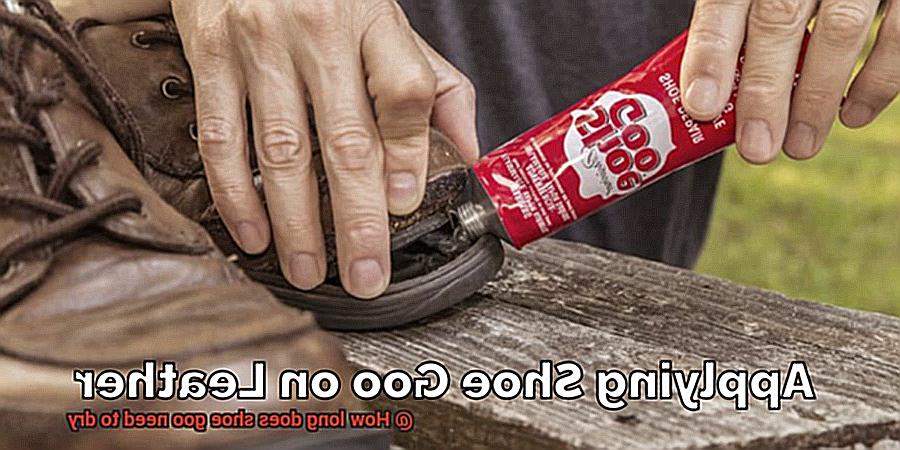
Applying Shoe Goo for Optimal Results
Do you have a beloved pair of shoes that are showing signs of wear and tear? Perhaps the sole is starting to detach or cracks are forming in the material. Fear not, for there is a handy solution that can save your shoes and your wallet – Shoe Goo.
Shoe Goo is a renowned adhesive known for its exceptional strength and flexibility. It is the perfect remedy for repairing damaged soles, sealing cracks, and safeguarding your shoes from further harm. But how do you apply it for optimal results? Let’s delve into the step-by-step process.
- Cleanse the area: Prior to applying Shoe Goo, it is imperative to thoroughly clean the area that requires repair. Utilize a mild detergent and warm water to eliminate any dirt, dust, or debris. Ensure the surface is completely dry before proceeding to the next step.
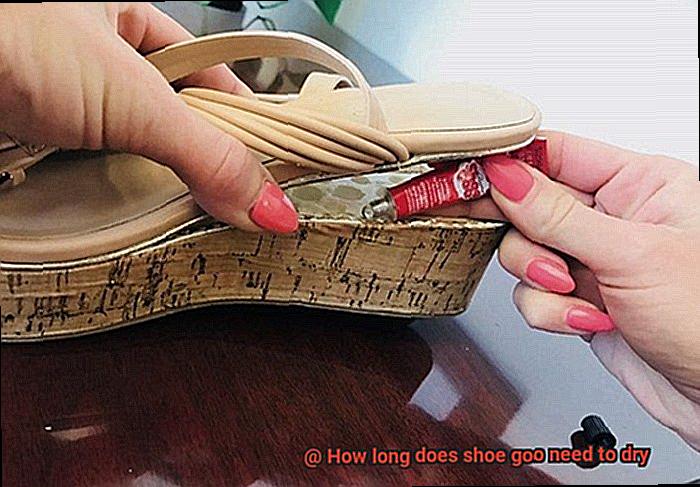
- Prepare Shoe Goo: Squeeze a small amount of Shoe Goo onto a disposable surface, such as a piece of cardboard or plastic. To achieve an even application, it is recommended to use a toothpick or small brush. Remember, multiple thin layers yield superior results compared to a single thick layer.
- Allow ample drying time: The drying time of Shoe Goo can vary depending on factors like temperature, humidity, and the thickness of the applied layer. On average, it takes approximately 24 to 72 hours for Shoe Goo to fully cure. However, please note that this is merely an estimate and actual drying time may differ.
- Provide proper ventilation: While waiting for Shoe Goo to dry, it is crucial to place the repaired shoe in a well-ventilated area. Adequate ventilation expedites the curing process of the adhesive. Avoid touching or exerting pressure on the repaired area during this time to ensure optimal results.
- Exercise patience before heavy use: Shoe Goo gains strength over time. Therefore, even if it feels dry after the estimated drying time, it is advisable to wait at least 48 hours before subjecting the repaired shoe to heavy use or vigorous activities. This guarantees a long-lasting repair.
- Make adjustments if necessary: Should you need to remove excess Shoe Goo or make any adjustments after it has dried, employ a sharp knife or sandpaper. Exercise caution when doing so to prevent any damage to the shoe.
- Proper storage: To maintain the efficacy of Shoe Goo, store it appropriately. Ensure the tube or container is tightly sealed after each use and store it in a cool, dry place. This preserves its shelf life and ensures it remains ready for future repairs.
Temperature and Humidity Considerations
Temperature and humidity considerations are crucial when it comes to understanding how long it takes for Shoe Goo to dry. These environmental factors play a significant role in the adhesive process, affecting the drying time and overall effectiveness of the product.
Let’s start with temperature. Shoe Goo dries faster in warmer temperatures. The heat accelerates the evaporation process, allowing the adhesive to dry more quickly. So, if you’re planning to repair your shoes during the summer months, you’re in luck. However, if you find yourself in a cold environment, be patient and give the adhesive ample time to dry completely.
Now, let’s talk about humidity. High humidity levels can slow down the drying time of Shoe Goo. The moisture in the air hinders the evaporation of solvents present in the adhesive, making it take longer to dry. It’s best to choose a day with relatively low humidity to ensure optimal drying conditions.
But what happens when temperature and humidity interact? In a high-temperature and high-humidity environment, the drying time may be prolonged due to the combined effect of these two factors. On the other hand, a low-temperature and low-humidity environment can speed up the drying process. Finding that balance is key.
Under ideal conditions (moderate temperature and low humidity), Shoe Goo can dry completely within 24 to 48 hours. However, keep in mind that these times are approximate and can vary depending on factors like the thickness of the applied layer, ventilation in the area, and any specific instructions provided by the manufacturer.
Different Materials and Drying Times
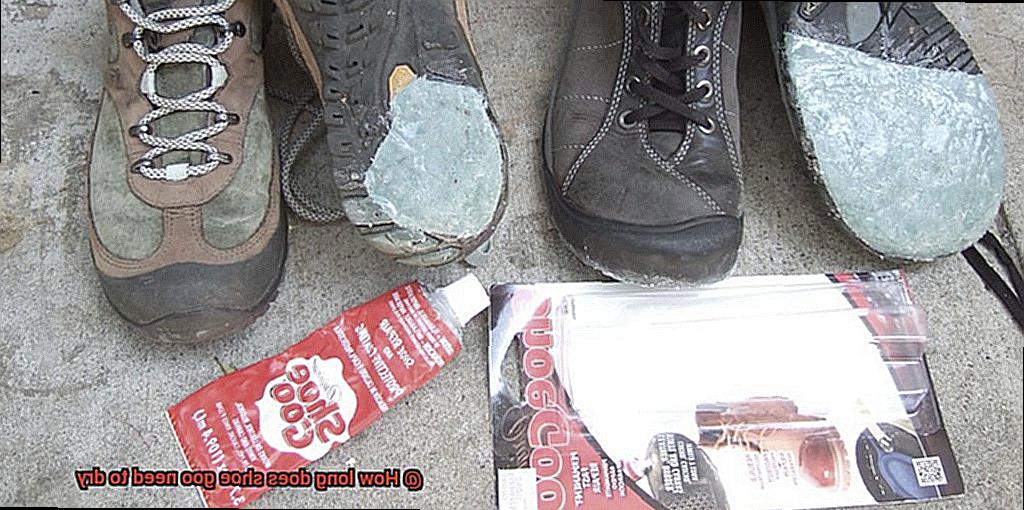
Well, fear not my friends, because Shoe Goo is here to save the day. This magical adhesive can work wonders on a variety of materials, but you may be wondering, “How long does it take to dry on different surfaces?” Let’s dive into the world of Shoe Goo and explore its drying times on various materials.
Let’s start with leather. Ah, the classic material that exudes style and sophistication. When using Shoe Goo on leather surfaces, it’s best to give it a solid 24 hours to dry. But hold your horses, cowboy. If you want that repair to last, give it an extra 48-72 hours before flexing or putting any pressure on it. You don’t want to rush perfection.
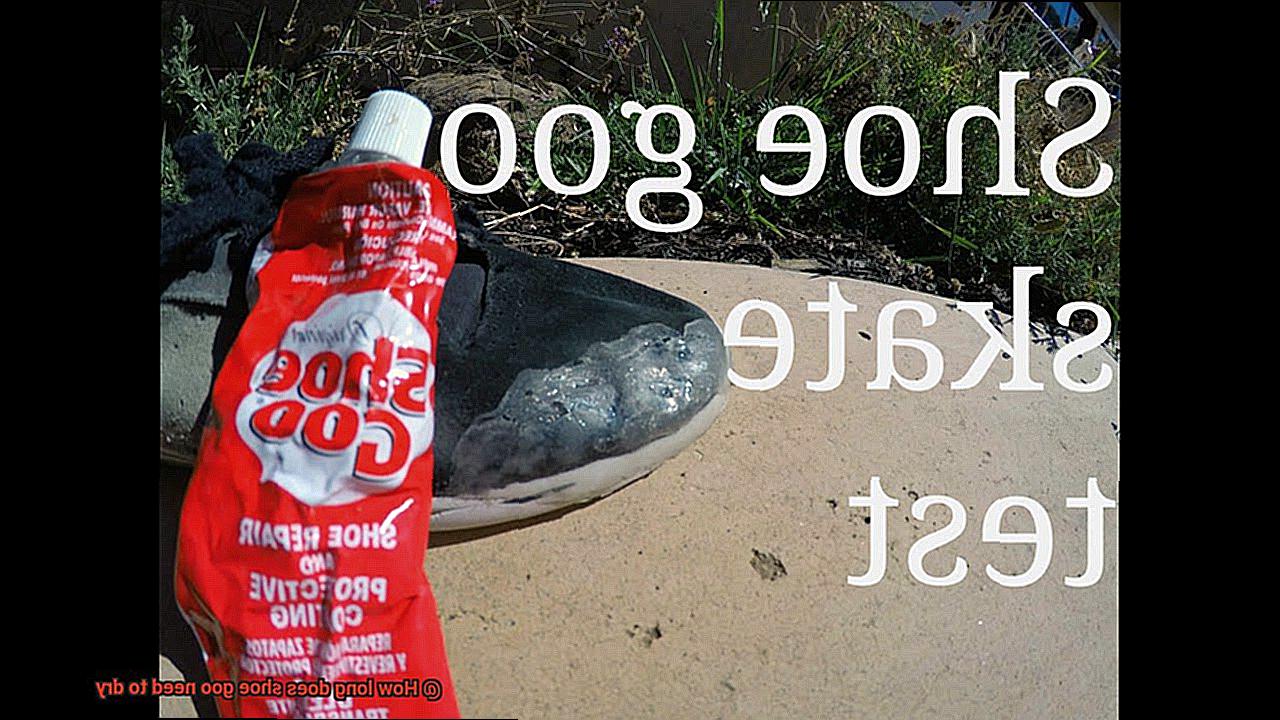
Next up, we have rubber and vinyl. These materials are often found in our trusty sneakers and beloved boots. Lucky for us, Shoe Goo doesn’t mess around when it comes to drying on rubber and vinyl. In most cases, a mere 12-24 hours will do the trick. But hey, if you’re feeling patient, go ahead and let it cure for a bit longer for an even stronger bond. It’s like giving your shoes a little extra love.
Now, let’s talk about fabric and canvas. Picture your favorite pair of canvas sneakers or that cozy fabric slipper you just can’t live without. When using Shoe Goo on these materials, make sure to apply a thin layer and let it dry for at least 24 hours. And remember, no washing or water exposure until it’s fully cured after 48-72 hours. We don’t want any mishaps ruining your repaired treasures. Patience is key here.
But wait, there’s more. Shoe Goo isn’t limited to just shoes. It can also work its magic on plastic and metal surfaces. So if you have a broken plastic toy or a metal accessory in need of some TLC, fear not. Give it a good 24-48 hours to dry, and you’ll be amazed at the results. It’s like having your own workshop at home.
Following the Manufacturer’s Instructions
Today, we embark on a glue-filled adventure into the world of Shoe Goo, the ultimate adhesive for repairing and protecting your beloved footwear. But before we dive in, it’s crucial to understand why following the manufacturer’s instructions is an absolute must. So, settle in and prepare to uncover the secrets to successful shoe restoration.
Get the Best Results:
Think of the manufacturer’s instructions as a secret recipe handed down through generations. These guidelines provide precise steps for applying Shoe Goo correctly, ensuring optimal results. Skipping this crucial step could lead to a subpar repair job or, even worse, a complete adhesive failure.
Drying Time Matters:
Ah, the magical drying time. Like waiting for a superhero to emerge from their secret lair, it requires patience and precision. The manufacturer’s instructions provide an estimated drying time range for Shoe Goo, taking into account factors like temperature, humidity, and layer thickness. Trusting these guidelines ensures a solid and long-lasting repair.
Additional Tips for Proper Drying:
To ensure your Shoe Goo adventure ends in triumph, here are some extra tips:
- Choose a well-ventilated area for drying your repaired footwear; fresh air aids in the curing process.
- Keep them away from direct sunlight or heat sources to prevent potential damage to the adhesive.
- Remember that different purposes require different drying times – minor repairs may need less time, while extensive ones or immediate wear may require more.
Rushing the Drying Process = Disaster:
Impatience can be our worst enemy when it comes to glue drying times. If you rush the process and don’t allow Shoe Goo enough time to fully dry and cure, you risk compromising its effectiveness. A weak bond or inadequate protection could leave you back at square one with your damaged shoes.
In the world of shoe repair, following the manufacturer’s instructions is like unlocking the secret to wielding a superpower. When it comes to Shoe Goo, this magical adhesive for repairing and protecting footwear, understanding and adhering to the instructions is crucial. By doing so, you’ll ensure optimal results, longevity, and a triumphant repair job that will make your shoes feel brand new.
Avoiding Premature Stress or Moisture Exposure
Imagine your favorite pair of shoes on the verge of falling apart – a worn-out sole, a frayed seam. But fear not. With Shoe Goo, you can bring them back to life. However, to ensure the effectiveness of this amazing adhesive, it is crucial to avoid premature stress or moisture exposure during the drying process. This article will delve into why this is important and provide tips for successful shoe repairs.
Importance of Avoiding Premature Stress or Moisture Exposure:
To maintain the bond effectiveness of Shoe Goo, it is vital to prevent premature stress and moisture exposure. Premature stress can cause the adhesive to shift or lose its grip, while moisture exposure dilutes and weakens its strength.
Tips for Avoiding Premature Stress:
- Handle with Care: Treat your repaired shoes delicately, avoiding bending, twisting, or excessive pressure on the areas where the adhesive has been applied.
- Keep Stationary: Place the shoe on a flat surface or use clamps to allow the adhesive to set undisturbed.
Precautions against Moisture Exposure:
- Stay Dry: Keep repaired shoes away from water, humidity, or excessive moisture during the drying period. Avoid walking in damp conditions, wearing them in rainy weather, or exposing them to water splashes.
- Store in a Dry Environment: After applying Shoe Goo, store your repaired shoes or items in a dry location until the adhesive has fully cured and dried.
Timing Considerations:
Follow the manufacturer’s recommendations regarding drying time. Factors such as temperature, humidity levels, and adhesive thickness may affect drying time. Generally, allow at least 24 hours for full curing. Always refer to the manufacturer’s instructions for optimal results.
Testing the Dryness:
Conduct a simple test by gently touching the adhesive surface with your finger or a small object. If it feels dry and no longer sticky, it’s likely fully cured. If tackiness persists, give it more drying time.
Allowing Adequate Curing Time
If you’ve ever used Shoe Goo to salvage your beloved kicks, you’re well aware of its transformative powers. However, it’s crucial to exercise patience and allow adequate curing time for your repairs to truly endure. In this article, we’ll delve into the reasons why this is so important, while offering expert tips to ensure your Shoe Goo repairs are nothing short of exceptional. So, let’s jump right in.
Why is Adequate Curing Time Important?
Maximum Strength Bond:
Rushing the drying process can compromise the integrity of the repair. By allowing Shoe Goo to cure fully, you ensure a strong and durable bond that can withstand everyday wear and tear. Don’t settle for a hasty fix when you can have a long-lasting repair.
Factors Affecting Drying Time:
Temperature Matters:
Temperature has a significant impact on the drying time of Shoe Goo. Higher temperatures accelerate the curing process, while colder temperatures slow it down. Take note of the ambient temperature and adjust your drying time accordingly for optimal results.
Humidity Can Be Tricky:
Humidity levels can prolong the curing time due to increased moisture in the air. To speed things up, consider using a dehumidifier or providing additional drying time in humid conditions. Don’t let Mother Nature dampen your repair efforts.
Thin is In:
Applying Shoe Goo in thin, even coats not only ensures a faster drying time but also promotes stronger bonding. Thicker layers take longer to cure, so keep it thin and reap the benefits. Trust us, less is more when it comes to Shoe Goo application.
Tips for Successful Curing:
Read the Instructions:
Different brands may have specific instructions for drying times, so always refer to the product packaging or manufacturer’s recommendations for accurate information. Don’t wing it – follow the guidelines provided to achieve the best results.
Patience is Key:
Allow at least 24 to 48 hours of drying time before subjecting your repaired shoes to any stress or pressure. Remember, good things come to those who wait. Give your Shoe Goo repair the time it needs to set and solidify.
Handle with Care:
During the curing period, avoid exposing your repaired shoes to excessive moisture or extreme temperatures. Keep them away from water and give them a break from outdoor adventures until the adhesive has fully dried. Treat your repairs like delicate artwork – with utmost care and consideration.
By allowing Shoe Goo the time it needs to cure properly, you’ll ensure that your shoe repairs are long-lasting and able to withstand whatever you throw at them. So, take a deep breath, exercise some patience, and let that Shoe Goo work its magic. Your shoes will thank you later.
9_6L5jW4j1E” >
Conclusion
Shoe goo, the magical adhesive that can revive your worn-out shoes, is a true game-changer. But how long does it need to dry before you can lace up and hit the streets with confidence? Well, my friend, the answer depends on a few factors.
Firstly, the drying time of shoe goo largely depends on the thickness of the application. If you’ve applied a thin layer to fix a minor crack or small hole, you’ll be back on your feet in no time. We’re talking about 24 to 48 hours tops. However, if you’ve gone all out and slathered on a generous amount to tackle major repairs, patience is key. You’ll need to give it at least 72 hours to fully cure and reach its maximum strength.
Now, let’s talk about environmental conditions because they play a significant role too. If you’re lucky enough to live in a warm climate with low humidity levels, rejoice. The drying process will be expedited, and you’ll be strutting around in your rejuvenated kicks sooner rather than later. On the other hand, if you reside in a damp or cold area, brace yourself for some extra waiting time. Moisture and chilly temperatures can slow down the drying process considerably.
But wait. Before you rush off and start planning your next shoe goo project, remember that these are general guidelines. Always check the product instructions for specific recommendations from the manufacturer. They know their goo best.
In conclusion, when it comes to drying time for shoe goo, exercise some patience and give it the time it needs to work its magic. Whether it’s 24 hours or 72 hours, remember that good things come to those who wait (and follow instructions).