Hey there, fellow DIYers, crafters, and fixer-uppers.
Contents
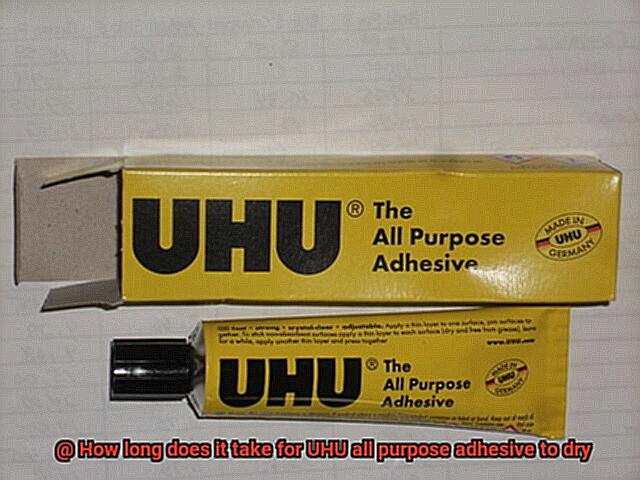
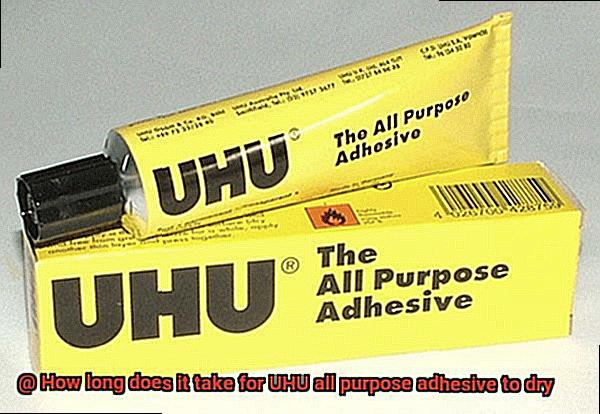
Today, we’re diving into a burning question that’s been on your minds: How long does it take for UHU all purpose adhesive to dry? Whether you’re sprucing up your home, getting creative with crafts, or just in need of a trusty bonding buddy, knowing the drying time of this adhesive is key to nailing those projects.
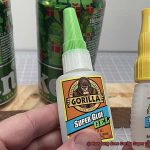
UHU all purpose adhesive is famous for its versatility and rock-solid strength, making it a go-to for pros and hobbyists alike. In this blog post, we’ll spill the beans on the exact drying time of UHU all purpose adhesive.
So, buckle up and get ready for some seriously sticky knowledge.
What is UHU All Purpose Adhesive?
In the world of adhesives, UHU All Purpose Adhesive stands as a true champion. Whether you’re an avid crafter, a DIY enthusiast, or a professional in need of a reliable bonding solution, UHU All Purpose Adhesive has got you covered. In this article, we will explore the remarkable features and benefits of this versatile adhesive, shedding light on its quick-drying formula, transparent finish, and resistance to water and temperature changes.
A Dynamic Drying Time:
When it comes to waiting for glue to dry, patience can wear thin. That’s why UHU All Purpose Adhesive takes the lead with its quick-drying formula. Within minutes of application, this adhesive begins to dry, allowing you to move forward with your project with minimal delay. However, it’s important to note that while the surface may feel dry, the adhesive may still be curing internally. To ensure maximum strength and durability, it is crucial to follow the recommended curing time provided by UHU.
Factors at Play:
The drying time of UHU All Purpose Adhesive is influenced by several factors. The type of materials being bonded together plays a significant role, as different materials have varying absorption rates that can impact drying time. Additionally, environmental conditions such as temperature and humidity can also affect how quickly the adhesive dries. By understanding these factors, you can adjust your working conditions accordingly and achieve optimal results.
Transparency at its Finest:
One standout feature of UHU All Purpose Adhesive is its ability to dry transparently. Once fully cured, this adhesive becomes virtually invisible, creating seamless bonds that are ideal for applications where aesthetics matter. Whether you’re working on delicate crafts or intricate repairs, UHU All Purpose Adhesive ensures that your handiwork shines through.
Resilience in any Environment:
Another remarkable characteristic of UHU All Purpose Adhesive is its resilience in the face of water and temperature changes. Once fully cured, this adhesive can withstand exposure to moisture and fluctuations in temperature without compromising the integrity of the bond. Whether you’re crafting something for indoor or outdoor use, UHU All Purpose Adhesive proves its reliability time and time again.
Ease of Use:
Using UHU All Purpose Adhesive is a breeze. Packaged in convenient squeeze tubes or bottles with precision applicator tips, this adhesive allows for easy and precise application without any mess or wastage. Simply apply a thin layer of adhesive onto the surfaces you wish to bond, press them firmly together, and let the adhesive work its magic.
Drying Time Factors
Say goodbye to endless anticipation and embrace the efficiency of UHU All Purpose Adhesive. This versatile adhesive promises quick drying, but did you know that several factors can influence its drying time? In this insightful blog post, we will delve into the science behind UHU’s drying process and explore the impact of adhesive type, surfaces being bonded, environmental conditions, and application method.
Adhesive Type:
UHU All Purpose Adhesive is available in various formulas, such as liquid glue, gel glue, and glue sticks. Each formula possesses a unique composition and viscosity that affect drying time. Liquid glue, with its lower viscosity, dries faster, while gel glue may require a bit more patience. Glue sticks offer a convenient option with rapid drying capabilities.
Amount of Adhesive:
The quantity of adhesive applied plays a pivotal role in drying time. Applying a thin layer of adhesive ensures faster drying compared to using a thick layer. Remember, when it comes to UHU All Purpose Adhesive, less is more.
Surfaces Being Bonded:
The materials being bonded also influence drying time. Porous surfaces tend to absorb the adhesive, slowing down the process. Non-porous surfaces, however, allow for quicker drying since there is minimal absorption.
Environmental Conditions:
The environment in which you work significantly impacts drying time. Higher temperatures and lower humidity levels generally expedite the process. Beware of extreme temperatures or humidity levels outside the manufacturer’s recommended range, as they may affect adhesive performance.
Application Method:
Your chosen application method can also affect drying time. Utilizing a fine-tipped applicator or applying small dots instead of spreading the adhesive over a large area accelerates the drying process. By covering less surface area, you reduce drying time.
Recommended Drying Times
Today, we will unravel the mysteries surrounding its drying times. Get ready for an exhilarating ride.
UHU All Purpose Adhesive, the superstar of bonding, has its own unique rhythm and timing. On average, it takes around 24 hours for this adhesive to fully dry and reach its maximum bonding strength. But patience is key in this adhesive’s enchanting performance.
Let’s delve into the factors that can affect drying time. First up, the material being bonded. Different surfaces require different drying times. Porous materials, with their intricate structure, might take a bit longer to dry compared to smooth ones.
Next on our list is the amount of adhesive applied. Remember, excess glue won’t make your bond stronger—it’ll just make it take longer to dry. So go easy on the squeeze and find that sweet spot of just enough adhesive.
Ah, environmental conditions. They play a crucial role in this adhesive’s drying game. Higher temperatures and lower humidity levels act as cheerleaders, speeding up the process. On the flip side, colder temperatures and higher humidity levels might slow things down a bit.
And don’t forget to consult the manufacturer’s guidelines for specific recommendations. They are the maestros behind this adhesive symphony.
Here’s a pro tip: give your bond some alone time for a full 24 hours to ensure it reaches its maximum strength. Trust me, your bond will thank you for it.
Lastly, proper storage is essential. Keep your UHU All Purpose Adhesive in a cool, dry place away from extreme temperatures or pesky humidity. You want it to stay fresh and effective for all your future bonding adventures.
Tips to Ensure Proper Bonding
Achieving strong and durable bonds with UHU all-purpose adhesive requires attention to detail and proper technique. Here are some essential tips to ensure proper bonding:
Clean and Prepare the Surfaces
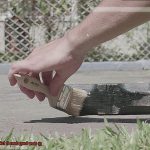
Before applying UHU all-purpose adhesive, take the time to thoroughly clean and prepare the surfaces to be bonded. Imagine trying to stick two pieces of paper together with crumbs and grease on them – it just won’t work. Use a mild detergent or cleaning solution to remove any dirt, dust, or grease from the surfaces. Additionally, roughening up smooth surfaces with sandpaper can enhance the adhesive’s grip, ensuring a stronger bond. Proper surface preparation is the foundation for successful bonding.
Apply the Right Amount of Adhesive
The key to achieving optimal bond strength is using the right amount of UHU all-purpose adhesive. Applying too little adhesive may result in weak bond strength, while applying too much can create a messy appearance. Follow the manufacturer’s instructions regarding the recommended amount of adhesive to be used. In most cases, a thin and even layer is sufficient for proper bonding. Remember, more adhesive doesn’t always mean a stronger bond.
Apply Even Pressure
Once the adhesive is applied, it’s important to apply even pressure to ensure proper bonding. This can be achieved by using clamps, weights, or simply pressing the surfaces firmly together. Applying even pressure helps the adhesive spread evenly and ensures maximum contact between the surfaces, resulting in stronger bonds. Think of it as giving your bond a tight hug.
Allow Sufficient Drying Time
The drying time of UHU all-purpose adhesive can vary depending on factors such as temperature, humidity, and the materials being bonded. It’s crucial to refer to the product’s instructions for specific drying times. Rushing the drying process can lead to weak bonds that may fail over time. Patience is key when waiting for the adhesive to fully cure – good things come to those who wait.
Avoid Excessive Movement During Drying
While waiting for the adhesive to dry, it’s important to avoid excessive movement or stress on the bonded surfaces. Any movement or stress can disrupt the bonding process and result in weak or failed bonds. If necessary, secure the bonded surfaces in place to prevent any accidental movement until the adhesive has fully cured. It’s like letting your bond have a peaceful retreat to solidify its strength.
Test the Bond before Applying Load or Stress
Before subjecting the bonded surfaces to any stress or load, it’s always a good idea to test the bond strength. Gently apply pressure or try to separate the bonded surfaces to ensure that the adhesive has created a strong and durable bond. If any issues are detected, additional adhesive may need to be applied or alternative bonding methods considered. It’s like giving your bond a little check-up before trusting it with heavy-duty tasks.
Temperature and Humidity Effects on Drying Time
Let’s kick things off with temperature. Imagine this: you’re elbow deep in a project on a chilly day. Well, guess what? That lower temperature can throw a wrench in your plans by slowing down the drying process of your UHU adhesive. Why does this happen? It all boils down to molecular movement. When it’s cold, those little molecules are sluggish like snails, making evaporation crawl at a snail’s pace. But crank up the heat, and those molecules start shimmying and shaking like it’s the hottest dance party in town. Higher temperatures pump up their kinetic energy, leading to faster evaporation and quicker drying.
But hold on tight – there’s another player in this game: humidity. Picture yourself working on that same project, but now it’s a humid day. The air is saturated with moisture, creating an uphill battle for your UHU adhesive to release its solvents or water content. And what does that mean? You got it – extended drying times. On the flip side, low humidity levels act as cheerleaders for your glue, encouraging faster drying by reducing moisture in the air.
Now, let’s not forget that different UHU adhesives may have varying drying times based on their formulation and application method. So always check the product packaging or manufacturer’s instructions for specific details. And here’s a pro-tip: don’t underestimate the power of air circulation and surface porosity – they can also influence drying times. So make sure to work in a well-ventilated area and consider using porous surfaces to speed up the process.
Internal Curing Process
In this article, we will explore the concept of internal curing, its benefits, and the magical ingredients that make it possible.
What is Internal Curing?
- Definition: Internal curing is a technique that involves adding lightweight aggregates or superabsorbent polymers (SAPs) to the concrete mixture to provide additional moisture for hydration.
- Purpose: Internal curing prevents early-age shrinkage and cracking by ensuring complete hydration of cement particles throughout the concrete.
The Science Behind Internal Curing:
Lightweight Aggregates:
- Expanded shale or clay: These porous materials act as sponges, absorbing water and gradually releasing it into the surrounding concrete.
- Lightweight and high water-holding capacity: They provide moisture for an extended period, enhancing hydration and reducing shrinkage.
Superabsorbent Polymers (SAPs):
- Tiny superheroes: SAPs have the ability to absorb many times their weight in water.
- Continuous hydration: They absorb water during mixing or from external sources and release it gradually into the concrete, ensuring optimal hydration.
Benefits of Internal Curing:
Reduced Shrinkage and Cracking:
- Continuous hydration prevents moisture loss, minimizing shrinkage and cracking.
- Improved durability and longevity of the concrete.
Enhanced Strength:
- Complete hydration of cement particles leads to a denser and stronger final product.
- Increased structural integrity and resistance against external forces.
Optimal Early-Age Hydration:
- Critical period: Internal curing ensures continuous hydration during the vulnerable early stages of concrete development.
- Minimized shrinkage and cracking risks during this crucial time.
Duration and Considerations:
- Duration: Internal curing continues for several weeks after casting, depending on factors such as aggregate type, SAP quantity, temperature, and humidity.
- External Curing: Internal curing complements external curing methods like moist curing and curing compounds. External methods prevent moisture loss and ensure optimal hydration.
Clamps and Weights for External Support
I’m here to share with you a little secret that will revolutionize your gluing game – clamps and weights.
Clamps and weights are like the dynamic duo of external support when it comes to using UHU all purpose adhesive. They ensure that your glue bond is not only strong but also durable, so your masterpiece stands the test of time.
So, let’s dive into the nitty-gritty details, shall we?
Clamps are your go-to buddy for holding two objects together while the adhesive works its magic. From simple spring clamps to more complex bar clamps, they come in various shapes and sizes. The key here is to apply even pressure on both sides of the bond, avoiding any wonky distortions or misalignments.
Now, let’s talk weights. These bad boys provide a downward force on the glued objects, eliminating any pesky gaps or air bubbles that might ruin your flawless finish. Whether it’s small weights like sandbags or dumbbells or larger ones like books, the goal is to distribute the pressure evenly across the glued area.
But here’s the catch: before you go clamp-crazy, make sure those objects are firmly in place. You don’t want any unexpected movement or shifting during the drying process. Also, be mindful of where excess adhesive might squeeze out – you wouldn’t want clamps or weights blocking those areas.
Now remember, my fellow crafters, patience is key. UHU all purpose adhesive has its own drying time that can be affected by temperature, humidity, and the materials you’re working with. While clamps and weights hold everything in place, they don’t exactly speed up the process. So, always follow the manufacturer’s instructions for the recommended drying time.
To sum it all up, clamps and weights are your secret weapons for creating strong glue bonds with UHU all purpose adhesive. They provide that extra external support you need to ensure a durable and long-lasting finish. Just remember to use them correctly and consider the specific requirements of your adhesive.
Following Instructions for Optimal Results
Prepare to embark on a journey into the world of UHU all purpose adhesive, where following instructions is the secret ingredient for optimal results. Get ready to discover the dos and don’ts that will make your glue projects shine.
Read and Comprehend:
Before diving into your gluing adventure, take a moment to delve into the treasure map provided by UHU. These magical guidelines hold the key to glue success. Pay close attention to recommended application methods, surface preparation, and drying time. They will guide you towards a bond that won’t let you down.
Less is More:
Remember, when it comes to applying UHU all purpose adhesive, less is more. Resist the temptation to go overboard with glue in hopes of achieving an ultra-strong bond. Trust me, it’s a trap. Applying a thin, even layer of adhesive ensures proper drying and bonding. Plus, it saves you from sticky situations (literally.).
Timing is Everything:
Patience, my friends, is a virtue when it comes to drying time. Follow UHU’s specified drying time for optimal results. Rushing this process may compromise the strength and durability of your bond. So sit back, relax, and let your glue work its magic.
Ventilation Matters:
Believe it or not, proper ventilation plays a vital role in the gluing process. Enhance drying time by working in a well-ventilated area or using fans to improve airflow around your glued surfaces. Let that fresh air breeze through and speed up evaporation – your bond will thank you later.
Material-Specific Tips:
Different materials require different approaches. UHU all purpose adhesive has some tricks up its sleeve for bonding paper, fabric, wood, or plastic. Consult the instructions or reach out to UHU’s customer support for tailored recommendations. It’s like having a glue guru in your back pocket.
The Power of Patience:
Remember, my fellow glue enthusiasts, patience is key. Avoid subjecting your bond to stress or load before the adhesive has fully dried and cured. Give it the time it deserves, and you’ll be rewarded with a bond that can withstand anything life throws its way.
bC48YBMti8A” >
Conclusion
The drying time of UHU all purpose adhesive can vary depending on various factors.
However, on average, it takes approximately 24 hours for the adhesive to fully dry and set. During this time, it is important to avoid disturbing or applying any pressure on the bonded surfaces to ensure a strong and durable bond.
Patience is key when using UHU all purpose adhesive as rushing the drying process may result in a weak bond that could easily break.