Welcome to our little corner of the creative universe, where we’re about to embark on an exciting journey into the magical world of Mod Podge. This glue-like wonder has the power to take ordinary objects and transform them into jaw-dropping works of art. But here’s the burning question that lingers in the air as we dive headfirst into our artsy adventures – just how long should Mod Podge sit for optimal results?
Prepare yourselves, my friends, because we’re about to unravel this mystery and discover the key to achieving flawless finishes with Mod Podge. Along the way, we’ll stumble upon some fascinating tidbits that will leave you itching to grab your crafting supplies and get started on your own masterpiece. So buckle up and get ready for an enlightening adventure where patience truly becomes an art form when it comes to mastering the secrets of Mod Podge.
Are you ready? Let’s dive in.
What is Mod Podge?
Contents
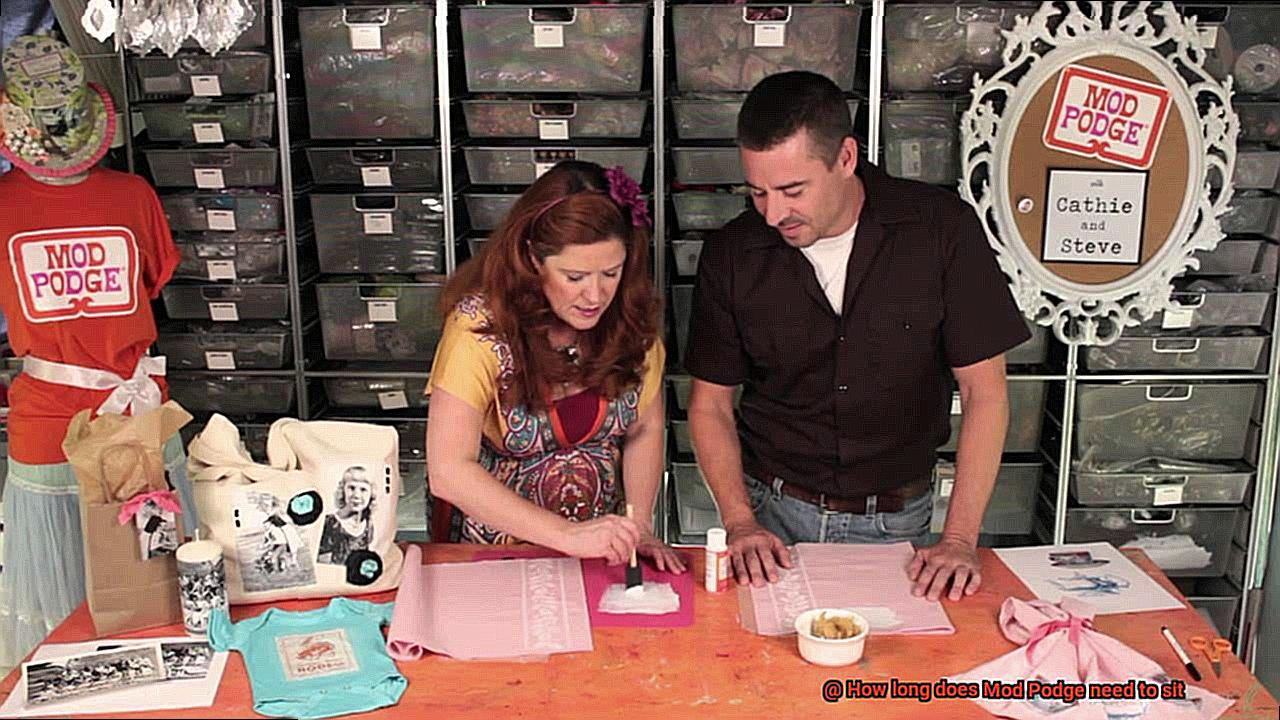
Look no further than Mod Podge. This popular decoupage medium has taken the crafting world by storm, offering both strong adhesion and a protective finish. Whether you’re a seasoned crafter or just starting out, Mod Podge is a must-have tool in your crafting arsenal. In this blog post, we’ll dive into what Mod Podge is, its different varieties, and how to use it effectively.
A Unique Combination:
Mod Podge is a unique combination of glue and varnish that allows you to attach various materials, such as paper, fabric, wood, and plastic, to surfaces. Its adhesive properties ensure that your materials stay securely attached, while the varnish component provides a glossy and protective finish.
Suitable for Various Surfaces:
Mod Podge can be used on a wide range of surfaces, including wood, glass, ceramics, metal, and fabric. This opens up endless possibilities for crafters to create personalized and customized objects.
Original Water-Based Formula:
The original water-based formula is perfect for quick and easy clean-up with soap and water.
Specialized Formulas:
- Mod Podge Outdoor: Ideal for projects exposed to the elements.
- Mod Podge Dishwasher Safe: Ensures items can withstand washing.
- Mod Podge Fabric: Perfect for fabric-related crafts.
Tips for Using Mod Podge:
- Prepare your surface: Clean and dry the surface before applying Mod Podge.
- Apply in thin layers: Thin layers dry faster and result in better adhesion.
- Let it sit undisturbed: Allow Mod Podge to dry for at least 15-30 minutes before applying additional coats or handling the project.
- Cure time: For maximum strength and durability, let Mod Podge cure for at least 24 hours.
Distinguishing Between Dry Time and Cure Time
Today, we’re delving into the world of Mod Podge, a beloved adhesive and sealant used in countless crafting projects. In particular, we’ll be exploring the distinctions between dry time and cure time.
Dry time refers to the period it takes for Mod Podge to no longer feel tacky to the touch. This duration can vary depending on various factors such as temperature, humidity, and the thickness of application. Typically, Mod Podge takes around 15-30 minutes to dry to a tacky state. However, it’s important to note that this timeframe may be extended in colder or more humid environments.
It is crucial to exercise patience and allow Mod Podge to dry completely before proceeding with your project. Applying additional layers or manipulating the surface prematurely can result in smudging, streaking, or even damage to your masterpiece. So resist the temptation to rush and let time work its magic.
Once Mod Podge has dried to a tacky state, it is ready for additional layers or embellishments. However, if you desire maximum durability and resistance for your project, it is recommended to wait for the cure time as well.
Cure time is the duration it takes for Mod Podge to reach its maximum hardness and durability. This stage typically lasts from 14-28 days. During this period, the Mod Podge undergoes a chemical process that allows it to become more resistant to wear and tear.
Although Mod Podge may feel dry and non-tacky after a shorter duration of time, it still requires adequate cure time for optimal results. Rushing the curing process may yield a less durable finish that may not withstand regular handling or cleaning. To ensure proper curing, it is best to follow the manufacturer’s instructions and allow the recommended cure time. Although it may require some patience on your part, trust me, the end result will be a beautifully finished project that stands the test of time.
Factors That Affect Dry Time
Waiting for Mod Podge to dry can sometimes feel like watching paint dry, but it’s a crucial step in ensuring your project turns out just right.
So, what factors affect the dry time of Mod Podge? Let’s dive in and explore.
- Type of Mod Podge: Different types of Mod Podge have different drying times. Regular Mod Podge usually takes around 15-20 minutes to dry, while the Mod Podge Ultra dries in just 10 minutes. Make sure to check the instructions or labels on the specific type you’re using to determine its recommended dry time.
- Application Thickness: The thickness of the Mod Podge layer you apply can greatly impact drying time. Thin layers dry faster because they allow for quicker evaporation, while thick layers take longer as moisture needs more time to evaporate. Applying multiple thin layers is a good strategy for faster overall drying.
- Humidity and Temperature: The environment you’re working in plays a significant role in drying time. High humidity levels can prolong drying as moisture from the air hinders evaporation. Similarly, low temperatures can slow down the process. Aim for a well-ventilated room with moderate humidity and temperature levels for optimal results.
- Material Absorption: The material you’re applying Mod Podge onto also affects drying time. Porous materials like wood, fabric, or paper tend to absorb more moisture, resulting in longer drying times. Non-porous materials like glass or plastic require less drying time as they don’t absorb moisture.
- Air Circulation: Good air circulation speeds up drying by facilitating evaporation. If you’re working in a closed-off area with limited airflow, it may take longer for Mod Podge to dry. Placing your project near a fan or in a well-ventilated area can help expedite drying time.
- Additional Additives: Mod Podge can be customized by adding water or acrylic paint, which can affect drying time. Adding water extends drying time due to increased moisture content, while adding acrylic paint may shorten it depending on the consistency and amount used. Experimenting on a small sample piece is always a good idea.
By understanding these factors, you can plan and execute your Mod Podge projects more efficiently. Consider the type of Mod Podge, application thickness, humidity and temperature levels, material absorption, air circulation, and any additional additives used to estimate how long your Mod Podge needs to dry before moving on to the next steps of your crafting journey.
The Recommended Cure Time
Before you unleash your creative genius, let’s take a moment to talk about the recommended cure time for this versatile glue. Trust me, my fellow crafters, patience is key.
The recommended cure time for Mod Podge is a minimum of 24 hours. Yes, I know it might feel like an eternity to wait for your masterpiece to dry, but believe me, it’s worth every second. During this curing period, Mod Podge undergoes a remarkable transformation – it dries and hardens, creating a bond that is as strong as your creative spirit.
But here’s the thing – the cure time can vary depending on a few factors. Thicker applications of Mod Podge or using specific formulas like the Outdoor one might require additional time to fully cure. So if you’ve piled on a generous layer of Mod Podge or you’re aiming for that weather-resistant finish with the Outdoor formula, be prepared to give it some extra time.
Let’s talk about the impact of temperature and humidity on the curing process. Higher temperatures and lower humidity levels can speed up the cure time, while cooler temperatures and higher humidity may lengthen it. So if you’re crafting in a hot and dry environment, your Mod Podge will dry faster than if you’re working in a cool and humid space.
I hear some of you impatient crafters out there – “But I need my project done ASAP.” Fear not, my friends. There are a few tricks you can try to expedite the drying process. First, make sure your project is in a well-ventilated area with good airflow. This will help the moisture evaporate more quickly. You can also use a fan or hairdryer on a low heat setting (from a safe distance.) to gently speed up drying. Just remember not to overheat or damage your project in the process.
It’s important to note that even after the recommended cure time, Mod Podge may continue to harden over several days or weeks. So handle your finished project with care during this period to avoid any potential damage.
Different Types of Mod Podge and Their Drying/Curing Times
Today, we are diving deep into the world of Mod Podge, the versatile adhesive that brings our creative projects to life. Have you ever wondered about the different types of Mod Podge and how long they take to dry and cure? Well, wonder no more. Join us as we uncover the secrets behind this magical crafting glue.
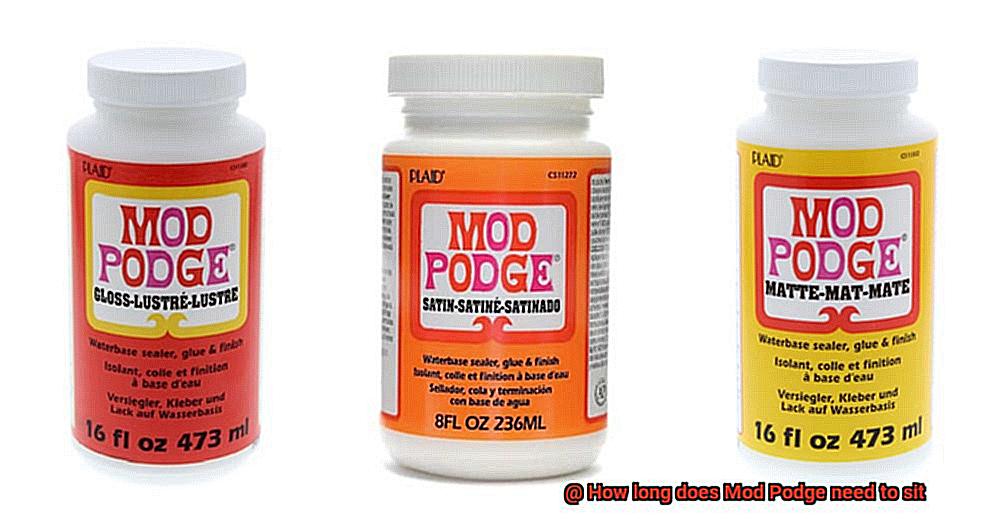
The Original All-Purpose Mod Podge:
The original Mod Podge formula is like a superhero of adhesives, ready to tackle any craft project. It dries within 15-20 minutes, but don’t be deceived by its speedy dry time. It takes up to 24 hours to fully cure. So, be patient, my friends, and let it work its magic.
Matte and Glossy Delights:
If you prefer a non-shiny finish, Matte Mod Podge is your go-to buddy. It has similar drying times as the original formula but may take a tad longer to cure due to its matte finish. On the other hand, if you want your project to shine like a star, Gloss Mod Podge is the way to go. It provides a shiny and glossy finish with similar drying and curing times as the original formula.
The Subtle Sheen of Satin:
For those seeking a touch of elegance and sophistication, Satin Mod Podge is here to grant your wishes. This variant offers a semi-gloss finish with a subtle sheen. And guess what? Its drying and curing times are just like those of the original formula.
Brave the Great Outdoors with Outdoor Mod Podge:
Ready for an adventure outside? Outdoor Mod Podge has got your back. It’s specially designed for outdoor use, offering added durability and weather resistance. It takes slightly longer to dry, usually within 30 minutes to an hour, and cures within 24 hours. Now your crafts can withstand the elements.
Fabric Fun with Mod Podge:
Calling all fabric lovers. Mod Podge Fabric is specially formulated for fabric-based projects. It dries within one hour and cures within 24 hours. But wait, there’s a secret. To make it fully washable, you’ll need to heat set it with an iron. How cool is that?
Hard Coat for Maximum Protection:
When your project needs extra strength and protection, Hard Coat Mod Podge is the hero you need. It takes longer to dry compared to other formulas, usually within 2-3 hours, and cures within 72 hours for maximum hardness. Say goodbye to worries about wear and tear.
Other Factors to Consider for Optimal Results
In our previous section, we discussed the different types of Mod Podge and their drying times. But did you know that there are other factors that can impact how quickly Mod Podge dries? Let’s explore these additional factors for optimal results.
Temperature and humidity play a significant role in how long Mod Podge takes to dry. It is recommended to work in a room with a temperature between 70-75°F (21-24°C) and a humidity level below 50%. Higher temperatures and humidity can prolong drying time, while cooler temperatures and lower humidity can expedite it.
Thin is in when it comes to applying Mod Podge. Thicker layers take longer to dry compared to thinner ones. To ensure faster drying and avoid tackiness or an uneven finish, apply thin and even coats.
Proper ventilation is crucial for quick drying. Open windows or use fans to improve air circulation in your workspace, but be cautious not to expose projects to direct airflow, as it may cause ripples or bubbles in the finish.
The type of surface you apply Mod Podge onto can also affect drying time. Porous surfaces absorb more moisture, resulting in longer drying times. Non-porous surfaces require less drying time.
Allow each layer to dry completely before adding another one. Adding wet layers on top of partially dried ones can lead to longer overall drying times and potential issues like wrinkling or bubbling.
Apply Mod Podge with smooth and even strokes using a brush or foam applicator. Applying too much pressure or using a heavy hand can result in thicker layers and longer drying times.
While Mod Podge may feel dry to the touch within 15-30 minutes, it takes longer for the glue to fully cure. Let Mod Podge cure for at least 24 hours before subjecting it to heavy use or exposure to moisture.
By considering these factors, you can ensure optimal results when working with Mod Podge. Adjust your working conditions, layer thickness, and application technique to speed up drying time and enhance the overall finish of your projects. Remember to always read the specific instructions provided on the Mod Podge bottle and conduct small tests before applying it to your entire project.
Tips for Working with Mod Podge
This versatile crafting adhesive is perfect for a wide range of projects, from decoupage to sealing finishes. But before you embark on your crafting adventure, let me share some invaluable tips that will help you achieve stunning results that will stand the test of time.
Clean and Dry: The Secret to Magic Adhesion
Before applying Mod Podge, ensure that your surface is clean and dry. Wipe away any dirt or moisture, as they can interfere with the adhesive’s magical sticking power. Grab a cloth and give your project surface a thorough wipe down for optimal adhesion.
Shake It Up for Smoothness
Give your Mod Podge bottle a vigorous shake before using it. This simple step ensures that all the ingredients are well-mixed, resulting in a smooth and consistent texture. A smooth consistency is essential for flawless crafting, so don’t skip this step.
Brush or Sponge: Your Crafting Magic Wand
When applying Mod Podge, opt for a brush, sponge, or foam applicator. Using your fingers may leave behind pesky fingerprints on your masterpiece. So grab a brush or sponge, let your creativity flow, and watch the magic unfold.
Thin is In: Coats that Dry in No Time
Thin coats are the key to success when working with Mod Podge. Apply thin and even layers for quicker drying times and a smoother finish. Thick layers take longer to dry and may result in a tacky mess. We want beautiful crafts, not sticky situations.
Patience is Virtuous: Let it Dry Completely
Each layer of Mod Podge requires sufficient drying time before adding another coat. While it typically takes 15-20 minutes for each layer to dry to a tacky touch, exercise patience and wait 24 hours for it to fully cure. This ensures that your project stays intact for a long time.
Sand Between Layers: Smooth as Butter
For projects with multiple layers of Mod Podge, lightly sand between each layer. This step helps achieve an exceptionally smooth finish, giving your crafts a polished and professional look. Grab some sandpaper and get ready to create a masterpiece that feels as smooth as butter.
Conclusion
The drying time for Mod Podge varies depending on the project and the thickness of the application.
In general, it is recommended to let Mod Podge sit for at least 24 hours to ensure proper adhesion and a smooth finish. However, for thicker layers or more intricate designs, it may be necessary to let it dry for up to 72 hours.
It’s important to note that humidity and temperature can also affect drying time, so it’s best to follow the specific instructions on the bottle or packaging of your Mod Podge product. Patience is key when working with Mod Podge – rushing the drying process can result in a tacky or uneven surface.
So, take your time and allow Mod Podge to fully cure before handling or applying any additional layers or finishes.

