Ready to embark on a journey into the fascinating world of J-B Weld? This mighty adhesive has won the hearts of many, thanks to its incredible bonding and repairing powers.
But hey, have you ever found yourself pondering the age-old question: “How long does it take for J-B Weld to sand?” Well, wonder no more, my friend.
Today, we’re diving deep into this mystery to uncover the perfect timing for getting that sandpaper out. Because let’s face it – sanding is a crucial step in countless projects.
So, buckle up and get ready to learn everything you need to know about when J-B Weld is ready for some serious sanding action.
Factors That Affect the Curing Time of J-B Weld
Contents
- 1 Factors That Affect the Curing Time of J-B Weld
- 2 The Recommended Curing Time for J-B Weld
- 3 Preparing the Surface for Sanding
- 3.1 Step 1: Clean the Surface
- 3.2 Step 2: Remove Loose Paint or Coatings
- 3.3 Step 3: Smooth Out Roughness
- 3.4 Step 4: Protect Surrounding Areas
- 3.5 Step 5: Choose the Right Grit Sandpaper
- 3.6 Step 6: Use a Sanding Block or Sponge
- 3.7 Step 7: Sand in a Back-and-Forth Motion
- 3.8 Step 8: Check for Smoothness
- 3.9 Step 9: Clean Sandpaper Regularly
- 3.10 Step 10: Clean the Surface Again
- 4 Selecting the Appropriate Sanding Equipment
- 5 Coarse Grit Sandpaper: Removing Rough Areas
- 6 Finer Grit Sandpaper: Achieving a Smoother Finish
- 7 Checking the Progress During Sanding
- 8 Avoiding Damage to the J-B Weld Surface
- 9 Conclusion
J-B Weld, the renowned epoxy adhesive, is a go-to solution for bonding and repairing various materials. However, understanding the factors that influence its curing time is crucial to achieve exceptional results. In this article, we will explore the science behind J-B Weld’s curing process and uncover the key factors that can impact its curing time.
Temperature:
Temperature plays a pivotal role in J-B Weld’s curing time. Higher temperatures accelerate the chemical reaction between the resin and hardener, leading to faster curing. Conversely, lower temperatures slow down the reaction, prolonging the curing process. To ensure optimal curing, adhere to a temperature range of 50°F to 90°F (10°C to 32°C). Extreme temperatures outside this range may compromise bond strength and adhesion.
Mixing Ratio:
The correct mixing ratio of J-B Weld’s resin and hardener is crucial for achieving optimal curing. Deviating from the manufacturer’s recommended proportions may result in incomplete curing or weakened bonds. Therefore, it is essential to precisely measure and mix the components according to the provided instructions.
Thickness of Application:
The thickness of J-B Weld application affects its curing time. Thicker layers require more time to cure due to limited oxygen exposure and slower heat dissipation. On the other hand, applying thin layers allows for faster curing as heat dissipates more efficiently. Adjusting the application thickness based on your desired curing time is key.
Surface Preparation:
Proper surface preparation is vital for achieving optimal bonding and faster curing. Ensure that the surfaces to be bonded are clean, dry, and free from contaminants like grease or oil. Enhancing mechanical adhesion by roughening the surfaces with sandpaper or a wire brush leads to faster curing.
Humidity:
Humidity levels in the environment can impact J-B Weld’s curing time. Higher humidity slows down the curing process, while lower humidity accelerates it. Working in a controlled environment with moderate humidity levels ensures consistent and predictable curing times.
Pressure and Clamping:
Applying pressure or using clamps during the curing process enhances bond strength and reduces curing time. Pressure ensures better contact between the adhesive and surfaces, ensuring optimal adhesion. Using clamps to hold the bonded parts together prevents movement or separation, which can weaken the bond.
The Recommended Curing Time for J-B Weld
When it comes to glue, waiting for it to dry can be a real pain. But with J-B Weld, you won’t have to wait forever. This amazing epoxy adhesive is known for its quick curing time and strong bond. So, how long should you really wait before putting your project to use? Let’s dive into the recommended curing time for J-B Weld and explore the factors that can influence it.
First and foremost, the recommended curing time for J-B Weld can vary depending on several factors. One of the most important factors is the type of J-B Weld product you’re using. Different products may have different curing times, so it’s crucial to read the instructions provided by J-B Weld for each specific product.
Temperature and humidity also play a significant role in the curing process. Higher temperatures generally accelerate the curing time, while lower temperatures can slow it down. It’s essential to follow the temperature range and curing time guidelines provided by J-B Weld to ensure optimal results.
In terms of initial strength, J-B Weld typically requires 4-6 hours of curing time. However, it’s highly recommended to let it cure for a full 24 hours before subjecting it to any stress or load. This extra time allows the adhesive to fully harden and ensures a stronger bond.
But that’s not all. When working with cured J-B Weld, it’s advisable to wait at least 24 hours before sanding or manipulating it. This gives the adhesive ample time to reach its maximum hardness, making it easier and safer to work with.
Thicker applications of J-B Weld may require longer curing times compared to thinner layers. It’s important to follow the specific instructions provided by J-B Weld based on your project requirements.
Now here’s an interesting tidbit: while J-B Weld may reach initial strength within a few hours, it can continue to cure and strengthen over an extended period. So if you have the luxury of time, waiting longer before applying stress or load on the bond can result in a stronger and more durable bond.
Proper storage of unused J-B Weld products is also crucial. Make sure to store them in a cool and dry place to prevent exposure to excessive heat or moisture, which can affect the curing time and overall performance of the adhesive.
If you ever find yourself unsure or have specific concerns about the curing time for your J-B Weld application, don’t hesitate to consult the manufacturer’s guidelines or reach out to their customer support for expert advice. They’re there to help you get the best results possible.
Preparing the Surface for Sanding
Now, let’s take it to the next level by sanding the surface. But before you jump into sanding, it’s important to follow a few crucial steps. In this guide, we’ll walk you through the process of preparing the J-B Weld surface for sanding, ensuring that you achieve a smooth and professional finish.

Step 1: Clean the Surface
Thoroughly clean the repaired area to remove any dirt, grease, or debris. A mild detergent and water solution will do the trick. Rinse the surface with clean water and allow it to dry completely before moving on.
Step 2: Remove Loose Paint or Coatings
If there are any loose or flaking paint or coatings on the surface, gently scrape them away using a scraper or sandpaper. Be cautious not to damage the underlying surface.
Step 3: Smooth Out Roughness
Inspect the repaired area for roughness or unevenness. Use a file or sandpaper to smooth out any high spots or bumps. This step is crucial for achieving an even and uniform finish during sanding.
Step 4: Protect Surrounding Areas
Cover adjacent surfaces that don’t require sanding with masking tape or plastic sheeting to prevent accidental damage.
Step 5: Choose the Right Grit Sandpaper
Select sandpaper with the appropriate grit for optimal results. Start with coarser grits like 80 or 120 for initial sanding, removing imperfections or excess material. Then switch to finer grits like 220 or 320 for final smoothing and preparing the surface for painting or further finishing.
Step 6: Use a Sanding Block or Sponge
For better control and even pressure distribution, use a sanding block or sponge. This minimizes the risk of uneven sanding and prevents dips or gouges in the repaired area.
Step 7: Sand in a Back-and-Forth Motion
Sand in a back-and-forth motion, following the grain of the surface if applicable. Apply moderate pressure, avoiding excessive force that could damage the repair or create uneven surfaces.
Step 8: Check for Smoothness
Periodically run your hand over the sanded surface to check for smoothness. If it feels even, move on to the next finer grit of sandpaper. If there are still rough or uneven areas, continue sanding with the current grit until desired smoothness is achieved.
Step 9: Clean Sandpaper Regularly
Regularly clean or replace clogged sandpaper to maintain effectiveness and prevent scratches or marks on the surface.
Step 10: Clean the Surface Again
After sanding, clean the surface to remove any dust or debris. Use a damp cloth or vacuum cleaner to ensure a clean surface before applying further coatings or finishes.
Selecting the Appropriate Sanding Equipment
Achieving a smooth and professional finish with J-B Weld requires careful consideration when selecting the right sanding equipment. From understanding the surface material to choosing the perfect grit sandpaper, there are several factors that can make or break your project. In this comprehensive guide, we will explore different types of sanding equipment and techniques to help you navigate the world of J-B Weld with confidence.
Consider the Surface Material:
J-B Weld forms strong bonds with various materials like metal, wood, and plastic. Each surface requires a specific approach to sanding. For metal surfaces, unleash the power of an orbital or belt sander armed with fine-grit sandpaper. This combination will effortlessly smoothen rough edges and remove excess epoxy while maintaining a flawless finish. Wood surfaces demand a gentler touch, so opt for a manual sanding block paired with medium to fine-grit sandpaper to preserve the wood’s integrity. When working on plastic surfaces, exercise caution to avoid heat buildup that can warp or melt the material. Choose low-speed power sanders or manual sanding blocks for precise and controlled sanding.

Choosing the Right Grit Sandpaper:
The grit of sandpaper determines the level of abrasiveness and refinement during the sanding process. Start with coarse-grit sandpaper (around 60-80 grit) for initial shaping and removing larger amounts of epoxy. As you progress, embrace finer-grit sandpaper (120-220 grit) to achieve a velvety smooth finish that will make your J-B Weld project stand out.
Protect Yourself and Your Work Area:
Sanding J-B Weld creates a cloud of dust that can be harmful if inhaled. Prioritize safety by wearing a dust mask or respirator throughout the sanding process to shield yourself from harmful particles. Additionally, employing a vacuum or dust collection system will not only keep your work area clean but also minimize the post-sanding cleanup.
Personal Preference and Comfort:
Remember that sanding is an art, and your personal preferences and comfort matter. Revel in the control and precision offered by a manual sanding block, allowing you to sculpt the perfect finish with finesse. Alternatively, embrace the efficiency and speed of power sanders for large-scale projects. Experiment with different tools and techniques to find your sanding nirvana.
Coarse Grit Sandpaper: Removing Rough Areas
When it comes to creating a professional finish on your J-B Weld projects, achieving a smooth and even surface is crucial. That’s where coarse grit sandpaper comes in. In this guide, we’ll delve into the purpose and effective use of this essential tool, ensuring that you can confidently tackle rough areas and achieve flawless results in your J-B Weld projects.
Understanding Coarse Grit Sandpaper:
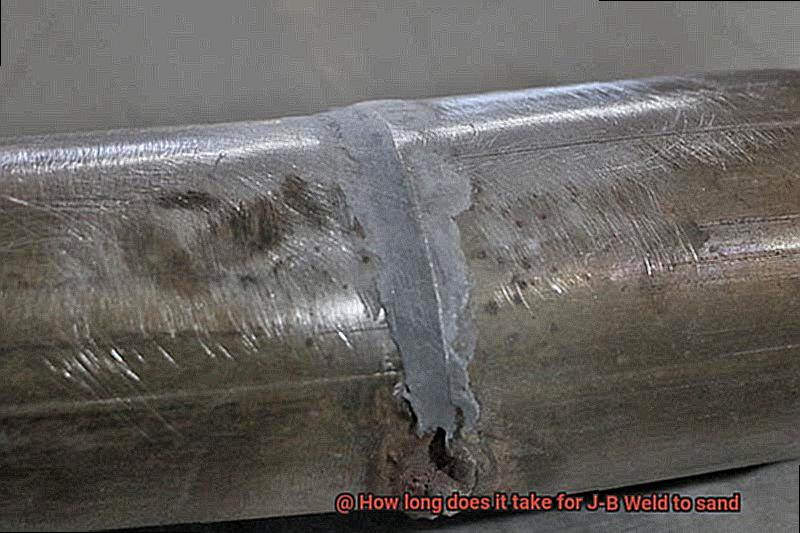
Coarse grit sandpaper is specifically designed to remove material quickly and efficiently. Its rough texture, characterized by grit sizes ranging from 40 to 80, allows it to smooth out rough areas like raised blobs of J-B Weld or uneven surfaces. The lower the grit number, the coarser the sandpaper.
The Sanding Process:
- Prepare the J-B Weld: Before diving into sanding, ensure that the J-B Weld has fully cured and hardened according to the manufacturer’s instructions. This is crucial for optimal results.
- Identify Rough Areas: Carefully inspect your project for any rough or uneven areas that need attention. These may include excess J-B Weld, rough edges, or annoying bumps.
- Select Coarse Grit Sandpaper: Choose a piece of coarse grit sandpaper that suits your needs. It can come in the form of sheets, rolls, or attached to a sanding block. Opting for a sanding block provides better control and even pressure during the process.
- Apply Even Pressure: When sanding, apply even pressure and use long, sweeping motions. Avoid exerting excessive force, as it may damage the underlying surface or remove too much of the J-B Weld.
- Monitor Progress: Keep a close eye on your progress as you sand. Frequently check the surface for improvements and adjust your technique if necessary.
- Transition to Finer Grit: Once the majority of roughness has been eliminated with coarse grit sandpaper, it’s time to switch to a finer grit. This will further refine the surface and prepare it for those finishing touches.
- Clean the Surface: After sanding, thoroughly clean the surface using a damp cloth or sponge. This ensures that any dust, debris, or residue left behind by the sanding process is removed. A clean surface is essential for subsequent treatments.
Finer Grit Sandpaper: Achieving a Smoother Finish
Today, we delve into the secrets of using finer grit sandpaper to achieve an impeccably smooth finish when working with J-B Weld. Get ready to elevate your projects to new heights of perfection.
Laying the Foundation: Begin with Coarse Grit Sandpaper
Before diving into the realm of finer grits, start by grabbing your trusty coarse grit sandpaper, around 120 or 150 grit. This initial step allows you to tackle any excess material or rough edges, paving the way for a truly stellar finish.
Gradually Ascend: Transitioning to Finer Grits
Having conquered the rough spots, it’s time to level up. Transition to finer grit sandpaper, such as 220 or 320 grit, and witness the transformation as your project becomes smoother with each stroke. Remember, this is a journey that requires patience and precision.
Embracing Grace: The Light Touch
When sanding J-B Weld, it’s crucial to channel your inner Zen and adopt a light touch. Allow the sandpaper to glide effortlessly over the surface, avoiding excessive pressure that can potentially damage the J-B Weld or create unevenness. Let finesse guide your every move.
Mastering Techniques: Circular Motion or Back-and-Forth Strokes
To ensure an even and consistent finish, employ a circular motion or use small back-and-forth strokes while sanding. These techniques distribute the sanding action across the surface, resulting in unparalleled harmony and smoothness. Let each stroke be deliberate and purposeful.
The Realm of Sublime Smoothness: Entering Superfine Grit Territory
As you progress to even finer grits, such as 400 or 600 grit, prepare to be amazed as your project’s surface transcends into a realm of sublime smoothness. Take periodic breaks to inspect the surface, ensuring that your desired results are being achieved. Revel in the satisfaction of witnessing your masterpiece come to life.
The Virtue of Patience and Attention to Detail
In the realm of glue projects, patience truly is a virtue. The time it takes to sand J-B Weld will vary depending on various factors, such as the size and complexity of the project, the condition of the J-B Weld, and the level of smoothness desired. Stay focused and pay attention to the smallest details, for they hold the power to elevate your finish from good to extraordinary.
Checking the Progress During Sanding
Checking the progress during sanding J-B Weld is a crucial step towards achieving that flawlessly smooth finish. As you embark on this journey towards perfection, there are several techniques you can employ to assess your progress along the way.
First and foremost, trust your eyes. Visual inspection is a simple yet effective way to gauge how well your sanding is going. Take a close look at the surface and identify any rough or uneven areas that may still be present. These spots will require further attention during sanding.
But don’t stop there. Engage your sense of touch by running your fingers lightly across the sanded surface. Feel for any bumps or imperfections that may still linger. If you detect any, continue sanding until the surface feels consistently smooth to the touch.
To shed light on potential hidden imperfections, grab a flashlight or direct a light source at a low angle towards the surface. This technique can reveal subtle flaws that may not be easily visible with just your eyes alone.
Another useful method is to wipe the surface with a clean cloth or rag. If you see any dust or debris left behind, it’s a clear sign that the sanding process isn’t complete. Keep going until you achieve a clean wipe every time.
While sanding, remember to frequently clean your sandpaper. Debris build-up can reduce its effectiveness and prolong the sanding time, so take a moment to brush off any accumulated dust and particles.
Pay attention to any color changes in the J-B Weld as you continue sanding. If you notice that the color becomes lighter or more consistent throughout, it’s an indication of progress. However, be cautious not to oversand, as this could weaken the epoxy bond and compromise its integrity.
Once you’re satisfied with the sanded surface, give it one final wipe down to remove any remaining dust or debris. Take a moment to inspect it and ensure it meets your expectations before proceeding with further steps, such as polishing or applying a protective coating.
In summary, checking the progress during sanding J-B Weld is crucial to achieving that flawlessly smooth finish. By employing these techniques and staying attentive to detail, you’ll be well on your way to elevating your projects to new heights of perfection.
To effectively check the progress during sanding J-B Weld, consider the following:
- Visual Inspection: Take a close look at the surface and identify any rough or uneven areas that may still be present.
- Tactile Assessment: Run your fingers lightly across the sanded surface to feel for any remaining bumps or imperfections.
- Illumination Technique: Use a flashlight or direct light at a low angle to reveal hidden flaws that may not be easily visible with just your eyes.
- Wipe Test: Wipe the surface with a clean cloth or rag and check for any dust or debris left behind, indicating incomplete sanding.
- Sandpaper Maintenance: Regularly clean your sandpaper to remove debris build-up and maintain its effectiveness.
- Color Changes: Pay attention to any color changes in the J-B Weld as you continue sanding, as it can indicate progress.
- Avoid Oversanding: Be cautious not to oversand, as this can weaken the epoxy bond and compromise its integrity.
- Final Inspection: Give the sanded surface a thorough wipe down to remove any remaining dust or debris before proceeding with further steps.
Avoiding Damage to the J-B Weld Surface
When it comes to sanding J-B Weld, there are some important precautions to keep in mind to avoid damaging the surface. Let’s dive in and explore the world of sanding, ensuring that our creations remain smooth and flawless.
First and foremost, let’s talk about the importance of selecting the right sandpaper grit. Just like choosing the perfect tool for a specific job, using the appropriate grit is crucial for achieving the desired result. Begin with a coarser grit, such as 80 or 120, and gradually progress to finer grits like 220 or 320. This careful progression helps to prevent deep scratches and ensures a beautifully smooth finish.
Now that we have our sandpaper ready, let’s focus on technique. Gentle is the name of the game here, my friends. Whether you choose a circular motion or a back and forth motion, the key is to apply even pressure and avoid any aggressive sanding. We want to steer clear of creating unsightly gouges or unevenness on the surface.
Consistency is key when it comes to sanding J-B Weld. Maintaining a consistent sanding pattern is essential for achieving a uniform result. Avoid going over the same area too many times, as this can lead to over-sanding and potential damage. Remember to take breaks during the process, allowing the surface to cool down—especially if you are utilizing power tools like electric sanders or grinding wheels.
To improve control and distribute pressure evenly, consider using sanding blocks or pads instead of relying solely on your hands. This simple adjustment minimizes the risk of uneven sanding or accidental damage. With these tools in hand, you can confidently sail through your sanding journey with J-B Weld.
Ahoy there. Don’t forget about those sharp edges and corners—they require extra caution. These areas are more prone to damage, so use lower grit sandpaper to avoid applying excessive force. By doing so, you’ll safeguard your masterpiece from any potential harm.
vRNPNju4ZjU” >
Also Read: Can You Put JB Weld Over JB Weld? – The Welding Guru
Conclusion
The time it takes for J-B Weld to be ready for sanding depends on various factors. Generally, it is recommended to wait at least 4-6 hours before attempting to sand the cured J-B Weld. However, this can vary based on the temperature and humidity of the environment.
In ideal conditions, where the temperature is around 70°F (21°C) and the humidity is low, J-B Weld may reach a point where it can be sanded within 4 hours. But if you’re working in colder temperatures or high humidity, it might take longer for the epoxy to fully cure and harden.
It’s important to note that rushing the sanding process can lead to undesirable results. If you try to sand J-B Weld before it has fully cured, it may gum up your sandpaper and create a messy surface. Patience is key when working with J-B Weld.
Once the appropriate curing time has passed, you can begin sanding. Start with a coarse grit sandpaper and gradually move to finer grits for a smoother finish. Take your time and apply even pressure as you work through the surface.
Remember, every project is unique and may require different drying times. It’s always best to refer to the specific instructions provided by J-B Weld for optimal results.
In conclusion, while there are general guidelines for how long it takes for J-B Weld to be ready for sanding, factors such as temperature and humidity can affect this timeframe. Waiting at least 4-6 hours under ideal conditions is recommended before attempting to sand the cured epoxy.