When you’re faced with a broken metal piece or the challenge of joining two metal surfaces, finding an adhesive that gets the job done fast is crucial. That’s where Krazy Glue swoops in like a superhero, ready to save the day.
This adhesive powerhouse has earned its reputation as a go-to tool for both DIY enthusiasts and seasoned professionals. But let’s get down to business – just how long does it take for Krazy Glue to work its magic and create an unbreakable bond between metals?
In this blog post, we’ll explore the ins and outs of its bonding time and discover why it reigns supreme in the realm of metal repairs.
What is Krazy Glue?
Contents
- 1 What is Krazy Glue?
- 2 Factors Affecting the Bonding Time
- 3 Preparing the Metal Surfaces for Bonding
- 4 Temperature and Humidity Considerations
- 5 Following Manufacturer Instructions
- 6 The Average Bonding Time for Krazy Glue and Metal
- 7 Ensuring Maximum Strength of the Bonded Metal
- 8 Applying Additional Layers of Krazy Glue for a Stronger Bond
- 9 Conclusion
When it comes to repairing or creating metal objects, finding a reliable adhesive can be a game-changer. Enter Krazy Glue, the superhero of adhesives. In this article, we will explore what Krazy Glue is, how it works, and why it is an excellent choice for bonding metal to metal.
What is Krazy Glue?
Krazy Glue is a popular brand of adhesive known for its exceptional bonding capabilities. It falls under the category of cyanoacrylate glue, which means it is fast-acting and forms a strong bond quickly. This versatile glue can be used for various household repairs and craft projects.
The Science Behind the Bond:
Krazy Glue’s secret lies in its composition, allowing it to create a chemical reaction when it encounters moisture. This rapid hardening reaction forms an incredibly strong and durable bond. However, achieving optimal results requires proper surface preparation.
Steps for Bonding Metal to Metal:
- Clean Thoroughly: Begin by cleaning the metal surfaces with a mild detergent or rubbing alcohol to remove any dirt, rust, or grease. Cleanliness is key to ensuring a successful bond.
- Apply Sparingly: Less is more with Krazy Glue. Apply a small amount of glue to one of the metal surfaces. Remember, excess glue can lead to messiness and seepage, so use it sparingly.
- Join Firmly: Press the two metal surfaces together firmly for about 30 seconds to allow the bond to form. However, patience is essential – wait at least 24 hours for the bond to fully cure before subjecting it to stress or load.
Factors Affecting Bonding Time:
Several factors can impact the time it takes for Krazy Glue to bond metal to metal:
- Metal Type: Different metals have varying surface characteristics that can affect the bonding process. Ensure you choose the appropriate Krazy Glue formula for the specific metal you are working with.
- Surface Preparation: Thoroughly clean and dry the metal surfaces before applying Krazy Glue. Remove any dirt, rust, or grease to ensure a strong bond.
- Temperature and Humidity: Higher temperatures and lower humidity levels can speed up the bonding process, while colder temperatures and higher humidity may slow it down. Take these factors into account when planning your project.
Factors Affecting the Bonding Time
Bonding metal surfaces can be a challenging task, but with the right factors in place, you can achieve a strong bond that will stand the test of time. Here are some key factors that affect bonding time and overall success when using Krazy Glue.
Firstly, surface preparation is of utmost importance. Before applying the glue, make sure the surfaces are clean and free from any contaminants like oil, grease, or dust. These pesky impurities can interfere with the bonding process and cause the glue to take longer to set. So grab a degreaser or rubbing alcohol and thoroughly clean those metal surfaces for optimal results.
Next, let’s talk about temperature and humidity. Believe it or not, these environmental factors can have a significant impact on bonding time. Higher temperatures and lower humidity levels speed up the curing process, while lower temperatures and higher humidity levels slow it down. Aim for a temperature range between 60°F-75°F (15°C-24°C) and a humidity level around 50% to achieve optimal bonding results.
The type of metal you’re working with also plays a role in bonding time. Smooth surfaces bond more quickly than rough or porous ones because they provide a larger contact area for the adhesive to adhere to. Additionally, certain metals may require special surface treatments or primers to enhance bonding strength and reduce curing time.
Gap size is another factor to consider. Smaller gaps allow for quicker adhesion as there is less surface area for the glue to cover. On the other hand, larger gaps may require additional application or multiple layers of glue, which can extend bonding time. Keep in mind that Krazy Glue works best for small gaps rather than filling large voids.
Proper application technique is crucial for optimal bonding time. Apply a thin, even layer of glue on both surfaces to ensure proper contact and adhesion. Applying too much glue or excessive pressure during the bonding process can result in longer curing times and weaker bonds. Follow the manufacturer’s instructions and use the recommended application technique for best results.
Lastly, be patient and allow sufficient curing time for the adhesive to fully bond the metal surfaces. While Krazy Glue sets rapidly, achieving maximum bond strength may take several hours or even up to 24 hours, depending on factors like temperature, humidity, and metal type. Don’t rush the process and avoid subjecting the bonded surfaces to stress or load until the glue has fully cured.
Preparing the Metal Surfaces for Bonding
Achieving a solid bond between metal surfaces requires careful preparation akin to conducting a symphony. Surface preparation, temperature, humidity, metal type, gap size, and proper application technique all contribute to creating a masterpiece of durability and strength. In this article, we will delve into the crucial step of preparing metal surfaces for bonding. Get ready to discover the art of surface preparation.
Step 1: Thoroughly clean the surfaces:
To ensure optimal adhesion, it is vital to eliminate any dirt, grease, oil, or other contaminants from the metal surfaces. Clean the surfaces using a mild detergent or solvent designed specifically for metal cleaning. Employ a clean cloth or brush to effectively remove debris. Ensure that the surfaces are completely dry before proceeding.
Step 2: Sanding or roughening:
For smooth or polished metal surfaces, lightly sand or roughen them to enhance adhesion. This process provides a larger surface area for the glue to bond to. Employ fine-grit sandpaper or abrasive pads for this task, taking care not to damage the surfaces excessively.
Step 3: Remove rust or corrosion:
Before bonding, eliminate any rust spots or traces of corrosion that can weaken the bond over time. Use a wire brush, sandpaper, or rust remover solution to eradicate these imperfections. Thoroughly clean the surface again to remove any residue and ensure all traces of rust are eliminated.
Step 4: Degreasing:
Degrease the metal surfaces with a degreasing agent specially formulated for metal surfaces. Follow the manufacturer’s instructions precisely. Apply the degreaser to a clean cloth and meticulously wipe down the metal surfaces. Allow them to dry completely after degreasing.
Step 5: Avoid touching the surfaces:
Once prepared, refrain from touching the metal surfaces with bare hands as our skin naturally produces oils that can compromise the bond. Wear clean gloves or use a clean cloth when handling the prepared metal surfaces to prevent any contamination.
Temperature and Humidity Considerations
When it comes to bonding metal surfaces, Krazy Glue is the ultimate adhesive for its unmatched strength and versatility. But, there’s more to achieving a flawless bond than simply applying the glue. Temperature and humidity are the unsung heroes that can make or break your metal-to-metal connection.
In this captivating exploration, we’ll dive deep into the captivating world of temperature and humidity considerations when working with Krazy Glue on metal surfaces.
Temperature: The Conductor of Bonding Symphony
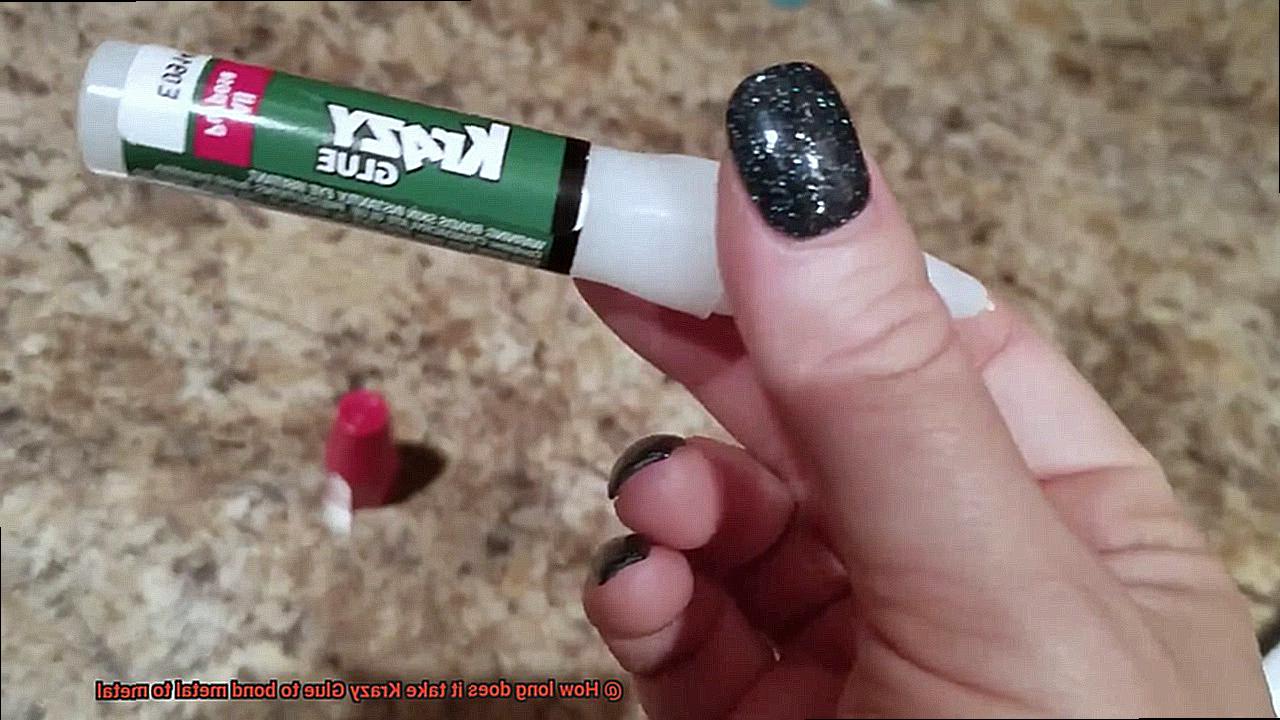
Temperature takes center stage as it conducts the symphony of bonding. Krazy Glue performs at its peak when applied at room temperature, which hovers around 20-25 degrees Celsius (68-77 degrees Fahrenheit).
Higher temperatures accelerate the curing process, resulting in a quicker bond. But beware. Excessive heat can dry out the glue too rapidly, jeopardizing the bond’s strength. On the flip side, lower temperatures slow down curing, demanding more time to achieve a robust bond.
Humidity: The Melodic Touch
Humidity adds an enchanting touch to our bonding symphony. High humidity levels can impede drying, prolonging bonding time. Moisture in the air interferes with Krazy Glue’s ability to dry completely and form a sturdy bond. Conversely, low humidity speeds up curing, potentially leading to a swifter bond. The sweet spot lies in moderate humidity levels between 50-70%, where the glue can cure optimally.
Metal Sensitivities: A Symphony of Unique Instruments
Just like each instrument in an orchestra has its unique characteristics, different metals have their own sensitivities to temperature and humidity changes. Some metals expand or contract dramatically with temperature variations, which may affect Krazy Glue’s bond strength.
Hence, it is crucial to consider the specific properties of the metals you’re working with and adjust temperature and humidity conditions accordingly.
The Perfect Harmony: Orchestrating Optimal Conditions
To achieve unparalleled results with Krazy Glue on metal, maintaining an optimal environment is paramount. Ensure the temperature remains within the recommended room range, avoiding extreme heat or cold. In addition, moderate humidity levels will promote proper curing without excessive moisture or dryness. Remember to consult the manufacturer’s instructions for precise temperature and humidity guidelines tailored to your Krazy Glue product.
Following Manufacturer Instructions
Embark on a captivating journey into the realm of metal bonding with Krazy Glue. As an expert in this field, I am here to illuminate the significance of following manufacturer instructions when wielding this formidable adhesive.
By adhering to these guidelines, you will unlock the secrets to achieving flawless metal-to-metal bonds that are unwaveringly strong, remarkably durable, and undeniably reliable.
Importance of Following Manufacturer Instructions:
Surface Preparation:
Prepare for triumph by heeding the manufacturers’ mandate of thoroughly cleansing metal surfaces before initiating the bonding process. Any lurking traces of dirt, oil, or debris can impair the adhesive’s ability to forge an unyielding connection. By embracing meticulousness and ensuring a pristine surface, you lay the foundation for success.
Correct Application Technique:
Krazy Glue is renowned for its potent bonding properties; hence, a mere dab will carry you far. It is imperative to apply only a minuscule amount of glue to one of the surfaces involved. This guarantees that the adhesive spreads evenly across the bond, eliminating any excess that could seep out and weaken its tenacity. Remember, moderation is key to avoiding messiness and preserving the bond’s unassailable strength.
Curing Time:
Patience emerges as your most trusted ally in the realm of metal-to-metal bonding with Krazy Glue. The manufacturer’s instructions specify a recommended curing time—typically spanning 30 seconds to 1 minute. During this critical interlude, it is paramount not to disturb or disrupt the nascent bond in any manner. Prematurely applying pressure or introducing stress can undermine its durability and strength, culminating in a disheartening failure.
Full Setting Time:
Once the initial curing period has elapsed, it is essential to grant the glue ample time to fully set—for a glorious span of 24 hours—before subjecting it to vigorous use or stress.
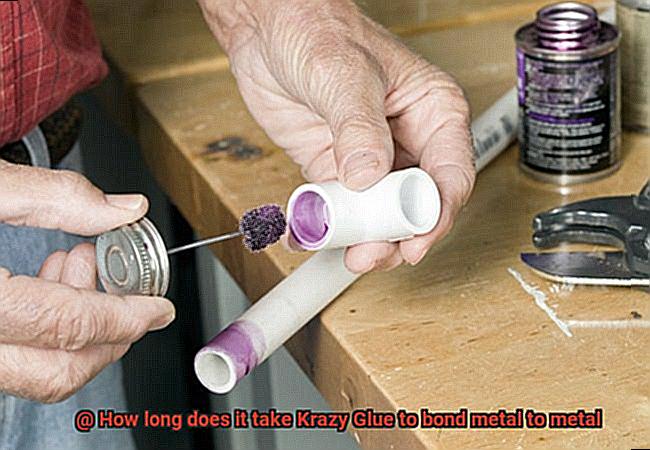
This additional waiting time ensures that the bond realizes its utmost potential strength, yielding a connection that is both dependable and enduring. Embrace patience as your steadfast companion, and it shall reward you with resolute metal-to-metal bonds.
Real-Life Examples:
In an ill-fated moment, I attempted a swift repair on a metal hinge without duly cleansing the surfaces. Alas, despite employing Krazy Glue, the bond faltered within hours, leaving me despondent. This humbling experience ingrained within me the paramountcy of surface preparation for forging an unyielding bond.
A friend, in a rush to expedite the curing process, heedlessly applied pressure to a freshly bonded metal-to-metal connection. Alas, the bond crumbled under the strain, necessitating a painstaking redo. This cautionary tale underscored the importance of patience—a virtue that allows the adhesive to cure undisturbed and unfurl its full potential.
The Average Bonding Time for Krazy Glue and Metal
This adhesive powerhouse has gained a reputation for its lightning-fast drying time and astonishing bonding strength, making it the go-to choice for both DIY enthusiasts and professionals alike.
But what exactly is the average bonding time for Krazy Glue and metal? Well, my friend, that depends on a few key factors that we must consider. First and foremost, the type of metal being bonded plays a significant role. Different metals may require varying amounts of time to achieve a full bond. Furthermore, surface preparation is absolutely crucial. Before applying the glue, make sure to thoroughly clean and roughen the metal surfaces to ensure optimal bonding performance.
Under ideal conditions, Krazy Glue can create an impressive bond between metal surfaces in mere minutes. However, it’s important to note that the initial bond may not reach its full potential immediately after application. The curing time for Krazy Glue can range anywhere from a few hours to a whole day, depending on the specific product and environmental conditions.
To truly unlock the immense strength and durability of your bond, it is highly recommended to allow sufficient curing time before subjecting the metal surfaces to any stress or load-bearing activities. This patience ensures that your bond reaches its maximum potential, giving you peace of mind and confidence in its longevity.
Now, let’s not forget about those sneaky variables that can influence bonding time and overall bond strength. Humidity levels, temperature variations, and even the thickness of the glue layer all come into play here. By keeping these factors in mind, you can optimize your results with Krazy Glue and achieve bonds that are truly unbreakable.
Remember, my dear friend, always follow the manufacturer’s instructions and guidelines when working with Krazy Glue for bonding metal to metal. These invaluable insights will provide you with precise information on surface preparation techniques, application methods, and curing times that are tailored to the specific product you are using.
Ensuring Maximum Strength of the Bonded Metal
When it comes to bonding metal, Krazy Glue is a true game-changer. Its lightning-fast drying time and jaw-dropping bonding strength have made it the go-to choice for DIY enthusiasts and professionals alike. But how do you ensure that your bonded metal reaches its full potential? In this article, we will delve into the essential steps that guarantee a bond so strong it defies the test of time.
Step 1: Pristine Preparation
For maximum strength, pristine surfaces are non-negotiable. Begin by banishing any dirt, dust, or greasy residues that dare to mar your metal’s beauty. A mild detergent or specialized metal cleaner is your secret weapon in this war against impurities. Once cleaned, ensure that not a drop of moisture lingers, as even the smallest hint can sabotage your bond’s integrity.
Step 2: Embrace Roughness
To unlock the true power of adhesion, embrace the beauty of roughness. Gently sand the metal surfaces with fine-grit sandpaper or wield a wire brush to create a textured masterpiece. This roughened terrain provides ample surface area for Krazy Glue to grip onto, fortifying your bond with unwavering strength.
Step 3: Masterful Application
The art of applying Krazy Glue lies in its subtlety. Apply a whisper-thin, even layer of this magical elixir on both metal surfaces. Remember, less is more when it comes to Krazy Glue; an excess can lead to overflow, compromising the very strength you seek. Let restraint guide your hand as you navigate this delicate dance of bonding brilliance.
Step 4: The Mighty Press
Now comes the moment of truth. Align the two metal pieces with meticulous precision and press them together with unwavering determination. Apply pressure, letting the glue seep into every crevice, forging an unbreakable bond. This act of intimacy ensures that your bond stands tall against any adversity that may come its way.
Step 5: The Patience Game
Patience is a virtue when it comes to perfecting strength. Respect the manufacturer’s prescribed curing time, for this is the crucible in which your bond will strengthen. The duration may vary based on the type of Krazy Glue and the metal you are uniting. During this interlude, guard your creation from movement or stress, allowing it to bask in the optimal bonding environment.
Step 6: The Extra Mile
While initial curing suffices for a strong bond, why settle for strength when you can achieve invincibility? Grant your bonded metal an additional 24 hours of undisturbed bliss. This extended period ensures complete curing, empowering your bond to unleash its maximum might upon the world.
Applying Additional Layers of Krazy Glue for a Stronger Bond
Look no further than the mighty Krazy Glue, the ultimate solution for creating unbreakable bonds between metal surfaces. In this comprehensive guide, we will explore how applying additional layers of Krazy Glue can result in a bond so strong it can withstand even the toughest challenges.
Step 1: Pristine Preparation
To achieve an optimal bond, cleanliness is key. Begin by meticulously cleaning the metal surfaces that will be joined together. With a clean cloth and an appropriate cleaner, remove any trace of dirt, grease, or residue. This ensures that nothing stands in the way of a powerful bond.
Step 2: Masterful Application
When applying Krazy Glue, remember that less is more. Begin by applying a thin layer of glue to one of the metal pieces. Take your time and ensure that you cover the entire surface evenly. Applying too much glue can lead to excess squeezing out when the pieces are pressed together.
Step 3: Embrace Roughness
Allow the first layer of glue to dry for approximately 30 seconds before proceeding to the next step. This second layer acts as a filler, seamlessly filling in any gaps or imperfections from the first layer. Embrace roughness and ensure complete coverage for maximum bonding strength.
Step 4: The Mighty Press
Now it’s time for the grand moment – carefully press the two metal pieces together, ensuring a solid contact between the glued surfaces. Hold them firmly in place for approximately 1-2 minutes. During this crucial period, avoid any movement or disturbance that could weaken the bond. Let the glue work its magic.
Step 5: Patience Is Key
After pressing the metal pieces together, exercise patience and allow the bond to fully cure and strengthen. Follow the recommended drying time mentioned on the product packaging. Rushing this step would compromise the bond’s resilience and durability. Give it time to reach its full potential.
Step 6: Going the Extra Mile
If you desire an even stronger bond, don’t hesitate to repeat the process of applying additional layers of Krazy Glue. However, remember to wait for each layer to dry before proceeding to the next one. This meticulous approach ensures that each layer bonds effectively and contributes to the overall strength of the bond.
w-iHL3tN__A” >
Also Read: Does Krazy Glue Work on Metal?
Conclusion
When it comes to bonding metal to metal, Krazy Glue is a reliable choice.
But just how long does it take for this super adhesive to work its magic? Well, the answer may surprise you.
In just a matter of seconds, Krazy Glue can create a bond between two pieces of metal that is practically unbreakable. Yes, you heard that right – within seconds.
So whether you’re fixing a broken piece of jewelry or working on a DIY project, Krazy Glue will have your metal pieces fused together in no time. It’s like having a superhero in a tiny bottle.
Say goodbye to waiting hours or even days for your glue to dry and hello to instant results. With Krazy Glue, your metal-to-metal bond will be strong, durable, and ready for action in mere seconds.

