Fixing things with the right adhesive is like a victory dance for any DIY enthusiast or professional craftsman. And when it comes to adhesives, Gorilla Glue is the name that pops up in every conversation. But have you ever wondered how long this super glue takes to fully cure? Well, my friend, today we’re going on a journey into the world of Gorilla Glue and uncovering the secrets behind its curing time.
In this blog post, we’ll explore why applying Gorilla Glue isn’t just a one-and-done deal. Oh no. It’s a fascinating process that requires some patience. So grab a chair and get ready to dive deep into the realm of one of the most versatile and popular adhesives out there.
Gorilla Glue is famous for its Herculean strength and its ability to bond almost anything – wood, metal, ceramics, plastics – you name it. But achieving that legendary strength isn’t an instant miracle; it takes time. Understanding the curing process will not only help you plan your projects better but also ensure outstanding results every single time.
So whether you’re fixing broken furniture, embarking on a woodworking adventure, or tackling a DIY project, knowing how long Gorilla Glue takes to cure is essential. Get ready to discover the solidification timeline of this infamous adhesive and gain peace of mind and confidence in your repair or construction work. Let’s dive in.
Factors that Affect Curing Time
Contents
- 1 Factors that Affect Curing Time
- 2 Preparing the Surfaces for Application
- 3 General Curing Time of Gorilla Glue
- 4 Temperature and Humidity’s Influence on Curing Time
- 5 Applying Pressure During the Curing Process
- 6 Fast-Cure Variants of Gorilla Glue
- 7 Proper Surface Preparation, Application Techniques, and Curing Time Recommendations
- 8 Conclusion
Gorilla Glue is renowned for its exceptional strength and versatility when it comes to bonding various materials. However, one common concern among users is the time it takes for the glue to fully cure.
The curing time refers to the period required for the adhesive to reach its maximum strength and durability. Several factors can influence the curing time of Gorilla Glue, and understanding these factors can help users achieve optimal results in their bonding projects.
- Temperature: The temperature at which Gorilla Glue is used plays a significant role in its curing time. Generally, higher temperatures accelerate the curing process, while lower temperatures slow it down. For instance, at room temperature (around 70°F or 21°C), Gorilla Glue takes approximately 24 hours to cure completely. However, if the temperature drops significantly below this range, say below 40°F (4°C), the curing time can extend to several days.
- Humidity: The level of humidity in the environment also affects the curing time of Gorilla Glue. In high humidity conditions, where there is an abundance of moisture in the air, the glue tends to cure faster. Conversely, in dry environments with low humidity levels, the curing process may take longer. It is important to note that excessive humidity can also interfere with the adhesive’s ability to bond effectively, so finding a balance is crucial.
- Bonding Materials: The type of materials being bonded together can impact the curing time of Gorilla Glue. Porous materials, such as wood or fabric, tend to absorb moisture from the glue, which can extend the curing time. On the other hand, non-porous materials like metal or plastic do not absorb moisture as readily and may result in faster curing times. It is essential to consider the characteristics of each material involved in the bonding project and adjust expectations accordingly.
- Pressure and Clamping: Applying pressure and using clamps during the curing process can significantly affect the bonding strength and curing time of Gorilla Glue. When pressure is applied, excess air and moisture are expelled from the bond, allowing for a more efficient curing process. Furthermore, clamping helps keep the bonded surfaces in close contact, enhancing the adhesive’s performance. It is advisable to follow the manufacturer’s instructions regarding the specific amount of pressure and clamping time required for optimal results.
- Thickness of Glue Application: The thickness of the glue application can also influence the curing time. Thicker layers of Gorilla Glue take longer to cure compared to thin, evenly spread layers. This is because thicker applications require more time for moisture to evaporate, hindering the curing process. To expedite curing, it is advisable to apply a thin layer of glue and ensure even coverage on both surfaces.
By considering these factors that affect the curing time of Gorilla Glue, users can make informed decisions and achieve successful bonding outcomes. It is crucial to understand that curing times may vary depending on specific circumstances, so it is always recommended to refer to the product’s instructions and conduct small tests before embarking on major projects. With proper knowledge and application, Gorilla Glue can deliver reliable and durable bonds within a reasonable timeframe.
Factors that Affect Curing Time
Gorilla Glue is renowned for its exceptional strength and versatility in bonding various materials. However, users often have concerns about the time it takes for the glue to fully cure. The curing time refers to the period required for the adhesive to reach its maximum strength and durability. Understanding the factors that affect the curing time of Gorilla Glue can help users achieve optimal results in their bonding projects.
Preparing the Surfaces for Application
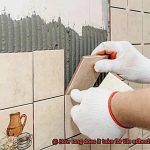
Preparing the surfaces before applying Gorilla Glue is a critical step that should not be overlooked. Proper surface preparation ensures a strong and long-lasting bond, allowing you to get the most out of your glue. So, let’s dive into the steps necessary for preparing the surfaces.
First, let’s talk about cleanliness. The surfaces need to be squeaky clean before applying the glue. Any dirt, dust, grease, or oil on the surfaces can hinder the glue’s ability to bond effectively. Think of it like trying to stick two pieces of paper together with butter smeared all over them – it just won’t work. To avoid this sticky situation, use a clean cloth or brush to remove any debris from the surfaces. This will ensure that the glue adheres directly to the material and not to any contaminants.
Now, let’s address non-porous surfaces. Gorilla Glue works best on porous materials, like wood or fabric. But what if you’re working with glass or metal? Don’t worry, there’s a solution. You can roughen up those sleek surfaces by using sandpaper or a file. Think of it as giving them a little makeover – creating tiny peaks and valleys on the surface for the glue to grip onto. It’s like adding some texture to a smooth canvas, making it easier for the glue to hold tight.
Once the surfaces are clean and prepared, it’s time to add a touch of moisture. Just like plants need water to thrive, Gorilla Glue needs a little moisture to activate and cure properly. However, don’t go overboard – we’re not trying to create a swamp here. Just dampen the surfaces slightly before applying the glue. This will help kickstart the bonding process and ensure a solid connection.
Now comes the fun part – applying the glue. But remember, less is more in this case. Apply a thin layer of Gorilla Glue onto one of the surfaces. We don’t want to drown the materials in glue, as excess can cause messy overflow when pressure is applied during bonding. So, be precise and economical with your glue application – a little goes a long way.
Once the glue is applied, it’s time to bring the surfaces together. Like puzzle pieces finding their perfect match, align the two surfaces properly and press them firmly together. Apply sufficient pressure for at least 1-2 hours to allow the glue to work its magic. It’s like a handshake between the materials, sealing their bond with strength and resilience.
During this bonding process, it’s crucial to keep everything in place. We don’t want any slipping or sliding – we’re aiming for a solid connection. So, grab those clamps or hold the bonded surfaces securely in place. This will maintain constant pressure and ensure a strong bond that can withstand the test of time.
But wait, we’re not done yet. Curing time is an important factor to consider. It can vary depending on factors such as temperature, humidity, and the type of materials being bonded. Gorilla Glue reaches its initial cure within 1-2 hours, but for maximum strength, it’s recommended to allow 24 hours for full curing. Think of it like marinating a steak – giving it enough time to absorb all those delicious flavors and become tender and juicy.
After the recommended curing time has passed, it’s time for a little quality check. Gently test the bond – is it rock solid or a little shaky? If there’s any sign of weakness or the bond feels loose, give it some more time to cure before subjecting it to any stress or load. Remember, patience is key when it comes to creating a strong bond that will withstand whatever life throws at it.
General Curing Time of Gorilla Glue
Gorilla Glue is a remarkable adhesive that has gained popularity for its exceptional bond strength and versatility in various applications. One crucial factor to consider for a successful bond is the curing time of Gorilla Glue. Curing time refers to the duration it takes for the adhesive to fully set and form a strong bond between the glued materials.
On average, Gorilla Glue takes about 24 hours to cure completely. However, it’s important to note that this is just an average estimate and can vary based on different circumstances. Several factors come into play, including temperature, humidity, and the materials being glued together.
In ideal conditions, where the temperature hovers around 70°F (21°C) and the humidity levels range between 50-60%, Gorilla Glue can reach its maximum strength within 2 hours and achieve a full cure within 24 hours. To ensure proper curing, it’s crucial to create an environment that supports these optimal conditions.
However, lower temperatures and higher humidity levels can extend the curing time of Gorilla Glue. In colder or more humid conditions, it’s important to exercise patience and allow additional time for the glue to cure properly. Conversely, higher temperatures and lower humidity levels can accelerate the curing process, but it’s still recommended to adhere to the general 24-hour curing time for maximum bond strength.
To achieve optimal results, it is essential to follow the manufacturer’s instructions provided with Gorilla Glue. These instructions may include specific recommendations for curing times based on different materials or applications. It’s always a good idea to read through these guidelines thoroughly before embarking on your project.
While Gorilla Glue may appear dry on the surface within a few minutes, it still requires adequate time to fully cure and develop its maximum strength. Consequently, it’s vital to resist the temptation to test or move the glued objects during the curing process. Allowing them to remain undisturbed will ensure a strong and enduring bond.
If you need to apply pressure or clamp the glued objects together, it is advisable to do so within the first few minutes after applying the glue. This early intervention will help ensure a tighter bond during the curing process.
Temperature and Humidity’s Influence on Curing Time
Temperature and humidity are two critical factors that significantly influence the curing time of Gorilla Glue. The impact of these factors on the adhesive’s curing process is essential to understand for achieving optimal results.
Higher temperatures generally accelerate the curing process, while lower temperatures slow it down. The optimal curing temperature for Gorilla Glue is around 70°F (21°C). This temperature allows the glue to cure within approximately 2 hours. However, Gorilla Glue can cure at temperatures ranging from 55°F to 90°F (13°C to 32°C). At lower temperatures, the curing time may increase significantly, sometimes even doubling or tripling the regular curing time. On the other hand, at higher temperatures, the curing time can be reduced by up to half. It’s important to note that extreme temperatures, either too high or too low, can negatively impact the strength and durability of the bond created by Gorilla Glue.
Humidity levels also affect the curing time of Gorilla Glue. Higher humidity tends to slow down the curing process, while lower humidity speeds it up. The ideal humidity range for curing Gorilla Glue is between 40% and 70%. Within this range, the glue can cure effectively. However, high humidity can extend the curing time and may result in a weaker bond. It’s advisable to avoid using Gorilla Glue in high humidity conditions if possible. On the other hand, very low humidity can cause the glue to cure too quickly and potentially compromise its strength.
To ensure proper curing and maximum bond strength, it is recommended to:
- Maintain a moderate temperature range of around 70°F (21°C) if possible.
- Keep humidity levels within the recommended range of 40% to 70%.
- Avoid extreme temperatures and high humidity conditions that may negatively impact the glue’s performance.
- Follow the manufacturer’s instructions for specific recommendations based on your materials or application.
Applying Pressure During the Curing Process
Applying pressure during the curing process is a critical step when using Gorilla Glue. This process is essential in order to achieve a strong and durable bond between the materials being glued together. Without proper pressure, the bond may be weak and prone to failure.
One of the key reasons why pressure is important during the curing process is that it helps to squeeze out any excess glue. When glue is applied between two surfaces, there is often some amount of excess glue that is not needed for the bond. By applying pressure, this excess glue is forced out, leaving behind only the necessary amount for a strong bond. If this excess glue is not removed, it can create gaps or weak spots in the bond.
In addition to squeezing out excess glue, applying pressure also plays a crucial role in ensuring that the adhesive fully penetrates the porous surfaces of the materials being glued together. Many materials, such as wood or fabric, have porous surfaces that can absorb glue. By applying pressure, the adhesive is pushed into these pores, creating a tight and secure bond. Without sufficient pressure, the adhesive may not fully penetrate the pores, resulting in a weaker bond.
The amount of pressure required during the curing process may vary depending on the specific project and materials involved. It is important to apply enough pressure to keep the materials firmly in place without causing them to shift or move. This can be achieved by using clamps, weights, or even your own body weight.
Clamps are commonly used when working with larger objects or when gluing multiple pieces together. They provide an even distribution of pressure across the entire surface area, ensuring a strong bond. It is crucial to use clamps that are appropriate for the size and weight of the materials being glued together.
Weights can be used when working with smaller objects or when clamps are not available. Placing heavy objects on top of the glued materials can help apply consistent pressure throughout the curing process. However, it is important to ensure that the weights are evenly distributed and do not cause any damage or distortion to the materials.
In some cases, you may need to get creative with applying pressure. For instance, when gluing vertical surfaces together, you can use tape or straps to hold them in place while the glue cures. Alternatively, you can use your own body weight by pressing down on the glued materials with your hands or feet.
While applying pressure during the curing process is beneficial, excessive pressure should be avoided. Too much pressure can cause the glue to squeeze out excessively, resulting in a weaker bond. It is always best to follow the manufacturer’s recommendations regarding pressure and curing times for optimal results.
Fast-Cure Variants of Gorilla Glue
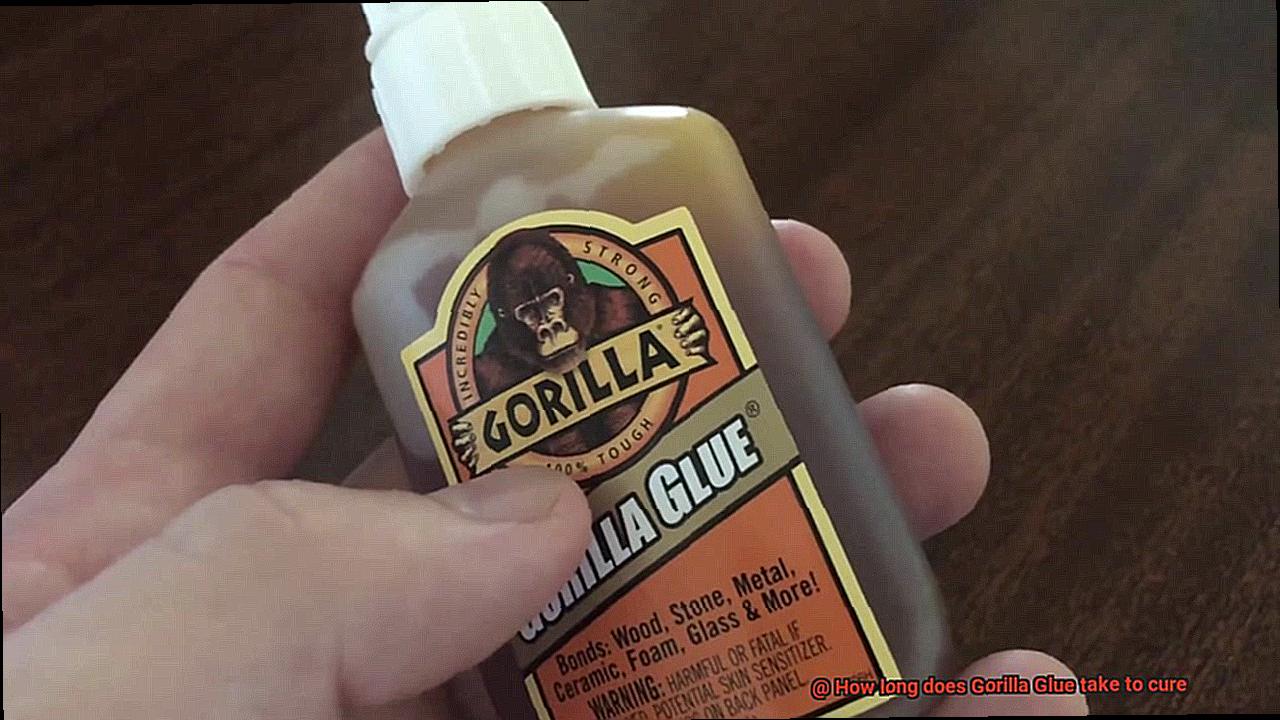
Fast-cure variants of Gorilla Glue are specifically formulated to reduce curing time and provide quicker results. These variants, such as the Gorilla Super Glue and Gorilla Wood Glue, offer a range of benefits for users who need fast-acting adhesive solutions.
The primary advantage of these variants is their rapid drying and curing time. Unlike the original glue, which may take hours or even days to fully cure, fast-cure variants can cure within seconds or minutes, depending on the materials and conditions. This makes them ideal for time-sensitive repairs or projects that require immediate results.
Gorilla Super Glue is one popular fast-cure variant known for its quick bonding properties. It forms a strong bond in just seconds, providing users with instant results. Gorilla Wood Glue, on the other hand, is specifically designed for woodworking projects and offers a fast drying time, allowing users to work efficiently and save valuable time.
While these fast-cure variants offer convenience, it is important to note that they may have slightly different properties compared to the original glue. Users should consider these differences and choose the appropriate variant based on their specific needs and requirements.
To achieve optimal results with fast-cure variants, it is crucial to follow the product instructions carefully. This includes properly preparing the surfaces, applying the glue evenly and in the right amount, and providing adequate clamping or pressure during the curing process.
It is also important to allow sufficient time for the glue to fully cure before subjecting it to heavy stress or load. Rushing the curing process may compromise the bond’s strength and durability. Therefore, exercising patience and allowing for proper curing time will ensure the best results.
Proper Surface Preparation, Application Techniques, and Curing Time Recommendations
Proper surface preparation, application techniques, and curing time recommendations are of utmost importance when working with Gorilla Glue. These steps are vital in ensuring the strongest bond possible and maximizing the effectiveness of the adhesive. Let’s delve into the reasons why these aspects are crucial:
- Surface Preparation: To achieve a robust and long-lasting bond, it is imperative to properly prepare the surfaces to be bonded. Cleaning the surfaces thoroughly eliminates any contaminants that may hinder adhesion. Dust, oil, or grease can be removed by using a mild detergent or rubbing alcohol. Moreover, roughening the surfaces is essential to create an ideal bonding surface for the glue. You can accomplish this by gently sanding the surfaces with fine-grit sandpaper or employing a wire brush. However, exercise caution to avoid damaging or weakening the materials being bonded.
- Application Techniques: Applying Gorilla Glue in an even and precise manner is paramount for a successful bond. Using too much glue can result in excess squeeze-out and weakened bonds. Conversely, applying too little may lead to an insufficient bond. Therefore, it is recommended to apply a thin layer of glue to one of the surfaces and evenly spread it using a brush or spreader. This technique ensures complete coverage and enhances adhesion.
- Curing Time Recommendations: Allowing ample time for Gorilla Glue to cure is critical in achieving maximum bond strength. Although Gorilla Glue may initially set quickly, it requires a full 24 hours to reach its optimal cure. It is advisable to wait for at least 72 hours before subjecting the bond to stress or heavy loads. This extended curing time ensures that the glue has achieved its maximum strength.
By adhering to these recommendations, users can attain optimal results when working with Gorilla Glue. Proper surface preparation guarantees excellent adhesion, while correct application techniques ensure proper coverage and sufficient amounts of glue. Allowing enough time for curing guarantees that the bond reaches its peak strength.
ycLnwJ2Tfec” >
Conclusion
The curing time of Gorilla Glue can vary depending on several factors.
However, on average, it takes about 24 hours for Gorilla Glue to fully cure. During this time, the glue undergoes a chemical reaction that transforms it from a liquid to a solid state.
It is important to note that the curing process may be affected by temperature and humidity levels. Higher temperatures and lower humidity can speed up the curing process, while colder temperatures and higher humidity can slow it down.
To ensure optimal results, it is recommended to follow the instructions provided by the manufacturer and allow sufficient time for the glue to cure before subjecting it to any stress or pressure.