We’ve all been there – those clumsy moments in the kitchen or unexpected accidents that leave us with cuts we never saw coming. In a panic, we grab whatever adhesive is within reach to quickly patch up the wound. But here’s the burning question: how long should you actually leave super glue on a cut? Is there a magic timeframe we should follow?
Today, we’re diving into the world of super glue and uncovering the ideal duration for keeping it on a cut. Sure, it might seem like an unconventional approach, but when used correctly, super glue can be a reliable alternative to traditional bandages. So let’s unravel this mystery together and find out just how long you should keep that super glue on your cut.
The main purpose of using super glue on wounds is to create a waterproof seal that speeds up the healing process. Unlike regular bandages, super glue creates an environment where your wound can breathe while keeping out nasty bacteria and other unwanted stuff. Of course, it’s important to remember that super glue is meant for minor cuts only – it won’t replace professional medical help for deeper wounds or serious lacerations.
While it might be tempting to think that gluing a wound shut is as simple as one-and-done, the truth is that you shouldn’t leave super glue on for too long. There’s a specific timeframe that ensures proper healing, reduces infection risk, and minimizes any adhesive-related problems. Leaving it on for too long can actually slow down healing or irritate your skin – not exactly what we’re going for.
So here’s the lowdown: experts generally recommend leaving super glue on a cut for no more than 24 to 48 hours. Within this time frame, the glue does its job of sealing up your wound without needing any further intervention. Once those initial hours are up though, it’s important to gently remove any excess glue using acetone or warm soapy water. This keeps your wound clean and free from potential irritants.
But hey, remember that everyone’s healing process is different, and some cuts might need more than just a quick super glue fix. If you notice excessive redness, swelling, or signs of infection, it’s crucial to seek medical advice right away.
A healthcare professional can assess your wound and provide a more comprehensive treatment plan if needed.
Understanding the Benefits of Using Super Glue on Cuts
Contents
- 1 Understanding the Benefits of Using Super Glue on Cuts
- 2 Preparing the Wound Before Applying Super Glue
- 3 Applying Super Glue to a Cut
- 4 How Long Should You Leave Super Glue on a Cut?
- 5 Removing Super Glue from a Cut
- 6 When Not to Use Super Glue for Cuts
- 7 Signs of Infection After Using Super Glue
- 8 Alternatives to Using Super Glue on Cuts
- 9 Conclusion
Super glue, scientifically known as cyanoacrylate adhesive, has gained popularity as an effective method for wound closure. This versatile adhesive, widely used in various industries for its strong bonding properties, offers several benefits when used on cuts and wounds. In this article, we will explore the advantages of using super glue on cuts and provide valuable information on its application.
One of the main advantages of using super glue on cuts is its ability to create a waterproof seal. Unlike traditional bandages that may lose their adhesive properties when exposed to water, super glue remains intact. This waterproof seal serves as a barrier against infection, preventing bacteria and contaminants from entering the wound.
Another benefit of using super glue on cuts is its remarkably quick drying time. Unlike traditional stitches that can take several minutes to set, super glue dries within seconds. This rapid drying time allows for immediate protection of the wound and promotes faster healing. Additionally, the quick setting of super glue reduces the risk of scarring.
Applying super glue on a cut is a simple process that does not require specialized training or medical expertise. This makes it a convenient option for minor cuts and wounds that can be treated at home. However, it is important to note that super glue should only be used on clean and small cuts that are not deep or gaping. Deep wounds or wounds requiring professional medical attention should not be treated with super glue.
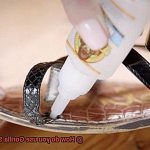
To apply super glue on a cut, begin by thoroughly cleaning the wound. Then, apply a thin layer of the adhesive across the edges of the cut and hold them together for approximately one minute until the glue sets. After applying super glue, it is crucial to keep the wound clean and monitor it for any signs of infection.
While super glue can be an effective temporary solution for minor cuts, it is not a substitute for proper medical care. It is always advisable to seek medical attention for serious or infected wounds. Moreover, super glue should not be used on sensitive areas such as the eyes, lips, or genitalia.
Preparing the Wound Before Applying Super Glue
This article will provide you with a step-by-step guide to ensure that your wound is clean and ready for the adhesive prowess of super glue.
By following these simple yet crucial steps, you can enhance the effectiveness of the glue while minimizing the risk of infection. Let’s dive in and learn how to prepare the wound before applying super glue.
Step 1: Wash Your Hands
Begin by thoroughly washing your hands with soap and water. This essential step helps prevent any bacteria from your hands entering the wound and causing further complications.
Step 2: Gently Rinse the Wound
Using clean water, carefully rinse the cut to remove any dirt or debris. Avoid using harsh chemicals or antiseptics as they may interfere with the adhesive properties of super glue.
Step 3: Remove Foreign Objects
If there are visible foreign objects such as splinters or glass shards, use sterile tweezers to gently extract them. Take caution not to push them further into the wound or cause additional damage.
Step 4: Cleanse the Surrounding Area
After cleaning the wound, employ a sterile saline solution or mild soap and water to cleanse the area around the cut. This step eliminates bacteria or dirt present on the skin surrounding the wound.
Step 5: Pat Dry
Once you have cleaned both the wound and surrounding area, gently pat them dry with a clean, sterile gauze or towel. Avoid rubbing or scrubbing, as it may irritate the skin and introduce more bacteria.
Step 6: Assess Wound Edges
Ensure that the edges of the cut are close together before applying super glue. If the cut is deep or gaping, it may require medical attention and stitches instead of relying solely on super glue.
Step 7: Use Adhesive Support (If Necessary)
In some cases, you can use sterile adhesive strips or butterfly closures to provide additional support and bring the edges of the cut together. These aids facilitate the healing process.
Step 8: Control Bleeding
Before applying super glue, make sure there is no excessive bleeding from the wound. If bleeding persists, apply gentle pressure with a sterile gauze pad until it stops.
Applying Super Glue to a Cut
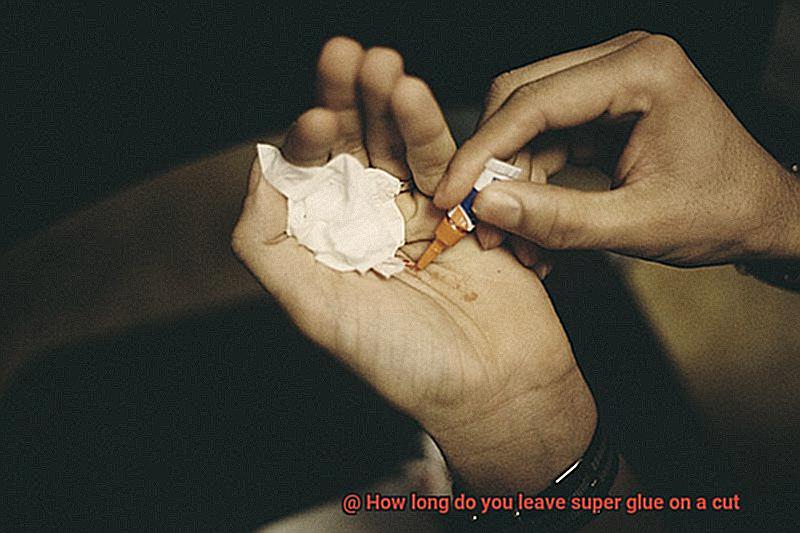
Well, my friend, you’re in for a treat. Super glue, also known as cyanoacrylate adhesive, can be a convenient tool for closing up small cuts and wounds. But before we delve into the intricacies of applying this magical adhesive safely, let’s make sure we’re crystal clear on the importance of cleanliness.
Step one: Clean that cut like an absolute boss. Begin by washing your hands thoroughly with soap and water. We absolutely want to steer clear of any pesky bacteria getting in the way of the healing process. Next, gently rinse the cut with mild soap and water to eliminate any dirt or debris. For an extra layer of disinfection, you can even use a sterile saline solution or hydrogen peroxide. But remember, gentle is the name of the game here.
Now that our wound is gleaming with cleanliness, it’s time to bring in the big guns – super glue. Take a deep breath and apply a minuscule amount of super glue directly onto the cut. Exercise caution to avoid contact with the surrounding healthy skin. Our goal is to stick the cut together, not ourselves.
Once the glue is applied, hold those edges together as if they’re about to win a beauty pageant. You can use your fingers or a clean cloth to gently press them together for approximately one minute. This will allow the glue enough time to work its magic and bond those stubborn edges.
Now here comes the crucial part – remember that super glue should only be used on small cuts that aren’t deep or bleeding excessively. If your cut is more severe, seek immediate medical attention. Safety always comes first.
After applying the glue, it’s vital to keep that wound clean and dry. Avoid immersing it in water for at least 24 hours. Allow the glue to do its thing and remain in place until it naturally peels off or dissolves, which usually takes around 5 to 10 days. If the glue starts to loosen before the wound is fully healed, there’s no need to panic. Simply consult a healthcare professional for further guidance.
And last but certainly not least, keep a keen eye on that cut. If you notice any signs of infection such as heightened pain, redness, swelling, or the presence of pus, don’t hesitate to seek medical attention. We want that wound to heal like a true champion.
How Long Should You Leave Super Glue on a Cut?
I’m here to give you the lowdown on how long you should leave super glue on a cut.
First, let’s talk about why super glue is even an option for closing cuts. Super glue, also known as cyanoacrylate adhesive, is a household adhesive that can actually be used to seal minor cuts and wounds. Its primary role in wound closure is to act as a barrier against bacteria and other contaminants, while allowing the wound to heal naturally underneath.
Now, let’s get to the important question – how long should you leave super glue on a cut? The general consensus among medical professionals is that super glue should not be left on a cut for more than 24 to 48 hours. Leaving it on for too long can lead to irritation, skin damage, or even an allergic reaction. Remember, safety always comes first.
Here are some pros and cons of using super glue for cuts:
Pros:
- Quick and easy: Super glue forms a strong bond quickly and seals the wound, preventing further bleeding and reducing the risk of infection.
- Cost-effective: Super glue is readily available and affordable compared to other wound closure methods.
- Convenience: You can apply super glue at home without the need for a medical professional.
Cons:
- Hinders natural healing process: Keeping the glue on for too long can hinder the natural healing process by trapping moisture and bacteria inside the wound.
- Limited use: Super glue should only be used on clean, minor cuts that are not deep or gaping. If the cut is severe or showing signs of infection, seek medical attention instead.
- Risk of adverse reactions: Some individuals may have an allergic reaction to super glue, so it’s important to monitor the glued wound closely for any signs of irritation or adverse reactions.
So, when should you use super glue for a cut? If you have a small, clean cut that is not deep or gaping, super glue can be a viable option for wound closure. Just make sure to follow the proper guidelines and remove the glue after 24 to 48 hours to avoid any potential complications.
Remember, it’s always better to err on the side of caution and seek medical attention if you have any concerns or if the wound does not appear to be healing properly. Your health and well-being should always be your top priority.
Removing Super Glue from a Cut
Accidents happen, and sometimes we find ourselves with a cut or wound that requires a little extra care. Super glue, also known as cyanoacrylate adhesive, can be a handy solution to seal minor cuts and promote healing. However, once the wound has sufficiently healed, it is important to remove the super glue to avoid any complications. In this article, we will explore the recommended methods for safely removing super glue from a cut, ensuring your health and well-being.
Proper application: Clean and dry wounds
Before delving into the removal process, it is crucial to understand the correct application of super glue on a cut. Ensure that the wound is clean, dry, and free from any debris or bacteria. Applying super glue to dirty or wet wounds can trap bacteria inside and increase the risk of infection.
Timing is key: Healing and removal
For minor cuts or abrasions, it is generally safe to leave the super glue on for about 5-7 days. During this time, the adhesive will gradually break down and peel off naturally as the wound heals. However, for deeper or more severe cuts, seeking medical attention is advisable.
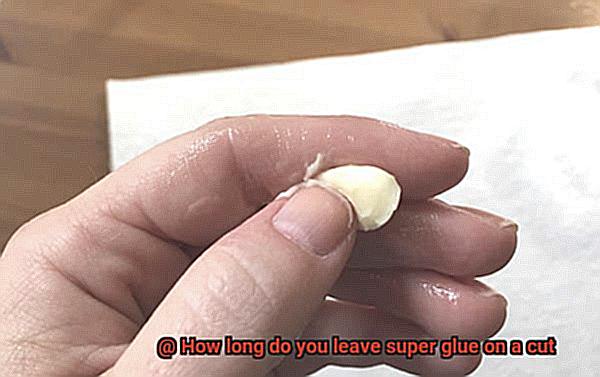
Soaking in warm soapy water or saline solution
One effective method of removing super glue involves soaking the affected area in warm soapy water or saline solution for about 20 minutes. This helps to loosen the adhesive properties of the glue. After soaking, gently rub the area with a soft cloth or cotton swab to remove any remaining glue.
Acetone or nail polish remover: Use with caution
Another option for removing super glue is using acetone or nail polish remover. However, caution should be exercised as acetone can be harsh on the skin and may cause irritation. Apply a small amount of acetone to a cotton ball or swab and gently dab the glue until it starts to dissolve.
Natural alternatives: Olive oil or coconut oil
If you prefer a more natural approach, olive oil or coconut oil can be effective in removing super glue. Apply a few drops of oil to the affected area and gently massage it in. After a few minutes, the glue should start to loosen, allowing it to be wiped away.
Patience and gentle removal techniques
Regardless of the method chosen, it is important to avoid forcefully peeling or ripping off the super glue from the cut. This can cause further damage to the skin and delay the healing process. Patience and gentle removal techniques are key to ensuring safe and effective removal of super glue.
When Not to Use Super Glue for Cuts
Super glue is a versatile adhesive that can come in handy for various DIY projects and repairs. However, when it comes to treating cuts and wounds, there are certain situations where super glue should not be used. It is essential to know when it is not appropriate to use super glue for a cut to ensure proper healing and prevent further complications.
Firstly, deep or extensive cuts should not be treated with super glue. These types of wounds often require medical attention and may need stitches or other medical interventions to properly close and prevent infection. Super glue simply cannot provide the necessary closure for such severe wounds.
Moreover, using super glue on infected wounds can be detrimental. The adhesive can trap bacteria inside the wound, making the infection worse. If you notice signs of infection such as redness, swelling, pus, or increased pain, it is crucial to seek medical attention instead of relying on super glue.
Furthermore, wounds located near sensitive areas such as the eyes, mouth, or other delicate tissues should not be treated with super glue. The chemicals in super glue can cause irritation or damage to these sensitive areas, leading to further complications.
In addition, burns should never be treated with super glue. Burns require specialized care and treatment to ensure proper healing. Applying super glue on burns can slow down the healing process and increase the risk of infection or other complications.
It’s important to note that some individuals may have an allergic reaction to super glue. If you have a known allergy to cyanoacrylate, the main ingredient in super glue, it is best to avoid using it on cuts to prevent further allergic reactions.
Lastly, super glue should not be used on wounds that are actively bleeding. It is important to stop the bleeding before applying any type of adhesive to the wound. Applying pressure with a clean cloth or bandage can help control bleeding.
Signs of Infection After Using Super Glue
Super glue is a handy tool for quick fixes, but it carries the risk of infection when used on cuts. This article explores the signs of infection to watch out for after applying super glue to a cut. By being aware of these signs, you can take appropriate action and seek medical attention if necessary.
Increased Pain and Tenderness:
One of the initial signs of infection after using super glue on a cut is increased pain and tenderness around the area. If the pain becomes more intense or does not subside after a few days, it could indicate an infection.
Redness and Swelling:
Another common sign of infection is redness and swelling around the cut. If the area becomes increasingly red and swollen, it may be a sign that your body is fighting off an infection.
Presence of Pus:
Pus, a thick, yellowish fluid, can indicate an infection. If you notice pus coming from the wound or if it appears to be oozing, it is crucial to seek medical attention.
Fever:
Developing a fever after using super glue on a cut could be a sign that your body is trying to fight off an infection. If you experience an elevated temperature, it’s important to consult with a healthcare professional.
Unusual Odor:
An unusual odor coming from the wound could also be a sign of infection. Foul-smelling wounds are often associated with bacterial infections.
Additional Symptoms:
Other symptoms such as chills, fatigue, or general malaise alongside signs of infection should not be ignored. These could be indicators of a more severe infection that requires immediate medical attention.
Alternatives to Using Super Glue on Cuts
When it comes to treating cuts, super glue may seem like a quick fix, but there are actually safer and more effective alternatives available. So put down that tube of glue and let’s explore some better options.
First up, we have medical adhesive strips, also known as butterfly stitches or Steri-Strips. These nifty little strips work by holding the edges of a cut together, promoting healing without the need for sutures or staples. They’re easy to apply and remove, making them a great option for minor cuts and scrapes.
Next on our list is liquid bandage. This magical adhesive forms a protective layer over the wound, sealing it off from bacteria and preventing infection. And the best part? It’s waterproof. So you can shower or swim without worrying about getting your cut wet.
If you prefer something more traditional, medical-grade adhesive tapes are here to save the day. These hypoallergenic and breathable tapes provide support and protection for your cut. They’re perfect for securing dressings or holding the edges of a cut together, allowing air circulation to promote healing.
Now let’s dive into the world of natural remedies. Yes, honey. This sweet sticky stuff has been used for centuries as a wound dressing because of its antibacterial properties. Simply slather some raw honey on your cut to prevent infection and speed up the healing process.
And last but not least, we have aloe vera gel. This soothing gel has incredible healing properties and is perfect for minor cuts and scrapes. Just apply a thin layer to your wound and let nature work its magic.
But remember, my friends, these alternatives are best suited for minor cuts and scrapes. For larger or deeper wounds that may require stitches or staples, it’s important to seek medical attention.
vDLrxILRwfA” >
Also Read: Can You Use Super Glue For Fake Nails?
Conclusion
When it comes to using super glue on a cut, it’s important to know how long to leave it on.
Leaving super glue on a cut for too short of a time may not allow it to properly seal the wound, while leaving it on for too long can lead to irritation and potential complications. So, what’s the ideal duration?
Well, the answer isn’t set in stone. It depends on various factors such as the size and depth of the cut, as well as your body’s healing process.
This gives enough time for the adhesive to form a protective barrier and promote healing without causing any harm.