You’ve taken on a plumbing project and you’re itching to finally have water flowing through those newly glued PVC pipes. But hold your horses. Rushing this step could lead to a wet disaster. That’s why it’s crucial to know exactly how long you should wait before turning on the tap.
In this post, we’ll dive into this topic and give you all the essential details you need to complete your project successfully and avoid any unexpected plumbing mishaps. Let’s quench that curiosity of yours, shall we?
Note: While I’m here to help, it’s always wise to consult a professional plumber or check the instructions provided with your PVC cement for the most accurate drying times tailored to your specific project.
What is PVC Pipe and its Adhesive?
Contents
- 1 What is PVC Pipe and its Adhesive?
- 2 What Factors Affect the Curing Time of PVC Pipe Adhesives?
- 3 How Long Should You Wait Before Running Water Through the Pipe?
- 4 Ensuring Proper Sealing of Joints
- 5 Testing for Leaks
- 6 Reapplying Adhesive or Using Additional Sealing Methods
- 7 Proper Preparation and Application Techniques for Strong Bonds
- 8 Using the Appropriate Adhesive for Different Types of PVC Pipes
- 9 Conclusion
PVC pipe and its adhesive are an essential duo in the world of plumbing. PVC, or polyvinyl chloride, is a versatile plastic material that is commonly used for various applications due to its durability, affordability, and resistance to corrosion. It is the go-to choice for plumbing systems, including water supply lines, drainage systems, and irrigation setups.
The smooth interior walls of PVC pipes play a crucial role in ensuring efficient flow of fluids. This feature allows water to move smoothly through the pipes without any hindrance or unnecessary pressure drops. It also minimizes the risk of blockages and clogs, ensuring a reliable and efficient plumbing system.
To securely join PVC pipes together, a specific adhesive is utilized. PVC pipe adhesive, sometimes referred to as PVC cement or glue, is a solvent-based formulation designed specifically for bonding PVC pipes and fittings. It functions by chemically melting the surfaces of the PVC materials being joined, creating a strong and permanent bond.
The adhesive consists of solvents and resins that work together to achieve a secure joint. The solvents in the adhesive dissolve the outer layer of the PVC pipe, allowing the resin to penetrate and bond with the material. As the solvent evaporates, it leaves behind a solid and secure joint that can withstand the test of time.
Using PVC pipe and its adhesive offers numerous benefits:
- Durability: PVC pipes are highly durable and resistant to corrosion, chemicals, and impact. This makes them ideal for long-lasting plumbing systems that can withstand harsh conditions.
- Affordability: PVC pipes are cost-effective compared to other materials commonly used in plumbing systems. They offer excellent value for money without compromising on quality.
- Easy installation: PVC pipes are lightweight and easy to handle, making them a breeze to install in various applications. Their flexibility allows for easy maneuvering around obstacles and tight spaces.
- Leak-free connections: When used correctly, PVC pipe adhesive creates leak-free connections between pipes, ensuring a reliable and watertight plumbing system. This eliminates the risk of costly and inconvenient leaks.
- Versatility: PVC pipes and adhesive are suitable for a wide range of applications, including water supply, drainage, irrigation, and more. They can be used in residential, commercial, and industrial settings.
When working with PVC pipe adhesive, it is crucial to follow the manufacturer’s instructions to ensure optimal results. This includes selecting the correct type of adhesive for the specific application, as there are different formulations available for pressure and non-pressure systems. It is also important to allow sufficient curing time before running water through the pipes to ensure a strong bond.
Proper preparation and application techniques are paramount for achieving reliable and long-lasting bonds. This includes cleaning and drying the surfaces to be bonded, evenly applying the adhesive, and securely fitting the pipe into the joint. Following these steps diligently will help ensure that the adhesive sets properly and creates a strong connection that can withstand the rigors of everyday use.
What Factors Affect the Curing Time of PVC Pipe Adhesives?
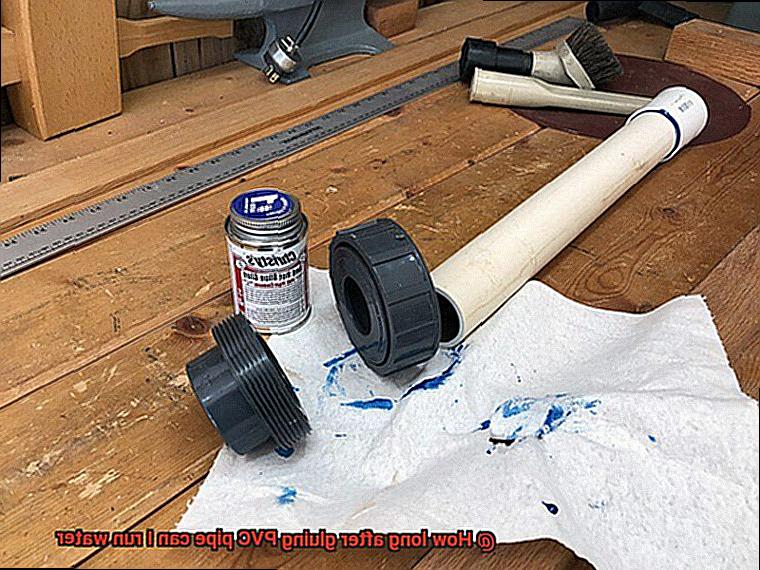
The curing time of PVC pipe adhesives is influenced by several factors. The type of adhesive used is crucial in determining the curing time. Solvent-based adhesives, which rely on evaporation for curing, typically take longer to cure compared to quick-setting adhesives.
Temperature and humidity levels also play a significant role in the curing process. Higher temperatures speed up the curing time, while lower temperatures slow it down. Similarly, higher humidity levels accelerate curing, while lower humidity prolongs it. These factors must be considered to ensure the efficient curing of PVC pipe joints.
The size and thickness of the pipes being joined can also affect the curing time. Thicker pipes require more adhesive and take longer to cure due to the larger mass that needs to be bonded together. Additionally, larger diameter pipes may need more adhesive, which can impact the overall curing time.
The design of the joint being created is another factor to consider. Joints with complex or irregular shapes take longer to cure due to the increased surface area that needs to be bonded together. Conversely, simple and well-designed joints with clean surfaces promote faster curing.
The application technique used can also impact the curing time. It is essential to apply a thin and even layer of adhesive for proper bonding and efficient curing. Applying too much adhesive can prolong the drying and curing process.
Finally, the quality of the adhesive itself affects its curing time. Using a high-quality adhesive specifically designed for PVC pipes ensures faster and more reliable curing. It is important to choose adhesives that meet industry standards and are recommended for the specific application.
How Long Should You Wait Before Running Water Through the Pipe?
When it comes to gluing PVC pipes, patience is key. Waiting for the adhesive to fully cure before running water through the pipe is crucial to ensure a strong and leak-free joint. But how long should you wait? Well, it depends on a few factors. Let’s break it down.
- Type of Adhesive: The most common adhesive for PVC pipes is solvent cement. This glue chemically bonds the surfaces together, creating a strong joint. Solvent cement typically requires at least 24 hours to fully cure before water can be introduced into the system. This curing time may vary depending on factors such as temperature and humidity.
- Manufacturer’s Instructions: Always follow the instructions provided by the adhesive manufacturer. They know their product best and will usually specify the recommended curing time for optimal results. These instructions may also provide guidelines for different pipe sizes and application methods.
- Fast-Setting Adhesives: If you’re in a hurry, fast-setting adhesives might be an option. These adhesives can cure within a few hours, allowing you to complete your plumbing project faster. However, it is essential to ensure that these fast-setting adhesives are suitable for use with PVC pipes and comply with local plumbing codes.
During the curing period, avoid putting stress or movement on the glued joint. That means no pressure or manipulation of the pipes until the adhesive has fully cured. Additionally, protect the joint from extreme temperatures, as they can affect the adhesive’s performance.
Ensuring Proper Sealing of Joints
To ensure a proper sealing of joints when gluing PVC pipes, it is important to follow a series of steps that guarantee a strong and leak-free connection. Here is a detailed guide to help you achieve the desired results:
- Choose the right type of PVC glue: Different types of PVC glues are available in the market, each designed for specific applications. Carefully read the labels and instructions to select the glue that best suits your needs.
- Prepare the surfaces: Before applying the glue, ensure that the surfaces of the PVC pipes and fittings are clean and free from any dirt, grease, or moisture. Use a clean cloth or sandpaper to remove any debris and create a smooth surface for better adhesion.
- Dry-fit the pipes and fittings: Assemble the pipes and fittings without using any adhesive to check for proper alignment and fit. Make sure the pipes are fully inserted into the fittings and aligned correctly. This step allows you to identify any potential issues before applying the glue.
- Apply the PVC glue: Using an appropriate applicator, apply a thin layer of glue to both the pipe and fitting surfaces. Avoid using excessive amounts of glue as it can lead to messy joints and weak bonds. Follow the manufacturer’s instructions regarding curing time before joining the glued surfaces together.
- Join the pipes and fittings: After applying the glue, quickly join the pipe and fitting together while twisting slightly to spread the adhesive evenly. This twisting motion helps distribute the glue and ensures a solid connection between the two surfaces. Hold them firmly in place for a few seconds to allow the adhesive to set.
- Allow sufficient curing time: It is crucial to give enough time for the glued joint to cure before subjecting it to water pressure. While some glues may have quick-setting times, it is generally recommended to wait at least 24 hours for full curing. This allows the glue to strengthen and create a watertight seal.
- Protect the joint during curing: During the curing process, avoid moving or manipulating the glued pipes and fittings to prevent any disruption to the bonding process. Additionally, protect the joint from extreme temperatures that could affect the adhesive’s performance.
Testing for Leaks
Testing for leaks in PVC pipes is an essential step to ensure the integrity of the plumbing system. After gluing the pipes, it is crucial to test for leaks before running water through them. There are several effective methods available for this purpose, each with its own advantages and limitations.
One of the simplest and most commonly used methods is visual inspection. After allowing the glued joints to dry for the recommended time, typically 24 hours, carefully examine the joints for any signs of leakage. Look for water droplets, wet spots, or discoloration around the joints. A thorough visual inspection can provide a good indication of whether the joints are secure.
Another popular method is the soapy water test. This involves mixing a small amount of dish soap with water and applying it to the glued joints using a brush or spray bottle. Observe the joints closely and look for any bubbles forming. The soap creates surface tension, making it easier to spot even small leaks by the formation of bubbles.
Pressure testing is another reliable method used by professionals. It entails pressurizing the system using air or water to check for any leaks. This method requires specialized equipment, such as pressure gauges or pumps, and should be conducted by experienced individuals who are familiar with pressure testing procedures.
In addition to these methods, electronic leak detectors are available in the market. These devices use sound or ultrasound technology to detect escaping air or water and can be helpful in pinpointing leaks in hard-to-reach areas.
It is important to conduct leak testing before running water through the pipes because leaking joints can cause significant damage if left undetected. Regular maintenance and inspections can also help identify potential leaks before they become major problems.
If any leaks are detected during the testing process, it is crucial to address them promptly. Depending on the severity of the leak, it may require re-gluing the joint or replacing the damaged section of the pipe. Seeking guidance from a professional plumber or knowledgeable expert is advisable to ensure proper repairs are made.
Reapplying Adhesive or Using Additional Sealing Methods
Reapplying adhesive or using additional sealing methods is essential to ensure a watertight seal and prevent leaks or water damage in PVC pipes. Here are some key reasons why these extra steps are important:
- Clean surfaces: Before reapplying adhesive, it is crucial to thoroughly clean the surfaces of the pipes and fittings to remove any excess glue or debris. This step ensures that the new layer of adhesive can bond properly and create a strong seal. Any dirt or moisture left on the surfaces can compromise the effectiveness of the adhesive.
- Curing time: Different adhesives have varying curing times, which refers to the time it takes for the adhesive to fully bond. It is vital to follow the manufacturer’s instructions and allow sufficient curing time before running water through the pipes. Rushing this process can result in a weaker bond and potential leaks.
- Pipe thread sealant tape: Using pipe thread sealant tape provides an additional layer of protection and reinforcement to the threaded ends of pipe fittings. This tape fills in any gaps or imperfections in the threads, creating a tight seal that prevents water from leaking out. It is a simple yet effective method to enhance the watertight seal on PVC pipes.
- PVC primer and cement: Combining PVC primer and cement with adhesive adds an extra layer of protection to the joint between pipes and fittings. The primer cleans and prepares the surfaces by removing any dirt, oil, or contaminants that could interfere with the effectiveness of the adhesive. This combination helps ensure a stronger and more durable seal, reducing the risk of leaks.
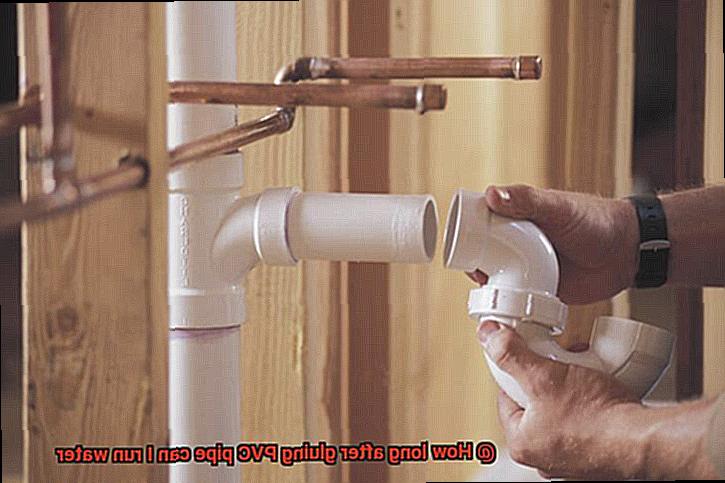
By taking these extra steps, you significantly improve the effectiveness of adhesive applications and sealing methods on PVC pipes. This not only prevents leaks and water damage but also guarantees a long-lasting and reliable plumbing system.
Proper Preparation and Application Techniques for Strong Bonds
Achieving strong bonds when gluing PVC pipes requires meticulous preparation and application techniques. The first step in this process is ensuring that the surfaces to be bonded are clean and free from any dirt, dust, or grease. A solvent cleaner specifically designed for PVC pipes is ideal for this task, guaranteeing a pristine surface for optimal adhesion.
Once the surfaces are clean, a touch of roughening is recommended. Sandpaper or a file can be used to lightly roughen the surfaces, increasing the bonding area and promoting a stronger connection. However, it is important to exercise caution and avoid excessive roughening, which can weaken the pipe.
Choosing the right adhesive is crucial for achieving a robust bond. There are different types available, including solvent-based cements and primer and glue combinations. It is essential to select an adhesive that is specifically designed for PVC pipes and compatible with the type of PVC being used. This ensures compatibility and maximum effectiveness.
Following the manufacturer’s instructions carefully is paramount when applying the adhesive. Each adhesive may have its own unique application techniques and curing times. By adhering to these instructions, a strong bond can be guaranteed, providing long-lasting results.
When applying the adhesive, using a brush or applicator designed for PVC pipe gluing ensures an even and uniform distribution on both surfaces. A thin and even layer of adhesive should be applied, covering the entire bonding area. This meticulous application guarantees optimal contact between the surfaces, resulting in a strong bond.
After applying the adhesive, it is crucial to join the two pieces of PVC pipe immediately. Proper alignment before joining is essential since repositioning becomes difficult once the adhesive sets. Applying slight pressure on the joint helps ensure a tight fit and enhances bond strength.
Holding the joined pipes together firmly for a few minutes allows the adhesive to set properly. The curing time varies depending on the type of adhesive used and environmental conditions. Referring to the manufacturer’s instructions for specific curing times is advised.
After the adhesive has fully cured, it is generally safe to run water through the glued PVC pipe. However, it is important to note that the bond’s full strength may take some time to develop. Waiting at least 24 hours before subjecting the pipe to high water pressure or stress ensures that the bond is fully established and capable of withstanding demanding conditions.
Using the Appropriate Adhesive for Different Types of PVC Pipes
Choosing the Correct Adhesive
When it comes to joining PVC pipes together, using the appropriate adhesive is of utmost importance. Whether you are working with schedule 40, schedule 80, or CPVC pipes, each type requires a specific adhesive to ensure a strong and reliable bond. Using the wrong adhesive can lead to leaks, pipe failure, and other plumbing issues.
Different Types of PVC Pipes
PVC pipes come in different types, each designed for specific applications. Schedule 40 PVC pipes are commonly used for general plumbing and irrigation systems, while schedule 80 PVC pipes have thicker walls and can withstand higher pressures and heavier loads. CPVC pipes, on the other hand, are suitable for hot water applications due to their higher temperature resistance. It is crucial to select the correct adhesive that is compatible with the type of PVC pipe being used.
Using Solvent Cement
Solvent cement is the most commonly used adhesive for PVC pipes. It works by chemically bonding the PVC surfaces together, creating a strong and permanent connection. The adhesive comes in different formulas, including regular, medium, and heavy-duty, depending on the size and thickness of the PVC pipes.
Preparing the Surfaces
Before applying solvent cement, it is essential to prepare the surfaces of the PVC pipes. This involves cleaning the pipe ends with a PVC primer, which removes any dirt or debris and improves the adhesion of the cement. After priming, the solvent cement can be applied using a brush or applicator.
Drying Time and Curing
The drying time for solvent cement varies depending on factors such as temperature, humidity, and the size of the joint being glued. It is recommended to wait at least 2 hours before pressurizing the system or running water through the newly glued PVC pipes. While the adhesive may be dry to the touch within a few minutes, it takes longer for it to fully cure and create a strong bond. Waiting for the recommended drying time ensures that the joint has reached its maximum strength and will not leak under pressure.
Manufacturer Instructions and External Factors
Following manufacturer instructions is crucial to ensure proper installation. Some manufacturers may provide specific guidelines regarding drying times for their solvent cements. Additionally, it is important to consider external factors such as temperature and pipe size. In certain cases, it may be necessary to extend the drying time before running water through the system, especially when working with larger diameter pipes or in cold weather conditions.
Testing the System
If there is a need to test the newly installed PVC pipe system before the recommended drying time has passed, a low-pressure air test can be done instead of running water. This involves using an air compressor to pressurize the system and checking for any leaks using a soap solution.
wxTq_5szm4g” >
Conclusion
After gluing PVC pipe, it is crucial to wait for the adhesive to fully cure before running water through it.
This process typically takes around 24 hours, but it can vary depending on factors such as temperature and humidity. Rushing this step can lead to leaks and compromised connections, which can be a costly and time-consuming problem to fix.
So, exercise patience and allow the glue to set properly before turning on the water.

