If you’re a passionate quilter, sewer, or needleworker, you know the pains of pinning fabric layers together. Those pesky pins can slow you down, interfere with your sewing machine, and even leave unsightly holes or distortions in delicate fabrics. But fear not. There’s a magical solution to this age-old problem: Roxanne Glue Baste It.
Roxanne Glue Baste It is a top-notch fabric glue that will revolutionize your creative process by providing a fast and secure alternative to traditional pinning methods. Whether you’re piecing together quilt blocks, delicately appliquéing intricate designs, or attaching eye-catching trims and embellishments, this glue will become your new best friend.
Using Roxanne Glue Baste It is as easy as pie – it saves time and ensures precise placements. Let me walk you through the simple steps to using it effectively:
- Step 1: Test on scrap fabric – Before diving into your project headfirst, take a moment to test the glue on a scrap piece of fabric. This way, you can make sure it’s compatible with your materials and get an idea of its drying time.
- Step 2: Apply a thin line of glue – Grab the fine-squeeze applicator and apply a small, thin line of Roxanne Glue Baste It onto one of the fabric layers where you want them to join together. Remember, less is more here; excessive glue may lead to seepage and discoloration.
- Step 3: Spread the glue – Get your fingers or a trusty little brush ready and gently spread the glue outward from the line you created in Step Make sure there’s even coverage without oversaturating the fabric.
- Step 4: Join the fabric layers – Now comes the exciting part. Align the edges of the two fabric layers and press them together over the glued area. Apply gentle pressure to ensure a strong bond.
- Step 5: Wait for drying – Give it a few minutes for the glue to dry, but don’t forget to consult the manufacturer’s instructions for precise drying times. Keep in mind that drying times may vary due to factors like temperature and humidity.
- Step 6: Sew as desired – Once the glue is nice and dry, you can confidently stitch over the bonded area without any pesky pins getting in your way. Roxanne
Gather the Necessary Materials
Contents
Glue basting has revolutionized the world of sewing and fabric crafts, providing a convenient and time-saving alternative to traditional pinning techniques. If you’re eager to explore the wonders of glue basting, Roxanne glue baste is an exceptional choice. In this article, we will guide you through gathering the necessary materials to embark on your glue basting journey with Roxanne glue baste.
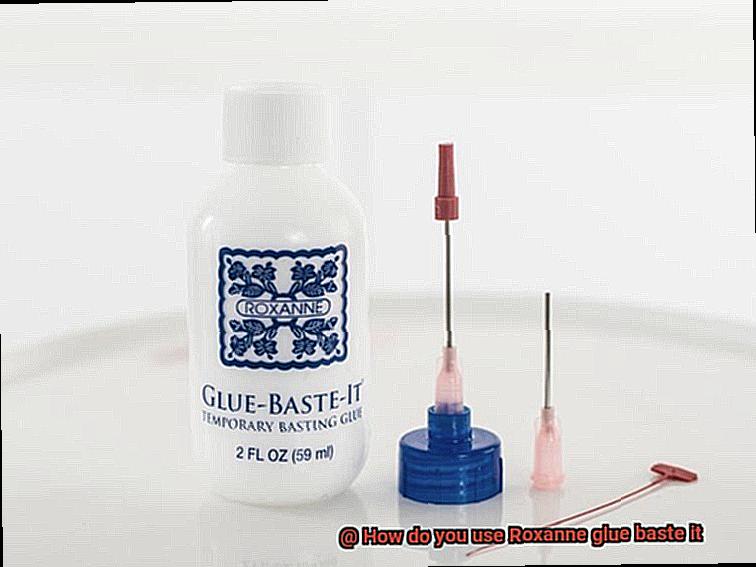
Roxanne Glue Baste:
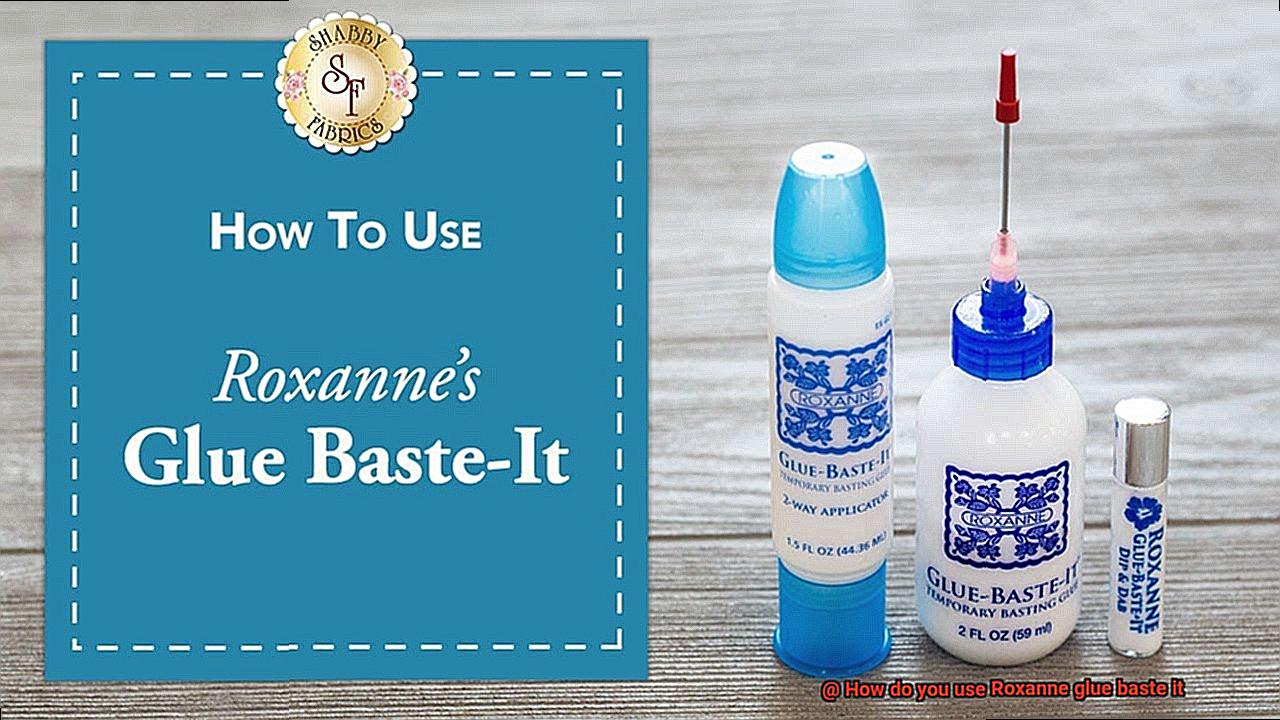
The star of the show, Roxanne glue baste, is a specially formulated fabric adhesive designed for temporary bonding. Ensure you have a fresh bottle of this high-quality adhesive to achieve optimal results in all your projects.
Small Brush or Applicator:
A soft-bristled brush or applicator is essential for precise application of the glue onto your fabric. This tool allows for controlled and even distribution, preventing any damage or fraying. Choose a brush that fits comfortably in your hand to enhance your dexterity and control.
Dedicated Container or Palette:
To maintain the purity and effectiveness of your Roxanne glue baste, it’s crucial to have a dedicated container or palette. This will prevent any contamination from other adhesives you may be using and ensure that you have easy access to the right amount of glue when needed. Opt for a small dish or palette with compartments to keep the glue separate and organized.
Clean and Stable Work Surface:
Prepare your workspace by clearing off any clutter and ensuring a dust-free environment. A clean and stable work surface provides an ideal foundation for working with fabric and glue baste. Smooth out any wrinkles or bumps in your work area to ensure seamless application.
Scrap Fabric or Test Pieces:
To familiarize yourself with Roxanne glue baste and test its compatibility with different fabrics, keep some scrap fabric or test pieces handy. This practice will help you gain confidence and ensure that the adhesive works well with your chosen materials before using it on your actual project.
Prepare Your Work Surface
Before embarking on your glue basting adventure with Roxanne glue baste, it is crucial to properly prepare your work surface. A pristine canvas is essential for achieving flawless bonds between your fabrics. Let’s explore the key steps to ensure your work surface is ready for the magic of glue basting.
First and foremost, cleanliness is paramount. Take a moment to clear away any dust, lint, or debris from your work area. This will provide a clean and smooth surface for the glue to adhere to. Grab a lint roller or a cloth and give your table or countertop a thorough wipe down.
Now, let’s talk about protection. To safeguard your work surface from accidental spills or stains, consider using a cutting mat or a plastic sheet as a protective layer. Not only will this shield your surface, but it will also make cleaning up any excess glue a breeze.
Stability is crucial when it comes to accurate application of glue baste. Ensure that you are working on a stable and flat surface. If your table or desk wobbles, consider finding a more sturdy alternative. We want to avoid any wonky lines or uneven adhesion.
Let’s shed some light on the situation. Good lighting is indispensable for applying glue baste accurately. You need to be able to see any inconsistencies or areas that require additional glue. Find a well-lit area or invest in extra lighting to ensure you don’t miss a single spot.
Lastly, let’s get organized. Gather all the necessary tools and materials within easy reach of your work area. This will save you time and prevent frustrating interruptions during the gluing process. Nobody wants to search for that brush or rummage through drawers for scrap fabric when they’re in the zone.
Shake the Bottle
You’ve obtained the coveted Roxanne glue baste it, the adhesive gem cherished by crafters and quilters alike. As you eagerly prepare to fuse your fabric pieces together, take a moment to heed this crucial advice – don’t skip the essential step of shaking the bottle.
“But why is shaking the bottle so important?” you may wonder. Allow me to elucidate. The act of shaking ensures that the glue is impeccably mixed, primed to perform its enchantment on your fabric masterpiece. Without a thorough shake, you risk encountering uneven adhesion or, worse yet, clumpy glue obstructions.
To become a virtuoso in the art of bottle shaking, follow these simple guidelines:
- Firmly grasp the bottle: Take hold of it securely, ensuring that the cap is tightly sealed. We must prevent any accidental spills or leaks.
- Employ gentle force: Initiate a delicate agitation, infusing just enough vigor to thoroughly mingle the contents. Picture yourself engaged in a subtle dance – not too wild, but sufficiently animated to set those ingredients into motion.
- Devote at least 30 seconds to shaking: Avoid shortcuts during this vital stage. Dedicate a solid half-minute to this activity, guaranteeing an immaculate fusion of elements. This meticulous process will ensure that your adhesive cascades evenly and smoothly onto your fabric canvas.
- Assess the consistency: Following your vigorous shake, sneak a quick glimpse inside the bottle. Should you discover an excessively thick or lumpy appearance, it could signal improper storage or expiration. In such cases, it’s best to discard that bottle and acquire a fresh one.
Remember, correctly shaking the bottle serves as the key to unlocking perfection with Roxanne glue baste it. It’s akin to delivering a wake-up call to your adhesive companion, ensuring its readiness to flawlessly unite your fabric fragments.
Now that you’ve mastered the art of bottle shaking, it’s time to unseal the cap and commence the gluing extravaganza. Always apply the glue with precision and care, relishing the seamless and hassle-free basting experience that Roxanne glue baste it offers.
Apply a Thin Layer of Glue
When it comes to securing fabric pieces together temporarily, Roxanne glue baste it is the go-to adhesive for quilting and sewing projects. Applying a thin layer of glue using this magical potion is a game changer that will take your creations to the next level. Let’s dive in and discover the secrets to achieving flawless glue basting.
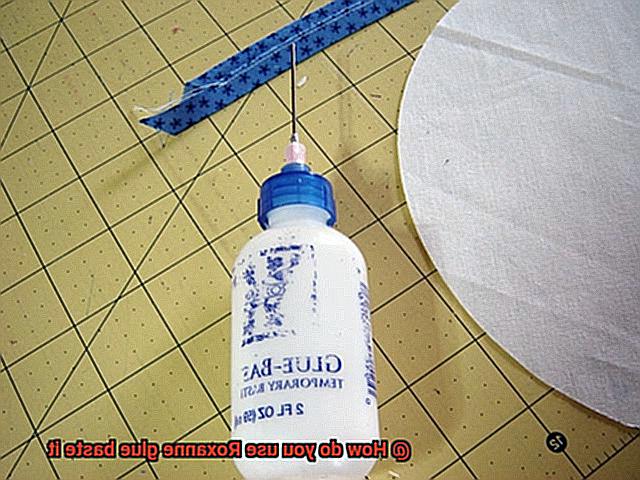
To start, give the bottle a gentle shake to ensure that the glue is well-mixed and ready for action. Unscrew the cap and squeeze a small amount of glue onto a scrap piece of fabric or paper. This primes the applicator tip and removes any pesky air bubbles that may be lurking.
Now for the fun part – applying the glue. Gently squeeze the bottle to release a thin line of glue onto your fabric, using it sparingly. Remember, a little goes a long way with Roxanne glue baste it. Starting from one edge of the fabric, use the applicator tip or a small brush/spatula to spread the glue evenly across the surface. This back-and-forth motion ensures that every nook and cranny is covered.
Pay special attention to the edges and corners of your fabric, as these areas are prone to fraying or coming apart. Applying a thin layer of glue along these areas reinforces them and prevents any unwanted unraveling.
Here’s an important tip – avoid applying too much pressure when spreading the glue. Excessive force can cause the glue to seep through the fabric, resulting in unsightly stains or discoloration. So, go easy on that squeeze.
Once you’ve applied a thin layer of glue to your fabric, let it dry completely before continuing with your project. This usually takes just a few minutes, but drying time may vary depending on factors like humidity and temperature.
Now you’re ready to unleash your creativity. Roxanne glue baste it is known for its temporary bonding properties, securely holding your fabric pieces together during the sewing process. And when you’re done, removing the glue is a breeze. Simply peel it off or use a damp cloth to gently rub it away.
Keep in mind that Roxanne glue baste it is water-soluble, so it’s not suitable for projects that will be exposed to excessive moisture or washing. But for all your quilting, sewing, and craft needs, this adhesive is a must-have tool in your arsenal.
Press Surfaces Together
Glue basting is a transformative technique that can revolutionize your quilting and sewing projects. And when it comes to unlocking its full potential, pressing surfaces together holds the key. In this comprehensive guide, we will explore the art of pressing surfaces together when using Roxanne glue baste it, uncovering the techniques, tools, and advantages that will elevate your crafting game to new heights.
The Technique:
To achieve a flawless bond with Roxanne glue baste it, start by applying a thin, sinuous line of glue along the desired edge or area. Then, with utmost precision, align the surfaces you wish to fuse and press them together with unwavering resolve.
Remember, applying even pressure across every nook and cranny is crucial to ensure seamless distribution of the glue and the creation of an unbreakable bond.
Tools for Pressing:
When it comes to pressing surfaces together with finesse and finesse, you have two options at your disposal. The first is harnessing the tactile expertise of your very own hands. This technique allows for unparalleled control and enables you to truly feel the pressure being applied. Before diving in, however, ensure that your hands are impeccably clean and devoid of any residue that could mar the bonding process.
If you prefer to take a more mechanical approach, fear not. Tools such as rollers or brayers can become your trusty sidekicks in this quest for perfection. For larger areas begging for a touch of finesse, opt for a smooth-surfaced roller that effortlessly glides across fabrics. Conversely, for intricate projects requiring utmost precision, a brayer adorned with small ridges will be your guiding light.
Holding Time:
Once the surfaces have been pressed together harmoniously, exercise patience and hold them in place for a few precious seconds. This short but significant interlude allows the glue to set, fortifying the bond and safeguarding it from any potential shifts or compromises. Do keep in mind that the drying time may vary depending on the specific glue and project requirements. Therefore, referring to the manufacturer’s instructions is an invaluable practice that ensures your masterpiece emerges unscathed.
Additional Methods:
In certain circumstances, you may find yourself yearning for extra measures to secure the bond while the glue works its magic. Fear not, for pins and clips shall come to your rescue. These tiny heroes can be strategically placed to hold the surfaces in place until the glue dries to perfection. However, tread cautiously and ensure that these tools do not leave their mark on your precious fabric or material.
Advantages of Pressing Surfaces Together:
Unyielding Strength and Security: By pressing surfaces together with unwavering force, you guarantee an unbreakable bond that will stand the test of time.
Let it Dry
Today, we embark on a journey into the often overlooked but essential step of letting Roxanne glue baste dry properly. This simple yet crucial process can make or break your project, ensuring a strong and unbreakable bond between fabrics. So, grab your favorite beverage, settle in, and let’s explore the magic of letting it dry.
Exploring the Drying Process:
Once you’ve applied Roxanne glue baste to your fabrics, it’s time to sit back and let the magic unfold. Allowing the glue to dry completely is like adding a secret ingredient that guarantees the longevity of your creation. Think of it as the final touch that solidifies the bond between fabrics and ensures they stay together for years to come.
Timing is Everything:
Now, you may be wondering, “How long do I need to wait?” Well, my friend, drying times can vary based on factors such as humidity, temperature, and the amount of glue used. But fear not. On average, giving it around 30 minutes to an hour should do the trick. Remember, great things come to those who wait.
The Art of Patience:
In a fast-paced world where instant gratification reigns supreme, waiting can feel like a lost art. However, rushing the drying process can have dire consequences for your project. Impatience may result in a weak bond that won’t withstand the test of time. So take a deep breath, practice mindfulness, and embrace the power of patience – your project will thank you.
Testing for Dryness:
Curious if the glue has dried completely? Let’s put it to the test. First, gently touch the glued area with your finger. If it feels tacky or sticky, hold off a little longer – it’s not ready yet. Next, press a piece of tissue or fabric against the glued area. If it doesn’t stick or leave any residue behind, congratulations. Your glue is dry and ready for the next exciting step.
Beware of Premature Bonding:
Premature bonding is a crafter’s nightmare. Rushing ahead before the glue is dry can lead to misalignment, wrinkles, and an overall messy appearance. So resist the temptation to speed things up and remember: patience is your greatest ally. Let that glue work its magic, and you’ll reap the rewards of a beautifully bonded project.
Tips for Speeding up Drying Time:
For those working under tight deadlines, fret not. I have a couple of tricks up my sleeve to help speed up the drying process without compromising the bond. First, try using a hairdryer set to low heat. Maintain a safe distance from your project and let the warm air gently encourage the drying process. Alternatively, position your creation under a fan to improve air circulation. Just remember, we want a strong bond, not melted glue trails.
Sew or Work on Your Project

When it comes to the question of whether to sew or work on your project, there are a few key factors to consider. First and foremost, you need to think about the drying time of the adhesive you are using.
Roxanne glue baste it is a popular choice for temporarily holding fabric in place before sewing, but it requires proper drying before stitching can begin. The recommended drying time can usually be found on the bottle, typically taking around 15-30 minutes.
However, factors like humidity and temperature can affect this timeframe, so it’s important to exercise patience and let the glue dry completely.
While waiting for the glue to dry, why not make good use of your time? Take this opportunity to organize your sewing tools, cut out fabric pieces for future steps, or plan the next stages of your project. By staying productive during this waiting period, you can keep your creative flow going and make progress on other aspects of your project.
The complexity of your project is another important consideration. If you’re working on a design with multiple layers or delicate details, it’s wise to give the glue a bit more time to dry. This extra drying time will provide added security and stability, ensuring that everything stays in place during sewing.
On the other hand, if you’re working on a simpler project with fewer layers or smaller fabric pieces, you might be able to start sewing sooner after the glue has dried. Just be sure to double-check that the glue is fully set before you pick up that needle and thread.
Clean Your Tools
When it comes to glue basting, the key to success lies in keeping your tools clean. Not only does this ensure that the adhesive properties of Roxanne glue baste it are at their best, but it also prevents any unwanted stains or discoloration on your fabric. In this article, we’ll explore the importance of cleaning your tools and provide you with some handy tips to keep them in tip-top shape.
Importance of cleanliness:
Picture this: you’re trying to stick two pieces of fabric together with a dirty brush or an applicator clogged with dried glue residue – not a pretty sight, right? By keeping your tools clean, you’ll guarantee a strong bond between your fabrics and avoid any unwanted mess. Dirt, debris, and residue can hamper the adhesive properties of the glue, leading to ineffective bonding and potential frustration down the line.
Cleaning solutions:
For routine cleaning, mild soap and water are your go-to solution. Simply rinse your tools in warm soapy water after each use to remove any excess glue. But what about those stubborn glue residues? Don’t worry – specialized glue removers or rubbing alcohol will come to the rescue. Just remember to follow the manufacturer’s instructions when using any cleaning solution.
Cleaning brushes:
After each use, give your brushes a thorough cleaning. Rinse them with warm soapy water, gently comb through the bristles to remove any residue, and then allow them to air dry completely before storing. This ensures that no glue remnants are left behind, ready to ruin your next project.
Cleaning tips for bottles and applicators:
The bottles and applicators used for dispensing Roxanne glue baste it also need some TLC. Wipe them clean after each use with a damp cloth or paper towel to prevent excess glue buildup. For a more thorough cleaning, soak the applicator tip in warm soapy water and use a small brush or toothbrush to remove any dried-on glue. Your tools will thank you.
Storage recommendations:
Last but not least, proper storage is essential for maintaining the longevity of your tools. Store them in a dry and dust-free environment, such as sealed containers or bags, to protect them from exposure to air and moisture. This will prevent the glue from clogging or drying out, ensuring your tools are always ready for your next creative endeavor.
nwzY0lUPTXw” >
Conclusion
Roxanne glue baste it is a versatile tool that can make your sewing projects easier and more efficient. To use it effectively, start by preparing your fabric and workspace. Lay out the fabric smoothly and ensure there are no wrinkles or creases. Then, apply a small amount of Roxanne glue baste it to the fabric, using either the brush applicator or the precision tip. Be careful not to use too much glue, as a little goes a long way.
Next, carefully position the pieces of fabric you want to join together. The glue will hold them in place temporarily, allowing you to sew with precision and accuracy. This is especially useful for intricate designs or when working with delicate fabrics that may shift easily.
Once you have positioned your fabric pieces, press them firmly together to secure the bond created by the glue baste it. The glue will dry clear and become tacky, providing a temporary hold that is strong enough for sewing but easy to remove when necessary.
When you’re ready to sew, simply stitch along the edges of your fabric pieces as usual. The Roxanne glue baste it will keep everything in place without leaving any residue on your needle or machine.
After you have finished sewing, you can easily remove the temporary bond created by the glue baste it by gently pulling apart the fabric pieces. If any residue remains, it can be easily washed away with warm water and mild soap.
In conclusion, using Roxanne glue baste it can greatly enhance your sewing experience by providing a temporary hold that is strong yet removable. With its precise application and easy removal process, this tool is perfect for achieving accurate and professional results in your sewing projects.