Are you tired of throwing out your favorite stuff just because it has a tiny crack or a broken piece? Well, fret no more, because I’ve got the perfect solution for you – Amazing GOOP.
If you haven’t heard of this game-changing adhesive, then you’re seriously missing out. This stuff can fix almost anything.
We’re talking broken shoes, toys, leaky pipes, and even cracked car parts – nothing is too tough for Amazing GOOP. But wait, there’s more.
This versatile adhesive isn’t just for repairs; it’s also great for all your crafting and DIY projects. In this blog post, we’ll dive into all the amazing uses of Amazing GOOP and give you some insider tips to help you make the most of this incredible product.
So buckle up and get ready to unleash your creativity with Amazing GOOP.
What is Amazing GOOP?
Contents
- 1 What is Amazing GOOP?
- 2 Preparing Surfaces for Bonding
- 3 Applying Amazing GOOP
- 4 Joining the Surfaces Together Firmly
- 5 Allowing Adequate Curing Time
- 6 Cleaning Up Excess Glue
- 7 Ensuring Maximum Bond Strength and Durability
- 7.1 Step 1: Cleanliness – The Gateway to Success
- 7.2 Step 2: Roughen It Up – Embrace the Grit
- 7.3 Step 3: Read the Instructions – Knowledge is Power
- 7.4 Step 4: Apply Evenly – A Symphony of Precision
- 7.5 Step 5: Join Together Firmly – The Moment of Truth
- 7.6 Step 6: Allow for Curing Time – Patience Rewarded
- 8 Tips for Using Amazing GOOP
In the realm of adhesives, Amazing GOOP stands tall as a magical solution to all your bonding needs. When you find yourself in a sticky situation, desperately searching for an adhesive that can bond different materials together, look no further than this versatile wonder. Let’s take a deep dive into the enchanting world of Amazing GOOP and uncover its remarkable features.
Strong Bonding Capabilities:
Amazing GOOP boasts an extraordinary ability to bond a wide variety of materials. Whether it’s metal, glass, plastic, fabric, leather, or even rubber, this adhesive creates a bond that is not only strong but also durable. No matter the project at hand, Amazing GOOP has got you covered.
Flexibility Matters:
Unlike other adhesives that become brittle over time, Amazing GOOP remains flexible even after it cures. This means that it can withstand movement and expansion without compromising its bond. Whether you’re repairing your favorite pair of shoes or working on outdoor equipment subject to constant stress and movement, Amazing GOOP will keep things firmly intact.
Resistant to the Elements:
Amazing GOOP fearlessly faces water, chemicals, and extreme temperatures head-on. It can brave scorching heat or freezing cold without losing its adhesive properties or breaking down. So whether you need to fix something indoors or take on an outdoor project, Amazing GOOP is up for the challenge, come rain or shine.
Special Formulas for Specific Needs:
Not all projects are created equal, and neither are the formulas of Amazing GOOP. There is an automotive formula designed specifically for car repairs and maintenance. With enhanced resistance to oils, fuels, and other automotive fluids, this formula ensures a secure bond that can withstand the demands of your vehicle. No matter the task at hand, there’s a specialized formula to meet your unique needs.
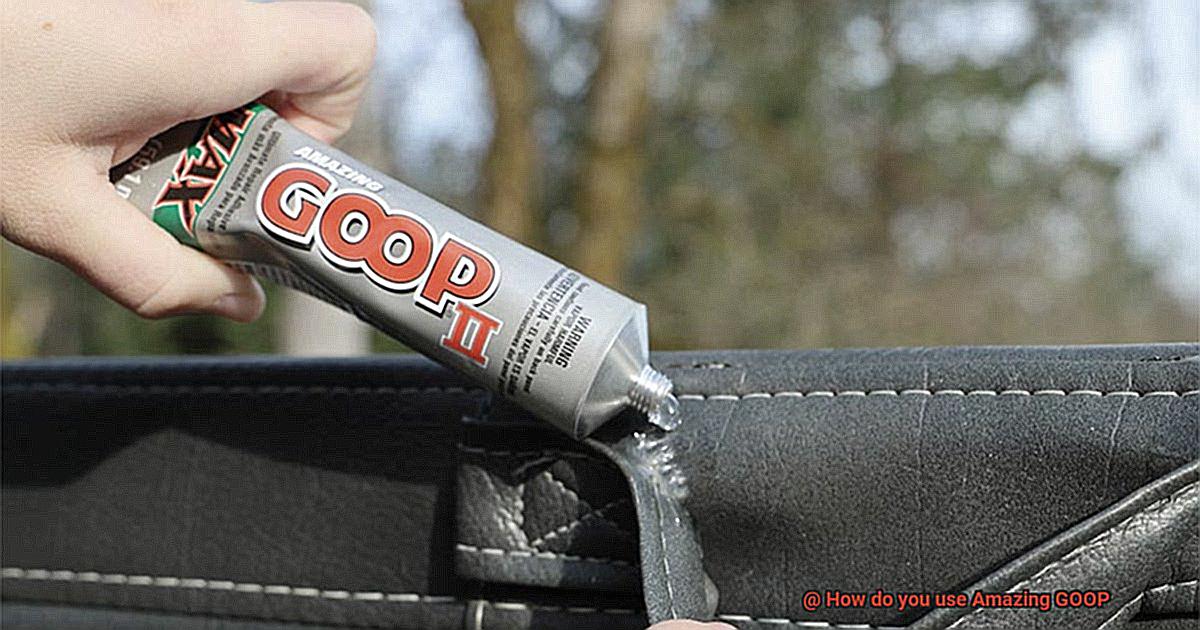
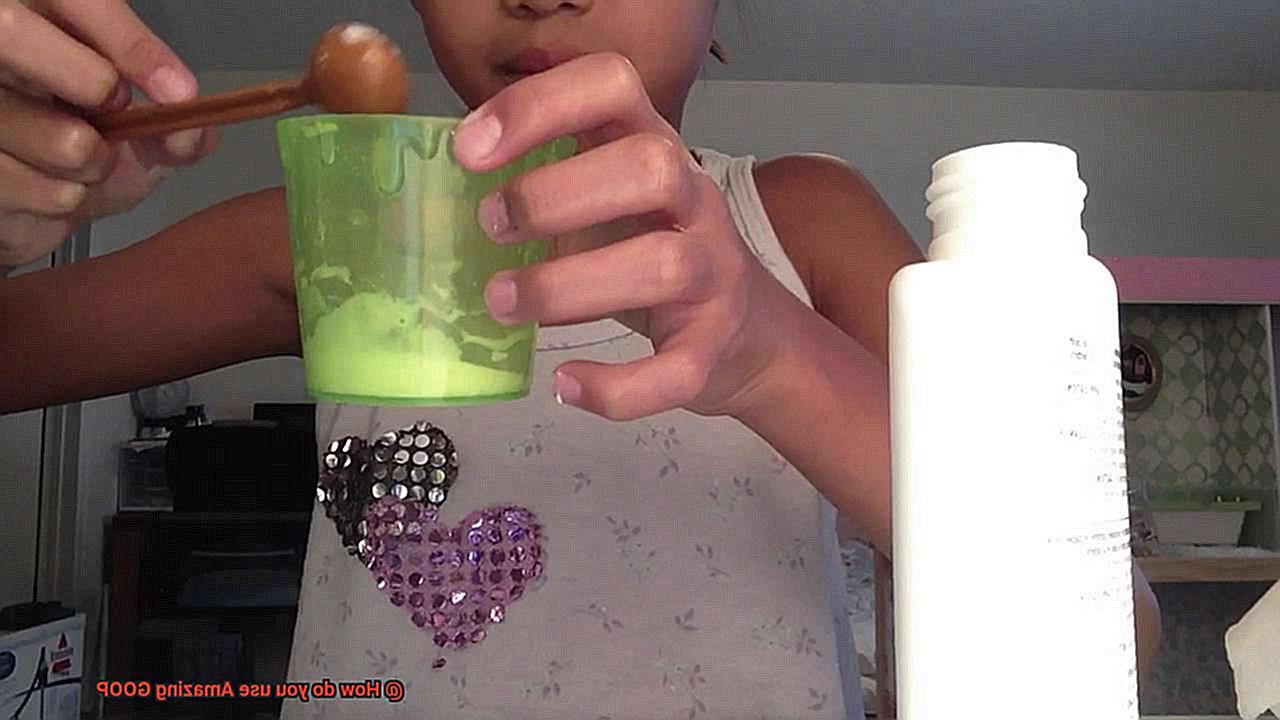
Using Amazing GOOP:
Using Amazing GOOP is as easy as 1-2-3. First, ensure that the surfaces you want to bond are clean and dry. Next, apply a thin layer of Amazing GOOP to both surfaces. Finally, firmly press the surfaces together and hold them in place until the adhesive cures. It’s that simple.
Preparing Surfaces for Bonding
Preparing surfaces for bonding is a crucial step in achieving strong and durable bonds. Whether you’re using Amazing GOOP or any other adhesive, following these steps will ensure optimal results.
- Cleanliness is key: Before applying any adhesive, thoroughly clean the surfaces you plan to bond. Use a mild detergent or rubbing alcohol to remove dirt, dust, grease, or oil. Pesky contaminants can interfere with the bond, so don’t skip this step.
- Rough it up: Give the surfaces a gentle sanding with fine-grit sandpaper. This seemingly small step makes a big difference. By roughening up the surfaces, you create more area for the adhesive to bond to, resulting in a stronger connection.
- Prime time: For non-porous surfaces, consider using a primer before applying Amazing GOOP. The primer helps create a chemical bond between the adhesive and the surface, maximizing adhesion. Follow the manufacturer’s instructions for application and drying time.
- Temperature matters: Pay attention to temperature and humidity conditions when preparing surfaces for bonding. Amazing GOOP works best within a specific temperature range. Ensure that both the surfaces and the adhesive are within this range for optimal results.
- Apply like a pro: Apply a thin and even layer of adhesive on one or both of the surfaces being bonded. Don’t go overboard – too much adhesive can lead to messy and less effective bonding.
- Press it real good: Align the surfaces carefully and apply firm and even pressure to ensure proper contact between the adhesive and the surfaces. You can use clamps or other tools to hold everything in place while the adhesive cures.
- Let it cure: Give your bond some time to work its magic. The curing time can vary depending on factors like temperature, humidity, and the specific adhesive used. Avoid disturbing or stressing the bonded surfaces until the adhesive has fully cured for the strongest bond possible.
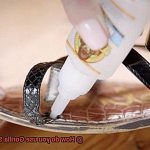
Applying Amazing GOOP
Before diving into the adhesive adventure, it’s imperative to set the stage for success. Begin by meticulously cleansing your surfaces of any impurities such as dirt, dust, or grease.
A gentle rubdown with rubbing alcohol or a mild detergent solution will ensure a pristine canvas for your bonding masterpiece. Give the surfaces ample time to dry completely, allowing for an unbreakable union.
The Perfect Application: Precision and Finesse
Armed with your Amazing GOOP tube or squeeze bottle, it’s time to embark on the journey of seamless application. Begin by squeezing a small amount of adhesive onto one of the surfaces you wish to bond. Now, armed with a brush or toothpick, spread the adhesive evenly over the entire bonding area. Leave no corner untouched, no crevice unattended.
Press and Hold: Forging an Unbreakable Union
The moment has arrived to bring your surfaces together in a powerful embrace. Firmly press the two surfaces together, ensuring optimal contact between them. Maintain continuous pressure for a few minutes, allowing the adhesive to work its magic and create an unyielding bond that defies all odds.
Patience is Key: Curing for Resilience
Now that the initial excitement of bonding has subsided, exercise patience and allow your creation to rest undisturbed for at least 24 hours. This period of serenity allows Amazing GOOP to cure fully, fortifying its durability and guaranteeing a long-lasting bond that will stand the test of time.
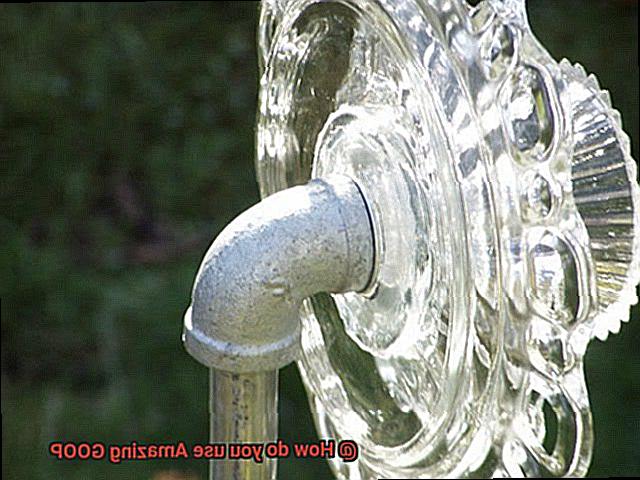
Indoor or Outdoor? No Problem. Versatility at its Finest

Amazing GOOP is no ordinary adhesive; it boasts superpowers that make it impervious to water, chemicals, and extreme temperatures.
This means you can confidently wield its bonding prowess for both indoor and outdoor applications, without fear of losing your grip on perfection.
The Great Escape (if needed): Freedom from Bondage
In the rare event that you need to liberate your creation from Amazing GOOP’s unyielding grasp, fear not. With a touch of acetone or mineral spirits, soften the adhesive and gently peel it away.
A testament to the strength of Amazing GOOP’s bond, yet also a testament to its flexibility in allowing you to reshape and redefine your creative endeavors.
Joining the Surfaces Together Firmly
In this comprehensive guide, we will delve into the extraordinary qualities of Amazing GOOP glue and unlock the secrets to firmly joining surfaces together. Prepare to embark on an adhesive adventure that will revolutionize your DIY projects.
Step-by-Step Guide:
Step 1: Prepare the Surfaces
The first step to achieving a solid bond is ensuring that the surfaces you wish to join are clean and free from any dirt, dust, or grease. Employ a clean cloth and a suitable cleaner to wipe away any impurities. Remember, cleanliness is the cornerstone of a robust bond.
Step 2: Apply Amazing GOOP
Exercise precision and finesse as you apply a thin and even layer of Amazing GOOP to one of the surfaces using the provided nozzle. The even application of adhesive will determine the strength of your bond.
Step 3: Press Firmly
Align the two surfaces correctly and exert firm pressure as you bring them together. Maintain this pressure for a few seconds to allow the adhesive to form a secure bond. A strong initial contact is crucial for a steadfast union.
Step 4: Secure While Curing
To fortify your bond and ensure an unbreakable connection, utilize clamps or other tools to hold the surfaces together while Amazing GOOP cures. This additional step provides added support and stability during the bonding process.
Step 5: Allow Time for Curing
The curing time for Amazing GOOP may vary depending on factors such as temperature and humidity. Adhere to the instructions provided by the manufacturer for optimal results. Patience is key; allow your bond to cure fully over 24 hours to maximize its strength and durability.
Advantages of Amazing GOOP:
- Versatility: Amazing GOOP possesses the remarkable ability to bond a wide range of materials together, making it suitable for various DIY projects.
- Durability: Once cured, the bond forged by Amazing GOOP becomes robust, resilient, and capable of withstanding diverse stresses and strains.
- Weather Resistance: This extraordinary adhesive is impervious to water, chemicals, and extreme temperatures, rendering it ideal for both indoor and outdoor applications.
Disadvantages of Amazing GOOP:
Material Compatibility: It is important to note that Amazing GOOP may not be suitable for specific materials such as Styrofoam or certain plastics. Always consult the product label or manufacturer’s guidelines before use.
Allowing Adequate Curing Time
In our previous section, we marveled at the amazing capabilities of Amazing GOOP glue and its transformative powers for DIY projects. But let’s not overlook the crucial step of allowing adequate curing time for this powerful adhesive. This is where the magic happens, folks.
Curing time refers to the duration required for the glue to fully dry and bond properly. When it comes to Amazing GOOP, giving it enough time to cure is paramount in achieving maximum strength. Rushing this process can result in a weaker bond and may cause the glue to fail prematurely. So, let’s dive deep into the factors that influence curing time and how you can ensure optimal results.
Firstly, temperature plays a significant role in the curing process of Amazing GOOP. In colder temperatures, the glue takes longer to cure, while warmer temperatures accelerate drying time. So, take note of the ambient temperature when allowing the glue to cure. If you’re working in a chilly environment, you may need to extend the curing time to ensure a robust bond.
Secondly, humidity levels can also impact the curing time of Amazing GOOP. In high humidity environments, the glue may take longer to dry. Excessive moisture in the air hinders solvent evaporation in the adhesive, thus prolonging the curing process. Be mindful of these conditions and adjust your curing time accordingly.
Moreover, the materials being bonded together can influence curing time as well. Porous materials like wood or fabric may require additional curing time compared to non-porous surfaces such as metal or glass. These materials can absorb moisture from the adhesive, affecting its drying process.
To ensure a proper bond formation and maximize the strength of your connection with Amazing GOOP, follow these guidelines:
- Refer to the product instructions for specific recommended curing time.
- Keep the bonded objects stationary and undisturbed during the curing period.
- If you need to move or use the glued items before the curing process is complete, provide additional support or reinforcement until the glue has fully cured.
Cleaning Up Excess Glue
We are diving into the world of cleaning up excess glue when using the mighty Amazing GOOP. Just like a superhero saves the day, this adhesive can work wonders when used correctly. However, sometimes we end up with a little too much of a good thing. Fear not. With our step-by-step guide, you’ll become a master at ridding yourself of those pesky glue remnants in no time. Let’s jump right in.
Step 1: Act Swiftly, Like a Superhero in Action:
As soon as you notice any excess glue, don’t wait around – tackle it immediately. The longer the glue sits, the tougher it becomes to remove. So, grab your cleaning supplies and get ready to unleash your cleaning prowess.
Step 2: Solvent Magic – Acetone to the Rescue:
Acetone is a common go-to for removing excess adhesive, but be cautious, as it can damage certain surfaces. To prevent any mishaps, test a small inconspicuous area before proceeding. Dip a clean cloth or cotton swab in acetone and gently dab it onto the excess glue. Allow it to sit for a few minutes, then use a clean cloth or paper towel to gently rub the glue in circular motions until it starts to come off. Repeat if needed.
Step 3: Alternatives for Sensitive Surfaces:
If acetone is not suitable for your surface, no worries. We’ve got your back. Heat is another effective method. Use a hairdryer or heat gun on a low setting to apply heat to the excess glue. Once softened, gently wipe it away with a clean cloth or paper towel.
Step 4: The Rubbing Alcohol Trick:
For surfaces that can’t tolerate acetone or heat, rubbing alcohol is your secret weapon. Dampen a cloth with rubbing alcohol and gently dab it onto the excess glue. Let it sit for a few minutes before wiping it away with a clean cloth or paper towel.
Step 5: Scrape with Care:
In some cases, scraping may be necessary, but proceed with caution to avoid surface damage. Use a plastic scraper or an old credit card to gently scrape away the excess glue. Apply just enough pressure to remove the glue without scratching the surface.
Step 6: Clean and Refresh:
After successfully removing the excess glue, give your surface a thorough cleaning. Use warm, soapy water and a soft cloth to clean the area. Rinse with clean water and dry it thoroughly.
Ensuring Maximum Bond Strength and Durability
This versatile adhesive holds the key to creating strong and long-lasting bonds. In this comprehensive guide, we’ll walk you through the steps and considerations necessary for ensuring maximum bond strength and durability. From meticulous surface preparation to strategic curing time, get ready to unleash the full potential of your projects.
Step 1: Cleanliness – The Gateway to Success
Before diving into your bonding adventure, cleanliness is non-negotiable. Rid both surfaces of dirt, dust, grease, or any other sneaky contaminants capable of sabotaging your bond. Scrub them squeaky clean using soap and water, rubbing alcohol, or a suitable cleaning agent. A pristine surface paves the way for unbeatable adhesion and an unbreakable bond.
Step 2: Roughen It Up – Embrace the Grit
Prepare to level up your bonding game by adding a touch of roughness. Gently sand the surfaces with fine-grit sandpaper or wield a wire brush like a master painter. This dance with roughness creates a textured battleground for the adhesive, allowing it to grip with unwavering tenacity and forge a bond that can withstand anything.
Step 3: Read the Instructions – Knowledge is Power
Don’t underestimate the power hidden within those instruction manuals. Each variant of Amazing GOOP has its own set of rules. Take a moment to acquaint yourself with the manufacturer’s guidelines before diving in. By doing so, you’ll unlock the adhesive’s true potential and wield it like a seasoned pro.
Step 4: Apply Evenly – A Symphony of Precision
With brush or applicator in hand, it’s time to orchestrate a symphony of adhesive application. Coat one surface with a thin and even layer of Amazing GOOP, ensuring every nook and cranny receives its fair share. A little goes a long way, so wield your brush with precision and watch the magic unfold.
Step 5: Join Together Firmly – The Moment of Truth
Now, the moment you’ve been waiting for – the union of surfaces. Apply firm, unwavering pressure to forge a connection that withstands the test of time. If clamping is an option, seize it with gusto. If not, employ weights to hold the surfaces in a tight embrace. The stronger the contact, the mightier the bond.
Step 6: Allow for Curing Time – Patience Rewarded
In the realm of maximum bond strength and durability, patience reigns supreme. Grant the adhesive its time to cure undisturbed for a minimum of 24 hours. Remember, curing time may vary based on temperature and humidity, so consult the instructions for specific recommendations. This period of incubation ensures your bond emerges with unyielding strength and unbreakable resilience.
Tips for Using Amazing GOOP
Look no further than Amazing GOOP. This versatile adhesive is perfect for bonding a wide range of materials, from leather to metal. In this article, we will share some tips and tricks to help you make the most out of your Amazing GOOP experience.
Tip 1: Prepping for Success
Before diving into your project, it’s crucial to prepare the surfaces properly. Give them a thorough cleaning to remove any dirt, grease, or debris that could weaken the bond. Soap and water or a mild solvent can do wonders in getting your surfaces squeaky clean.
Tip 2: Roughen Up Smooth Surfaces
Smooth surfaces can be a bit slippery for glue to grip onto. To enhance the adhesive’s effectiveness, lightly sand or file the surfaces before applying Amazing GOOP. This simple step creates more surface area for the glue to hold onto, making it even stronger.
Tip 3: The Art of Application
When it comes time to apply the Amazing GOOP, remember that less is more. Use a thin, even layer on one of the surfaces you want to bond. Then, press the surfaces together firmly. This way, you distribute the adhesive evenly and avoid any excess glue mess.
Tip 4: Double Up for Porous Surfaces
For materials like fabric or wood that are more porous, applying a second coat of Amazing GOOP after the first one has dried can provide extra strength. It ensures a secure bond that will withstand whatever you throw at it.
Tip 5: Patience is Key
Once you’ve bonded your materials together, give them time to fully cure. Factors like temperature and humidity can affect curing time, so follow the instructions on the product label. Waiting at least 24 hours before stressing or loading the bond will guarantee its long-lasting strength.
Tip 6: Clean-up and Storage
Nobody likes a messy work area. Immediately wipe away any excess glue with a cloth or paper towel soaked in acetone or nail polish remover. But remember to always test these solvents on a small, inconspicuous area first. Afterward, securely close the Amazing GOOP container and store it in a cool, dry place away from direct sunlight.
ElKyAqPd6Oc” >