Remember to clean any excess glue from the nozzle and store your glue gun in a safe place. Using a hot glue gun may seem intimidating at first, but with a little practice and these simple steps, you’ll be gluing like a pro in no time.
So go ahead, unleash your creativity, and let the hot glue gun become your new favorite tool.
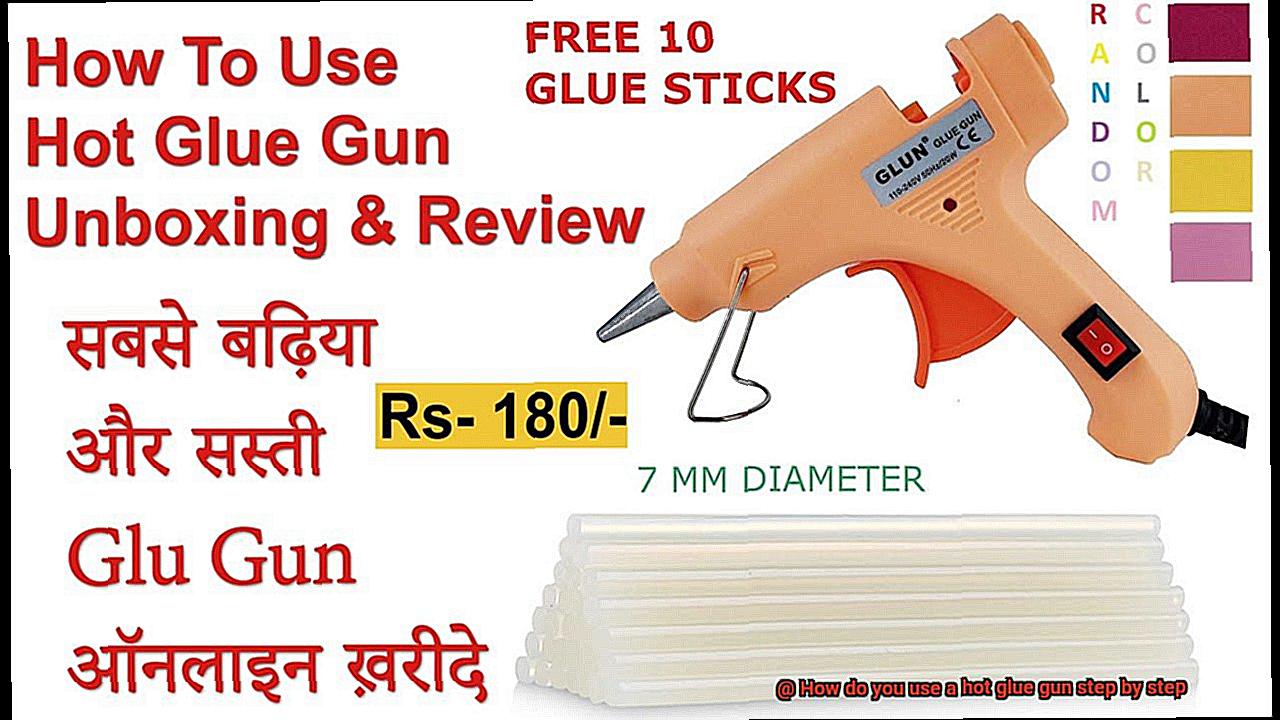
Gather Your Materials
Contents
Efficiency, safety, precision, testing, clean-up, and overall success – these are the benefits you can reap by gathering all the necessary materials before starting your project with a hot glue gun. Imagine the frustration of having to pause your creative flow to search for missing items or make additional trips to get supplies. It disrupts your momentum and hampers your progress. But fear not. With a little preparation and organization, you can ensure a smooth and successful gluing process.
First and foremost, let’s talk about efficiency. Having all the materials ready before starting your project allows you to work seamlessly without interruptions. No more frantic searches or time wasted on multiple trips to the store. By gathering everything you need in advance, you can focus solely on bringing your vision to life.
Now, let’s move on to safety. We all know that hot glue guns can be, well, hot. That’s why it’s crucial to gather the right materials for protection. Heat-resistant gloves will shield your hands from potential burns caused by the hot glue. And don’t forget about your work surface. A heat-resistant mat or silicone pad will not only protect it from damage but also provide a safe space for your creative endeavors.
Precision is another aspect to consider. Different projects require different adhesive properties and bond strengths. That’s why it’s essential to have the appropriate glue sticks on hand. Whether you’re working with wood or fabric, specialized glue sticks tailored to specific materials will yield better results compared to generic ones.
Testing and clean-up go hand in hand when it comes to using a hot glue gun. Having scrap material or disposable surfaces nearby allows you to test the flow and consistency of the glue before applying it to your actual project. This ensures that you achieve the desired adhesive coverage without any surprises along the way. And if you happen to have any excess glue or accidental drips, these scrap materials can be used for quick clean-up, preventing them from sticking to your project.
Finally, gathering all the necessary materials before starting your project increases your chances of achieving a successful outcome. No distractions, no interruptions – just you and your creative process. By being well-prepared, you set yourself up for a smooth and efficient gluing process.
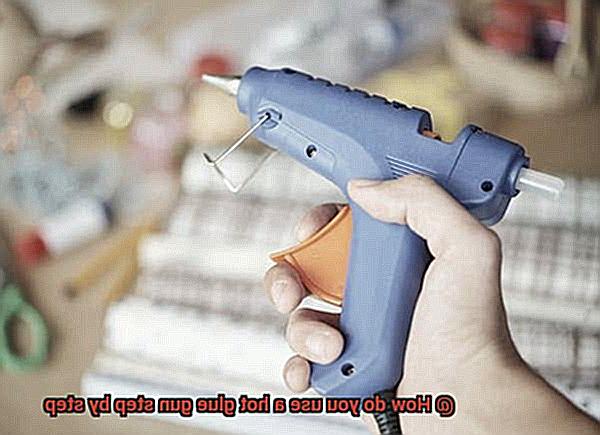
Plug in the Hot Glue Gun
To plug in a hot glue gun, gather all the necessary materials: the hot glue gun itself, a power outlet, and compatible glue sticks. Find a suitable power outlet that is easily accessible and ensure it has a voltage of 120V. Locate the plug on the hot glue gun’s power cord, usually at the rear end of the handle. Align the plug with the socket and firmly insert it into place, double-checking that it is fully inserted for a proper electrical connection.
Next, locate the power switch or button on the gun, usually near the handle or trigger. Flip or press the switch to turn on the power supply to the heating element. Be patient as it may take a few minutes for the hot glue gun to heat up to its optimal temperature. While waiting, handle the hot glue gun with caution, avoiding contact with heated parts to prevent burns or injuries. Place it on a heat-resistant surface to protect underlying surfaces.
Once the indicator light or audible indicator signals that the glue gun has reached its optimal temperature, it is ready to be used for gluing. Remember to follow the manufacturer’s instructions and recommendations regarding temperature requirements for different types of glue sticks.
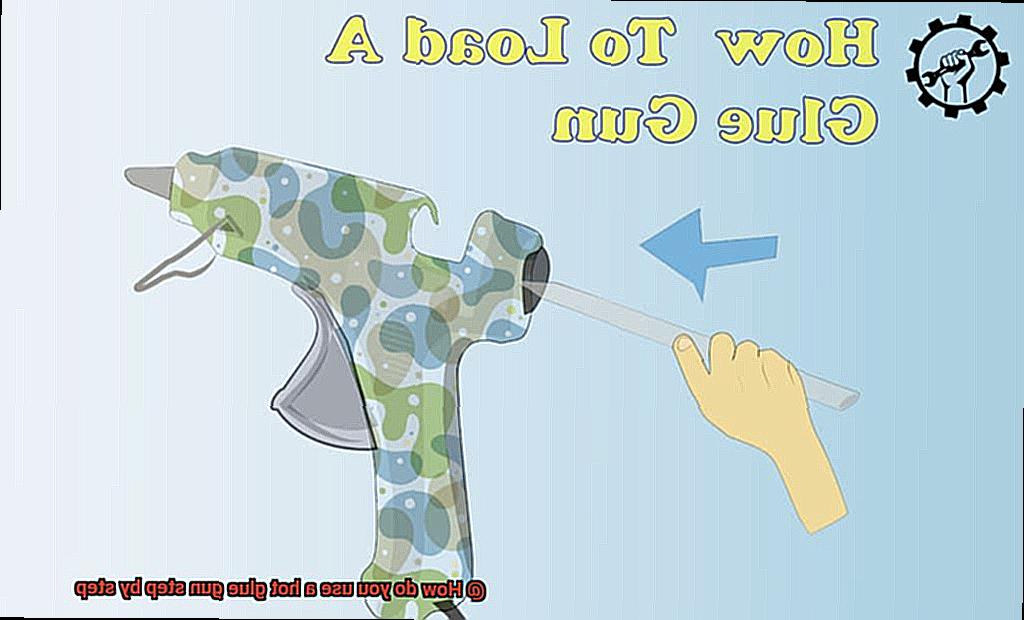
Insert a Glue Stick
Inserting a glue stick into a hot glue gun is not just a simple task, but a crucial step to ensure successful and safe usage. Whether you are engaging in crafting or repair projects, it is important to insert the glue stick correctly to avoid any mishaps or accidents. Here is a comprehensive guide on how to insert a glue stick into a hot glue gun:
First, gather all the necessary materials: a hot glue gun, a glue stick, and a clean work surface. Having everything ready beforehand will save you time and prevent any frustration during the process.
Next, turn on the hot glue gun and allow it some time to heat up. Just like a car engine needs time to warm up, the hot glue gun needs a few minutes to reach the ideal temperature for melting the glue. This ensures that the glue flows smoothly and effectively.
Before inserting the glue stick, it is important to check its compatibility with your hot glue gun. Different hot glue guns may require specific types and sizes of glue sticks. Refer to the manufacturer’s instructions or the packaging of both the hot glue gun and the glue stick to ensure they are compatible.
Once you have verified compatibility, place the hot glue gun on a stable work surface. This will prevent any accidents or spills that could occur if it is not properly secured.
Now comes the exciting part: inserting the glue stick. Carefully locate the chamber or slot where the glue stick will be inserted. Most hot glue guns have removable chambers or slots at the rear end for easy access.
Take your chosen glue stick and insert it into the chamber or slot of the hot glue gun. Apply gentle but firm pressure until you feel resistance. This ensures that the glue stick is securely in place and ready for use.
Depending on your hot glue gun model, mechanisms may automatically secure the glue stick, or you may need to manually adjust or tighten it. Follow the manufacturer’s instructions to ensure proper placement and security.
Now that the glue stick is inserted and secured, give it a few moments to melt completely. This will guarantee a smooth flow when you squeeze the trigger of the hot glue gun.
To verify that the glue flows smoothly and consistently, gently press the trigger of the hot glue gun. If there are any issues with flow, consult the troubleshooting section of your hot glue gun’s manual or contact the manufacturer for assistance.
Always exercise caution when using a hot glue gun, as the melted glue can cause burns. Remember to unplug the hot glue gun when not in use to prevent accidents.
Test the Flow of Glue
Crafting with a hot glue gun can be a sticky situation, but fear not. To ensure the flow of glue is smooth and consistent, follow these steps:
- Protect your workspace: Lay down a heat-resistant mat or scrap cardboard to shield your area from damage.
- Power up: Plug in your glue gun and let it heat up until the glue becomes liquid gold.
- Stick it in: Insert a glue stick into the chamber, pushing it gently until it snugly rests against the heating element. Don’t force it, or you’ll clog the flow.
- Squeeze and please: Press the trigger or lever to unleash the adhesive river. Start with a slow, controlled squeeze to observe the speed and smoothness of the flow. Any delays or interruptions could signal nozzle blockages or heating element issues.
- Consistency is key: Keep squeezing and watch for even dispensing. No clumps or funky irregularities should mar the stream. If something’s off, adjust the temperature or clean out debris that’s gumming up the works.
- Adhesion assessment: Apply small amounts of glue to different surfaces like paper, fabric, wood, or plastic. Let it dry, then test its strength and durability. This will determine if your glue gun is up to snuff for your crafting dreams.
- Cool beans: The glue should cool and solidify quickly, allowing you to keep working without delay. If it takes too long or remains tacky, fiddle with the temperature or consider better quality glue sticks.
Position Your Project
Positioning your project correctly when using a hot glue gun is absolutely essential for achieving precise and clean results. To ensure that your project turns out just the way you want it, follow these expert tips on positioning:
First and foremost, choose a stable work surface. Opt for a sturdy and flat area that provides stability while you work. This will help prevent any unnecessary movement that could lead to mistakes or accidents.
Next, protect your work area. Cover your work surface with a craft mat or newspaper to shield it from any glue spills and make cleanup a breeze. It’s always better to be safe than sorry.
Before you start gluing, take a moment to plan your positioning. Visualize where you want to apply the glue on your project. By doing this, you’ll be able to determine the best angle and position for holding the glue gun.
Now it’s time to hold the glue gun correctly. Firmly grip the glue gun in your dominant hand, making sure to keep your fingers away from the hot nozzle. Use your other hand to support the project or hold it in place while applying the glue.
To ensure smooth and effective glue application, preheat the glue gun as per the manufacturer’s instructions. This usually takes just a few minutes, but it’s absolutely essential for achieving flawless results.
Once the glue gun is heated, test the glue flow by applying a small amount of glue on a scrap piece of material or paper. This will help you ensure that the glue flows smoothly and evenly without any clogs or inconsistencies.
With your project and positioning in mind, squeeze the trigger of the glue gun to dispense the hot glue onto the desired area. Start from one end and move along steadily, ensuring an even distribution of glue.
If you’re working on a larger project, it’s best to divide it into smaller sections. This will allow you to focus on one area at a time, ensuring better control and accuracy in your glue application.
Throughout the process, be prepared to make adjustments to your positioning if necessary. This may involve changing your grip on the glue gun or repositioning your project to achieve the desired outcome. Flexibility is key.
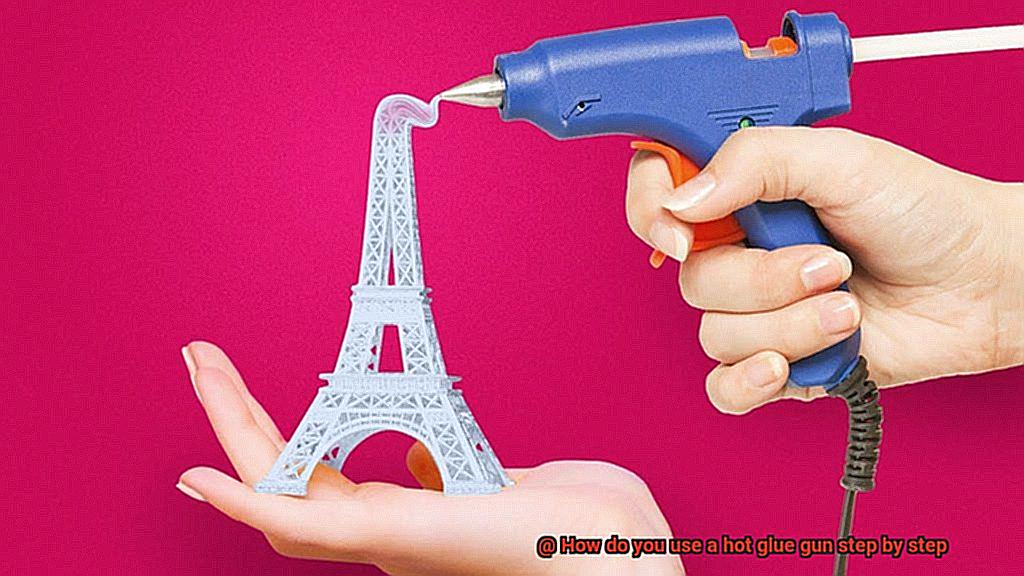
Apply the Glue
Applying glue with a hot glue gun requires precision and attention to detail. Before you begin, ensure that your workspace is clean and organized, providing a flat surface for your project. Covering the surface with a protective material like a silicone mat or parchment paper will prevent any accidental spills or damage.
Next, check the glue stick in your hot glue gun to make sure it is properly inserted. Plug in the gun and allow it to heat up for a few minutes until the glue becomes molten and ready for application. Follow the manufacturer’s instructions for heating time, as different models may vary.
Once the glue is heated, hold the hot glue gun at a slight angle above the surface where you want to apply the adhesive. This angle allows for better control and precision during application. Gently squeeze the trigger to release the molten glue, keeping an even and steady motion as you move the gun along your intended path.
As you apply the glue, be mindful of any gaps or spaces that need to be filled. Hot glue is perfect for bonding porous materials like fabric or wood, but it may not adhere well to non-porous surfaces like metal or glass. In such cases, consider using an alternative adhesive suitable for those materials.
It’s important to work efficiently and be prepared before applying the glue because it bonds quickly. If you have a larger project or need more time for adjustments, apply the glue in smaller sections and work on them individually.
Once you have applied the desired amount of glue, release the trigger and allow the hot glue gun to cool down. During this cooling period, handle the gun with caution as the nozzle and surrounding areas may still be hot.
Bond Your Materials
Bonding materials is an essential step in bringing your creative vision to life. Whether you are working on a crafting project or a DIY endeavor, the method you choose for bonding your materials can greatly impact the overall quality and durability of your creation. One popular and effective method is using a hot glue gun.
To bond your materials using a hot glue gun, you will need to gather all the necessary materials: a hot glue gun, compatible glue sticks, and the materials you want to bond. Ensuring that the surfaces of the materials are clean and free from any debris is crucial for optimal adhesion.
Once you have everything ready, plug in your hot glue gun and let it heat up. You will know it’s ready for use when the indicator light turns on. It usually takes a few minutes for the gun to reach the ideal temperature.
With a glue stick inserted into the gun, hold the hot glue gun with one hand while guiding and positioning the materials with your other hand. Be cautious of the nozzle’s heat during this process.
To apply the glue, gently squeeze the trigger of the glue gun to create a steady flow of molten glue. Move the nozzle along one material’s surface, applying an even line or dots depending on your project’s needs.
Immediately press the second material onto the glued surface before the glue cools down and hardens. Hold them together firmly for a few seconds to allow the bond to set.
Keep in mind that hot glue dries quickly, so work efficiently. If adjustments or repositioning are necessary, do so before the glue hardens completely.
Once your project is complete, unplug the hot glue gun and let it cool down. Remove any excess glue from the nozzle and store it safely until its next use.
Clean Up Any Excess Glue
While the bonding process may have been flawless, there’s often some excess glue that needs cleaning up. Fear not, my fellow glue enthusiasts, for I am here to guide you through the art of tidying up after your adhesive adventures.
First, exercise patience and allow the glue to cool completely. This crucial step prevents burns and avoids spreading the glue further. Once cooled, it’s time to tackle the excess.
Start by gently peeling off any large chunks of glue with your fingers or tweezers. Take care not to damage the surface you’re working on. For smaller bits of stubborn glue, grab a credit card or plastic scraper and gently scrape them away. Remember to keep a light touch to avoid scratching the surface.
Now, let’s talk about porous materials. If the glue has seeped into fabrics or porous materials, arm yourself with rubbing alcohol or acetone. Apply a small amount to a cotton ball or cloth and carefully dab at the glue until it starts to dissolve. Test on an inconspicuous area first to ensure it won’t harm the material.
But what about glass or metal? Fear not. A hairdryer can be your ally. Set it on low heat and hold it a few inches away from the glued area. The heat will soften the glue, making it easier to scrape off with a plastic scraper or your fingers.
Once you’ve removed as much excess glue as possible, it’s time for the final touch. Clean any remaining residue with warm soapy water and a sponge or cloth. Gently scrub until the glue is completely gone, then rinse with clean water and dry thoroughly.
Remember, different glues may require different cleaning methods, so always consult the manufacturer’s instructions for specific guidance. And of course, be cautious when working with hot glue guns to avoid burns or other injuries.
3gNZY_FwU1k” >
Conclusion
In conclusion, the hot glue gun is a versatile and effective tool that can elevate your crafting and DIY projects to new heights. By following these step-by-step instructions, you’ll be able to wield this powerful adhesive with confidence and achieve professional-level results.
First things first, gather all the necessary materials and prepare your workspace for maximum efficiency and safety. Make sure you have the right glue sticks, slip on those heat-resistant gloves, and set up a suitable work surface that can handle your creative ambitions.
Now it’s time to power up. Plug in that hot glue gun and watch as it heats up to its optimal temperature. Remember, patience is key here. Handle the hot glue gun with caution, as we don’t want any accidental burns spoiling your crafting adventure.
Once the glue gun is heated to perfection, securely insert a compatible glue stick into the chamber or slot. Before diving into your project headfirst, it’s always wise to test the flow of glue on scrap material. This way, you can ensure smooth dispensing and avoid any sticky mishaps along the way.
Positioning is everything when it comes to wielding a hot glue gun like a pro. Choose a stable work surface that won’t wobble under pressure, and hold the hot glue gun at an angle for maximum control. As you apply the glue evenly along your desired path, feel free to work in smaller sections if needed – precision is key.
Now comes the moment of truth – bonding those materials together like they were meant to be. Immediately after applying the hot glue, press those pieces together firmly. The clock starts ticking as soon as that adhesive hits the surface, so work swiftly but confidently.
As with any artistic endeavor, there may be some messy aftermath to deal with – excess glue that needs taming. Fear not. Allow that excess glue to cool completely before gently peeling or scraping it off. Depending on what you’re working with, consider employing the power of rubbing alcohol or warm soapy water to restore order and cleanliness.
By following these steps and keeping safety at the forefront of your mind, you’ll be able to unleash your creativity with a hot glue gun and achieve awe-inspiring results in your crafting endeavors. So go ahead, let your imagination run wild, and embrace the endless possibilities that come with wielding this powerful tool.