Are you tired of the same old photo frames and canvas prints? Why not try something new and transfer your favorite pictures onto wood? With this technique, you can create a unique piece of art that adds texture and warmth to any space.
Wood photo transfer is a blend of modern technology and traditional craftsmanship, making it an exciting way to preserve your memories. Imagine having your treasured family photos or breathtaking landscape shots transferred onto rustic wood for a one-of-a-kind decorative piece.
But how do you make this happen? It’s easier than you might think. Depending on the type of wood and transfer method, you can use various tools like a laser printer, transfer paper, Mod Podge, or even a soldering iron. In this blog post, we’ll guide you through different techniques such as the wax paper method, packing tape method, and gel medium method.
Get ready to unleash your creativity and transform your cherished memories into stunning works of art with these affordable DIY methods. Whether you’re an aspiring artist or just looking for a fun project, transferring real pictures to wood is an excellent way to celebrate life’s beauty in a timeless way.
Materials Needed for Picture Transfer
Contents
- 1 Materials Needed for Picture Transfer
- 2 Step-by-Step Guide to Transfering a Picture onto Wood Using Mod Podge
- 3 Step-by-Step Guide to Transfering a Picture onto Wood Using Gel Medium
- 4 Tips and Tricks for Achieving Optimal Results
- 5 Common Mistakes to Avoid When Transfering Pictures to Wood
- 6 Benefits of Transfering Pictures to Wood
- 7 Different Types of Wooden Surfaces and How They Affect the Process
- 8 Alternatives to Transfering Pictures to Wood
- 9 Conclusion
Look no further than transferring real pictures onto wood for a unique and eye-catching addition. But what do you need to make this happen? Here’s a breakdown of the materials needed for picture transfer onto wood.
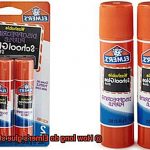
First and foremost, you will need the picture or image that you want to transfer. This can be a printed photograph, a drawing, or a painting. It’s important to print your image on regular paper using a laser printer to ensure optimal transfer results. You will also need a piece of wood that is smooth, knot-free, and light-colored such as birch, maple, or pine. This will help make the transferred image more visible.
To facilitate the transfer process, you will need transfer medium such as Mod Podge, gel medium, or acrylic varnish. A foam brush or roller will come in handy to apply the transfer medium to both the wood and the printed image. A brayer or scraper tool can also be useful for smoothing out any bubbles or wrinkles in the transferred image.
In addition to these materials, you’ll need basic tools like scissors, a ruler, and a pencil. These will help you measure and cut your image to fit onto the wood surface accurately.
It’s worth noting that the specific type of materials used may vary depending on personal preference and the method of picture transfer being used. However, having these basic materials on hand will make the process smoother and more successful.
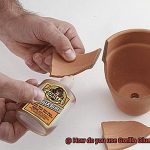
There are several popular methods for transferring pictures onto wood surfaces. Two of the most widely used methods are Mod Podge and gel medium. For both methods, start by applying a generous amount of transfer medium onto the wooden surface and place your printed image on top of it. Press down firmly to remove any air bubbles and let the medium dry overnight.
For Mod Podge method, once it has dried, use a damp cloth to gently rub away the paper from the wooden surface. This process will reveal the transferred image on the wood. For stubborn areas where paper won’t come off, try using a toothbrush or sandpaper to gently scrub them away.
For gel medium method, once it has dried, wet the back of the paper with water and gently rub away the paper with your fingers or a damp cloth. This will reveal the transferred image on the wood.
Step-by-Step Guide to Transfering a Picture onto Wood Using Mod Podge
If you’re looking for a fun and creative way to add a personal touch to your home decor or gift-giving, transferring a picture onto wood using Mod Podge is an excellent option. It’s simple, inexpensive, and allows you to express your creativity by making something truly unique.
To get started, gather your supplies. You will need a piece of unfinished wood, Mod Podge, a foam brush or sponge brush, a printed photo (reversed if there are words in the image), and scissors or a craft knife.

Now let’s dive into the step-by-step guide of transferring a picture onto wood using Mod Podge.
- Step 1: Apply an even layer of Mod Podge to the surface of the wood using your foam brush or sponge brush. Be sure to cover the entire surface where you will be placing your photo.
- Step 2: Carefully place your printed photo onto the Mod Podge-covered wood surface. Smooth out any bubbles or wrinkles with your fingers or a credit card. This is where the magic starts to happen.
- Step 3: Allow the Mod Podge to dry completely, which may take several hours. This step requires patience, but it’s worth it. Once dry, moisten the paper with a damp cloth or sponge and gently rub away the paper fibers until only the ink remains. This process will reveal your transferred image on the wood surface, creating a smooth and durable finish.
- Step 4: To protect your transferred image from damage, apply another layer of Mod Podge over it.
There you have it. You’ve created a stunning piece of customized home decor or gift. Repeat this process with different photos and wood surfaces to create a beautiful collection.
Step-by-Step Guide to Transfering a Picture onto Wood Using Gel Medium
As a seasoned expert in this technique, I am here to guide you through the step-by-step process.
Before starting, make sure you have all the necessary supplies. You will need gel medium, a brush or foam roller, a wooden surface, a laser-printed picture, and a damp cloth. Once you have everything ready, it’s time to prepare the wooden surface. Sand it down and wipe away any dust to ensure a smooth transfer.
Next, apply a layer of gel medium to the surface using the brush or foam roller. Spread it evenly and cover the entire surface. Then, place the laser-printed picture face down onto the gel medium and smooth out any bubbles or wrinkles. It’s crucial to center the picture on the wood surface to ensure a balanced transfer. Allow the gel medium to dry completely, which can take anywhere from a few hours to overnight.
Once the gel medium has dried, it’s time to remove the paper. Wet the paper with a damp cloth and gently rub away the paper with your fingers or a soft-bristled brush until only the ink from the picture remains on the wood surface. Be careful not to rub too hard, as this can damage the transferred image.
Finally, let the transferred image dry completely before sealing it with another layer of gel medium or a clear coat sealer. This ensures that your transferred image stays vibrant and protected over time.
Tips and Tricks for Achieving Optimal Results
If you’re looking for a creative and personal way to decorate your home or create unique gifts, transferring real pictures onto wood can be a great option. However, achieving optimal results requires some attention to detail and following certain tips and tricks. Here are five sub-sections that will help you achieve the best results:
Choose the Right Type of Wood:
Not all wood types are suitable for photo transfer. You should select a smooth surface, free of knots or imperfections. Birch plywood or a similar type of wood is the best choice.
Prepare the Wood Surface:
Before transferring the picture, prepare the wood surface by sanding it lightly to remove any roughness or bumps that may affect the transfer. It’s also essential to clean the surface thoroughly, removing any dirt, dust, or debris that may interfere with the transfer process.
Use High-Quality Transfer Paper:
Using high-quality inkjet transfer paper ensures clear and vibrant images. Make sure that the transfer paper is specifically designed for use with wood to avoid smudging or fading over time.
Apply Even Pressure:
It’s crucial to apply even pressure when transferring the image onto the wood surface, using a squeegee or similar tool. This helps to ensure that the image is transferred evenly without any bubbles or wrinkles.
Allow for Proper Drying Time and Seal the Image:
After transferring the image, allow it to dry completely before removing the transfer paper to achieve optimal results. Finally, sealing the transferred image with a protective coating such as varnish or polyurethane can help preserve its quality and prevent it from fading or peeling over time.
Common Mistakes to Avoid When Transfering Pictures to Wood
With the right knowledge, you can easily avoid these mistakes and achieve stunning results that will last a lifetime.
First and foremost, it’s crucial to use the right type of paper. Regular printer paper or photo paper may seem like a good idea, but they won’t work for this process. Instead, use transfer paper that is specifically designed for transferring pictures to wood. This special paper is readily available at most craft stores and will produce the best results.
Another mistake people often make is not applying enough pressure when transferring the picture. Remember, you need to apply a lot of pressure to ensure that the picture adheres properly to the wood. If you don’t use enough pressure, the picture may not transfer properly and could end up blurry or distorted.
Using too much glue is another common mistake that many people make. While glue is necessary for this process, using too much can cause the picture to wrinkle or bubble, ruining your work. To avoid this mistake, apply just enough glue to cover the entire surface of the wood and then place the picture on top. Smooth out any wrinkles or bubbles as you go.
Lastly, perhaps one of the biggest mistakes is not allowing enough drying time. It’s essential to allow the glue to dry completely before attempting to move or handle the wood. If you try to move it too soon, the picture may lift or smudge, ruining your hard work.
To sum it up, here are some tips to help you avoid these common mistakes:
- Use transfer paper specifically designed for transferring pictures to wood.
- Apply a lot of pressure when transferring the picture.
- Use just enough glue to cover the entire surface of the wood.
- Allow enough drying time before moving or handling the wood.
Benefits of Transfering Pictures to Wood
If you’re looking for a creative and unique way to display your cherished memories, transferring pictures onto wood is the way to go. As an expert in this field, I can attest that there are numerous benefits to this method that make it stand out from traditional picture frames.
One of the most significant advantages of transferring pictures onto wood is its durability. Wood is a sturdy material that can withstand wear and tear over time, ensuring that your transferred image becomes a long-lasting piece of art that can be passed down for generations. Say goodbye to flimsy frames and hello to a sturdy display option.
Moreover, each piece of wood has its own distinct grain pattern, which adds character and texture to your transferred image. This results in each piece of wood art being one-of-a-kind and unique, providing a creative and rustic touch to your home decor. You also have complete creative control over the final product, from the type of wood to the finish.
Another advantage of transferring pictures onto wood is its versatility in terms of design and display options. You can experiment with different sizes, shapes, and types of wood, allowing you to create custom pieces that suit your style best. Also, unlike traditional picture frames, there’s no need for glass or backing, making them lightweight and easy to move around. You can hang them on a wall or place them on a shelf, depending on your preference.
Lastly, transferring pictures onto wood makes for great personalized gifts. Whether it’s a wedding photo or a family portrait, these pieces make thoughtful presents that will be treasured for years to come. It’s an excellent way to express your love and appreciation for special people in your life.
Different Types of Wooden Surfaces and How They Affect the Process
The process of transferring real pictures onto wood requires a careful consideration of the type of wooden surface being used. Different types of wood have varying textures, colors, and densities, which can all impact how well the image adheres to the surface and the final outcome. In this article, we will explore the various types of wooden surfaces available and how they can impact the image transfer process.
Birch Plywood
Birch plywood is a popular choice for image transfers because of its smooth surface and consistent grain pattern. This makes it easier to transfer images onto, and it tends to be less absorbent than other types of wood. As a result, ink is less likely to bleed or smudge during the transfer process. However, birch plywood can be prone to warping, which can cause issues during the transfer process.
Pine Wood
Pine wood has a more rustic and natural look, with visible knots and a prominent grain pattern. While this can add character to the final image transfer, it can also make it more difficult to achieve a smooth and even transfer. Pine is also more absorbent than birch plywood, which can cause the ink to spread and blur.
Maple Wood
Maple wood has a tight and fine grain pattern, which can create a smooth and even surface for transferring images onto. However, maple wood is highly absorbent, which can make it more challenging to achieve vibrant colors and sharp details.
Walnut Wood
For those looking for a darker wood option, walnut is a popular choice. Walnut has a rich color and distinctive grain pattern that can enhance the overall appearance of the transferred image. However, like maple, the density of walnut can make transferring images more challenging.
Cherry Wood
Cherry wood has a warm reddish-brown color and a smooth texture that makes it a great choice for image transfers. It has a medium level of absorbency, which can help prevent ink from bleeding or smudging during the transfer process.
It’s crucial to note that there are many other types of wood available for image transfers, each with their own unique characteristics and challenges. Some other popular options include oak, poplar, and mahogany. Ultimately, the type of wooden surface chosen will depend on personal preference and the specific requirements of the project.
Alternatives to Transfering Pictures to Wood
There are plenty of alternatives to consider that can produce beautiful and personalized results.
One popular method is using gel medium, a versatile acrylic polymer that can transfer images onto various surfaces, including wood. First, print your desired image onto a laser printer or photocopy it.
Then, apply a generous amount of gel medium onto both the wood surface and the image, ensuring even coverage. Place the image face-down onto the wood and smooth out any bubbles or wrinkles.
After letting it dry overnight, wet the paper with a damp cloth and gently rub it away until your image appears. This technique provides a clear and vibrant result that can withstand wear and tear.
Another alternative is using heat transfer methods, which involve printing your image onto transfer paper using an inkjet printer. Then, use a heat press or iron to transfer the image onto the wood surface. This method works best on lighter-colored woods and provides a durable and long-lasting result.
For those looking for a more creative approach, decoupage techniques can be perfect for transferring images onto wood. Cut out images from paper or fabric and adhere them onto the surface using specialized glue or varnish. You can arrange multiple images in unique patterns or designs that match your personal style.
Rt3EBRTJI1o” >
Conclusion
In conclusion, the art of transferring real pictures onto wood is a delightful and imaginative way to personalize your home decor or create one-of-a-kind gifts. With careful attention to detail and some essential tips, you can transform your most precious memories into stunning pieces of art that will stand the test of time.
To get the best results, it’s crucial to start by selecting the right type of wood and preparing its surface correctly. High-quality transfer paper, even pressure during the transfer process, and ample drying time before sealing are also key factors in achieving optimal outcomes. Additionally, avoiding common blunders such as using incorrect paper or glue, insufficient pressure application, or not allowing enough drying time is vital.
While birch plywood remains a popular choice for image transfers due to its smooth surface and consistent grain pattern, other types of wood like pine, maple, walnut, and cherry offer unique features that can impact the transfer process.
For those seeking alternative methods for transferring pictures onto wood, options include gel medium or heat transfer techniques as well as exploring decoupage methods.