If you’re into all things leather, then you know that sticking leather to leather is a skill worth mastering. Whether you’re fixing up a torn jacket, adding some flair to a bag, or just want to join pieces for that extra durability and style, knowing how to stick leather to leather is an absolute must.
So, buckle up folks because in this blog post, we’re diving deep into the world of leather bonding. We’ll walk you through the step-by-step process, spill the beans on the materials you need, and even throw in some expert tips to make sure your leather-to-leather bonding game is on point.
How do you stick leather to leather?
Contents
- 1 How do you stick leather to leather?
- 2 Different Types of Adhesives for Sticking Leather to Leather
- 3 Choosing the Right Adhesive for Your Project
- 4 Preparing the Leather Surfaces for Adhesion
- 5 Applying the Adhesive Evenly and Firmly
- 6 Testing the Adhesive on a Small Area Before Use
- 7 Working with Contact Cement and Epoxy Resin
- 8 Using Double-sided Tape and Stitching Techniques
- 9 Final Considerations When Sticking Leather to Leather
- 10 Conclusion
Step 1: Get those surfaces ready
Before embarking on this sticky adventure, give your leather surfaces a good cleaning. Wipe away any dirt or oils with a damp cloth and let them air dry like they’re sunbathing on a tropical beach.
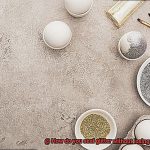
Step 2: Choose your adhesive wisely
Picking the right adhesive is like choosing the perfect pair of shoes – it’s gotta fit just right. Look for adhesives specifically made for sticking leather to leather. You’ve got options like contact cement, trusty old leather glue, or even specialized adhesive tapes designed just for this purpose. Consider what kind of leather you’re working with and follow the instructions on the adhesive label.
Step 3: Slap on that adhesive
Grab yourself a brush or applicator and spread a thin layer of adhesive onto both pieces of leather that you want to bond together. Make sure every nook and cranny gets covered because we don’t want any loose ends here.
Step 4: Let it get tacky
Depending on which adhesive you chose, it might need some time to dry until it gets nice and tacky. This tackiness is key for creating an awesome bond between those leathery surfaces when they come together.
Step 5: Stick ’em together
Now comes the moment of truth. Carefully align those edges or position your leather pieces just right, and then press them together with all your might. Apply consistent pressure across the entire area to ensure a bond that’s as strong as Hercules.
Step 6: Give it some time
Patience is a virtue, my friends. Follow the instructions on the adhesive label for the recommended drying time. This step is crucial because it ensures that bond sets in like concrete, making it permanent and unbreakable.
But wait, there’s more. Here are some expert tips
Different Types of Adhesives for Sticking Leather to Leather
Mastering the skill of sticking leather to leather is essential. However, choosing the right adhesive can be a challenge. In this guide, we will explore the different types of adhesives available, their advantages, and disadvantages. Let’s dive in.
Leather Glue:
One of the best options for sticking leather to leather is leather glue. This adhesive is specifically formulated for use with leather, ensuring a flexible bond that maintains the leather’s natural movement and flexibility. It dries clear, leaving no unsightly residue on your craft. To achieve a strong bond, apply a thin and even layer of leather glue to both surfaces, let it set for the recommended time, and firmly press the pieces together.
Advantages:
- Flexible bond that allows the leather to move and flex without compromising its integrity.
- Dries clear, maintaining the aesthetic appeal of your project.
Disadvantages:
- May not be suitable for heavy-duty applications or extremely thick leathers.
Contact Cement:
Contact cement is another popular choice for sticking leather to leather. This adhesive creates a strong and permanent bond. Apply contact cement to both surfaces and allow it to dry until tacky. Then, firmly press the pieces together. Contact cement is particularly effective with porous materials like leather.
Advantages:
- Provides a strong bond that withstands rigorous use.
- Suitable for most leather-to-leather applications.
Disadvantages:
Epoxy Resin:
When working on heavy-duty projects or requiring an exceptionally strong bond, epoxy resin is the way to go. Epoxy consists of two components that need to be mixed before application. Apply the mixture evenly on both surfaces and firmly press them together. Keep in mind that epoxy resin may leave a visible line where the pieces are joined.
Advantages:
- Exceptionally strong and durable bond, ideal for heavy-duty applications.
- Provides excellent resistance to heat, water, and chemicals.
Disadvantages:
- May not be suitable for thin or delicate leathers due to its rigid nature once dry.
- Requires proper mixing and precise application.
Double-sided Tape:
For temporary or small-scale projects, double-sided tape can be a convenient option. Look for double-sided tape specifically designed for fabric or leather. This adhesive is perfect for attaching small embellishments to larger leather surfaces or temporarily holding pieces together.
Advantages:
- Convenient and easy to use for quick projects or temporary bonding needs.
- Ideal for applications where repositioning or removal is desired.
Disadvantages:
- Not suitable for permanent bonding.
- Limited strength and durability, making it unsuitable for heavy-duty use.
Choosing the Right Adhesive for Your Project
Selecting the perfect adhesive for sticking leather to leather is essential for creating a strong and durable bond. With various adhesive options available, it’s important to consider certain factors to ensure success in your project.
First and foremost, you need to consider the type of leather you are working with. Different adhesives may work better on certain types of leather. For most leather types, contact cement is a popular choice as it forms a flexible and permanent bond. However, if you are working with heavy-duty or thick leathers, epoxy adhesive may be more suitable due to its exceptional strength and durability.
Next, think about the intended use of your bonded leather. If you are creating fashion accessories or garments that require flexibility, fabric glue can be a suitable choice. Fabric glue is designed to bond different types of fabrics, including leather, without compromising flexibility.
Consider your personal preferences as well. Some adhesives emit strong fumes, so if you have sensitivity to odors or prefer a more eco-friendly option, water-based contact cement or leather glue may be better choices for you.
Proper application is also crucial for achieving a successful bond. Before applying the adhesive, make sure to clean and prepare the leather surfaces. Remove any dirt or oils that could hinder the bonding process. Apply the adhesive evenly on both surfaces using a brush or nozzle applicator for precise application.
Allow sufficient drying and curing time according to the adhesive’s instructions. Rushing this step can lead to a weak bond. Once dry, press the leather pieces together firmly, ensuring good contact between the surfaces.
If you’re unsure about which adhesive to use, consult with a professional or conduct a small test on scrap leather before proceeding with your project. This will help ensure that the chosen adhesive provides the desired bond strength and durability without damaging the leather surfaces.
Preparing the Leather Surfaces for Adhesion
Attention, adhesive aficionados. If you’re venturing into the world of leather bonding, it’s crucial to understand the secrets of preparing your leather surfaces for the ultimate adhesion. No one wants their prized leather project falling apart, right? Let’s delve into some tried and true methods that will ensure your leather surfaces are primed and ready for the perfect bond.
Banish the Grime:
Before we even think about gluing, we must rid our leather of any grime. Reach for rubbing alcohol or acetone and apply it to a clean cloth. Gently, in graceful circular motions, wipe away dirt, oils, and residues that could sabotage your adhesive efforts. Remember, a gentle touch is all it takes to preserve the integrity of the leather.
Rough It Up with Sanding:
Smooth or glossy leather finishes can be stubborn when it comes to bonding. Fear not. Equip yourself with fine-grit sandpaper or a sanding block, and delicately sand the surface to create a rougher texture. This extra grip will entice superior adhesion.
Unleash the Leather Deglazer:
For those tougher leathers that demand extra love, introduce them to the leather deglazer or prep solution – your secret weapons. These magical concoctions are designed to banish coatings, finishes, and residues from leather surfaces. Apply them with a clean cloth and work their magic until you achieve the desired effect.
Tailored Techniques for Different Leathers:
Not all leathers are created equal; they each have unique needs. Suede or nubuck leather, for instance, requires the gentle caress of a suede brush to raise the nap before attempting any bonding. Patent leather, on the other hand, may necessitate a specific cleaner or solvent to strip away protective coatings. Always ensure your chosen method aligns with the type of leather you’re working with.
Test Before You Commit:
Remember this golden rule. Before fully committing to gluing, conduct a small test on an inconspicuous area of the leather. This guarantees compatibility and prevents any potential damage or unsightly discoloration. It’s better to be safe than sorry.
Applying the Adhesive Evenly and Firmly
Whether you’re a seasoned crafter or a novice in the world of leatherwork, this blog post will equip you with the knowledge and techniques to create a strong and flawless bond that will withstand the test of time.
Preparing the Leather Surfaces:
Before diving into the gluing process, it’s essential to start with clean surfaces. Gently wipe down both pieces of leather using a damp cloth or mild leather cleaner, removing any dirt, dust, or oils that may interfere with adhesion. Allow them to dry completely before proceeding. This step ensures optimal bonding by eliminating any potential interference.
Choosing the Right Adhesive:
Selecting the appropriate adhesive is vital for a successful bond. Consider using contact cement, leather glue, or fabric glue specifically designed for bonding leather. Read product labels and check for instructions or recommendations for use on leather.
Applying the Adhesive:
To achieve an even application, use a small brush or specialized applicator designed for glue application. Apply a thin layer of adhesive onto one surface of the leather, ensuring complete coverage. Avoid excessive application to prevent messy seepage.
Pressing and Securing the Bond:
Once the adhesive has been applied, press the two pieces of leather firmly together. Use your hands to evenly distribute pressure across the entire surface, eliminating air bubbles or gaps between layers. This step ensures a strong bond and aids in proper adhesive setting.
Enhancing Bond Strength:
For larger pieces of leather or added support, consider using clamps or placing heavy objects on top of the bonded area while the adhesive dries. Exercise caution to prevent damage or distortion.
Allowing Sufficient Drying Time:
Follow the manufacturer’s instructions regarding drying time for the adhesive to set properly. Refrain from disturbing or manipulating the leather during this period to ensure a successful bond.
Reinforcing Weak Spots:
Inspect the leather after the adhesive has fully dried and the bond is secure. If any weak spots or gaps are found, apply a small amount of adhesive and repeat the pressing process to reinforce the bond.
Handling with Care:
Handle your bonded leather project with utmost care to maintain its integrity. Avoid excessive pulling or tugging on the bonded area, as it can weaken the adhesive and potentially cause separation. Be cautious when exposing the bonded leather to excessive heat or moisture, as it can compromise the adhesive’s effectiveness.
Testing the Adhesive on a Small Area Before Use
Choosing the right adhesive is crucial for a successful bond that won’t damage your precious leather goods. In this comprehensive guide, we will explore why testing the adhesive on a small area before sticking leather to leather is important and how to go about it.
Step 1: Selecting the Test Area
Before applying any adhesive, carefully choose a small and inconspicuous area on your leather item for testing. Opt for a hidden spot, such as an inside flap or a corner that won’t be easily visible. By selecting a hidden spot, you can minimize the risk of any noticeable damage or discoloration.
Step 2: Applying the Adhesive
Once you have chosen the test area, it’s time to apply the adhesive. Use a cotton swab or a small brush to spread a small amount of the adhesive evenly over the surface. Follow the manufacturer’s instructions regarding the application method and quantity to ensure accurate results during the testing process.
Step 3: Allowing Drying Time
Patience is key. After applying the adhesive, allow it to dry for the recommended time. Rushing this step may give you inaccurate results and compromise the success of your leather-to-leather bond.
Step 4: Inspecting the Test Area
Once the adhesive has dried, inspect the test area carefully. Look for any signs of damage or alteration in texture. Pay attention to changes in color, stiffness, or stickiness. Gently touch and pull at the glued area to test the bond’s strength.
Step 5: Decision Time
Based on your inspection, make a decision about whether to proceed with using the adhesive on larger areas of your leather project. If there are no signs of damage and the bond appears strong, congratulations. You can confidently move forward. However, if you notice any adverse effects, it’s crucial to seek an alternative adhesive or consult with a professional before proceeding.
Working with Contact Cement and Epoxy Resin
In the world of leather crafting, finding the perfect adhesive is like finding a dance partner – crucial for a successful bond without damaging your precious leather goods. Enter contact cement and epoxy resin, two powerful adhesives that can create a lasting connection between leather surfaces. In this article, we will delve into the nuances of these adhesives, exploring their differences and providing you with the knowledge needed to choose the right one for your leather-to-leather applications.
Contact Cement: A Strong and Versatile Partner
Contact cement is renowned for its exceptional strength and durability, making it an ideal choice for sticking leather to leather. Whether you opt for the solvent-based or water-based formula, contact cement offers flexibility in selecting the best option for your project. The solvent-based variant provides an even stronger bond, while the water-based variant is more environmentally friendly. It’s important to note that contact cement forms an instant bond, requiring precise alignment and pressure application as there is no room for repositioning.
Epoxy Resin: An Unyielding Connection
If resilience and strength are what you seek, epoxy resin is your go-to adhesive. This formidable bond withstands heat, moisture, and chemicals with ease, ensuring your leather-to-leather connection remains intact. Comprising two components – a resin and a hardener – epoxy resin must be mixed in specific ratios before application. It is perfect for applications where durability is paramount, guaranteeing a long-lasting bond that can withstand various environmental conditions.
Choosing the Right Adhesive:
To make an informed decision between contact cement and epoxy resin, consider factors such as flexibility requirements, desired bond strength, and the environmental conditions your bonded leather will encounter. Contact cement excels in projects that demand an instant bond, while epoxy resin shines when resilience and strength are crucial. Additionally, always follow the manufacturer’s recommended surface preparation and application techniques for each adhesive.
Using Double-sided Tape and Stitching Techniques
When it comes to sticking leather to leather, there are two main options: using double-sided tape or employing stitching techniques. Let’s delve into the advantages and disadvantages of each method to help you determine which one is best for your project.
Advantages of Double-Sided Tape:
- Ease of Use: Double-sided tape is a breeze to use. It requires no complex techniques or specialized tools. Simply apply it to one piece of leather, align the second piece, and press firmly to secure the bond.
- Instant Bond: With double-sided tape, there’s no need to wait for drying or setting time. It provides an instant bond, making it perfect for quick projects or temporary bonds.
- Non-Intrusive: Unlike stitching, double-sided tape leaves no visible holes or perforations on the leather surface. This ensures a seamless and clean look, which can be advantageous for certain projects.
Disadvantages of Double-Sided Tape:
- Limited Strength: While double-sided tape offers a strong bond for lightweight applications, it may not be suitable for heavy-duty or long-lasting bonds. Over time, the adhesive may weaken or fail under stress.
- Limited Durability: Double-sided tape is not resistant to moisture or extreme temperatures. If your leather project will be exposed to these conditions, the tape may lose its adhesive properties and fail.
Advantages of Stitching Techniques:
- Strength and Durability: Stitching provides a strong and durable bond that can withstand regular use and wear. It is ideal for heavy-duty applications like bags, belts, or shoes.
- Professional Look: Stitching adds a decorative touch to leather projects, giving them a refined and professional appearance. It elevates the overall aesthetic value of your creation.
- Versatility: There are various stitching techniques you can choose from – saddle stitching, whip stitching, running stitch, etc. Each technique offers different looks and strengths, allowing you to customize your project to your liking.
Disadvantages of Stitching Techniques:
- Time and Effort: Stitching requires more time and effort compared to using double-sided tape. It involves threading a needle, aligning the leather pieces, and carefully stitching through both layers. This may not be suitable for quick or time-sensitive projects.
- Visible Perforations: Unlike double-sided tape, stitching leaves visible holes or perforations on the leather surface. While this can add a decorative touch, some may prefer a seamless and clean look.
Final Considerations When Sticking Leather to Leather
When sticking leather to leather, it is important to consider several factors to ensure a strong and durable bond. From selecting the right adhesive to proper surface preparation and alignment, each step plays a crucial role in achieving optimal results.
In this article, we will discuss the final considerations that should be taken into account when adhering leather to leather.
Adhesive Selection:
- Choose an adhesive specifically designed for leather bonding.
- Look for adhesives that can penetrate the porous surface of leather and form a strong bond.
- Avoid using general-purpose glues that may not provide the same level of adhesion.
Surface Preparation:
- Thoroughly clean the leather surfaces to remove dirt, oils, and residues.
- Use a mild soap or leather cleaner and a soft cloth or sponge for gentle cleaning.
- Allow the leather to dry completely before applying the adhesive.
Application Method:
- Select an application method such as brush, roller, or spray.
- Apply an even layer of adhesive, avoiding excessive glue that can lead to an uneven bond.
Alignment and Positioning:
- Carefully align and position the leather pieces before pressing them together.
- Take your time to avoid misalignment or mistakes that could compromise the final result.
Pressure Application:
- Apply pressure evenly to ensure a secure bond.
- Use clamps or heavy objects to hold the bonded pieces in place while the adhesive sets.
- Leave undisturbed for at least 24 hours for full curing.
Environmental Conditions:
- Work in a well-ventilated area with moderate temperature and humidity levels.
- Avoid exposing bonded leather to extreme temperatures or excessive moisture.
Bond Strength Testing:
- After curing time, gently tug or pull on the bonded leather pieces to test the strength of the bond.
- If any signs of weakness or separation are observed, additional adhesive may be required.
CQjsemw30m0″ >
Conclusion
Sticking leather to leather may seem like a tricky task, but with the right techniques and materials, it can be done seamlessly. To achieve a strong bond between two pieces of leather, you have several options at your disposal.
One method is to use leather glue, specifically designed for bonding leather surfaces together. Apply a thin layer of the adhesive onto both pieces of leather and press them firmly together. Allow sufficient drying time for the glue to set and create a secure connection.
Another approach is using double-sided adhesive tape. This tape has adhesive on both sides, allowing you to stick one piece of leather onto another effortlessly. Simply cut the tape to the desired length, apply it evenly along the edges or surface of the leather, and press the pieces firmly together.
For a more traditional approach, consider stitching or sewing the leather pieces together. This method not only provides a strong bond but also adds an aesthetically pleasing touch. Use a needle and thread specifically designed for leatherwork and carefully stitch through both pieces of leather in a consistent pattern.
If you prefer a temporary solution or need flexibility in your project, consider using snap fasteners or rivets. These hardware options allow you to attach and detach leather pieces easily while ensuring they stay securely connected when needed.
Remember to clean and prepare the surfaces before attempting any bonding method. Remove any dirt or oils from the leathers using mild soap or specialized cleaners, ensuring optimal adhesion.
In conclusion, sticking leather to leather requires careful consideration of various methods such as using adhesives, double-sided tape, stitching/sewing, or hardware options like snap fasteners and rivets.