Hey there, fellow sparkle enthusiasts.
Contents
- 1 Choosing the Right Glitter
- 2 Using Mod Podge as a Sealer
- 3 Clear Spray Sealants for Glitter
- 4 Using Clear Nail Polish as a Sealer
- 5 Applying Adhesive or Sealer in Thin Layers
- 6 Handling Sealed Glitter Projects with Care
- 7 Troubleshooting Common Issues
- 8 Alternative Techniques for Sealing Glitter
- 9 marize the key points discussed in the article
- 10 terate the importance of properly sealing glitter to maintain its sparkle
- 11 Conclusion
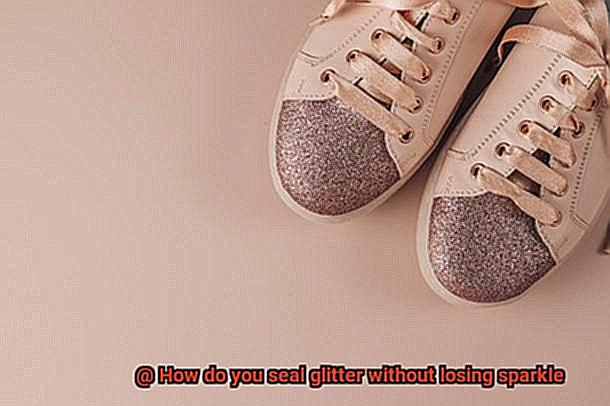
Are you tired of seeing your glitter creations lose their shimmer and shine? It’s like watching a shooting star fizzle out before your very eyes.
Well, fret not, my friend. Today, we’re going to spill the beans on how to seal glitter without sacrificing its sparkle.
Whether you’re a crafty connoisseur or just someone who loves a touch of glitz and glam in their life, this blog post is for you. We’ll cover everything from greeting cards that twinkle like stars to phone cases that scream “look at me.”
Let’s make sure your sparkles stay dazzling for days on end.
Choosing the Right Glitter
In the realm of creativity, glitter reigns supreme as a magical ingredient that adds a touch of sparkle and wonder to any project. However, sealing this enchanting element can be a daunting task. How do we prevent our glitter from losing its radiant shine or prematurely bidding us farewell? Fear not. In this article, we embark on a journey through the glittery cosmos, exploring the various forms and secrets of selecting the perfect glitter that will maintain its sparkle when used for sealing.
Consider the Form of Glitter:
- Loose Glitter: A versatile yet tempestuous companion. While it allows for endless possibilities and can be mixed with different adhesives, it requires meticulous application to avoid messy fallout.
- Glitter Glue: A convenient and alluring option, combining adhesive and sparkle in one delightful package. Its transparent nature ensures the glitter’s brilliance remains intact.
- Glitter Paint: Ideal for larger surfaces or ambitious projects, providing a thicker adhesive layer. Beware, however, as its texture may slightly affect the overall sparkle.

Size, Shape, and Reflective Properties:
- Fine glitters: These tiny marvels adhere with unparalleled finesse, granting projects a smooth and polished finish.
- Chunkier glitters: Captivating and bold, these gems demand stronger adhesives to prevent their magnificent presence from cascading away.
- Holographic or iridescent glitters: Aptly named dreamweavers, they bestow upon creations an extraordinary dimension of gleaming radiance.
Longevity and Durability:
- Seek glitters labeled as UV-resistant or tested for enduring color vibrancy, ensuring your masterpieces stand the test of time.
- If your creation is intended for wearables or will be frequently handled, choose glitters with sturdy constitutions that defy flaking.
Sealing Techniques:
Clear Adhesive or Sealer:
- Mod Podge: Apply this translucent marvel with a delicate brush or sponge applicator, creating a thin and even layer. Allow each coat to dry completely before applying another if necessary.
- Clear Spray Sealant: Embrace the guidance of aerosol cans, releasing an even and ethereal veil of protection upon your glittery wonders.
- Clear Nail Polish: Unleash the power of this versatile ally by gently brushing on a thin layer over the bejeweled domain, patiently awaiting its complete drying.
Proper Application:
- Invest in high-quality glitter adorned with fine or ultra-fine particles, ensuring their steadfast adherence and minimizing fallout.
- Apply adhesive or sealer in thin layers, unveiling a mesmerizing shimmer without overwhelming the delicate balance of your creation.
Using Mod Podge as a Sealer
Look no further. In this comprehensive guide, we will dive headfirst into the captivating world of using Mod Podge as a sealer for glitter, unlocking the key to achieving a mesmerizing and long-lasting sparkle. So gather your glitter collection, prepare for a glittery adventure, and let’s embark on this dazzling journey together.
Step 1: Prepare the Stage
Before immersing ourselves in the glitz and glamour, it’s crucial to ensure your project’s surface is immaculate and smooth. Rid it of any pesky dust or debris and, if necessary, give it a gentle sanding, preparing the perfect canvas for your glitter and Mod Podge to adhere flawlessly. With a pristine foundation, your sparkles will truly shine.
Step 2: Secure the Glitter
To keep your precious glitter securely in place, utilize a robust adhesive such as craft glue or a sprightly spray adhesive. Apply it generously and evenly over the desired area, ensuring every nook and cranny is covered. Strike the perfect balance between ample adhesive and not overpowering the brilliance of the glitter.
Step 3: Unleash the Magic
Now comes the spellbinding moment – it’s time to seal that sparkle. Armed with either a brush or sponge applicator, dip it gracefully into your chosen Mod Podge finish – whether it be matte, gloss, or satin. Begin by delicately applying a thin layer of Mod Podge over the glittered area, utilizing smooth strokes or gentle dabbing motions to avoid disturbing those precious glitter particles. Revel in the magical transformation unfolding before your eyes.
Step 4: Patience is Key
Once you’ve coated your glittered masterpiece with Mod Podge, exercise patience and allow it to dry completely. This crucial step ensures that no smudging or dulling of the glitter occurs, preserving its brilliance for years to come. Remember, good things come to those who wait.
Step 5: Layer Upon Layer of Brilliance
If you desire even greater durability or a heightened shine, fear not. Feel free to apply multiple coats of Mod Podge, ensuring each layer is dry before proceeding. These additional coats will provide an extra layer of protection, intensifying the brilliance of your glittered creation.
Step 6: Defying the Elements (optional)
For projects that may face moisture or frequent handling, such as drinkware or jewelry, it is highly recommended to add an extra layer of protection. Apply a waterproof topcoat after sealing with Mod Podge to safeguard your masterpiece’s longevity against the wear and tear of everyday life. Let your glittered creation defy the elements with style.
Clear Spray Sealants for Glitter
Preserving the Sparkle: Discover the Magic of Clear Spray Sealants for Glitter
Step into the world of glitter and let your creations shine like never before. Say goodbye to dull and fading glitters with the help of clear spray sealants. These enchanting products offer a protective layer that keeps your glitter intact and glowing for longer. But before you embark on this glittery adventure, let’s explore the benefits and important factors to consider when using clear spray sealants.
- Ease of Use: Like waving a magic wand, using clear spray sealants is a breeze. They come in convenient aerosol cans, making application a quick and effortless process. With just a shake and a gentle spray, you can give your glitter surface a coat of protection that works wonders.
- Compatibility Matters: Not all sealants play nicely with every type of glitter. Some may cause your glitter to lose its sparkle or even change color – a glitter lover’s worst nightmare. To avoid this catastrophe, it is crucial to test the sealant on a small, inconspicuous area before fully committing. Look for sealants specifically labeled as “glitter sealants” or “sparkle sealants” for optimal results. Don’t hesitate to seek recommendations from fellow crafters or read product reviews; after all, we’re all in this sparkling journey together.
- Handle with Care: While clear spray sealants offer fantastic protection, they can’t guarantee that your glitter won’t shed or fade over time. Excessive handling or exposure to moisture can still affect its sparkle. Treat your glittered items like precious treasures and minimize wear and tear to keep them shining bright.
- Versatility Unleashed: The magic of clear spray sealants doesn’t stop at glitter alone. These incredible products can work their charm on various surfaces such as paper, fabric, wood, or plastic. Imagine adding a touch of sparkle and protection to all your creative projects – the possibilities are endless.
Using Clear Nail Polish as a Sealer
Well, fear not, for I have just the trick up my sleeve – clear nail polish as a sealer. This simple and accessible solution can help preserve the shimmer and shine of glitter on all your craft projects. So, let’s dive into the captivating advantages and slight limitations of using this technique.
Advantages:
- Effortless Application: Using clear nail polish as a sealer couldn’t be easier. All you need is a trusty bottle of clear nail polish and the brush applicator that comes with it. Just dip the brush into the polish, ensuring it’s coated, and effortlessly apply it over the glittered surface. Voila.
- Budget-Friendly Option: Clear nail polish is an affordable choice for sealing glitter. Chances are, you already have it in your household, but if not, it can be purchased at wallet-friendly prices from most stores.
- Quick Drying: No one likes waiting around for things to dry, right? Well, lucky for you, clear nail polish dries rapidly, leaving behind a glossy finish that seals in the glitter and shields it from wear and tear.
Limitations:
- Surface Suitability: While clear nail polish works wonders on small craft projects or decorative items, it may not be the ideal option for larger surfaces or objects that undergo frequent handling. So, be sure to consider the specific requirements of your project before opting for this method.
- Limited Protection Against Heavy Use and Water: Clear nail polish may not provide long-lasting protection against heavy use or exposure to water. Thus, it’s essential to keep this in mind when deciding whether to utilize it as a sealer.
Tips for Success:
- Surface Preparation: Before applying clear nail polish as a sealer, make sure to clean the surface thoroughly. This ensures a smooth and even finish, allowing the nail polish to adhere better.
- Glue or Adhesive Consideration: If you’re working with loose glitter, it’s wise to apply a layer of glue or adhesive prior to adding the glitter. This creates a better surface for the nail polish to stick to and minimizes any potential fallout.
- Thin and Even Coats: For a flawless finish, apply thin and even coats of clear nail polish. Allow each coat to dry completely before applying the next one.
- Periodic Reapplication: Over time, the nail polish may wear off or chip, especially with frequent handling or friction. To maintain the desired effect, consider reapplying clear nail polish periodically.
Applying Adhesive or Sealer in Thin Layers
Say goodbye to dull and fading glitter projects, because today we’re diving into the art of sealing glitter with adhesive or sealer in thin layers. Get ready to make your crafts shine like never before.
Why is applying adhesive or sealer in thin layers so important? It’s simple, really. We all know that the key to a successful glitter project is keeping those sparkles firmly in place while maintaining their vibrant shine. By using thin layers, you can achieve a smooth and even finish that enhances the sparkle of your glitter and ensures it stays put.
So, let’s delve into the nitty-gritty details. When choosing an adhesive or sealer for your glitter, opt for products specifically designed for fine particles. These gems are formulated to provide a strong hold while preserving the glitter’s dazzling shine. Look for clear and non-yellowing options to keep those colors popping.
Before you embark on your glitter-sealing journey, prep your surface like a pro. Ensure it’s clean and dry, free from any dirt or moisture that could compromise the bond between the adhesive and the glitter. Grab a mild soap and water solution, give that surface a good scrub, and let it dry completely. Trust me, this step is crucial for long-lasting sparkle.
Now comes the fun part – applying the adhesive or sealer in thin layers. Arm yourself with a small brush or sponge applicator, ready to work your magic. Dip it into the adhesive, making sure to load only a small amount on the bristles. With a gentle touch, lightly brush over the area you want to seal, ensuring even coverage without any clumps.
Keep an eagle eye out for any excess adhesive or sealer pooling in certain areas. If you spot any troublemakers, gently blot them with a cloth or tissue to remove them. This simple act will maintain a smooth finish and prevent uneven drying, resulting in a flawless glittery masterpiece.
Now, here’s the secret to sealing glitter like a pro – patience is key. Allow each layer of adhesive or sealer to dry completely before applying another layer. Thin layers dry faster and more evenly compared to thick ones, ensuring that your glitter remains intact and sparkling. Remember, good things come to those who wait.
Less is more when it comes to sealing glitter. Applying too many layers of adhesive or sealer can potentially dull the sparkle, and nobody wants that. So, apply only as many layers as necessary to achieve the desired level of sparkle and protection. It’s all about finding that perfect balance.
Oh, and here’s a little bonus tip for you – consider using a topcoat specifically designed for glitter. These magical potions provide an extra layer of protection and can further enhance the sparkle of your glitter. Just follow the same application technique we’ve been talking about – thin and even layers for the win.
Handling Sealed Glitter Projects with Care
Well, fret no more. As an expert in the art of “Handling Sealed Glitter Projects with Care,” I’m here to reveal the secrets that will keep your glitter creations looking absolutely fabulous for years to come.
First and foremost, let’s discuss the delicate art of handling these sparkly wonders. Treat them with the utmost care, my friends. Refrain from excessive rubbing or scratching, as this can cause the glitter to chip or fade away like a distant memory. Instead, use clean and dry hands to prevent any oils or moisture from transferring onto the surface, potentially dampening the adhesive or dulling the mesmerizing glimmer.
Now, on to storage – the sanctuary for your precious sparkle. Shield your sealed glitter projects from the clutches of dust by storing them in a pristine environment. Consider a display case or a sealed container as your armor against those pesky dust particles that seek to dim their brilliance.
Cleaning – a task that requires finesse. Treat your sealed glitter projects with tender loving care when it comes to cleaning. Leave behind any thoughts of harsh chemicals or abrasive materials. Instead, embrace the gentle touch of a soft, lint-free cloth or a brush specifically designed for delicate surfaces. This way, you’ll keep your sparkle intact without endangering the sealant or the very essence of your glitter itself.
Ah, but what about those areas that have lost their shimmer over time? Fear not. You can revive them with a touch of magic. Apply a delicate smattering of clear adhesive and sprinkle fresh glitter on top, blending it ever so carefully with the existing sparkle for a seamless finish.
Lastly, let us embark on a journey through transportation. Whether you’re bestowing these glittering treasures as gifts or moving them to a new abode, take heed and ensure they arrive unscathed. Wrap them securely or employ the aid of proper packaging materials to safeguard against any movement or impact that could potentially rob them of their sparkle and leave you heartbroken.
Troubleshooting Common Issues
Don’t fret, because I’m here to help you troubleshoot those pesky problems and keep your glitter shining bright like a diamond.
First things first, let’s talk about the glue or sealer you’re using. The wrong adhesive can turn your glitter into a dull mess. So make sure to choose a glue or sealer specifically designed for glitter. Look for those labeled as “glitter glue” or “sparkle sealer.” These babies are specially made to enhance the shine and vibrancy of your glitter particles, so you can keep that sparkle intact and mesmerize everyone.
Next up, application technique matters. When applying the glue or sealer, remember to go for a thin and even layer. Too much adhesive can hide the glitter and make it lose its shine. And uneven application? That’s a big no-no. To ensure an even coat, grab a brush or sponge applicator instead of squeezing it straight from the bottle. With these magical tools, you’ll have better control and be able to distribute the glue more precisely for that sparkling finish you’ve been dreaming of.
Now, let’s talk about drying time. Patience is truly a virtue here. Trying to rush the drying process by blasting it with excessive heat or not giving it enough time can result in lackluster glitter. Each adhesive has its own drying time, so make sure to follow the instructions provided by the manufacturer. Some glues might take several hours or even an entire night to fully set and preserve that enchanting shimmer. Remember, good things come to those who wait.
The choice of glitter itself can also make or break its ability to retain its sparkle when sealed. Don’t settle for mediocre glitter; opt for high-quality brands known for their durability and long-lasting shine. Fine glitters tend to adhere better to the adhesive, giving you a smoother and more reflective surface. Coarser glitters, on the other hand, might have a rougher texture, making them more prone to losing their sparkle during the sealing process. So choose wisely and let your glitter shine like a shooting star.
And let’s not forget about the environment. Excessive moisture or humidity can turn your glitter into a clumpy mess or even make it lose its shine altogether. Keep your glittered items in a dry place, away from direct sunlight or moisture sources. If you live in a humid area, consider using a dehumidifier or silica gel packets in your storage containers to absorb excess moisture and protect that precious sparkle you worked so hard for.
Alternative Techniques for Sealing Glitter
Say goodbye to lackluster sparkle and hello to a world of dazzling possibilities. In this guide, we will explore alternative techniques for sealing glitter that will keep your creations shining bright. Get ready to dive into a sparkling adventure as we unveil the secrets to sealing glitter like a pro.
Clear Drying Glue:
For a flawless finish, opt for specially formulated glues that dry transparently. Begin by applying a thin layer of glue onto your desired surface. While the glue is still wet, generously sprinkle your chosen glitter over it. Allow it to dry completely before gently shaking off any excess. This technique ensures a strong and long-lasting bond, keeping your glitter in place.
Mix with a Topcoat or Sealant:
Ideal for larger areas or objects requiring even distribution, mixing glitter with a clear topcoat or sealant guarantees an enchanting result. In a container, combine your glitter with the topcoat or sealant until evenly dispersed. Using a brush or sponge applicator, apply the mixture in smooth, even strokes. Let it dry completely, unveiling a mesmerizing finish that will leave others spellbound.
Mod Podge Magic:
Unleash the magic of Mod Podge by using it to seal your glitter creations. Apply a thin layer of Mod Podge onto your surface using a brush or sponge applicator. Sprinkle the glitter while the Mod Podge is still wet, gently tapping off any excess. Once dry, apply another coat of Mod Podge to seal the glitter in place, creating a dazzling masterpiece that will captivate all who behold it.
Fabric Glue for Fashionable Sparkles:
For fabric or clothing items that demand style and durability, fabric glue is your go-to solution. Begin by applying a thin layer of fabric glue onto the desired area. Sprinkle your glitter over the wet glue and press gently for secure adhesion. Allow it to dry completely before shaking off any excess glitter. To enhance longevity, seal the glitter with a layer of fabric sealant or clear fabric paint for added protection during washing or wearing.
Spray Sealant Wonder:
Embrace the ease and efficiency of spray sealants to create a long-lasting sparkle on various surfaces. Choose a spray sealant with your desired finish, whether glossy or matte. After applying adhesive to the surface and sprinkling the glitter while wet, allow it to dry. Hold the spray sealant can at a distance and evenly coat the area, revealing an awe-inspiring, glittery wonder that will endure.
marize the key points discussed in the article
I have all the secrets to sealing glitter without sacrificing its shine. Let’s embark on this glittery adventure together and discover the key points discussed in the article “How do you seal glitter without losing sparkle.”
First and foremost, we need to delve into the world of sealants and glues. There are three trusty options: mod podge, clear nail polish, and spray sealants. Each method has its own advantages and disadvantages, so it’s crucial to choose the one that suits your project best.
But hold on, there’s more to consider before sealing your glitter. Properly preparing the surface is essential for ensuring that the glitter sticks and the sealant does its job effectively. And when it comes to application, a smooth and even finish is paramount. Nobody wants clumpy or streaky glitter ruining their masterpiece.
Now, let’s address a common issue that plagues glitter enthusiasts worldwide – yellowing or dulling over time. It’s a real bummer, but fear not. I have some handy tips and solutions up my sleeve to prevent this from happening. Say goodbye to lackluster glitter.
But what about maintenance? How do we keep our sealed glitter projects looking their absolute best? Don’t worry, I’ve got you covered. I’ll share some tricks on how to clean and maintain your glittery creations so they can continue shining brightly for years to come.
And of course, I wouldn’t leave you hanging without some fantastic product recommendations. After testing and trying various sealants and glues, I can point you in the direction of those that have proven to be top-notch in preserving that coveted sparkle. Get ready to dazzle the world with your sparkling masterpieces.
terate the importance of properly sealing glitter to maintain its sparkle
Glitter, the enchanting material that adds a touch of magic and allure to any craft project. However, if not properly sealed, the sparkle of glitter can fade away, leaving behind a lackluster creation. Let’s explore the importance of sealing glitter and discover how it can preserve its mesmerizing shine for years to come.
First and foremost, let’s discuss why sealing glitter is absolutely crucial. Imagine painstakingly applying glitter to your masterpiece, only to have it flake off or lose its brilliance over time. It would be devastating. Properly sealing glitter not only protects it from rubbing off but also ensures that it remains vibrant and dazzling.
One of the primary reasons for sealing glitter is to prevent shedding. Those tiny, lightweight particles have a mischievous tendency to find their way onto every surface imaginable. By sealing the glitter, you create a barrier that keeps these pesky particles in place, preventing them from wreaking havoc on your furniture or clothing.
Sealing glitter not only prevents shedding but also maintains its color and sparkle. Glitter can fade or become dull when exposed to light, air, moisture, or even through handling. Sealing provides a shield against these elements, preserving the original brilliance of the glitter for a longer period.
Durability is another advantage of properly sealed glitter. The sealant acts as a protective layer, making the glitter less vulnerable to wear and tear. Whether you’re using glitter on items that will be frequently handled or exposed to the elements, a good seal will ensure that your creation stands the test of time.
Now, let’s talk about the practicality of sealing glitter – it makes clean-up a breeze. Unsealed glitter has an uncanny ability to spread like fairy dust, leaving behind a trail of shimmering chaos. However, with a proper sealant, you can easily wipe away any excess glitter or clean the surface without worrying about damaging its sparkle.
Last but certainly not least, sealing your glitter enhances its overall appearance. The sealant creates a smooth and glossy finish, elevating the reflective properties of the glitter. Your project will have a polished look that exudes professionalism and aesthetic appeal.
7yEaMx1GfYw” >
Conclusion
To preserve the dazzling sparkle of glitter while ensuring it stays securely in place, sealing is essential. But how can you seal glitter without sacrificing its shimmer and shine? Fear not, for I have the answers you seek. By following these expert tips and tricks, you can achieve a flawless seal that keeps your glitter masterpiece gleaming for all to admire.
Firstly, choose the right type of sealant. Opt for a clear and glossy formula that won’t dull or dim the brilliance of your glitter. Look for products specifically designed for sealing glitter, such as spray sealants or brush-on glazes. These specialized formulas are formulated to provide a protective barrier without compromising the sparkle.
Next, apply the sealant with care and precision. Use a fine-tip brush or a spray bottle to evenly distribute the sealant over your glittered surface. Be sure to cover every nook and cranny, ensuring complete coverage without overwhelming the delicate shimmer.
Once applied, allow ample drying time. Patience is key here; rushing the drying process may result in a lackluster finish. Give your sealed glitter project ample time to dry completely before handling or displaying it.
Another crucial tip is to avoid excessive handling of your sealed glitter creation. While tempting to touch and marvel at its radiance, excessive touching can cause the sealant to wear off prematurely, leading to potential loss of sparkle. Treat your masterpiece with care and keep unnecessary handling at bay.
Furthermore, consider adding multiple layers of sealant for added protection. Applying multiple thin coats will not only enhance durability but also intensify the glimmering effect of your glitter.
Lastly, store your sealed glitter creations properly to maintain their sparkle over time. Keep them away from direct sunlight or extreme heat as these elements can fade or damage the glitziness. Store them in a cool and dry place where they won’t be subjected to unnecessary wear and tear.
In conclusion, sealing glitter without losing its sparkle is indeed possible. With the right sealant, careful application, adequate drying time, and proper handling and storage, your glittered creations will continue to dazzle and shimmer for years to come.