Do you have a broken ceramic item that you just can’t seem to part with? Maybe it’s a cherished keepsake or a beloved piece of pottery. Whatever the case may be, repairing ceramic can be intimidating. But fear not, because Gorilla Glue is here to save the day.
Gorilla Glue is well-known for its strength and durability in fixing just about anything. And when it comes to ceramic repair, it’s no different. Not only is it easy to use, but it’s also cost-effective. Plus, its formula is designed to withstand extreme weather conditions, making it an excellent choice for indoor and outdoor repairs.
But before you start gluing away, there are a few essential steps to follow for optimal results. In this article, we’ll cover everything you need to know about how to repair ceramic with Gorilla Glue. From preparing the surface to applying the glue and sanding down the finish, we’ve got you covered.
Say goodbye to constantly replacing your favorite ceramics and hello to a long-lasting fix with Gorilla Glue. So sit back, relax, and let’s get started on your repair project.
What is Gorilla Glue?
Contents
Gorilla Glue is more than just an adhesive. It’s the ultimate solution to all your bonding needs. This polyurethane-based adhesive was first introduced in the United States in the late 1990s and has since gained a reputation as one of the toughest glues on the market.
What makes Gorilla Glue so unique? The secret lies in its primary ingredient: polyurethane. This chemical reaction produces a strong, durable adhesive that is resistant to water and heat. In other words, it’s designed to withstand even the toughest conditions.
Gorilla Glue comes in several different forms, including a clear drying formula, a fast-drying formula, and a waterproof formula. It can bond a wide variety of materials, including wood, metal, plastic, ceramic, and more. Whether you’re fixing a broken vase or building a wooden shelf, Gorilla Glue has got you covered.
However, using Gorilla Glue requires skill and care. It expands as it dries, so it’s important to use it sparingly and clamp the materials being bonded together until the glue has fully cured. This ensures that the bond is strong and long-lasting. And once it has dried, Gorilla Glue can be difficult to remove, so make sure to clean up any excess before it dries.
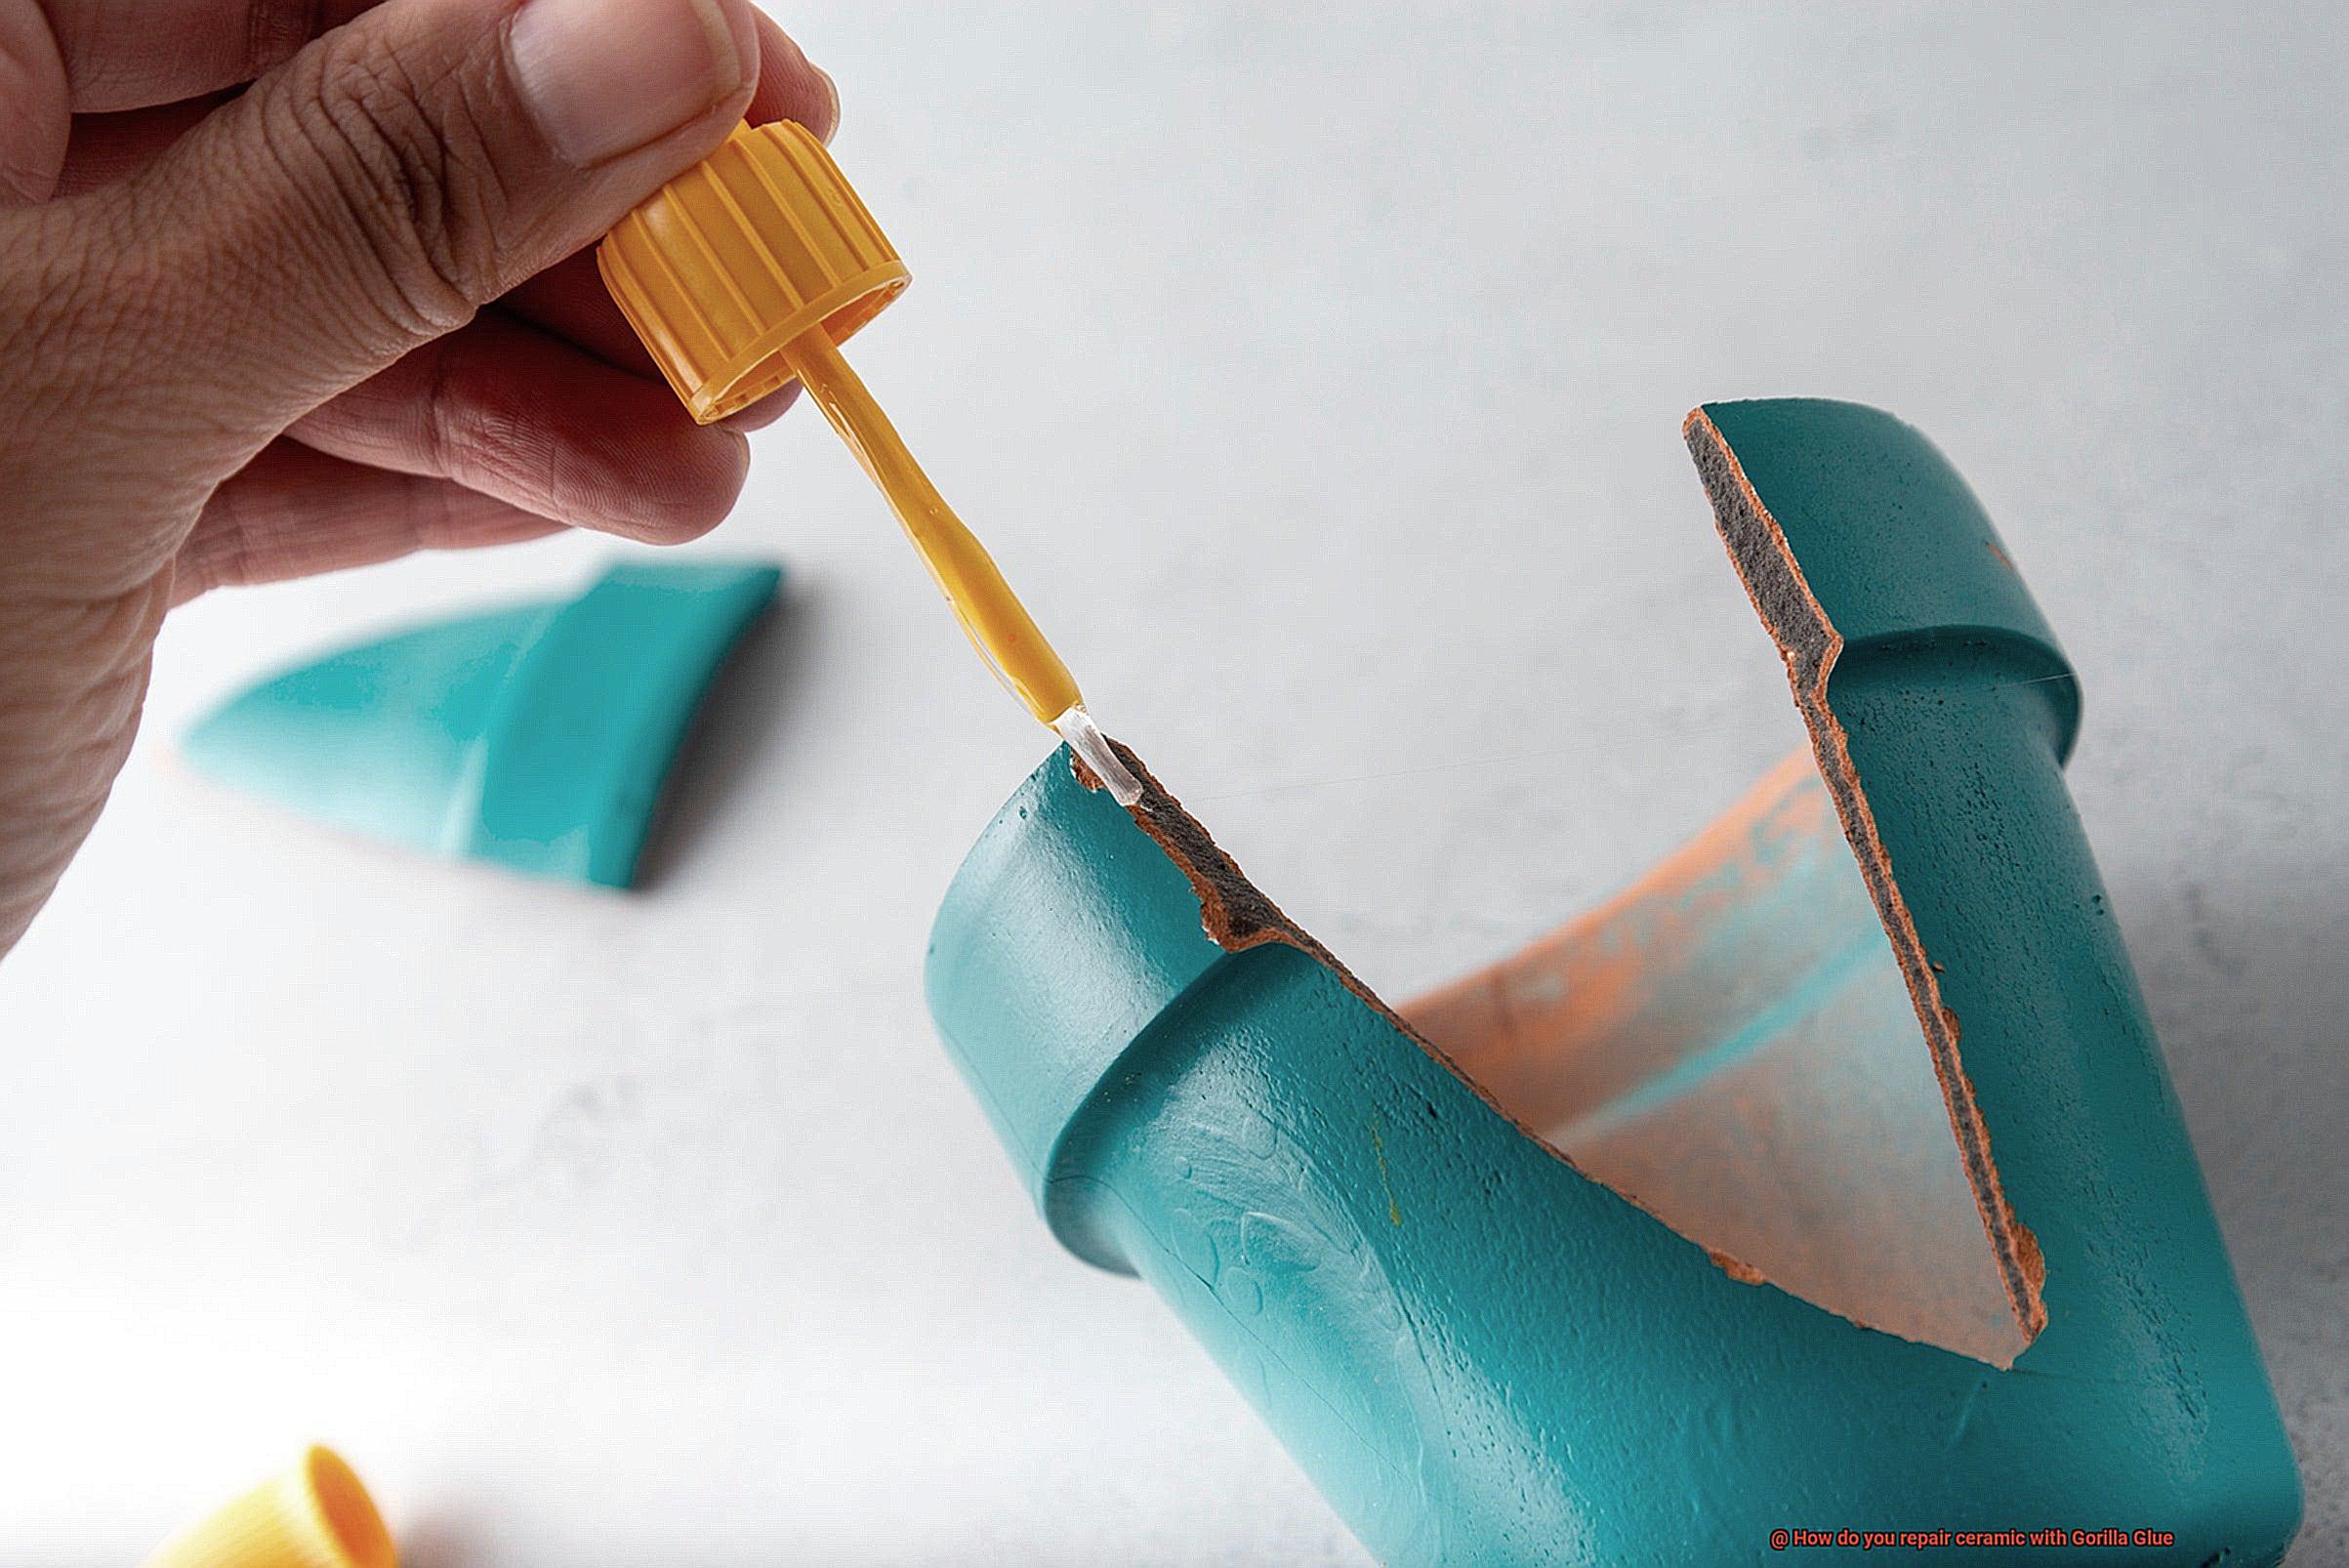
One of the most popular uses for Gorilla Glue is repairing ceramics. To ensure a successful repair, you need to clean the ceramic thoroughly and securely position all pieces before applying the glue. Apply a small amount of glue to one of the broken edges and align the pieces carefully. Hold them together firmly for several minutes to allow the glue to dry. Once the initial application has dried, apply more Gorilla Glue around the outside of the repair to seal and secure it fully.
Preparing the Ceramic for Repair
Don’t worry, with Gorilla Glue and proper preparation, you can fix it up good as new. But before you start, it’s important to know how to properly prepare the ceramic for repair.
First, cleanliness is key. Get a soft cloth or brush and mild soap and water and give the damaged area a thorough scrub to remove any dirt, dust, or debris that could prevent the glue from adhering properly. Rinse with clean water and let it dry completely before moving on.
Next, inspect the ceramic for any cracks or chips. If there are any large pieces missing, try to find them and save them for later. If it’s just a small gap, you may be able to fill it in with Gorilla Glue. However, if there are larger gaps or missing pieces, you might need a filler material before applying the glue.
If there are any rough edges or sharp points around the damaged area, use sandpaper or a file to smooth them out. This will create a smooth surface for the glue to adhere to without causing further damage.
Once the ceramic is clean and smooth, it’s time to apply Gorilla Glue. But before doing that, make sure that you have all of your materials ready and follow the instructions for mixing or applying any fillers you may need. A well-prepared surface will increase the bonding strength of the glue and ensure a successful repair.
Applying Gorilla Glue to the Broken Edge
It can be disheartening to see something you treasure so much in such a state, but don’t rush to throw it away just yet. With the help of Gorilla Glue and some care, you can mend your broken ceramic object like a pro. As an expert in applying Gorilla Glue to the broken edge of a ceramic object, let me guide you through the steps.
The first step is crucial – cleanliness. Make sure that the broken pieces are free from any dirt or debris before beginning the repair process. Apply a small amount of Gorilla Glue to one of the broken edges, using just enough glue to cover the surface area.
With the glue applied, press the two broken edges together firmly and hold them in place for at least 10-20 seconds. It’s important to ensure that the edges are aligned correctly with no gaps between them. If you notice any gaps, use a toothpick or small brush to fill them in with more glue.
It’s essential to remember that Gorilla Glue expands as it dries, so avoid using too much glue as it can cause excess to seep out and create a mess. Begin with a small amount of glue and add more if necessary.
After holding the broken edges together for at least 10-20 seconds, set the object aside and allow it to dry completely. It’s best to leave the object untouched for at least 24 hours, ensuring that the glue has fully cured and hardened.
Apart from applying Gorilla Glue to the broken edge, you can also fix any cracks or chips in your ceramic object. Follow the same steps as above, using a small amount of glue and holding the edges together until it dries.
Aligning and Holding the Pieces Together
Luckily, with some Gorilla Glue and a little patience, you can bring your cherished item back to life. However, the key to a successful repair job is in the process of aligning and holding the pieces together.
To start, ensure that the broken pieces fit together perfectly. You may need to do a bit of sanding or filing to create a better fit. Once you have them aligned, you’ll need to hold them in place while the glue dries. While Gorilla Glue has an incredibly strong adhesive quality, it may take several hours to fully dry and cure. To keep the pieces in place during this time, use any of the following methods:
- Clamps or tape: If you have large pieces that need to be held together, clamps or tape can keep them in place until the glue sets.
- Rubber bands: For smaller pieces, wrap a rubber band tightly around the ceramic piece until it holds firmly in place. Just be careful not to wrap it too tightly as this could cause the glue to squeeze out and create a mess.
- Hot glue gun: Another option is to use a hot glue gun to hold the pieces together temporarily. This will allow you to adjust the alignment as needed before the Gorilla Glue sets. Just be sure to remove any excess hot glue before applying the Gorilla Glue.
Sealing the Repair with More Glue
In our previous section, we learned how to use Gorilla Glue to fix broken ceramic items. But that’s not all – sealing the repair with more glue is a crucial step in ensuring your repair lasts for years to come. Let’s dive into the process of sealing the repair with more glue.
First and foremost, it’s essential to clean the area around the repair of any debris or dust. This will ensure that the second layer of glue adheres properly. Once you’ve cleaned the area, apply a small amount of Gorilla Glue to the surface of the ceramic. Don’t worry about using too much – any excess can be sanded away later on.
Next, using a toothpick or small brush, carefully spread the glue around the repaired area. Make sure that you cover every nook and cranny of the repair and that there are no gaps or air bubbles. This step is vital as any gaps or air bubbles can cause weakness in your repair, which could lead to cracks or chips down the line.
After you’ve applied the second layer of glue, give it time to dry completely according to the instructions on the packaging. It’s tempting to rush this step, but resist the urge. Proper drying time is crucial for forming a strong bond between the ceramic and glue.
Once the glue has dried, you may notice some excess residue around the repair. This is normal and can easily be removed by gently sanding it away using a fine-grit sandpaper. Be careful not to apply too much pressure as this could damage the repair.
Allowing Time for the Glue to Set and Cure
It’s a fulfilling process, but it requires attention to detail and a lot of patience. One of the most crucial steps in this process is allowing enough time for the glue to set and cure. Why is this so important? Let’s take a closer look.
Firstly, once you’ve applied the Gorilla Glue and joined the ceramic pieces together, it’s vital to hold them in place for at least 1-2 hours. During this period, no pressure or movement should be applied to the repaired area. Think of it like a delicate surgery – you want everything to stay put while the glue does its magic.
After the initial setting time has passed, it’s tempting to use your newly repaired item right away. However, it’s critical to leave the ceramic piece untouched for at least 24 hours to allow the glue to fully cure. This step can’t be rushed since it enables the bond to become permanent and robust enough to withstand daily use.
It’s also important to note that temperature and humidity can significantly affect Gorilla Glue’s drying and curing time. Higher temperatures and humidity levels can speed up the process, while lower temperatures and humidity levels can slow things down. Therefore, it’s best to store your repaired ceramic piece in a dry place at room temperature during this curing period.
In summary, allowing enough time for Gorilla Glue to set and cure is essential in achieving a successful repair of ceramic pieces. Rushing through this step can result in a weak bond that may break again quickly – nobody wants that. To ensure a long-lasting repair, remember to follow the instructions on the Gorilla Glue packaging carefully and be patient during this process. Your patience will pay off with a beautifully restored ceramic item that will last for years to come.
Wiping Away Excess Glue
Today, we’re delving into the meticulous process of wiping away excess glue – a vital step in repairing ceramic with Gorilla Glue. As an expert on the matter, I’ve compiled some research notes to help you achieve a flawless and professional repair job.
To start, ensure that you have a damp cloth or paper towel at the ready. It’s crucial to use a damp cloth instead of a wet one as excess water can weaken the glue bond. Gently wipe away any excess glue from the repaired area with care to avoid disturbing the bond.
But what if the glue has already dried? Fear not. You can use a scraper or sandpaper to remove it, but take extra caution not to scratch or damage the ceramic surface. Once all excess glue has been removed, allow the repaired area to dry completely before proceeding with any additional steps.
It’s important to note that wiping away excess glue should be done immediately after applying the Gorilla Glue. This prevents the glue from hardening and becoming more difficult to remove. Taking your time and properly wiping away excess glue ensures that your ceramic repair looks neat and professional.
Additionally, here are some tips to help you perfect this process:
- Use a light touch when wiping away excess glue to avoid damaging the bond.
- If using sandpaper, use fine-grit sandpaper to avoid scratches.
- Avoid using water or solvents to remove excess glue as they can weaken the bond.
9ZHXmeutKJc” >
Also Read: How To Glue Ceramic Back Together?
Conclusion
In conclusion, repairing your broken ceramic items with Gorilla Glue can be a game-changer, saving you from having to bid adieu to beloved pottery or cherished keepsakes. This polyurethane-based adhesive formula is the perfect solution for both indoor and outdoor repairs because it’s designed to withstand even the most extreme weather conditions.
However, using Gorilla Glue requires finesse and attention to detail. The glue expands as it dries, so it’s essential to exercise caution and apply it sparingly. Clamping the materials together until the glue has fully cured is also crucial.
But before applying Gorilla Glue to your broken ceramic item, you must prepare properly. Thoroughly cleaning the ceramic and positioning all pieces securely before applying the glue will ensure optimal results. Once applied, aligning and holding the pieces together until the glue dries is essential.
Sealing the repair with more glue is also a vital step in ensuring that your repair lasts for years to come. Proper drying time is crucial for forming a strong bond between the ceramic and glue. Allowing enough time for Gorilla Glue to set and cure is essential in achieving a successful repair of ceramic pieces.
By following these tips and tricks, you can perfect your process of repairing ceramic items with Gorilla Glue like an expert.

