Are you sick and tired of that outdated vinyl flooring sticking to your stunning concrete foundation? Well, worry no more. In this handy guide, we’ll walk you through the simple yet effective methods of removing glued vinyl flooring from concrete, giving you a fresh canvas to work with. Don’t let the process intimidate you – armed with some patience and the right tools, you’ll achieve remarkable results. So, roll up those sleeves, slip on your trusty work boots, and let’s dive right in.
Bid farewell to vinyl flooring clinging onto your concrete as we take a systematic approach together. Follow along as we break down each step of the process, ensuring that your concrete floors will soon be looking brand new once again.
Advantages of Glued Vinyl Flooring
Contents
Glued vinyl flooring is the answer. This type of flooring offers a range of advantages that make it a popular choice among homeowners and commercial spaces.
First and foremost, glued vinyl flooring is known for its exceptional durability. The layers of vinyl are fused together using strong adhesives, creating a sturdy and long-lasting floor. This makes it perfect for high-traffic areas like hallways, kitchens, and living rooms where constant wear and tear occur.
In addition to its durability, glued vinyl flooring is incredibly easy to clean and maintain. It is resistant to stains, spills, and moisture, making it suitable for areas prone to accidents. Regular sweeping or vacuuming, along with occasional mopping using a mild detergent, is usually sufficient to keep the floor looking clean and fresh.
One of the major advantages of glued vinyl flooring is its versatility in design. It can mimic various natural materials such as hardwood, stone, and tile, allowing homeowners to achieve the desired look without the associated cost and maintenance. Additionally, it comes in a variety of colors and patterns, offering endless possibilities for customization.
But that’s not all. Glued vinyl flooring also provides a comfortable surface to walk on due to its cushioned nature. The softness of the material reduces foot fatigue and provides a more pleasant experience compared to harder flooring options like ceramic tiles or concrete. This makes it particularly suitable for areas where people stand for extended periods, such as kitchens or retail spaces.
Furthermore, glued vinyl flooring has excellent sound insulation properties. It helps reduce noise transmission between floors by absorbing impact sound, making it an excellent choice for multi-story buildings or apartments. This feature contributes to a quieter and more peaceful living environment.
When it comes to cost-effectiveness, glued vinyl flooring is hard to beat. It offers a cost-effective option without compromising on quality. Its relatively low installation cost, combined with its durability and ease of maintenance, make it an attractive choice for budget-conscious homeowners.
Last but not least, glued vinyl flooring is relatively easy to install, especially for those with basic DIY skills. It can be installed directly over concrete or other smooth surfaces, eliminating the need for extensive subfloor preparation. The use of adhesive ensures a secure bond between the vinyl and the floor, ensuring a long-lasting and professional-looking installation.
Preparing the Area for Removal
Removing glued vinyl flooring from concrete may seem like a daunting task, but fear not. With the right preparation and techniques, you’ll be able to conquer this challenge with ease. In this guide, we’ll walk you through the process step by step, ensuring a smooth and successful removal.
Step 1: Clear the Path
Creating a clean and open workspace is essential before diving into the removal process. Move any furniture or obstacles out of the way, providing yourself ample room to maneuver. This will not only make the process easier but also protect your belongings from potential damage.
Step 2: Protect and Isolate
To prevent any mishaps during the removal process, take the time to protect nearby surfaces and objects. Cover them with drop cloths or plastic sheets, acting as a shield against accidental scratches or spills. Seal off vents or openings with plastic sheeting or tape to contain dust and debris.
Step 3: Safety First
Prioritize safety before getting your hands dirty. Shield yourself from sharp edges, dust particles, and fumes by wearing protective gear such as gloves, safety goggles, and a mask. Safeguarding your health throughout the process is crucial.
Step 4: Assess and Remove Loose Sections
Inspect the vinyl flooring for any loose or peeling sections. Start by removing them first, simply lifting them up from one corner and peeling them back. For stubborn spots, employ a putty knife or scraper to loosen the adhesive.
Step 5: Soften the Adhesive
If there are no loose sections, it’s time to soften the adhesive that holds the vinyl flooring in place. Unleash the power of heat. A heat gun or hairdryer on its highest setting can work wonders here. Hold the heat source about six inches away from the surface and move it back and forth until you notice the adhesive softening.
Step 6: Begin the Removal Process
Once the adhesive has softened, it’s time to start removing the vinyl flooring. Gently lift up one corner using a putty knife or scraper, gradually peeling back the vinyl. Apply more heat if necessary, but exercise caution to avoid damaging the concrete surface.
Step 7: Bid Adhesive Farewell
After successfully removing the vinyl flooring, inspect the concrete surface for any remaining adhesive. If traces of adhesive persist, apply a commercial adhesive remover or a mixture of warm water and detergent. Let the remover sit for a few minutes, then scrub with a brush or sponge.
Step 8: Clean and Dry
Once all adhesive residue has been eliminated, thoroughly clean the concrete surface with warm water and mild detergent to remove any remaining debris. Allow the area to air dry completely before proceeding with any flooring installation or refinishing.
Tools and Materials Needed
Removing glued vinyl flooring from a concrete surface may seem like a daunting task, but fear not. With the right tools and materials, you can tackle this project like a pro. In this article, we will guide you through the essential tools and materials needed to ensure a smooth and efficient removal process. Let’s get started.
Utility Knife:
A trusty utility knife is your go-to tool for cutting through the vinyl flooring. Its sharp blade allows for precise cuts, making it easier to remove the flooring in manageable sections. Remember to exercise caution and work slowly to avoid accidents.
Heat Gun or Hair Dryer:
To soften the adhesive and make removal easier, you’ll need a heat gun or hair dryer. Applying gentle heat to the vinyl flooring will help loosen the glue. Use the lowest heat setting to prevent damage to the flooring and ensure your safety.
Floor Scraper or Putty Knife:
A sturdy floor scraper or putty knife is essential for scraping away the vinyl flooring and adhesive residue. Look for a tool with a sharp edge and a comfortable handle that allows for effective removal without causing strain on your hand.
Gloves and Safety Glasses:
Safety should always be a top priority during any home improvement project. Protect your hands with gloves to shield them from sharp edges and potential chemical exposure. Wear safety glasses to prevent debris from getting into your eyes.
Respirator Mask:
When removing glued vinyl flooring, dust and fumes may be released, which can be harmful if inhaled. To protect your lungs, wear a respirator mask specifically designed for this purpose.
Adhesive Remover:
Depending on the type of adhesive used, you may need an adhesive remover to dissolve and loosen the glue further. Choose a commercial adhesive remover suitable for vinyl flooring removal, following the product instructions for optimal results.
Plastic Sheeting:
To contain the mess and prevent debris from spreading throughout your space, lay down plastic sheeting or drop cloths. This simple step will make cleanup much easier once you have removed the vinyl flooring.
Vacuum Cleaner:
After removing the vinyl flooring, there may be leftover debris and dust on the concrete surface. A vacuum cleaner with a brush attachment will come in handy for thorough cleaning. Ensure the surface is clean and dry before proceeding with any new flooring installation.
Heating the Vinyl Flooring
Don’t worry, we’ve got you covered. In this article, we’ll walk you through the process of heating vinyl flooring to make removing it from concrete a breeze. Say goodbye to stubborn adhesive and hello to a fresh new floor.

The Power of Heat: Why It Works
Heat softens the adhesive, making it easier to pry up the flooring without damaging the concrete underneath.
Tools of the Trade
To heat your vinyl flooring, you’ll need a few key tools: a heat gun, a hairdryer, or boiling water.
Safety First
Always wear protective gloves and eyewear. Ensure the area is well-ventilated.
Heating Methods: Heat Gun, Hairdryer, or Boiling Water?
Heat Gun:
- Hold the heat gun 6-8 inches away from the vinyl.
- Move it back and forth in a sweeping motion.
- Use a putty knife or scraper to gently pry up the softened flooring.
Hairdryer:
- Hold the hairdryer 6-8 inches away from the vinyl.
- Move it back and forth over the area you want to remove.
- The hot air will gradually warm up the adhesive for easy removal.
Boiling Water:
- Boil water and pour it onto one small section of the vinyl flooring.
- Allow the hot water to sit for a few minutes.
- Use a putty knife or scraper to lift the softened flooring.
Removing the Vinyl Flooring from Concrete
Well, you’re in luck. In this post, we’ll guide you through the process of safely and efficiently removing glued vinyl flooring from concrete.
Let’s start by discussing the essential tools and materials you’ll need. Make sure you have a floor scraper, heat gun or hairdryer, adhesive remover, protective gloves and goggles, and a trusty putty knife or scraper. These tools will be your faithful companions as you tackle this project.
With your arsenal at the ready, it’s time to begin. Before diving into the removal process, ensure the area is well-ventilated. Open those windows and doors wide to welcome fresh air because no one wants to inhale those pungent adhesive remover fumes. And don’t forget to suit up with protective gloves and goggles to keep yourself safe.
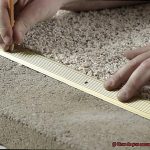
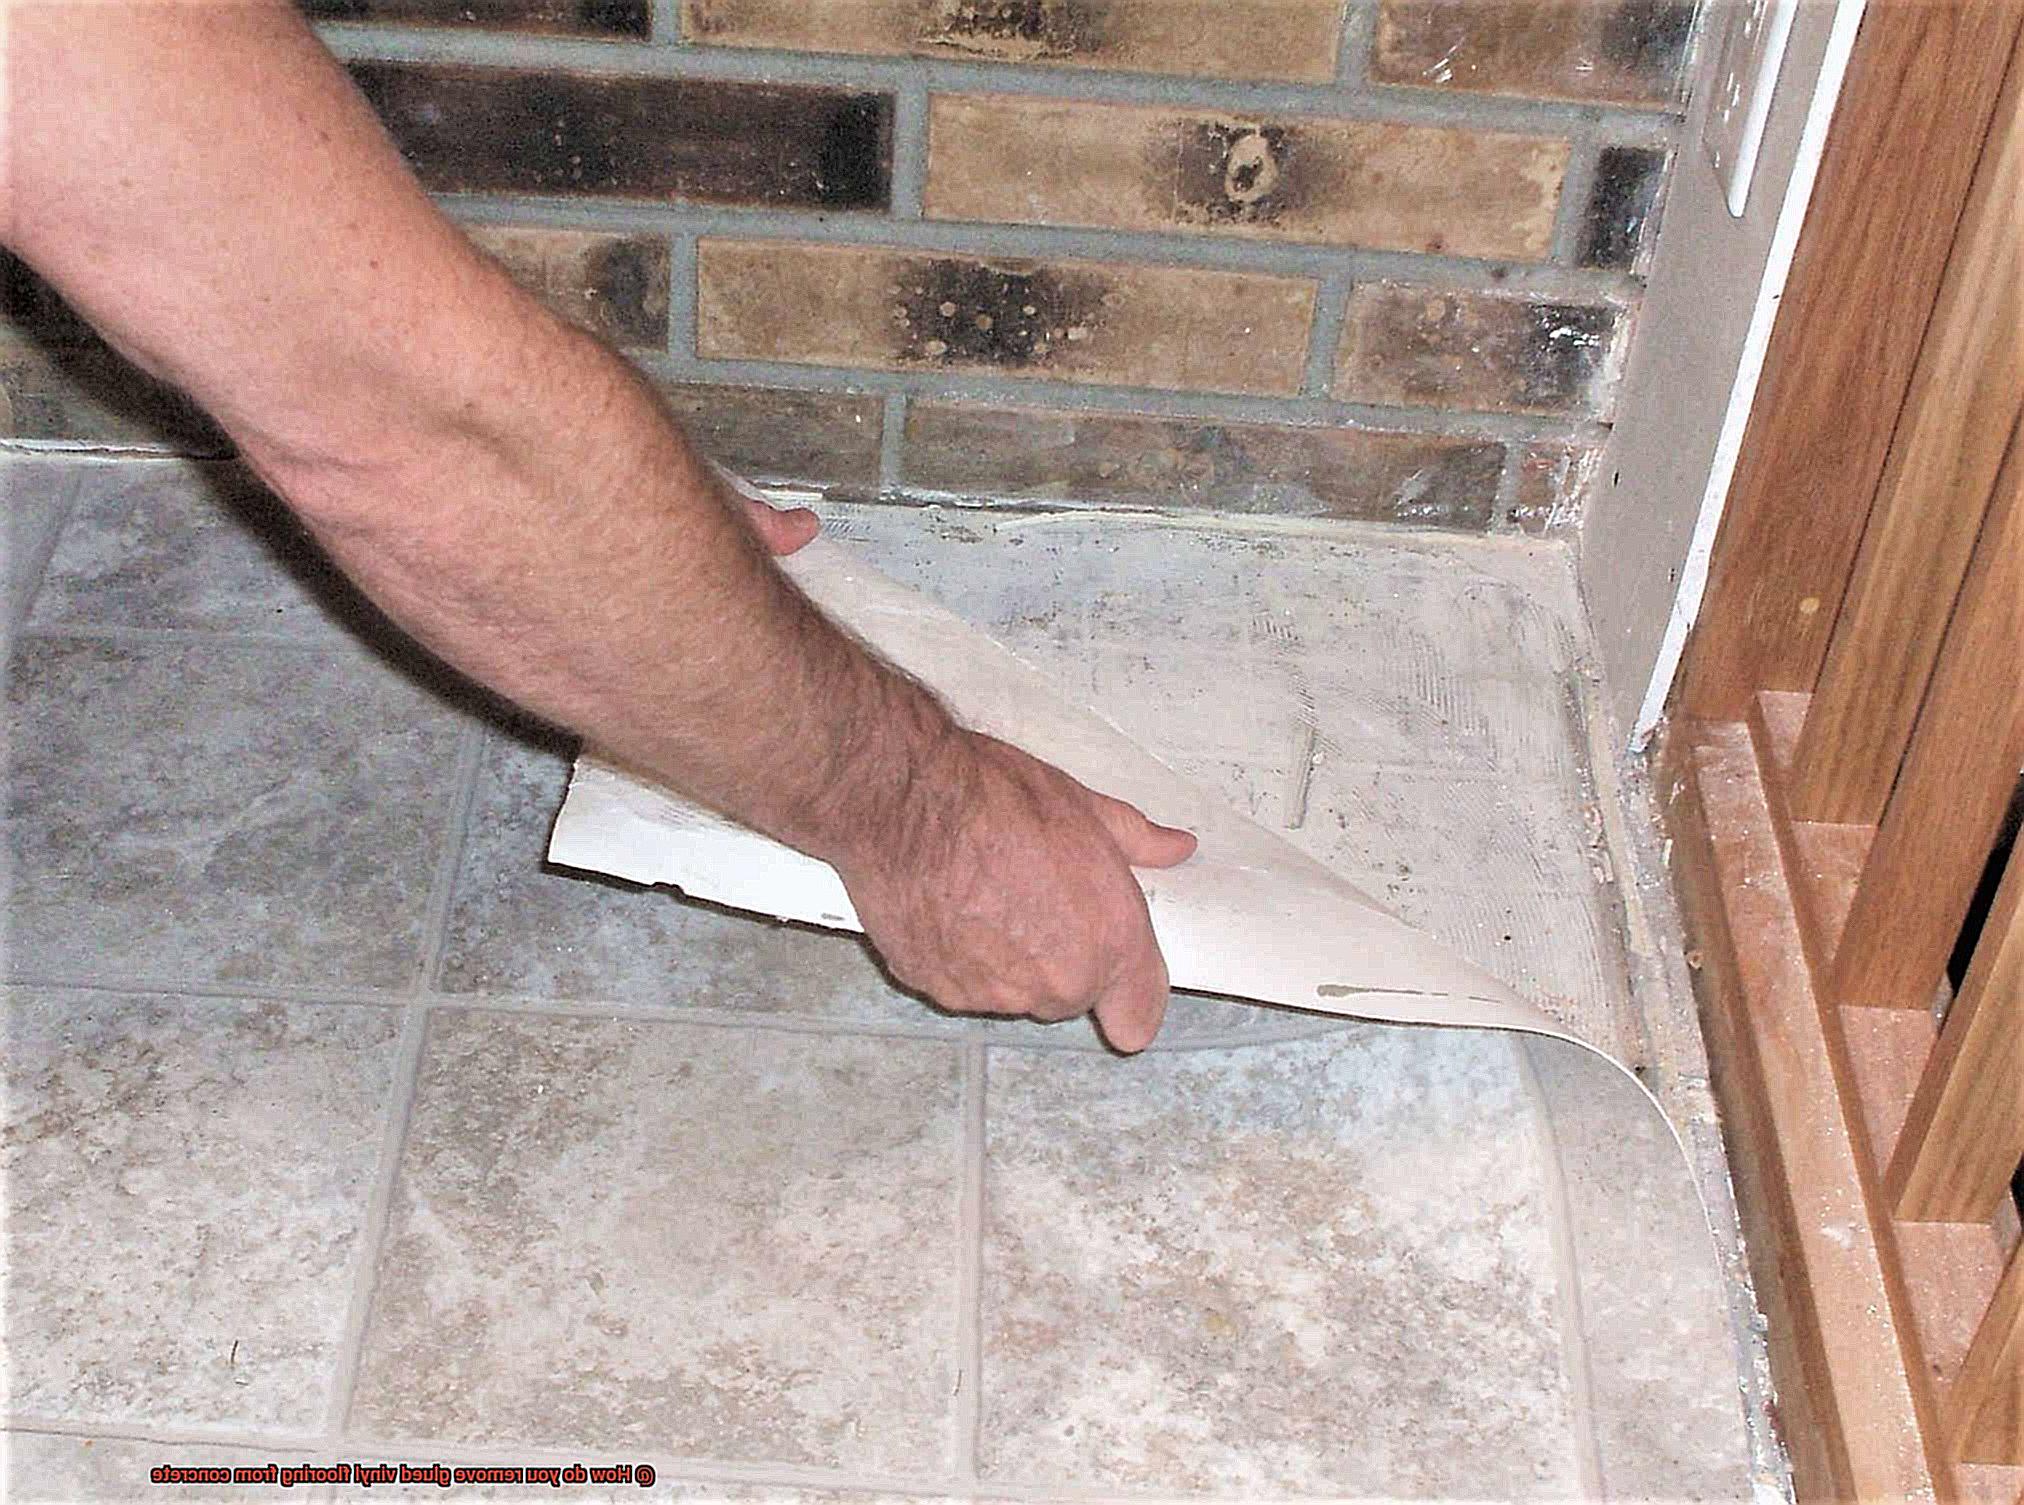
Now, let’s get down to business. Start by delicately lifting up a corner or edge of the vinyl flooring using your floor scraper or putty knife. It’s like peeling back layers of an onion, sans the tears (hopefully). Once you’ve lifted a section, bring on the heat. Grab your trusty heat gun or hairdryer and set it on high heat. Apply the heat to the area you’re working on – this will soften the adhesive, making removal a breeze.
As you apply heat, use your floor scraper or putty knife to slowly peel back the vinyl flooring. Take it slow and steady, working in small sections at a time. Rushing this process may lead to torn vinyl or sticky adhesive residue left behind. And nobody wants that mess.
Occasionally, there may be stubborn spots where the vinyl clings on for dear life. Fear not. We have a solution for that too. Grab your preferred adhesive remover – just ensure it’s suitable for use on vinyl flooring and safe for concrete. Follow the manufacturer’s instructions for application. Generally, you’ll need to spray or apply it onto the adhesive residue and allow it to sit for a while. This gives the remover time to work its magic and dissolve that persistent adhesive.
Once the adhesive remover has done its job, take your putty knife or scraper and gently scrape away the softened adhesive. Exercise caution to avoid damaging or scratching the concrete surface – we want your floors looking fabulous, not battered. If necessary, you can reapply the adhesive remover and repeat the scraping process until all adhesive residue is gone.
Phew. You’re almost there. After successfully removing the vinyl flooring and adhesive residue, it’s time to give that concrete surface a thorough cleaning. Create a mixture of warm water and mild detergent, then use a scrub brush or mop to eliminate any remaining residue or dirt. Rinse the area well, allowing it to dry completely before proceeding with any new flooring installation.
Asbestos Considerations
When it comes to home improvement projects, removing glued vinyl flooring may seem like a simple task. However, it is crucial to consider a hidden danger – asbestos. In this article, we will delve into the importance of considering asbestos when removing glued vinyl flooring from concrete. By understanding the risks and taking appropriate precautions, you can ensure a safe and successful removal process.
Understanding Asbestos:
Before tackling the removal process, it is essential to understand what asbestos is and why it matters. Asbestos is a mineral fiber that was commonly used in building materials, including vinyl flooring, until its harmful health effects were discovered. Inhalation of asbestos fibers can lead to severe health issues such as lung cancer, mesothelioma, and asbestosis.
Identifying Asbestos in Vinyl Flooring Adhesive:
To determine if your vinyl flooring adhesive contains asbestos, it is crucial to have a sample tested by a certified asbestos testing laboratory. Collecting the sample should be done with utmost caution to avoid potential exposure.
Professional Assistance:
If your vinyl flooring adhesive contains asbestos, it is highly recommended to hire a professional asbestos abatement contractor. These experts are trained to handle asbestos safely and will take all necessary precautions to protect your health and the environment.
Personal Protective Equipment (PPE):
Regardless of whether asbestos is present or not, wearing appropriate PPE during the removal process is crucial. This includes disposable coveralls, gloves, goggles, and a respirator with a HEPA filter to safeguard against asbestos fibers.
Containment and Disposal:
To minimize the spread of asbestos fibers, proper containment measures must be taken. This may involve sealing off the work area with plastic sheeting, using negative air pressure machines, and wetting down the adhesive and flooring to suppress dust. After removal, proper disposal of the asbestos-containing materials is essential.
Alternatives to Removal:
In some cases, if the vinyl flooring is undamaged, encapsulation may be an option. This involves applying a special sealant to prevent the release of asbestos fibers. However, this should only be done by professionals experienced in working with asbestos-containing materials.
Cleaning Up After Removal
Removing old, outdated vinyl flooring from concrete can leave behind a sticky mess of adhesive residue. But fear not. We have the perfect guide to help you clean up after removal and restore that concrete surface to its former glory. Get ready to say goodbye to the remnants of the past and hello to a pristine floor.
Before we dive into the step-by-step process, let’s gather all the tools and materials you’ll need for this project:
- Heat gun or hairdryer: These trusty tools will help soften the adhesive residue.
- Putty knife or scraper: Perfect for gently scraping off the softened residue.
- Commercial adhesive remover for vinyl flooring: This powerful product is designed to tackle stubborn residue.
- Solvent (denatured alcohol or mineral spirits): For those tough residues that won’t budge, a solvent will do the trick.
- Clean cloth: Essential for applying solvents and wiping away residue.
- Mild detergent: You’ll need this to mix with warm water for a thorough cleaning.
- Stiff-bristle brush or mop: To scrub away any remaining adhesive.
Now that we have our tools ready, let’s get down to business with these steps:
- Use heat: Start by applying heat to small sections of the adhesive residue. Use a heat gun or hairdryer and gently scrape off the softened residue with a putty knife or scraper.
- Adhesive remover: If there’s still some stubborn residue left, it’s time to bring in the big guns. Grab a commercial adhesive remover specifically designed for vinyl flooring. Follow the instructions on the product label and work in a well-ventilated area.
- Solvent power: For those tougher residues that just won’t budge, it’s time to bring out the solvents. Apply denatured alcohol or mineral spirits onto a clean cloth and gently rub it over the adhesive until it starts to dissolve. Remember safety first – wear gloves and protective eyewear, and make sure the area is well-ventilated.
- Scrub-a-dub-dub: Once you’ve removed most of the adhesive residue, it’s time to give that concrete surface a good scrubbing. Mix a mild detergent with warm water and use a stiff-bristle brush or mop to thoroughly scrub the area. Rinse with clean water to remove any soapy residue.
- Dry it out: After cleaning, allow the concrete surface to dry completely before proceeding with any further flooring installation or refinishing. Moisture trapped in the concrete can cause issues such as mold growth or damage to new flooring materials. Patience is key here.
- Dispose responsibly: Lastly, it’s important to dispose of any leftover adhesive, solvent, or cleaning materials properly. Check with your local waste management facility for guidance on how to dispose of these materials safely and responsibly.
Troubleshooting Stubborn Adhesive Spots
Removing glued vinyl flooring from concrete can be a challenging task, especially when stubborn adhesive spots refuse to let go. But fear not. In this comprehensive guide, we will equip you with the knowledge and tools needed to tackle those sticky remnants head-on. We’ll explore various troubleshooting methods, from commercial adhesive removers to heat application and mechanical techniques. So, let’s dive in and restore your concrete floor to its former glory.
Assess the Severity of the Issue:
Before diving into the troubleshooting process, it’s crucial to evaluate the extent of the stubborn adhesive spots. Are there only a few small areas or numerous and large spots? This assessment will help determine the best course of action.
Method 1: Commercial Adhesive Remover:
Commercial adhesive removers are your secret weapon against tough adhesive spots. These specially formulated products dissolve adhesives, making them easier to remove. Follow the manufacturer’s instructions carefully and don’t forget to don protective gloves and goggles for safety.
Method 2: Apply Heat:
Heat can work wonders in softening stubborn adhesive spots. Use a heat gun or a hairdryer to apply focused heat directly to the spot. Be cautious and work in small sections to avoid damaging the underlying concrete. The softened adhesive can then be scraped off with a putty knife.
Method 3: Mechanical Techniques:
If the previous methods fail to eliminate the sticky residue, it’s time to bring out the big guns. Grab a scraper or a floor buffer with a sanding pad attachment. With careful precision, physically remove any remaining adhesive spots. Take extra caution not to damage the concrete surface during this process.
Seek Professional Help if Needed:
Sometimes, despite our best efforts, stubborn adhesive spots persist. In such cases, it’s wise to seek professional help from experienced flooring contractors who specialize in adhesive removal. They possess the expertise and tools necessary to tackle even the most stubborn spots.
Finishing Touches:
Once all the adhesive spots have been successfully removed, it’s essential to give your concrete floor a thorough cleaning. Wipe away any remaining residue with a clean cloth and a mild detergent. This step ensures a clean surface, ready for any future flooring installation or finishing.
CuMx94E2BtQ” >
Also Read: How To Remove Glue From Furniture?
Conclusion
Removing glued vinyl flooring from concrete can be a challenging task, but with the right techniques and tools, it is definitely doable.
One method you can try is using a heat gun to soften the adhesive and then carefully scraping it off with a putty knife. Another option is using a floor scraper or an oscillating tool with a scraping attachment to remove the vinyl and adhesive.
Additionally, wearing protective gear such as gloves and goggles is essential for your safety.