Title: Say Goodbye to Glued Linoleum: A Simple Guide to Removing it from Your Subfloor
Introduction:
Contents
Imagine a world without the eyesore of old linoleum, where every step on your floor feels like a victory. If you’re ready to bid farewell to that stubborn linoleum and unleash your inner flooring artist, you’ve come to the right place. In this blog post, we’ll take you through the exhilarating journey of removing glued linoleum from your subfloor. Get ready for a hassle-free experience as we guide you step-by-step, ensuring minimal damage and maximum satisfaction. It’s time to unveil a fresh canvas for your new flooring masterpiece. Let’s dive in and conquer that sticky situation together.
Preparing the Area for Linoleum Removal
Preparing the Area for Linoleum Removal
Before embarking on the task of removing linoleum from a subfloor, it is crucial to properly prepare the area. Taking the time to prepare will not only make the removal process more efficient but also help minimize any potential damage to the subfloor and surrounding surfaces. In this article, we will outline the necessary steps to prepare the area for linoleum removal, with a specific focus on glue removal.
- Clear the room: Begin by clearing out the room completely. Remove any furniture, appliances, or other items that may obstruct your access to the flooring. This will prevent any potential damage to these items during the removal process and make it easier for you to maneuver.
- Ensure ventilation: It is important to have proper ventilation in the room. Open windows and doors to allow fresh air to circulate and minimize exposure to fumes or odors that may be released during linoleum removal. Consider using a fan or ventilation system if necessary.
- Gather tools and equipment: Before starting the removal process, gather all the necessary tools and equipment. This typically includes a utility knife, scraper or putty knife, heat gun or hairdryer, gloves, safety goggles, and a dust mask. These tools will help you safely and effectively remove the linoleum.
- Protect nearby surfaces: Cover nearby surfaces or areas that are not being worked on to prevent any potential damage caused by scraping or cutting tools. Use drop cloths or plastic sheeting to protect walls, countertops, or cabinets.
- Check for underlayment or adhesive layers: In some cases, linoleum may be installed over an underlayment or adhesive layer. If this is the case, it may be necessary to remove these layers as well. Use a scraper or putty knife to gently lift and remove any underlayment or adhesive residue from the subfloor.
- Clean the area: Before beginning the linoleum removal, it is important to clean the area. Remove any loose debris or dirt from the flooring to ensure a smooth and effective removal process. This can be done using a broom or vacuum cleaner.
Softening the Adhesive
Thankfully, removing it doesn’t have to be a daunting task. One crucial step in the process is softening the adhesive beneath the linoleum, which makes it a breeze to scrape off. In this article, we’ll guide you through the process of softening adhesive, ensuring a successful linoleum removal without any damage to your subfloor. Let’s get started.
Method 1: The Power of Heat:
Using heat is a popular and effective way to soften adhesive. Embrace the transformative power of heat by selecting either a heat gun or a hairdryer. Simply apply heat to the linoleum, and watch as the adhesive starts to melt, making it easier to scrape off. Remember to keep a safe distance between the heat source and the linoleum and avoid overheating one spot for too long. Allow the heat to work its magic and witness the adhesive surrender its grip on your subfloor.
Method 2: Commercial Adhesive Removers:
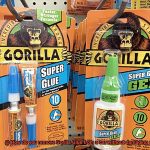
Unleash the might of specialized commercial adhesive removers. These products are specifically designed to dissolve adhesives, turning them into feeble foes. Before engaging in battle, test the remover on a small, inconspicuous area of the linoleum to ensure no damage or discoloration occurs. Arm yourself with patience and follow the manufacturer’s instructions carefully, allowing the product ample time to work its adhesive-dissolving magic.
Method 3: Natural Alternatives:
For those who prefer a more organic approach, harness the power of vinegar mixed with warm water. This natural concoction proves to be a formidable opponent against adhesive bonds. Apply this solution to the linoleum surface and let it sit for some time. The acid in vinegar wages war against the adhesive, breaking down its stronghold and making removal a breeze.
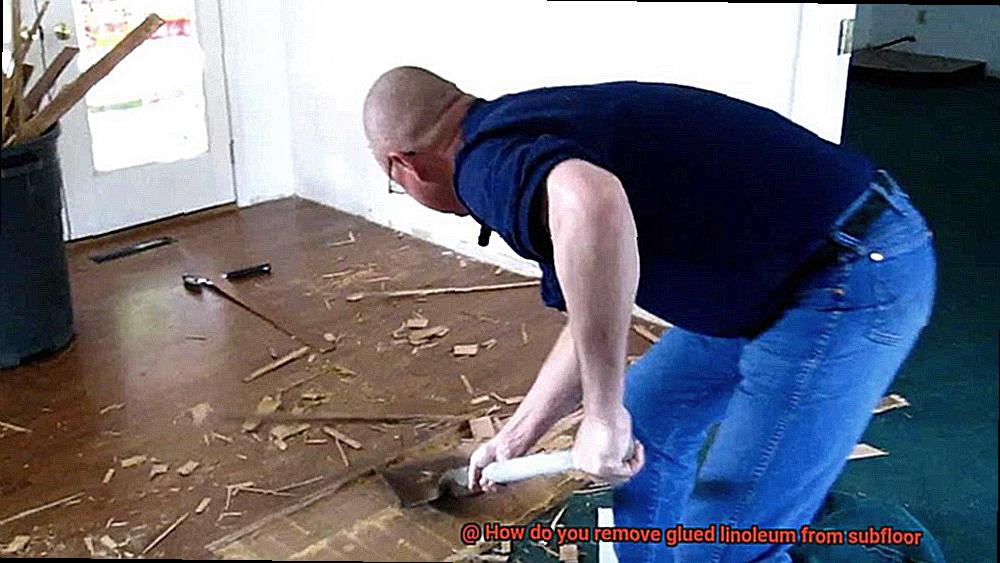
Scraping Off the Linoleum:
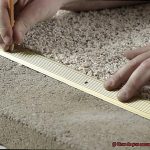
Once you’ve softened the adhesive using heat or an adhesive remover, it’s time to delicately lift and remove the linoleum with a putty knife or scraper. With finesse and precision, glide the blade under the linoleum, coaxing it away from your subfloor. Take your time and work carefully to avoid damaging the subfloor. Stubborn areas may require repeating the process or employing a more potent adhesive remover.
Cleaning Up:
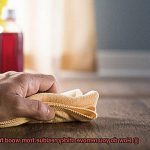
After successfully removing the linoleum and adhesive, your subfloor deserves a thorough cleansing. Equip yourself with a damp cloth or sponge, armed with warm water and mild detergent. Vigorously scrub away any residue or remaining adhesive, leaving your subfloor pristine and ready for its next flooring adventure.
Peeling Off the Linoleum
Say goodbye to the past and embrace a fresh new look. Removing glued linoleum from a subfloor may seem like a daunting task, but fear not. With the right tools, techniques, and a sprinkle of patience, you can easily conquer this DIY project. In this article, we will guide you step by step through the process of safely and effectively peeling off linoleum. Prepare to unveil the hidden beauty beneath that linoleum and transform your space.
Getting Started: Tools and Materials:
To embark on this mission, gather your trusty tools and materials. Your sidekick for this adventure will be a putty knife or floor scraper, ready to lift the linoleum from the subfloor. Don’t forget your protective gear – gloves and eye goggles are essential to keep you safe from any potential injuries. And for those stubborn spots, make sure to have good ventilation and consider using a heat gun or hairdryer to soften the adhesive.
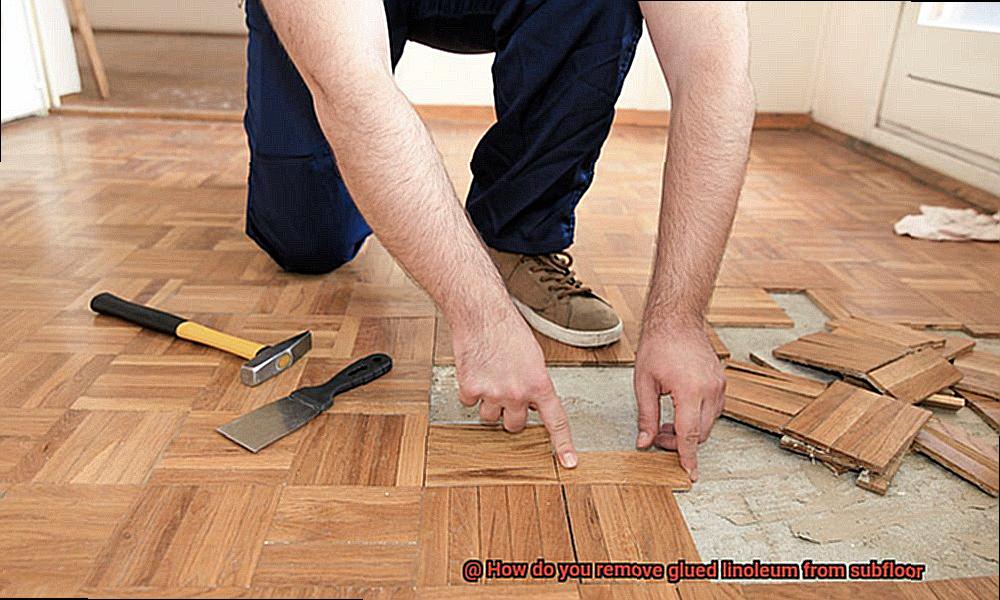
The Peeling Process:
Now it’s time to dive into the peeling process. Look for a loose corner or create one by applying gentle heat to soften the adhesive. Slowly begin peeling from this point, using your putty knife or floor scraper. Take it section by section, savoring the unveiling of your new floor. Remember, patience is key – rushing can cause damage to the subfloor. For those stubborn areas, apply more heat or use gentle scraping motions to free the linoleum from its adhesive grip.
Asbestos Awareness:
Before proceeding further, let’s address an important topic – asbestos awareness. Older linoleum installed before the 1980s may contain asbestos, which poses serious health risks if disturbed. If you suspect asbestos, it’s crucial to consult professionals in asbestos removal to ensure your safety. Always prioritize your well-being during any renovation project.
Tackling Adhesive Residue:
Congratulations on successfully peeling off the linoleum. But wait, there’s still some work to do. You may find stubborn adhesive residue left behind. Fear not, for there are adhesive removers specifically designed for linoleum and other flooring materials. Follow the manufacturer’s instructions and use a scraper or putty knife to gently remove the remaining adhesive. A mild detergent and warm water can then be used to clean the subfloor thoroughly, leaving it ready for its next adventure.
Removing Any Remaining Adhesive
Now it’s time to tackle the remnants of adhesive that may be lingering. As an expert in the field, I’m here to guide you through the process, equipping you with all the tips and tricks needed to achieve a flawlessly adhesive-free subfloor.
Step 1: Heat ‘Em Up.
Prepare your heat gun or hairdryer and direct its power at the adhesive residue. As the heat permeates, it effortlessly softens the adhesive, rendering it easier to scrape off. Remember to exercise caution by avoiding excessive heat or keeping the heat source too close to the subfloor, as these actions can cause damage. Work in small sections, applying heat as required.
Step 2: Say Hello to Solvents.
If heat alone fails to vanquish the stubborn adhesive, it’s time to introduce solvents into the battle. Numerous commercial products have been specifically concocted for this purpose. Follow the manufacturer’s instructions diligently, ensuring an even application of solvent onto the residue. Allow it a few minutes to penetrate and dissolve the adhesive before engaging your scraper or putty knife in a gentle scraping motion. Repeat if necessary.
Step 3: Mechanical Might.
For those thick or stubborn adhesive layers that refuse to yield, mechanical methods soar in as a hero’s aid. Arm yourself with a floor buffer equipped with an abrasive pad or sandpaper attachment. Begin with a low grit sandpaper or abrasive pad and gradually escalate the intensity as needed. This strategy ensures optimal removal of residue without compromising the integrity of your subfloor. Don’t forget your protective eyewear and mask; safety is paramount.
Step 4: Cleanse and Refresh.
Once all traces of adhesive have been eliminated, embark on a thorough cleansing of your subfloor. Utilize a damp cloth or mop to eradicate any lingering debris or residue. Allow the subfloor to air dry completely before proceeding with flooring installation or refinishing.
Cleaning the Subfloor
Cleaning the Subfloor: Preparing for a Smooth Removal Process
Are you ready to embark on the battle against stubborn, glued linoleum? Fear not. We have the ultimate guide to help you conquer this adhesive removal journey. Before you dive in, it’s crucial to prepare your subfloor properly. Cleaning is the key to ensuring a smooth and successful removal process, so grab your cleaning supplies and let’s get started.
- Clear the Battlefield: The first step in preparing your subfloor is to clear away any loose debris or dirt. Armed with a trusty broom or vacuum cleaner, sweep away those pesky particles. This simple but essential step will prevent scratching or damage to your subfloor during the cleaning process.
- Mix Up a Formidable Cleaning Solution: It’s time to mix up a cleaning solution that will make those adhesive remnants tremble in fear. Grab a sturdy bucket and fill it with warm water. Add a mild detergent to the mix, but avoid harsh chemicals or abrasive cleaners as they can weaken the adhesive bond or damage your precious subfloor.
- Scrub Away the Residue: With your cleaning solution ready, dip a mop or sponge into the mixture and wring out any excess liquid. Now it’s time to gently scrub the subfloor surface, focusing on areas with visible stains or adhesive residue. Take care not to oversaturate the subfloor with excessive water, as this can cause damage to certain types of subfloors.
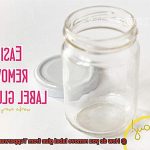
- Specialized Weapons for Stubborn Stains: But what about those persistent stains or adhesive remnants that refuse to budge? Fear not. There are specialized weapons at your disposal – commercial adhesive removers designed specifically for linoleum flooring. Follow the manufacturer’s instructions and apply the remover onto the affected areas. Let it sit for a few minutes, allowing it to soften the adhesive, and then gently scrape it off using a putty knife or scraper.
- Thoroughness is Key: Repeat the cleaning process as many times as necessary until your subfloor is sparkling clean. Remember, any remaining residue can compromise the adhesion of new flooring materials, so thoroughness is key.
- Patience for Perfection: Once you’ve conquered the adhesive remnants, give your subfloor some time to dry completely before moving forward. Moisture left on the surface can wreak havoc on your new flooring, causing problems like mold growth or warping. So be patient and let your subfloor breathe.

Congratulations. You’ve succeeded in transforming your subfloor into a clean and pristine canvas, ready for its next adventure. Whether you’re installing new flooring or refinishing your existing one, you can now proceed with confidence, knowing that you’ve tackled the cleaning process like a true warrior.
Evaluating the Subfloor
Evaluating the Subfloor: A Crucial Step in Removing Glued Linoleum
Before you strap on your work boots and grab your trusty scraper, take a moment to evaluate the condition of your subfloor. This seemingly simple step can make all the difference in the success of your linoleum removal project. Let’s dive deeper into why it’s so crucial.
First and foremost, assessing the damage is key. Get down on your hands and knees and give that subfloor a thorough inspection. Look for any signs of rot, water stains, or unevenness. These issues, if left unaddressed, can wreak havoc on your new flooring installation. Repairing the subfloor may involve replacing sections, patching up holes and cracks, or even leveling out uneven spots.
Now, let’s talk materials. The type of subfloor material will determine the best approach to removing the glued linoleum.
If you’re dealing with a plywood subfloor, make sure those wood planks are securely attached without any loose or damaged areas. If you find any wobbly boards, don’t hesitate to resecure them with screws or nails.
Concrete subfloors require a different kind of attention. Check for cracks or areas that are crumbling. Don’t despair if you find any imperfections; a self-leveling compound can work wonders in smoothing out those uneven spots.
Lastly, be on high alert for the dreaded asbestos lurking beneath older linoleum flooring. Asbestos was commonly used in linoleum production until the 1980s. If you suspect that your linoleum contains asbestos, it’s essential to seek professional assistance for removal. Disturbing asbestos can pose serious health risks, so don’t take any chances.
Tips and Tricks for Easier Removal
Removing glued linoleum from a subfloor can be a challenging task, but with the right tips and tricks, it can become much easier and more efficient. In this article, we will explore some simple yet effective methods to help you tackle this project like a pro.
Prepare the area and protect yourself:
Before you start removing the glued linoleum, clear out any furniture or items that may obstruct your work area. This will give you more space to maneuver and make the removal process easier. Additionally, wear safety goggles and gloves to protect yourself from potential injuries caused by sharp tools or chemicals.
Heat it up for easy removal:
One effective way to make the removal process easier is by heating the linoleum. Use a heat gun or a hairdryer on its highest setting to warm up the linoleum. The heat will soften the glue, making it easier to peel off. Keep the heat gun or hairdryer moving constantly to avoid damaging the linoleum or subfloor.
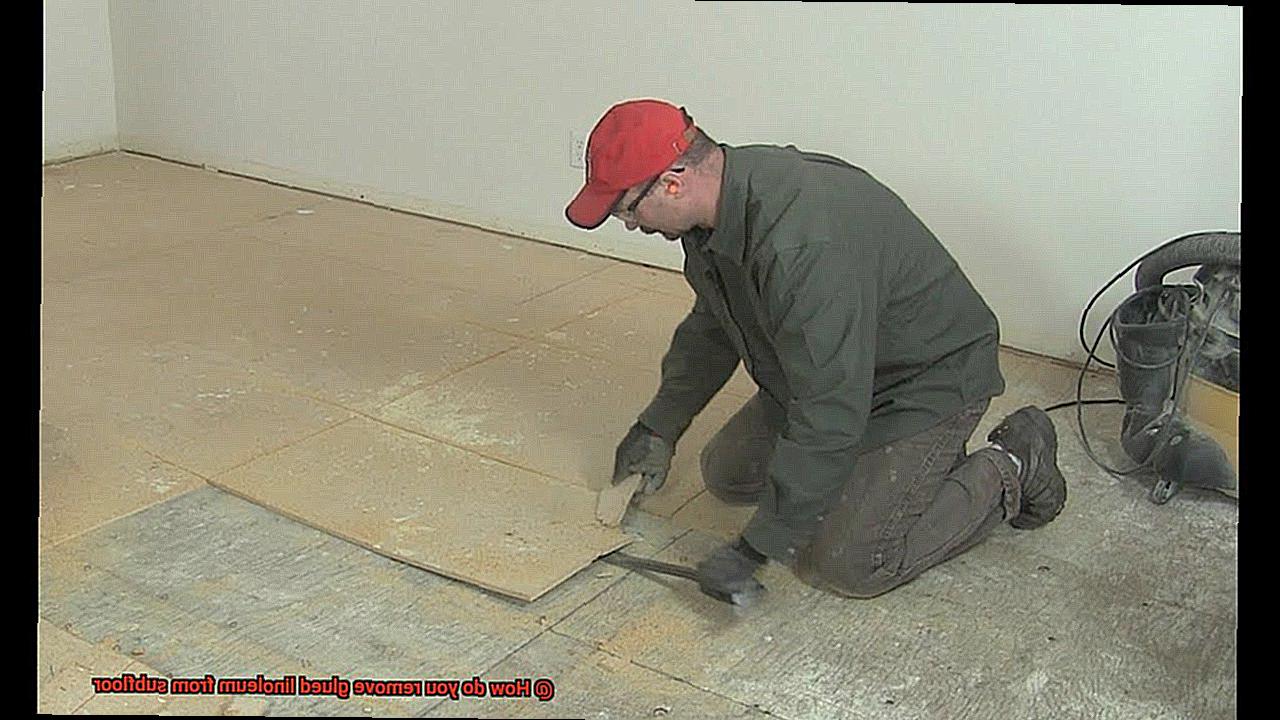
Scrape it off gently:
After heating the linoleum, use a floor scraper or putty knife to gently lift and separate it from the subfloor. Start at one corner and work your way across, applying steady pressure to loosen the adhesive bond. Be cautious not to dig too deep into the subfloor, as it may cause damage. Gradually remove the linoleum in small sections.
Tackle stubborn residue with adhesive remover:
If you encounter stubborn areas where the linoleum is not coming off easily, apply a solvent or adhesive remover directly onto the glue. Let it sit for a few minutes to soften the adhesive, then use a scraper or putty knife to gently lift off the linoleum. Follow the manufacturer’s instructions and wear proper protective gear when using solvents or adhesive removers.
Clean and prepare the subfloor:
After removing the linoleum and any remaining glue, thoroughly clean the subfloor before installing new flooring. Use a broom or vacuum cleaner to remove loose debris, and mop the subfloor with a mild detergent solution to remove any remaining residue. Allow the subfloor to dry completely before proceeding with any further steps.
Safety Considerations
Before you embark on the journey of removing glued linoleum from a subfloor, it’s essential to prioritize safety. With sharp tools and potentially harmful chemicals involved, taking the necessary precautions is paramount. In this guide, we’ll walk you through the safety considerations for a smooth and accident-free linoleum removal process.
Protective Gear:
Gear up for safety. Don your safety goggles to shield your eyes from flying debris. Slip on a pair of gloves to protect your hands from sharp objects and potential chemical exposure. And don’t forget the dust mask to keep pesky particles and fumes at bay.
Preparation:
Clear your workspace of furniture or obstacles that could pose a tripping hazard. Good ventilation is key, so open windows or set up fans to keep the air flowing smoothly and minimize dust accumulation.
Electrical Considerations:
Prioritize safety when dealing with electrical outlets and wiring. Turn off the power supply in the working area and be cautious of exposed wires while removing the linoleum. A little extra vigilance goes a long way.
First Aid Kit:
Accidents happen, even with precautions in place. Keep a well-stocked first aid kit nearby, equipped with adhesive bandages, antiseptic wipes, and other basic medical supplies.
Asbestos Awareness:
Some linoleum glues may contain toxic substances like asbestos. If you suspect its presence, consult professionals trained in asbestos removal. They have the expertise and equipment to handle hazardous materials safely.
Professional Assistance:
When in doubt, seek professional help. If unsure about tackling the removal process yourself or concerned about safety, rely on experts. They possess the experience and knowledge to handle the task efficiently and safely, minimizing risks.
hw50PbQTtV8″ >
Conclusion
Removing glued linoleum from a subfloor can be a daunting task, but with the right techniques and tools, it can be done effectively. Here are some steps to help you in this process:
- Start by preparing the area: Clear the room of any furniture or obstacles that may hinder your progress. Open windows or use fans for proper ventilation.
- Assess the condition of the linoleum: Determine if the linoleum is still intact or if it has started to deteriorate. This will affect the removal method you choose.
- Heat it up: Use a heat gun or hairdryer to warm up the linoleum and soften the adhesive underneath. Be careful not to overheat as it can damage the subfloor.
- Peel off the linoleum: Once heated, start peeling off the linoleum using a putty knife or floor scraper. Work in small sections and apply steady pressure to lift it away from the subfloor.
- Remove adhesive residue: After removing the linoleum, you may find sticky residue on the subfloor. Use an adhesive remover or a mixture of warm water and dish soap to loosen and dissolve the adhesive.
- Scrape off remaining adhesive: With a scraper or putty knife, gently scrape off any remaining adhesive from the subfloor. Take your time and be patient as this step requires precision.
- Clean and prepare for new flooring: Once all adhesive is removed, clean the subfloor thoroughly with a damp cloth or mop to remove any leftover residue. Allow it to dry completely before installing new flooring.
Remember, removing glued linoleum requires time, effort, and patience. It’s important to take necessary safety precautions such as wearing gloves and eye protection during this process.