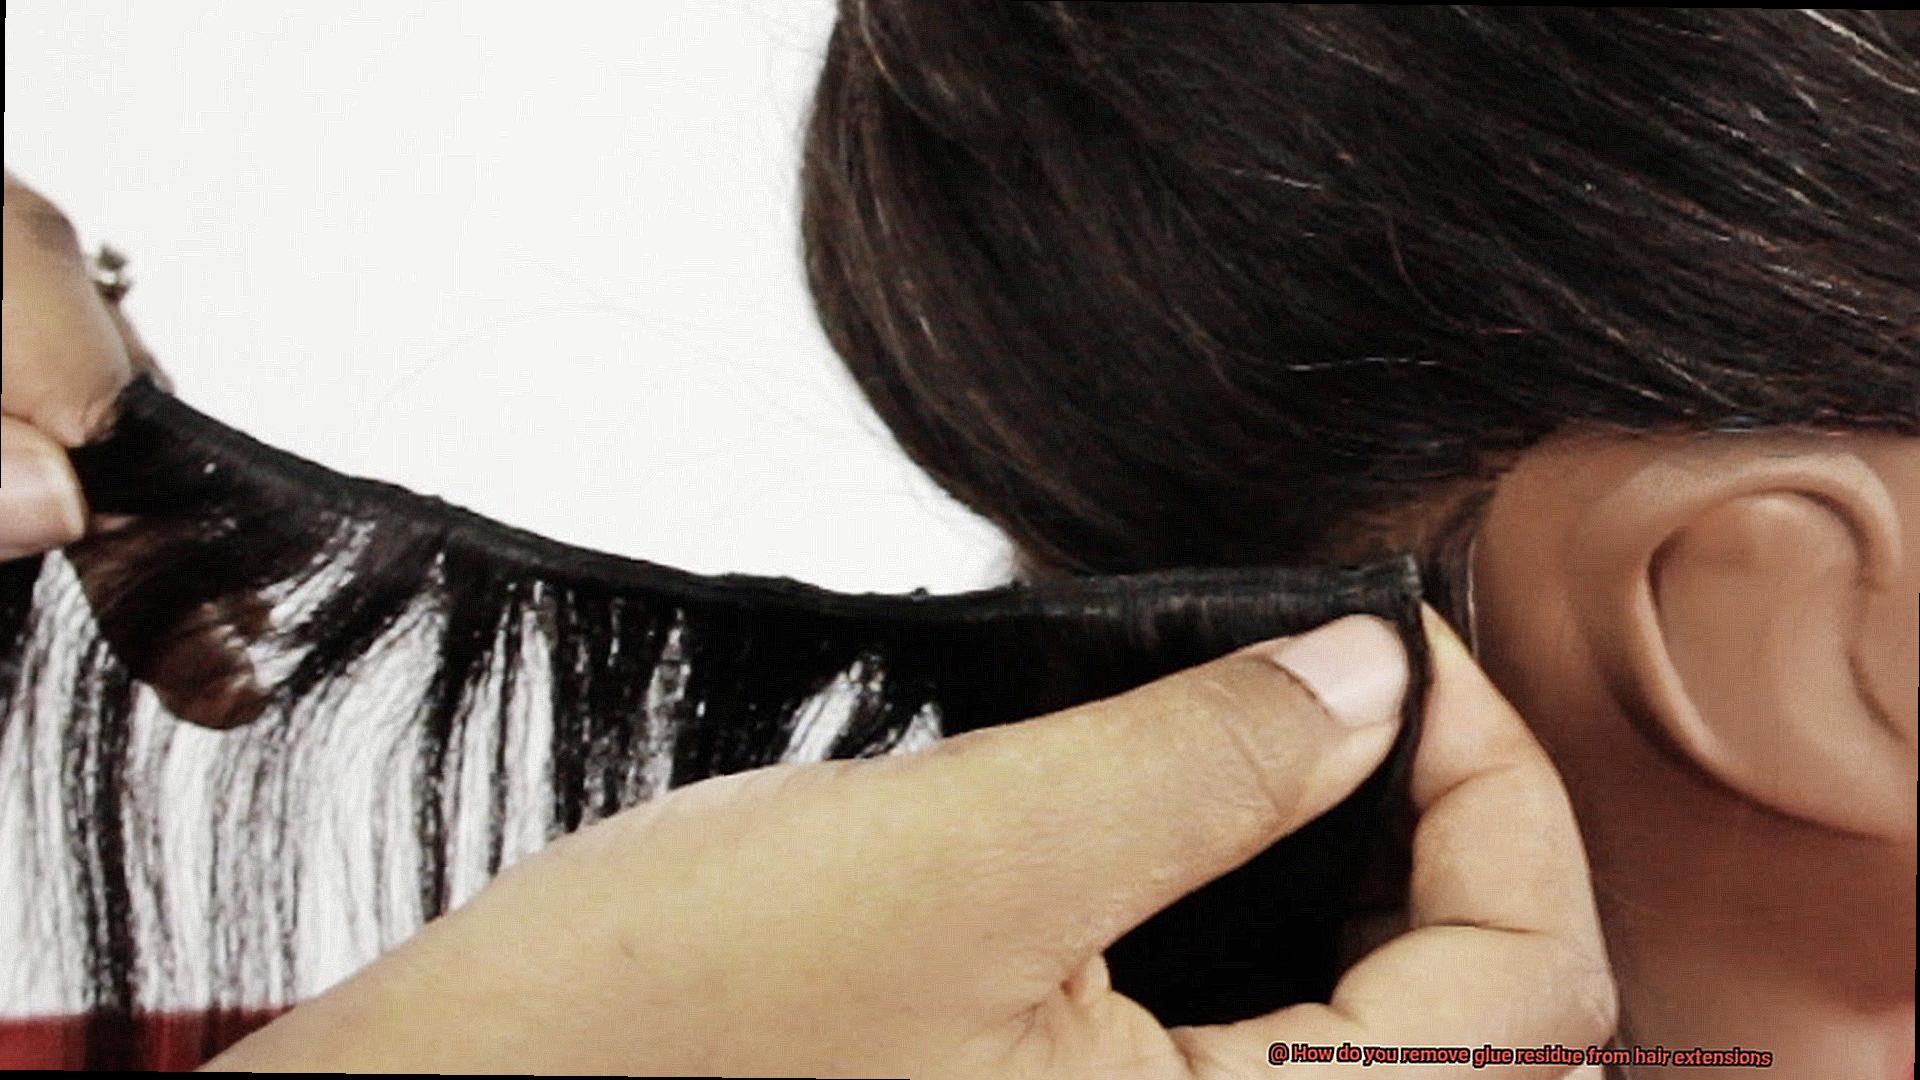
Well, fret no more because I’ve got the ultimate solution for you. Removing glue residue from hair extensions may seem like a daunting task, but trust me, it’s totally doable.
Picture this: You’re all dolled up and ready to rock the night away when suddenly you spot that unsightly residue left behind by the adhesive. Panic sets in as you desperately search for a remedy, but fear not, my friend, help is right here.
In this blog post, we’ll dive deep into the world of hair extension glue residue removal and explore some kickass techniques to restore your strands to their former glory. From natural remedies to badass professional products, we’ve got it all covered. You’ll discover the power of gentle tools and learn why patience is key when tackling this pesky problem.
So whether you’re a die-hard hair extension lover or just seeking some expert guidance, keep reading. By the time you finish this post, you’ll be armed with all the knowledge necessary to bid farewell to that glue residue nightmare once and for all. Your hair extensions will thank you, and you’ll be ready to slay any occasion with confidence. It’s time to say goodbye to sticky situations and hello to flawless, residue-free hair extensions.
What is Glue Residue and Why Is It Important to Remove?
Contents
- 1 What is Glue Residue and Why Is It Important to Remove?
- 2 Adhesive Remover: The Most Common Method for Removing Glue Residue
- 3 How to Use an Adhesive Remover
- 4 Heat Method: An Alternative for Removing Glue Residue
- 5 Natural Oils: Another Effective Option for Dissolving Glue Residue
- 6 Patience Is Key When Removing Glue Residue from Hair Extensions
- 7 Tips for Avoiding Damage to Hair and Extensions
- 8 Conclusion
Hair extensions can elevate your style and give you the freedom to experiment with different looks. However, once the extensions are removed, you may be left with stubborn glue residue that can be quite a challenge to eliminate. In this article, we will delve into the world of glue residue – what it is and why it is crucial to remove it. By understanding the significance of removing glue residue, you can ensure that your hair extensions stay clean, healthy, and ready for their next application.
What is Glue Residue?
Glue residue refers to the lingering adhesive material that remains on the hair extensions after they have been taken out. This sticky residue can make the extensions appear messy and far from appealing. It is absolutely vital to remove this residue to maintain the appearance and hygiene of both your natural hair and the extensions themselves.
Why is Removing Glue Residue Important?
Appearance:
Glue residue can render your hair extensions untidy and unkempt. As time goes by, the glue may break down or discolor, resulting in an unattractive sight. By removing the residue, you ensure that your extensions look clean, well-maintained, and ready to shine.
Scalp Health:
The adhesive used in hair extensions often contains chemicals and synthetic materials that can potentially irritate or harm your scalp and hair follicles. If left unattended, these residues can clog and congest your scalp’s pores, leading to discomfort such as itching, redness, or even infections. Properly removing glue residue helps safeguard the health of your natural hair and scalp.
Maintenance and Reapplication:
Whether you plan to reuse your extensions or apply fresh ones in the future, removing glue residue is an absolute must. This residue can act as a barrier between your natural hair and the adhesive, hindering the bonding process. By diligently eliminating the residue, you create a smooth surface that allows for proper attachment of the extensions, ensuring a seamless and secure hold.
Hair Hygiene:
Accumulated glue residue has a knack for attracting dirt, dust, and styling products, making it exceedingly difficult to maintain clean and healthy hair. Moreover, it can contribute to tangling and matting of the extensions, putting them at a higher risk of breakage. By bidding farewell to the glue residue, you grant your hair extensions a fresh start and promote better overall hair hygiene.
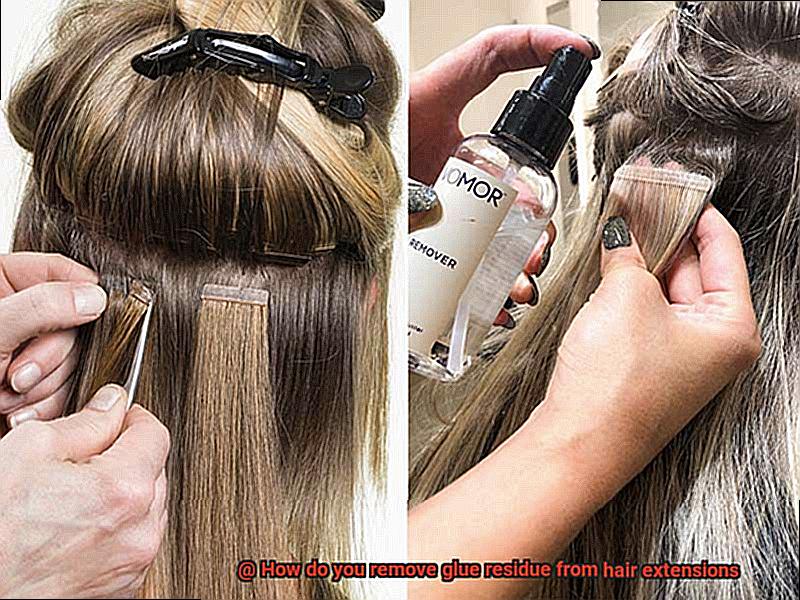
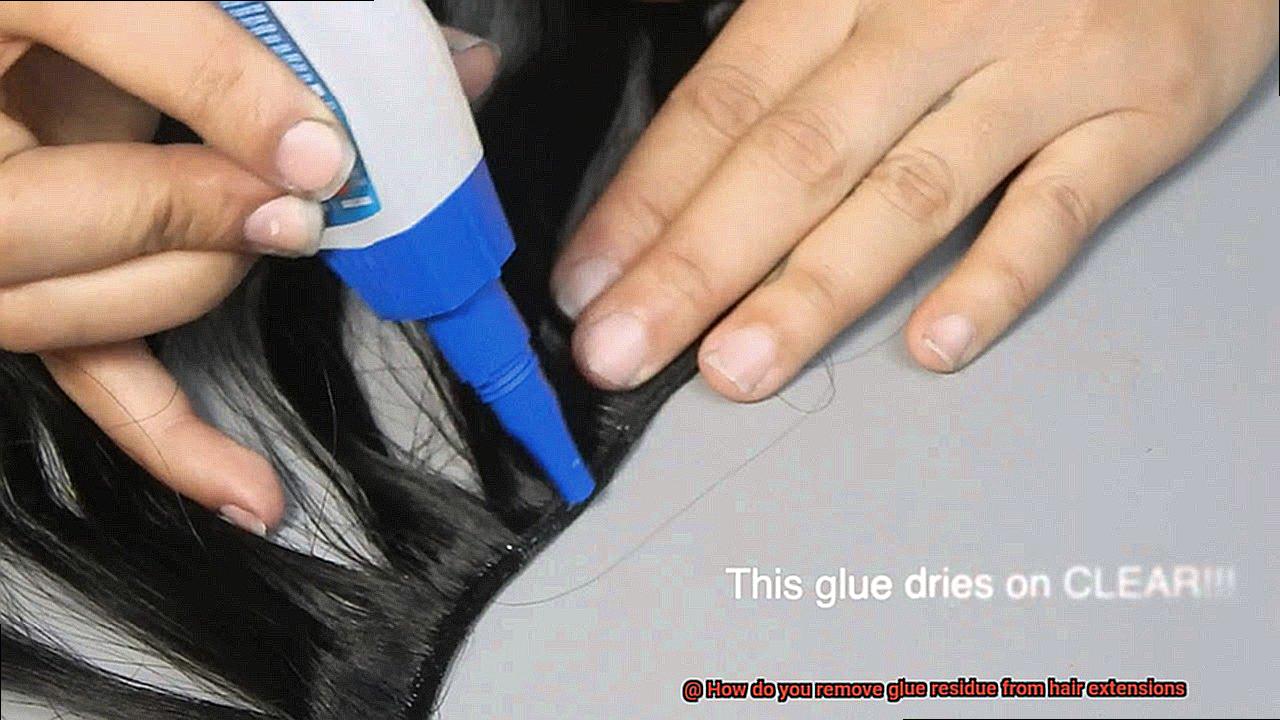
Adhesive Remover: The Most Common Method for Removing Glue Residue
Say goodbye to the dreaded glue residue that clings stubbornly to your hair extensions. Adhesive removers are here to save the day. In this captivating exploration, we will unravel the secrets of using adhesive remover to bid farewell to that sticky nuisance. Get ready for a journey towards flawless hair extensions.
Choosing the Perfect Adhesive Remover:
Not all adhesive removers are created equal. Your hair and extensions deserve the best, so take the time to find a product that ensures their safety. Dive into the world of adhesive removers by reading product labels and seeking advice from professionals. With the right adhesive remover in hand, you’ll be armed for successful glue residue removal.
Patch Test: A Prelude to Perfection:
Before embarking on your adhesive remover adventure, perform a patch test. This small act of caution involves applying a tiny amount of the product on a discreet section of hair or extension. By doing so, you can ensure a reaction-free experience and proceed with confidence.
The Technique: Unleashing the Power of Adhesive Remover:
- Apply: Begin by delicately applying a modest amount of adhesive remover directly onto the affected area. This is not a drowning session – we aim to dissolve the glue, not drown your precious locks.
- Massage: With your fingertips as gentle guides, massage the adhesive remover into the glue. This tender touch aids in even distribution, allowing the product to penetrate and break down the formidable adhesive barrier.
- Wait: Patience becomes your ally here. Grant the adhesive remover a few minutes to work its enchantment on that feisty glue residue.
- Comb or Pull: Equipped with a fine-tooth comb or your nimble fingers, gracefully comb or delicately pull out the dissolved glue from your hair or extensions. Take your time; haste may lead to hair breakage. Proceed with care and grace.
- Repeat: Should any stubborn glue residue persist, fret not. Simply repeat the application and removal process until every last trace of glue succumbs to your determined efforts.
Rinse and Restore: The Finishing Touches:
Rejoice in your triumphant removal of the glue residue. To ensure a pristine finish, thoroughly rinse your hair or extensions with water, banishing any remnants of adhesive remover.
How to Use an Adhesive Remover
In just a few simple steps, you can effectively remove the glue and have clean, ready-to-use extensions. So let’s dive in and discover how to use an adhesive remover on your hair extensions.
Gather Your Supplies
Before you begin, make sure you have all the necessary materials. You’ll need an adhesive remover specifically designed for hair extensions, cotton pads or balls, a fine-toothed comb, and a mild shampoo. Having everything ready will make the process smooth sailing.
Apply the Adhesive Remover
Take a small amount of the adhesive remover and apply it onto a cotton pad or ball. Gently dab the remover onto the glue residue, taking care to avoid getting it on your natural hair. Be meticulous in your application, ensuring that every bit of glue is covered.
Let It Work Its Magic
Allow the adhesive remover to sit on the glue residue for a few minutes. This gives it time to penetrate and dissolve the stubborn glue. Remember, patience is key here, as rushing the process may result in ineffective results.
Comb Through
Armed with a fine-toothed comb, gently comb through your hair extensions, starting from the ends and working your way up towards the roots. This process helps loosen and remove any remaining glue residue. Treat your extensions with care, as rough handling can cause damage.
Rinse and Cleanse
Once you’ve combed through all your hair extensions, rinse them thoroughly with lukewarm water to remove any residual adhesive remover. Follow up with a mild shampoo to cleanse the extensions and eliminate any lingering residue from the adhesive remover. Rinse again to ensure all products are completely removed.
Remember, patience is key when using an adhesive remover on your hair extensions. Take your time and be gentle throughout the process to avoid damaging your natural hair or extensions. If you have any doubts or concerns, it’s always a good idea to consult with a professional hairstylist who can guide you through the process safely.
Heat Method: An Alternative for Removing Glue Residue
The stubborn glue residue clinging to your strands can be a real nightmare. But fear not. There’s a magical technique that can save you from this sticky mess – the heat method. In this article, we will delve into the fascinating world of using heat as an alternative and effective way to bid farewell to glue residue on your hair extensions. So grab your hair dryer and prepare to embark on a journey of hair-care wizardry.
Harnessing the Power of Heat:
The heat method works wonders by softening the glue, making it a breeze to remove. By applying gentle warmth to the affected area, the once stubborn glue becomes pliable and less adhesive.
Essential Tools:
To bring this enchanting method to life, you’ll need a trusty hair dryer. Set it to a low or medium heat setting and hold it approximately 6 inches away from the glue residue. This ensures that the heat is evenly distributed, safeguarding your precious locks and scalp.
Dance in Circular Motion:
Remember, patience is key when using the heat method. Gently move the hair dryer in a mesmerizing circular motion, distributing warmth evenly across the glue residue. Avoid focusing on one spot for too long, as this could result in overheating and potential damage.
Embrace Gentle Peeling or Scraping:
As the heat works its magic, you’ll witness the glue softening before your eyes. Now it’s time to delicately peel or scrape off the residue using either your nimble fingers or a fine-tooth comb. Exercise caution, ensuring not to exert excessive pressure or forcefully pull on your extensions, for they deserve gentle treatment to prevent any damage or breakage.
Persistence is Rewarded:
Removing all traces of glue residue requires a sprinkle of patience and a dash of persistence. Should stubborn areas persist, reapply heat and continue gently scraping away the softened glue until your extensions are liberated from any remnants.
The Final Flourish:
Once you’ve triumphantly bid adieu to the glue residue, it’s time to give your hair extensions a well-deserved cleanse. Pamper them with a mild shampoo and conditioner, ensuring they are thoroughly cleansed and ready for reapplication, should you desire it.
Natural Oils: Another Effective Option for Dissolving Glue Residue
Escape the clutches of glue residue nightmares and embark on a journey of liberation for your hair extensions. Prepare to be captivated by the enchanting prowess of natural oils, including the delightful trio of coconut oil, olive oil, and almond oil. These magical elixirs have been proven to possess the extraordinary ability to dissolve even the most stubborn glue residue, allowing your extensions to breathe freely once again. Brace yourselves, dear readers, as we delve into the realm of adhesive dissolving wizardry.
The Mystical Properties of Natural Oils:
Prepare to be mesmerized by the miraculous powers of natural oils. Not only are they a divine treat for your luscious locks, but they also possess the inherent ability to break down the adhesive properties of glue. This mystical phenomenon allows the glue residue to be effortlessly dissolved and banished from your extensions. Among these celestial oils, coconut oil reigns supreme, boasting an exceptional concentration of lauric acid that works wonders in dissolving adhesive remnants.
The Sacred Ritual of Oil Application:
Enter into a sacred realm as you begin the alchemical process of applying natural oils to your hair extensions. Embrace the transformative power by generously anointing the affected area with your chosen elixir. With gentle yet firm fingertips, massage the oil into the strands, allowing it to penetrate deeply and soften the stubborn glue residue. As you indulge in this magical massage, feel a sense of tranquility wash over you, soothing both hair and spirit.
The Artistry of Gentle Comb-through:
Behold, the time has come to wield your comb like a skilled artisan. Armed with a fine-toothed comb or your nimble fingers, embark on a journey through your hair extensions, starting from the roots and delicately descending towards the tips. With each stroke, witness the loosening of glue residue as it surrenders to the gentle persuasion of your touch. Exercise patience, for this art requires a delicate hand to ensure the preservation of your cherished extensions.
Patience Is Key When Removing Glue Residue from Hair Extensions
Today, we delve into the delicate art of removing glue residue from your cherished extensions. Prepare yourself for a tale of patience, finesse, and the secrets to unlocking the enchantment of adhesive dissolving wizardry.
Embracing Patience:
Imagine this: you discover stubborn glue residue clinging to your glorious hair extensions. Your initial instinct may be to yank, tug, or scrub fiercely to banish it immediately. But hold your breath. Patience is the sacred virtue that must guide you on this path. Rushing or exerting excessive force risks irreversible damage to both your extensions and natural hair.
Gentle Techniques for Success:
Embark on your magnificent quest by generously applying oil or adhesive remover to the afflicted area. This magical elixir will work its enchantment by loosening the grip of the persistent glue. However, dear adventurers, remember not to rush this process. Allow the oil or adhesive remover a few precious minutes to penetrate and disintegrate the adhesive bonds.
The Power of Combing:
Once the oil or adhesive remover has woven its spell, gently comb through your hair extensions with a fine-toothed comb. Begin at the ends and gradually ascend, untangling with utmost care to avoid any knots or snarls. Believe me when I say that this gentle approach will shield you from heartache and shield your precious tresses from unnecessary breakage.
Repeating the Ritual:
In some cases, you may find that remnants of the glue residue persist after your first attempt. Fear not. Resist the temptation to forcefully pull or yank at it. Instead, anoint more oil or adhesive remover onto the area and repeat the previous steps until every last trace of residue is vanquished. Remember, dear friends, patience is your ally in this battle.
Thorough Cleansing:
Huzzah. You have emerged victorious, liberating your hair extensions from the clutches of glue residue. But our tale does not end here. To ensure a blissful conclusion, thoroughly cleanse and condition your extensions to banish any lingering traces of oil or adhesive remover. This final enchantment will leave your extensions feeling refreshed and ready for their next grand adventure.
Tips for Avoiding Damage to Hair and Extensions
Achieving and maintaining beautiful, damage-free hair and extensions requires proper care and maintenance. In this article, we will delve into the importance of avoiding damage to both natural hair and extensions. By following these expert tips, you can ensure that your hair remains strong, voluminous, and beautiful.
Gentle Handling:
Handle your hair with care to prevent damage. When brushing or styling your hair, especially around the area where the extensions are attached, opt for a wide-toothed comb or a brush specifically designed for extensions. By being gentle, you can avoid tugging or pulling on the bonds, preserving their integrity.
Heat Protection:
Excessive heat can be detrimental to both natural hair and extensions. Shield your strands by using a heat protectant spray or serum before using any hot tools. Additionally, opt for lower heat settings whenever possible to minimize the risk of weakening the bonds between your hair and extensions.
Loosen Up Your Style:
Tight hairstyles may look sleek, but they can wreak havoc on your hair and extensions. Avoid hairstyles that put excessive tension on the roots, such as tight ponytails or braids. Opt for looser styles or use hair-friendly accessories like scrunchies to minimize stress on your locks.
Trust the Pros:
When it comes to getting hair extensions, entrust the task to a professional stylist who specializes in this field. They possess the skill and expertise needed to apply extensions correctly and securely, significantly reducing the risk of damage. Avoid the temptation of DIY and let the professionals work their magic.
Mindful Chemical Treatments:
Harsh chemical treatments like bleaching or perming can compromise the health of both natural hair and extensions. Minimize their use or avoid them altogether if possible. If you must undergo chemical treatments, consult your stylist for proper guidance and care instructions to mitigate damage.
Regular Maintenance:
Make it a priority to schedule regular maintenance appointments with your stylist who specializes in hair extensions. These appointments serve as check-ups for your extensions, ensuring that they are in optimal condition and addressing any potential issues early on. By being proactive, you can maintain the longevity and health of both your hair and extensions.
3oNabSqhRbw” >
Also Read: How To Remove Glue In Hair Extensions?
Conclusion
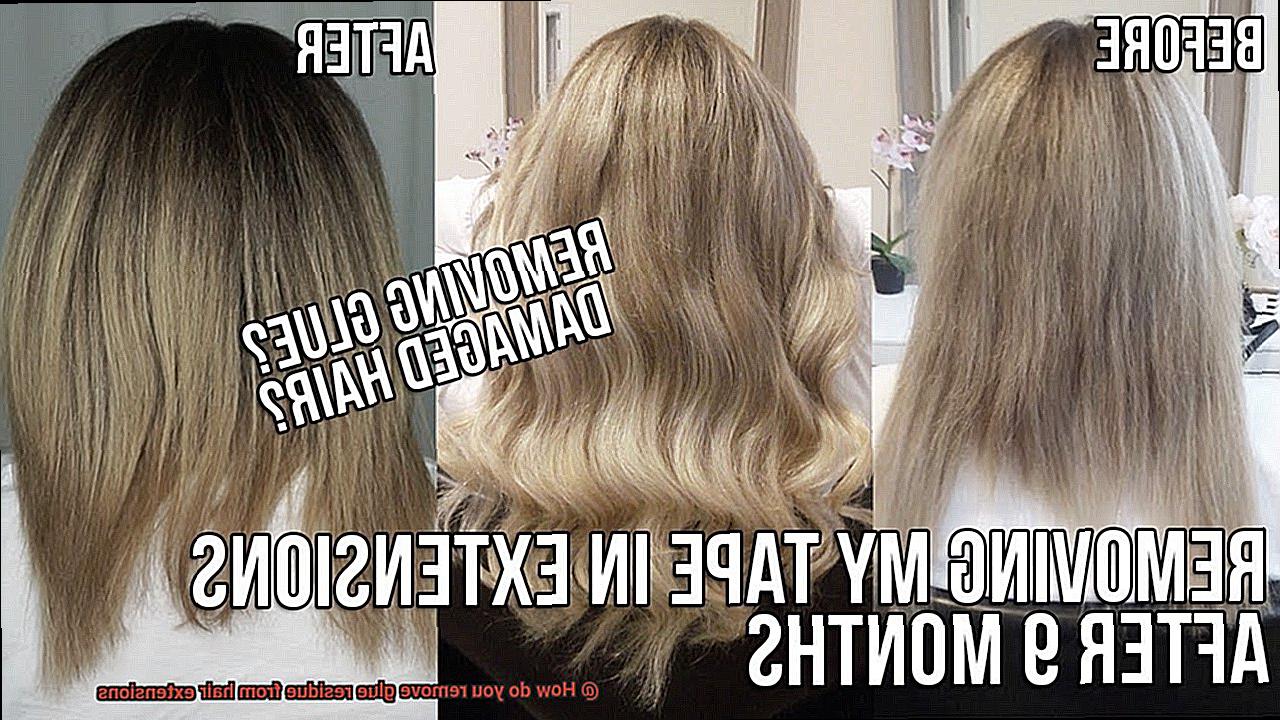
Removing glue residue from hair extensions can be a tricky task, but with the right techniques and products, it is possible to achieve clean and residue-free extensions.
One method is to use a gentle adhesive remover specifically designed for hair extensions. Apply the remover to a cotton pad and gently rub it onto the glue residue, allowing it to penetrate and loosen the adhesive.
Another option is to use natural oils, such as coconut or olive oil, which can help break down the glue residue without causing damage to the hair. Simply apply a small amount of oil to the affected area and gently massage it in, allowing it to sit for a few minutes before combing through with a fine-toothed comb.
It’s important to be patient during this process, as rushing can lead to hair breakage or tangling. Once the glue residue has been loosened, carefully comb through the hair extensions using a wide-toothed comb to remove any remaining residue.
Lastly, wash the extensions with a clarifying shampoo and conditioner to ensure they are thoroughly clean and ready for reapplication.