We’ve all been there, faced with the daunting task of prying off a stubbornly glued-on mirror. Whether you’re giving your space a makeover or simply seeking to free your reflection from its adhesive prison, fret not. As seasoned experts in the art of mirror liberation, we’re here to spill the secrets of removing that bonded beauty without breaking a sweat—or the mirror itself.
In this guide, we’ll take you through each step of this delicate dance, ensuring your mirror emerges unscathed. From arming yourself with the right tools to executing foolproof techniques, consider us your trusty comrades in this quest for freedom. So grab your tool belt and let’s embark on an adventure where mirrors are liberated and no cracks shall mar their shine.
Preparing for Mirror Removal
Contents
Mirror removal can be a challenging task, particularly when dealing with mirrors that are glued onto walls or surfaces. Whether you’re renovating your bathroom or replacing a damaged mirror, proper preparation is crucial to ensure a safe and successful removal process. In this comprehensive guide, we will walk you through the necessary steps and precautions to take when removing a mirror using glue.
Before you dive into the mirror removal process, it’s important to gather all the tools and materials you’ll need. Make sure you have safety goggles and gloves on hand to protect yourself from glass shards and cuts. Additionally, you’ll require a putty knife or scraper, a heat gun or hairdryer, adhesive remover or solvent, and a drop cloth or tarp to safeguard the surrounding area.
To prioritize personal safety, keep your goggles and gloves on throughout the entire process. Lay down a drop cloth or tarp to catch any falling glass pieces or adhesive residue. Take a moment to inspect the surrounding wall or surface for any cracks or damage that may need repair prior to removal.
Clear the area of any artwork, furniture, or objects that could potentially be damaged during the removal process. This will not only provide you with more space to work but also reduce the risk of accidents.
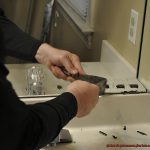
Identifying the type of adhesive used to glue the mirror onto the wall is essential. Different adhesives may require different removal techniques and products. For instance, if it’s a strong adhesive like construction adhesive, use a heat gun or hairdryer to soften the glue. Gently heat the edges of the mirror to loosen the adhesive without risking overheating and causing it to crack.
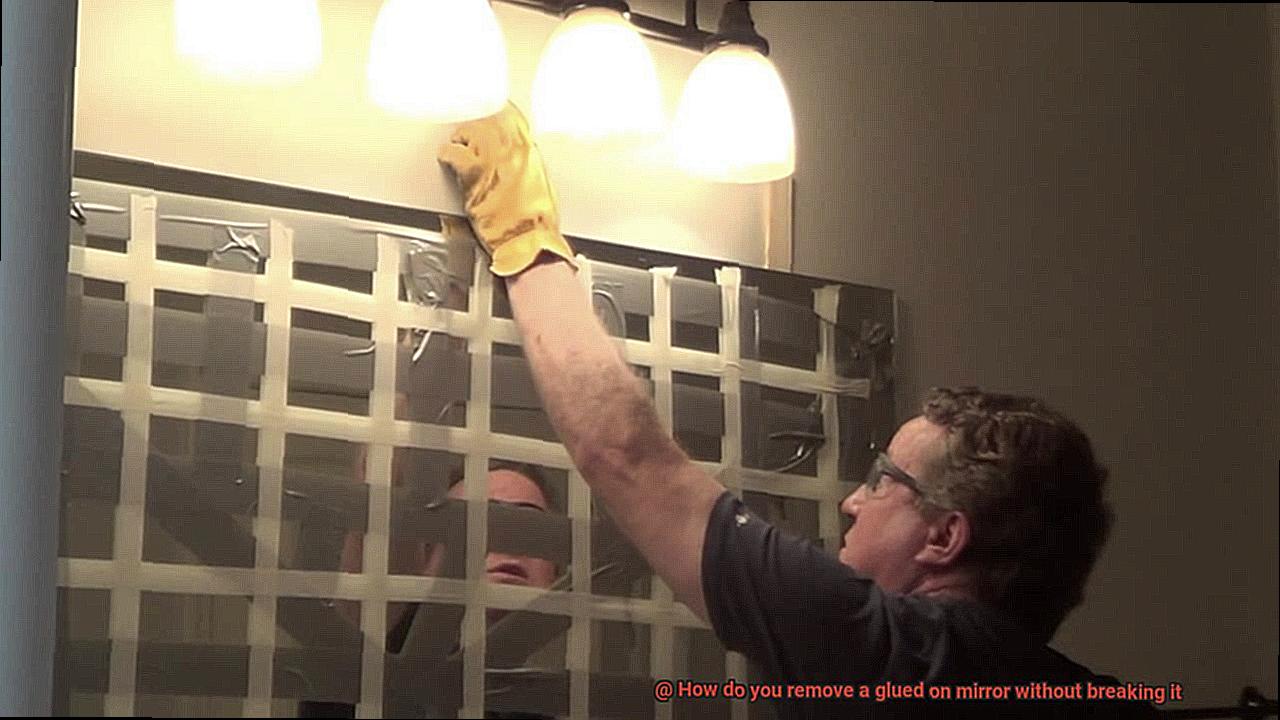
For mirrors attached with adhesive tape, utilize a putty knife or scraper to carefully pry the mirror away from the wall. Begin at one corner and gradually work your way around, applying gentle pressure to separate the mirror from the adhesive tape.
In cases where the mirror has been glued on with mastic or adhesive caulk, an adhesive remover or solvent may be necessary. Apply the product according to the instructions and allow it to penetrate the adhesive before attempting to remove the mirror.
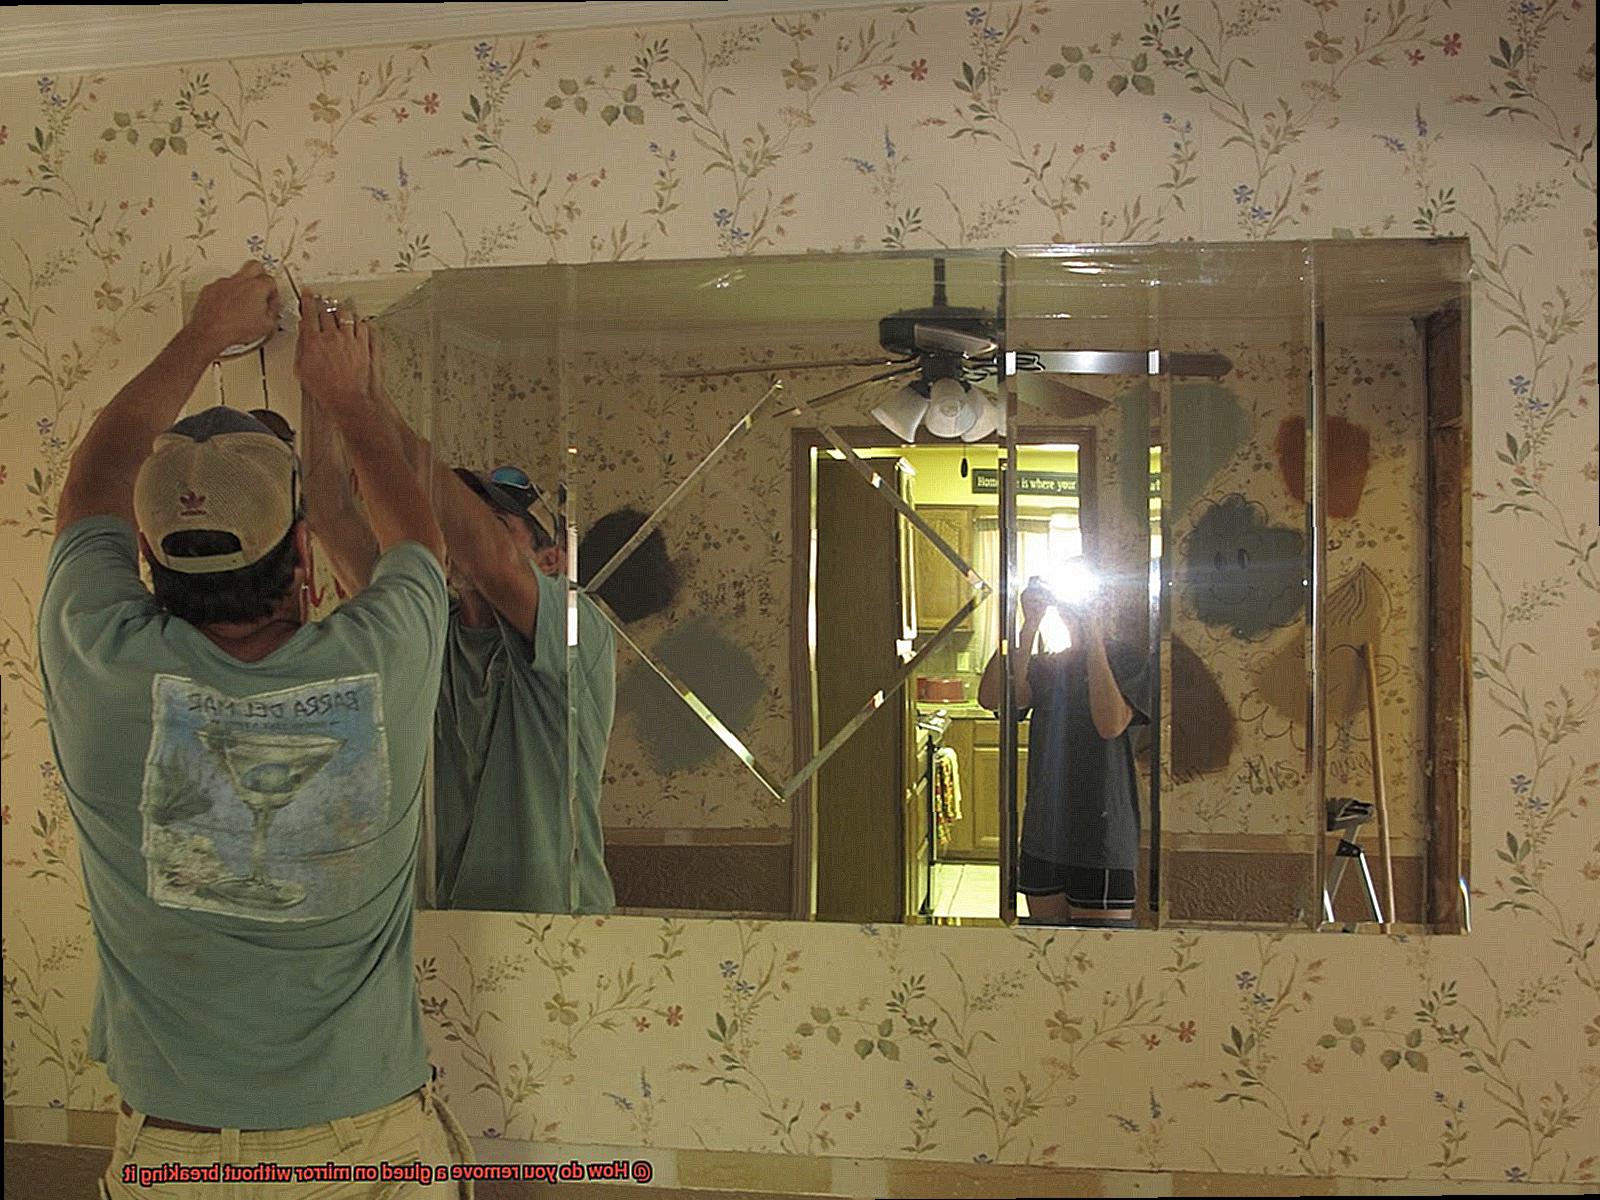
With all the necessary preparations made, it’s time to proceed with the actual removal process. Take your time and work slowly and carefully to ensure the mirror doesn’t break. If needed, enlist the help of someone to provide additional support and safety during the removal process.
Before starting, be sure to clean the surrounding area and remove any debris or loose pieces. It’s crucial to exercise caution when using heat or tools to avoid injury or damage. Once you’ve successfully removed the mirror, clean any remaining adhesive residue from both the mirror and the surface using an appropriate cleaner or solvent.
Finally, inspect the mirror for any damages or cracks before deciding whether it can be reused or needs replacement.
Enlisting Assistance
This task requires finesse and teamwork to achieve success without any mishaps. So, grab your safety goggles, because we’re about to explore why enlisting assistance is crucial for mastering this art.
Mirror Mirror on the Wall…What’s Next?
Imagine having a stunning mirror glued to your wall, but you crave a change. However, attempting to remove it solo is like navigating a treacherous minefield – one wrong move and *crack* – your beloved mirror shatters into countless pieces. This is where a trusty assistant becomes your saving grace.
Why Seek Help?
Removing a glued-on mirror demands delicate handling and specialized tools. Having a reliable helper by your side provides an extra pair of hands, eyes, and most importantly, sanity. Plus, tackling challenges with a buddy is always more enjoyable.
Finding the Perfect Sidekick:
Choosing the right assistant is paramount. Look for someone who possesses the patience of a saint, the precision of a surgeon, and the willingness to listen and follow instructions. Bonus points if they have experience with delicate objects. Remember, teamwork makes the dream work.
Tools of the Trade:
Before diving into the removal process, gather your arsenal of tools. Check off safety goggles and gloves for protection. Equip yourself with a putty knife or scraper for gentle prying. Don’t forget adhesive solvent or remover to loosen the glue’s grip. And ensure you have protective padding or blankets to cushion any accidental mishaps.
The Game Plan:
Clear communication is vital for success. Sit down with your trusty partner-in-crime and thoroughly discuss the removal plan. Ensure they understand the importance of caution and gentle movements to avoid turning your mirror into an unsolvable puzzle.
Safety First:
Prepare your battlefield. Clear any potential obstacles around the mirror and lay down protective coverings to catch adhesive drips or shards in case of an accidental slip-up. Safety should always take precedence.
Tagging Duties:
To avoid confusion and mishaps, divide the tasks between you and your assistant. One person holds the mirror while the other applies adhesive solvent – a well-coordinated dance that minimizes risk and maximizes success.
Lift with Care:
When the moment of truth arrives, it’s time to lift and detach the mirror from its glued position. Using proper lifting techniques is crucial to avoid straining your muscles or sending your mirror on an unexpected trip to shatterville. Secure, firm grips using your palms, not just your fingers, will give you better control.
Slow and Steady Wins the Race:
Rushing through this delicate process is a recipe for disaster. Encourage your helper to be patient and emphasize the importance of precision. Remember, you’re removing glue, not running a marathon.
Using Heat to Loosen Adhesive
If you’ve ever been stuck (pun intended) trying to remove a glued-on mirror without shattering it into a million pieces, fear not. I’m here to share some expert tips on using heat to loosen adhesive and make this daunting task a breeze. So buckle up and get ready to harness the power of heat.
Method 1: The Classic Approach – Hairdryer or Heat Gun
Grab your trusty hairdryer or heat gun and set it to a medium or high heat setting. Hold it about six inches away from the mirror and direct the heat towards those sneaky edges where the adhesive is lurking. Gently move the tool back and forth, evenly heating the adhesive. Remember, my friends, patience is key – don’t scorch the mirror by getting too close for too long.
Method 2: Hot Water, Anyone?
If you’re more of a water lover, this method might be your cup of tea. Fill up a basin or bucket with hot water (not boiling.) and carefully immerse the backside of the mirror in it. Let it soak for around 15-20 minutes. Watch as the heat works its magic, softening the adhesive and making removal a piece of cake. Just handle that slippery mirror with care.
Method 3: A Cozy Alternative – Heat Packs and Warm Towels
Don’t have a hairdryer or hot water? No problem. Grab a heat pack or warm up some towels in the microwave or oven. Apply the heat pack directly to the mirror’s edges or wrap those toasty towels around it. Give it a few minutes for that warmth to transfer onto the adhesive, making it easier to pry off. But remember, safety first – watch out for burns.
Safety Precautions:
As much as we love playing with heat, safety always comes first. Here are some essential safety tips to keep in mind:
- Wear protective gloves and eyewear to shield yourself from potential hazards.
- Be mindful of the surface behind the mirror – excessive heat can cause damage.
- If the adhesive isn’t budging easily, don’t force it. Seek professional assistance to avoid any mishaps.
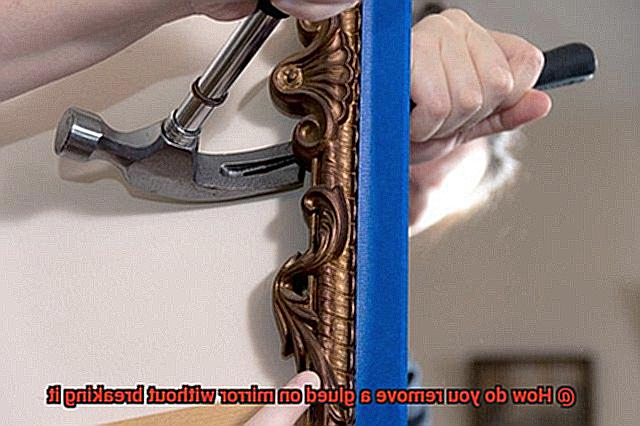
Heating and Detaching Edges
In the captivating world of adhesive removal, there exists a thrilling technique known as heating and detaching edges. Imagine, my fellow glue enthusiasts, the exhilaration of removing a glued-on mirror without any heart-stopping breakages. Brace yourselves for an epic adventure into the realm of adhesive mastery.
To embark upon this daring quest, gather your trusty tools of the trade. Arm yourself with a hairdryer or heat gun, slip on protective gloves, find a reliable putty knife or razor blade, and don’t forget a soft cloth or towel to keep things cozy.
But wait. Safety is your loyal sidekick on this journey. Don those gloves to shield yourself from unexpected burns, and ensure that your mirror is securely in place. We wouldn’t want it leaping off the wall in a fit of spontaneity.
Now, let the heat be your guide. Begin by setting your hairdryer or heat gun to a low temperature setting. Hold it at arm’s length from the edge of the mirror and direct that warm air towards the glued area. Picture yourself giving the adhesive a gentle nudge in the right direction.
As you continue applying heat, gradually increase the temperature setting. But beware, my friend – too much heat can cause thermal stress and lead to unsightly cracks on the mirror’s surface. We must avoid such heartbreak at all costs.
Now, the moment of truth arrives – the test for detachment. With your trusty putty knife or razor blade, gently pry up one corner of the mirror. If it resists, do not despair. Keep applying heat and testing until you achieve that satisfying detachment you seek.
Once victory is yours and that first corner is conquered, it’s time to conquer the remaining edges. Proceed slowly and methodically, using gentle movements and applying heat as needed. Patience is your greatest ally here. Remember, Rome was not built in a day, and neither was this masterful adhesive removal technique.
Finally, when the mirror is freed from its adhesive prison, take a moment to revel in your triumph. But hold your celebrations. There may be pesky residue left behind. Fear not, for you can conquer this too. Grab an appropriate adhesive remover or concoct a mixture of warm water and mild soap. Cleanse away that residue, being careful not to harm the mirror’s delicate surface.
And there you have it, my glue-loving comrades. With these steps, you can remove a glued-on mirror without breaking it, preserving its beauty for future escapades. Remember to stay safe, be patient, and relish in the glory of adhesive removal mastery.
But if you find yourself not up to the challenge or in possession of an especially precious mirror, fear not. Call upon the experts to work their magic. Sometimes, it is best to let the masters handle the task.
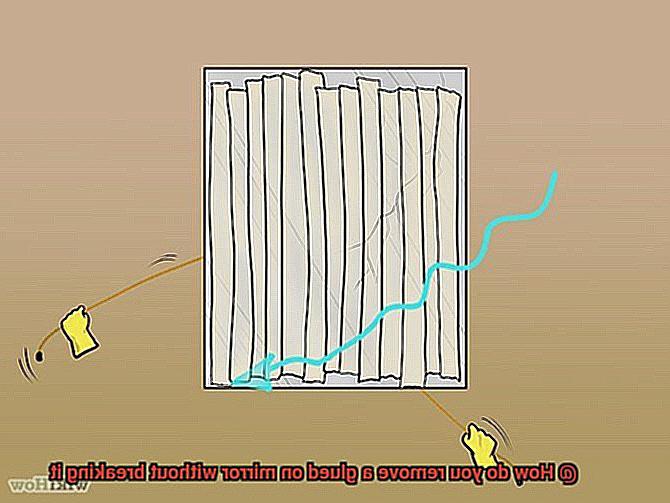
Gently Prying with a Thin Tool
Mirrors add an exquisite touch to any space, but when it’s time to remove a glued-on mirror, caution and precision are paramount. In this comprehensive guide, we will delve into the exciting technique of gently prying with a thin tool. By following these steps and taking necessary precautions, you’ll be able to safely remove a glued-on mirror without any damage. So, grab your tools and let’s embark on this adhesive removal adventure.
Step 1: Gather the necessary tools
Before diving into the removal process, make sure you have the right tools at hand. Opt for a thin and flexible tool like a putty knife or flathead screwdriver. It should be slim enough to easily fit between the mirror and the glued surface.
Step 2: Inspect and create entry points
Carefully examine the mirror’s edges for visible gaps or spaces between the mirror and the surface. If no gaps exist, gently insert the thin tool at a corner or edge of the mirror to create an entry point.
Step 3: Apply gentle prying motion
Starting at one corner, apply gentle pressure with the thin tool against the adhesive holding the mirror in place. Gradually work your way along the edges, increasing pressure as needed. Patience is key here – avoid using excessive force that may cause the mirror to crack or shatter.
Step 4: Apply heat if necessary
Encountering resistance while prying? Applying heat can soften the adhesive and make removal easier. Use a hairdryer on low heat or direct warm air from a heat gun toward the area where you’re using the tool. Be cautious not to direct heat directly onto the mirror itself.
Step 5: Assess progress and adjust technique
Periodically evaluate your progress by checking if the mirror has started to loosen from its glued surface. If significant resistance persists, pause the prying process and reassess your technique. Applying too much force or prying at an improper angle could increase the risk of breakage.
Step 6: Safely detach the mirror
Once the mirror begins to detach, continue prying gently until it is fully separated from the surface. Be prepared to catch the mirror as it becomes loose to prevent any potential falls and fractures. Place a soft surface, such as a towel or blanket, beneath the mirror to cushion its descent.
Step 7: Clean residual adhesive
After successfully removing the mirror, cleanse any remaining adhesive from both the mirror and the surface it was attached to. Utilize adhesive removers available in the market and follow the provided instructions carefully. Ensure proper ventilation while using these products.
Working Around All Edges
Today, we embark on a thrilling journey into the world of glue and adhesive removal, focusing specifically on the delicate task of removing a glued-on mirror without any disastrous cracks or shatters. If you find yourself with a mirror clinging on for dear life and yearning for a fresh start in a new spot, this guide is tailor-made for you.
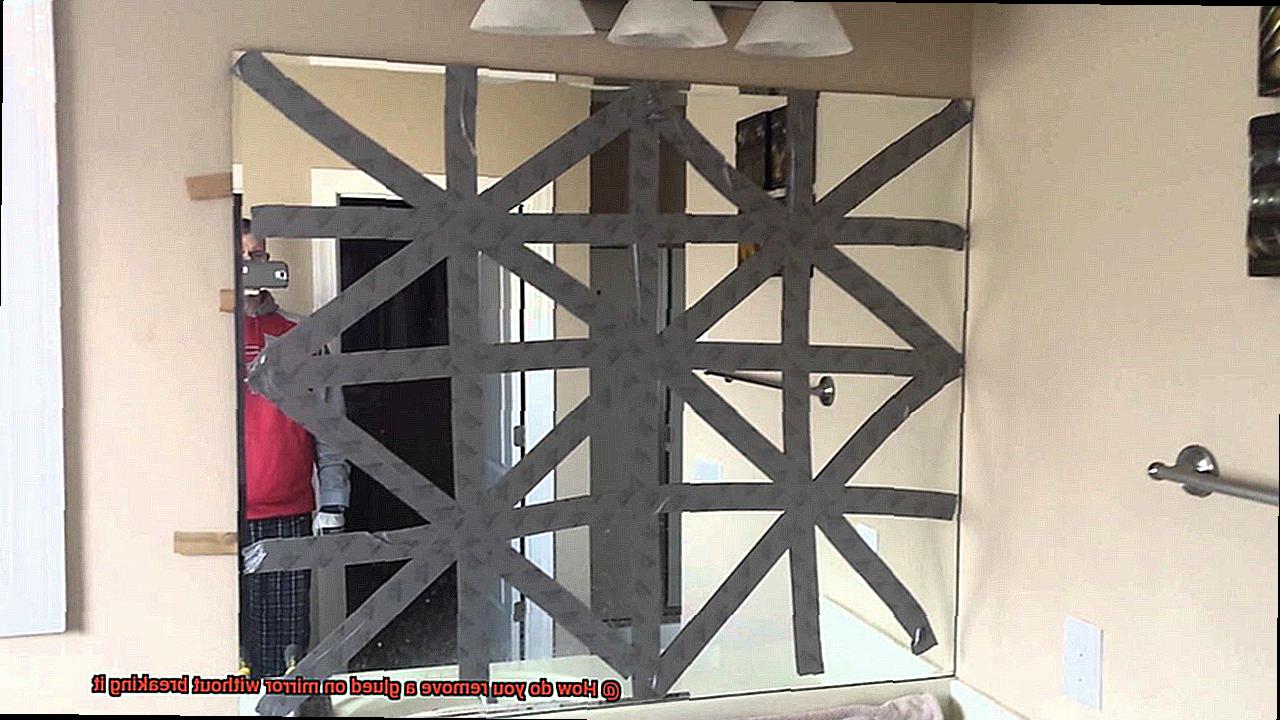
Working around all edges is paramount when it comes to liberating a glued-on mirror. These edges are like the fragile fringes of a magnificent artwork – they require extra care and attention to avoid any mishaps. After all, we wouldn’t want your beloved reflection companion ending up in countless pieces, would we?
Why are these edges so crucial, you may ask? Well, my esteemed readers, the edges of a glued-on mirror are its Achilles’ heel. They are more vulnerable than the sturdy center and can easily succumb to damage during the removal process. But fret not. Equipped with well-researched tips and tricks, you shall soon become a master of this delicate dance.
First things first – assess that adhesive. Different adhesives demand different strategies for removal. Take a moment to investigate the sticky situation at hand. Whether it’s construction adhesive, silicone adhesive, or double-sided adhesive tape, knowing your foe will help you plan your attack with precision.
Next up – protect your surroundings. The last thing you want is to inadvertently scratch your walls or furniture while prying that mirror loose. Safeguard nearby surfaces with drop cloths or plastic sheets to shield them from any unintended consequences of your removal mission.
Safety takes precedence, my friends. Don’t forget to don protective gloves and goggles. We’re dealing with glass here, and no one wishes for an unfortunate accident resulting in cuts or eye injuries. It’s always better to be safe than sorry, don’t you agree?
Now, let’s conjure some magic – heat. Grasp that trusty hairdryer or heat gun (on low heat, mind you) and gently warm up those edges. By applying heat, you shall soften the adhesive, rendering it more pliable for removal. However, exercise caution and avoid excessive heat, lest you unintentionally create a cracked mirror.
Once the adhesive is suitably softened, it’s time to introduce a thin object into the equation. Picture yourself as a skilled surgeon deftly sliding a putty knife or plastic scraper between the mirror’s edge and its attachment surface. Employ slow and delicate movements, applying gentle pressure to separate the mirror from its adhesive bond. No forcing or prying like a bull in a china shop – we seek finesse.
Patience is the key, dear readers. Proceed methodically, tackling small sections at a time along the perimeter of the mirror. By distributing pressure evenly and minimizing the risk of cracks or breaks, you shall avoid any unfortunate mirror mishaps.
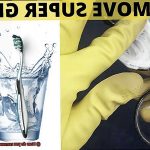
Using Solvent for Stubborn Adhesive
In our last adventure, we explored the art of delicately removing glue from delicate surfaces. Today, we are going to dive even deeper into the mesmerizing world of using solvents to tackle stubborn adhesive on mirror surfaces. So, grab your solvent of choice and let’s embark on this captivating journey.
Step 1: Choose the Right Solvent
Before we begin this delicate dance, it’s crucial to pick the perfect partner for the job. Acetone often steals the show when it comes to removing glue residue from glass surfaces like mirrors. However, it’s always a good idea to consult the manufacturer’s instructions or seek expert advice if you’re unsure about which solvent to use.
Step 2: Test, Test, Test.
Before we pour our hearts into this endeavor, let’s take a moment to test the waters. Find a small, inconspicuous area on the mirror and apply a tiny amount of solvent. Observe and wait with bated breath for any signs of adverse reactions such as discoloration or damage. If all looks good, we can confidently move on to our next step.
Step 3: Soak and Dab
Now, let’s waltz into action. Take a clean cloth or sponge and immerse it in the enchanting solvent of your choice. Gently dab the cloth onto the adhesive, ensuring it becomes thoroughly saturated. Allow the solvent to serenade the adhesive for a few minutes. This graceful act will soften the glue and make it easier to remove.
Step 4: Scrape with Caution
As the adhesive gracefully surrenders to the power of the solvent, it’s time for some careful choreography. Armed with a plastic scraper or even a trusty old credit card, gently scrape away the softened adhesive. Like a skilled dancer, exercise caution and grace, never applying too much pressure that may harm the mirror surface. Remember, we’re treating those edges like fragile fringes.
Step 5: Repeat if Necessary
Sometimes, adhesive can be a stubborn partner on the dance floor. If there are still traces of glue remaining, don’t fret. Simply repeat the enthralling routine until all the adhesive is swept away. This may require a few encore performances, especially for particularly tenacious or aged adhesive.
Step 6: Clean and Shine
Congratulations, maestro of adhesive removal. You have successfully orchestrated the removal of the adhesive from your mirror surface. But before you take your final bow, it’s time to give that mirror a little tender loving care. Grab a mild glass cleaner and delicately wipe down the mirror to remove any residue from the solvent. Admire that sparkling reflection and revel in your accomplishment.
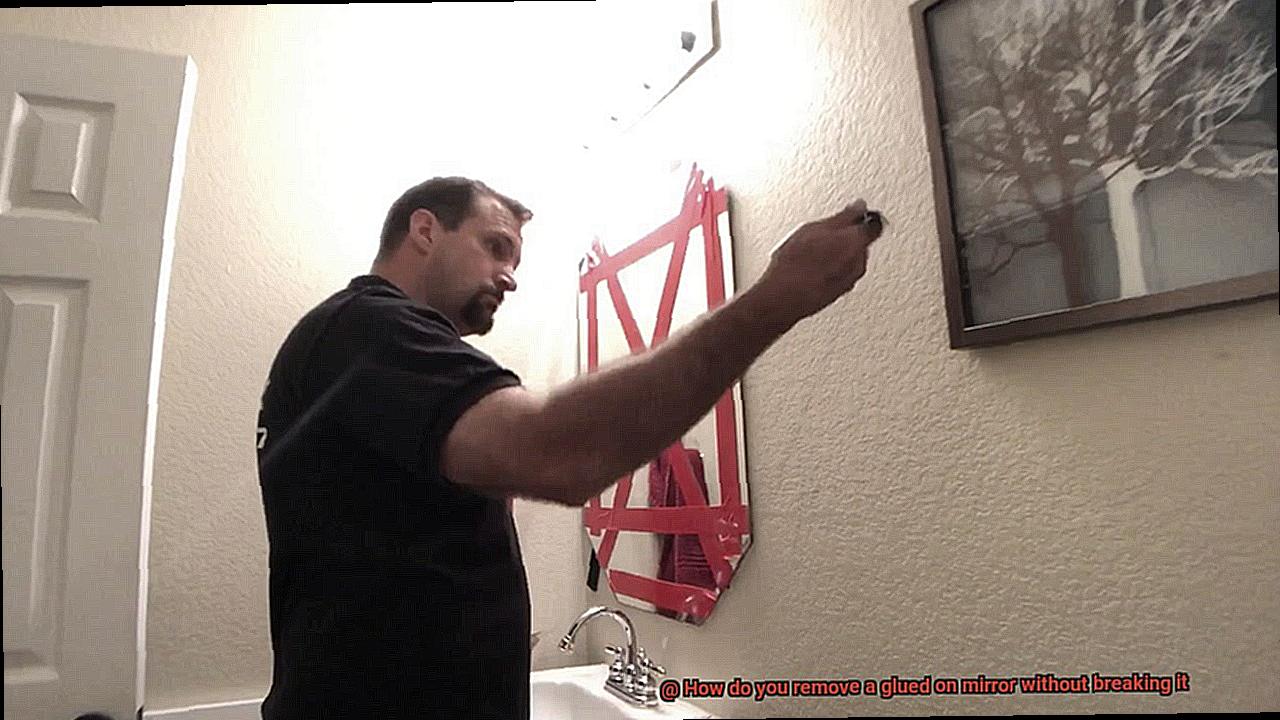
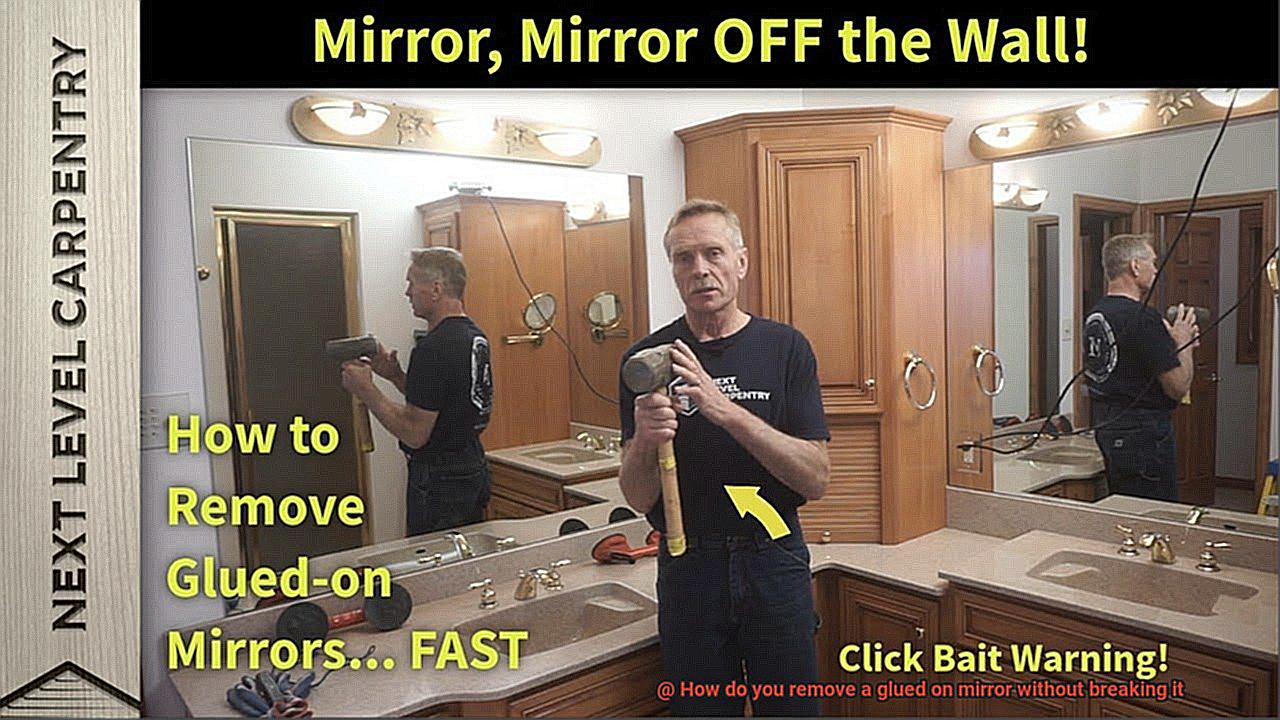
Lifting Off Mirror Safely
Imagine wanting to rearrange the mirrors in your home but being held back by fear of damaging them during the removal process. Fear not, for we have the ultimate guide to safely lifting off glued-on mirrors without causing any harm. Get ready to embark on this journey with your tools in hand as we navigate the intricacies of mirror removal.
Step 1: Gather the necessary tools and materials
Before diving into the task, ensure you have all the essential equipment ready. Don your gloves and safety glasses, and make sure to have a trusty putty knife or scraper, a heat gun or hairdryer, and an adhesive remover at your disposal. Remember, safety must always be the first priority, so equip yourself accordingly.
Step 2: Precautionary measures
To create a safe working space, clear the area around the mirror. Lay down a drop cloth or old towels on the floor to protect it from debris that may fall during the process. These simple precautions guarantee a smooth and accident-free removal experience.
Step 3: Gently insert the putty knife or scraper
With utmost care, slide the putty knife or scraper between the mirror and the wall. Apply minimal pressure, avoiding any cracks or shattering. Gradually work your way around the edges of the mirror, slowly lifting it away from the wall.
Step 4: Applying heat
If you encounter stubbornly attached areas, it’s time to bring out some heat. Utilize a heat gun or hairdryer set on low heat. Hold it several inches away from the mirror and move it in a gentle back-and-forth motion along the edges. The heat will delicately soften the adhesive, making it easier to lift off the mirror.
Step 5: Dealing with stubborn areas
Sometimes, certain spots require extra attention. Apply more heat to these areas and wiggle the putty knife or scraper gently to loosen the adhesive’s grip. Remember, patience is key here. Rushing can lead to unintended consequences, so take your time.
Step 6: Removing residue with an adhesive remover
After successfully lifting off the mirror, you may find residue or adhesive left behind on the wall. Follow the manufacturer’s instructions for an adhesive remover. Use a clean cloth or sponge to apply it to the affected areas, gently scrubbing until all traces of adhesive vanish.
Step 7: Cleaning the mirror
Before reinstalling or storing the mirror, ensure it receives a thorough cleaning. Employ a glass cleaner and a lint-free cloth to wipe down both sides of the mirror, ensuring a streak-free finish. Be extra cautious during this step to prevent any accidental slips or drops.
Cleaning Residue and Inspecting the Mirror
Immerse yourself in the euphoria of transforming your living space into a reflection of your personal style. But before embarking on this liberating journey, it’s crucial to understand the significance of cleaning residue and inspecting the mirror.
These vital steps ensure a seamless removal process and safeguard against potential damage. Prepare yourself with gloves, safety glasses, and tools, as we guide you through the delicate art of removing glued-on mirrors without inflicting harm.
Cleaning Residue: An Elegant Approach
Preserving the pristine surface of your mirror demands the use of gentle, non-abrasive cleaning agents. Harsh chemicals or abrasive materials are adversaries that can scratch or damage the mirror, leaving it vulnerable to breakage during removal.
Instead, opt for a solution of warm water and mild dish soap in a spray bottle. Spritz this magical concoction onto the residue, allowing it to work its magic for a few precious minutes. Now, armed with a soft cloth or sponge, gently dance in circular motions, applying minimal pressure to caress away the residue. For stubborn remnants, employ a plastic scraper or credit card with grace and caution to avoid unnecessary force.
Inspecting the Mirror: Discerning Weak Points
Before parting ways with your beloved mirror, embark on an intimate inspection. Savour the edges, seeking any chips or cracks that may have occurred during removal or existed prior to your encounter.
Venture further into the depths of its soul, exploring the back for loose fragments or any damage that could compromise its structural integrity. Identifying weak points and areas that beckon for extra attention allows you to choreograph an impeccable removal strategy.
Strategy and Precautions:
Armed with knowledge about the mirror’s condition, you must now proceed with finesse to safely liberate it without shattering its soul. If significant damage or weakness emerges, seek the guidance of professionals to avert the risk of injury. However, if the mirror radiates strength, execute your removal plan with calculated precision. Employ gentle lifts or graceful slides, while ensuring the necessary precautions are in place.
uh9Zk9X-esg” >
Also Read: How to Remove Gorilla Glue from Wall?
Conclusion
Removing a glued-on mirror without breaking it can be a delicate task. However, with the right approach and some careful maneuvering, you can successfully separate the mirror from its adhesive grip. It’s crucial to proceed with caution and take your time to ensure that no damage occurs during the removal process.
One technique you can use is heating the adhesive. By applying heat to the back of the mirror using a hairdryer or heat gun on low settings, you can soften the glue and make it easier to loosen. Be sure to keep the heat source at a safe distance to prevent any cracks or warping of the mirror.
Once the adhesive has been warmed up, gently insert a thin blade or putty knife between the mirror and the surface it’s attached to. Slowly work your way around the edges, applying slight pressure to gradually release the bond. Take extra care not to apply too much force, as this could cause stress fractures in the glass.
If you encounter stubborn areas where the adhesive is particularly strong, you can try using a solvent or adhesive remover specifically designed for mirrors. Apply a small amount of solvent onto a cloth or sponge and carefully dab it onto those areas. Allow it to penetrate for a few minutes before attempting to pry off the mirror again.
Remember, patience is key when removing a glued-on mirror without breakage. Take breaks if needed and proceed methodically until you’ve successfully loosened all sides of the mirror.
Once freed from its adhesive prison, handle with care and find an appropriate place for your newly liberated mirror.