Are you tired of twiddling your thumbs while waiting for glue to dry? It’s time to take matters into your own hands and speed up the drying process of Gorilla Super Glue.
Whether you’re fixing a beloved piece of pottery or tackling an exciting craft project, we’ve got the tips and tricks to get you back on track in record time. From prepping surfaces like a pro to harnessing the power of accelerators, we’re about to unleash a whirlwind of knowledge on how to make Gorilla Super Glue dry faster.
So buckle up and let’s dive headfirst into this sticky situation.
What is Gorilla Super Glue?
Contents
- 1 What is Gorilla Super Glue?
- 2 How Does Gorilla Super Glue Dry?
- 3 Applying Heat to Speed up Drying Time
- 4 Using Accelerator Products to Speed Up Drying Time
- 5 Ensuring Clean and Properly Prepared Surfaces for Faster Drying Times
- 6 Applying a Thin Layer of Glue for Faster Drying Times
- 7 Tips for Optimizing the Drying Time of Gorilla Super Glue
- 8 Conclusion
Look no further than Gorilla Super Glue. In this article, we will delve into the world of Gorilla Super Glue, exploring its exceptional features, lightning-fast drying time, and why it has become the adhesive of choice for professionals and DIY enthusiasts worldwide.
Unleashing Unbreakable Bonds:
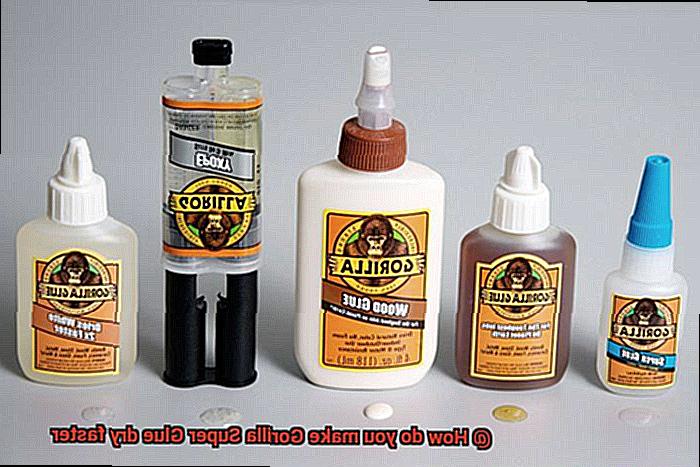
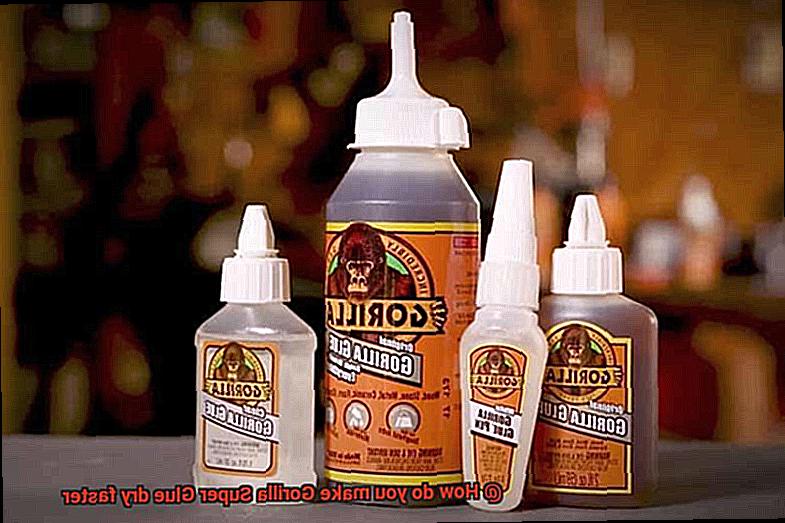
Gorilla Super Glue is not your ordinary adhesive. It is a fast-drying, cyanoacrylate-based glue that forms an incredibly strong bond within seconds. From wood and metal to ceramics, plastics, and rubber, this versatile glue effortlessly adheres to a wide range of materials. Whether you’re fixing a broken chair leg or working on intricate crafts, Gorilla Super Glue has got you covered.
Built to Endure:
One of the standout features of Gorilla Super Glue is its ability to withstand extreme conditions. No matter the weather, this adhesive remains unyielding. With a temperature range of -65°F to 220°F (-54°C to 104°C), it can handle scorching summers and freezing winters with ease. Additionally, it is resistant to moisture, chemicals, and impact, ensuring that your bonded items stay firmly in place even under the most challenging circumstances.
Lightning-Fast Drying:
Time is precious, and Gorilla Super Glue understands that. Unlike traditional adhesives that take ages to dry, Gorilla Super Glue’s fast-drying formula sets it apart. Upon contact with air, it dries in a flash, allowing you to move forward with your project without delay. While drying times may vary depending on factors such as temperature and humidity, you can rely on Gorilla Super Glue to deliver speedy results.
Easy Application:
Gorilla Super Glue is designed with convenience in mind. Its precision tip ensures controlled application, preventing any messy glue mishaps. To achieve optimal bonding strength, it is important to prepare the surfaces by thoroughly cleaning them, ensuring they are free from dust and grease. Apply a small amount of glue evenly on both surfaces, and then press them firmly together. Voila. A powerful bond is formed that will stand the test of time.
Tips for Faster Drying:
If you find yourself in a rush to complete your project, there are a few techniques you can employ to speed up the drying time of Gorilla Super Glue. Applying gentle heat using a hairdryer or exposing the glued area to sunlight can accelerate the glue’s drying process. Additionally, using accelerator products specifically designed for cyanoacrylate-based glues can promote faster curing times, giving you the results you need in no time.
How Does Gorilla Super Glue Dry?
Look no further than Gorilla Super Glue. With its lightning-fast drying time and incredible strength, this adhesive is a game-changer for all your bonding needs. But have you ever wondered how this magical glue actually dries? In this article, we’ll delve into the science behind Gorilla Super Glue and uncover the secrets of its rapid drying process.
The Composition of Gorilla Super Glue:
Gorilla Super Glue is a cyanoacrylate adhesive that cures through a chemical reaction triggered by moisture. This adhesive is composed of tiny molecules that form long chains when they come into contact with water.
Activation and Polymerization:
When Gorilla Super Glue is applied to a surface, it needs clean and dry conditions. Any moisture present can interfere with the bonding process. Once the glue comes into contact with moisture in the air or on the surface, it activates and starts to cure. During this process, the glue undergoes polymerization, forming long chains of molecules that harden and solidify rapidly.
Tackiness Stage:
As the glue cures, it transitions through different stages. Initially, it becomes tacky or sticky, allowing for repositioning and adjustment before fully setting. This stage provides flexibility in case any last-minute tweaks are needed.
Gradual Hardening:
Over time, Gorilla Super Glue continues to cure and harden. It gradually becomes less flexible and more rigid until it reaches its final state. The exact drying time depends on factors such as temperature, humidity levels, and the thickness of the glue layer applied.
Maximum Strength:
While Gorilla Super Glue dries quickly, achieving maximum strength can take up to 24 hours. It’s crucial to avoid putting stress or pressure on the glued object during this curing period to ensure a strong and durable bond.
Applying Heat to Speed up Drying Time
Well, my friend, look no further because I have the answer: heat. That’s right, applying heat can be the secret ingredient that speeds up the drying time of Gorilla Super Glue, making your life easier and your projects faster to complete.
But before we dive headfirst into the fascinating world of heat and glue, let’s take a moment to understand the science behind it all. When you apply heat to Gorilla Super Glue, those minuscule molecules within the glue start dancing with excitement. They begin moving faster than ever before, like ants at a picnic, generating an increased rate of evaporation. And voila. The drying process is suddenly turbocharged, leaving you with more time to revel in your artistic triumphs.
Now that we understand the magic behind heat and glue, let’s explore some practical methods for applying this newfound knowledge. Here are a few simple yet effective techniques to try:
- Hairdryer: Fetch your trusty hairdryer from its drawer of wonders and set it on a low or medium setting. Position it a few inches away from the glued area and sway it in a gentle circular motion. This rhythmic dance will evenly distribute the heat and coax your glue into drying faster than ever before.
- Heat lamp or heating pad: If you possess the holy grail of crafting tools – a heat lamp or a heating pad – rejoice. Set them to a low temperature and carefully place the glued object nearby (without direct contact). The gentle warmth emitted by these marvelous inventions will work its magic, speeding up the drying process without any negative side effects.
- However, a word of caution: too much heat can spell disaster for your glue’s bond. Like Goldilocks searching for the perfect porridge, you must find the sweet spot in temperature. Keep a watchful eye on the thermometer and avoid subjecting the glue to excessive heat. After all, nobody wants their masterpiece to crumble like a sandcastle in a heatwave because they got a little overzealous with the hairdryer.
- One last thing: don’t forget to consult the wise words of the manufacturer. The makers of Gorilla Super Glue may have specific recommendations or guidelines regarding using heat for faster drying. So, be sure to heed their advice and follow their instructions to achieve optimal results.
Using Accelerator Products to Speed Up Drying Time
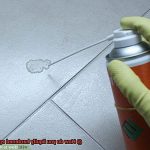
Accelerator products are a game-changer when it comes to speeding up the drying time of adhesives like Gorilla Super Glue. These products, available in spray or brush-on forms, contain special chemicals that initiate and promote the curing process. By reducing the moisture required for the glue to dry, accelerators can make your glue dry faster, even in humid conditions.
Using an accelerator is a straightforward process. Simply follow the manufacturer’s instructions carefully to ensure proper application and avoid any potential risks. It’s worth noting that some accelerators may have a strong odor, so working in a well-ventilated area or wearing a mask may be necessary to ensure safety.
When it comes to applying the accelerator, you have two options. You can either apply it directly to the bonding surface before applying the glue or spray it onto the glue after it has been applied. Regardless of your chosen method, using the recommended amount of accelerator is crucial for optimal results.
However, before diving headfirst into using accelerators, it’s important to check their compatibility with Gorilla Super Glue. Not all adhesives work well with accelerators, so conducting a small compatibility test on an inconspicuous area is highly recommended. This step will help prevent any potential mishaps and ensure a successful bond.
While accelerators can significantly reduce drying time, it’s essential to exercise patience and allow sufficient curing time for the adhesive to fully bond and achieve maximum strength. Rushing this process could compromise the durability of your bond, so be sure to follow the recommended curing time.
Ensuring Clean and Properly Prepared Surfaces for Faster Drying Times
When it comes to ensuring clean and properly prepared surfaces for faster drying times, there are a few key steps to keep in mind. First and foremost, cleanliness is crucial. Before applying Gorilla Super Glue or any other adhesive, it is essential to clean the surfaces that will be bonded. Any dirt, dust, grease, or moisture can interfere with the drying process and prolong your wait time. To tackle this issue, grab a mild detergent or an alcohol-based cleaner and give those surfaces a thorough scrub. This will ensure that you have a pristine canvas for your glue to work its magic.
Once the surfaces are clean, preparation becomes the name of the game. After all, a little roughing up won’t hurt anyone – at least not when it comes to bonding materials. Lightly sanding the surfaces with fine-grit sandpaper creates a rough texture that allows the glue to adhere better and dry faster. Not only does this quick step enhance the bonding process, but it also adds some extra grip for a stronger bond overall.
Now that your surfaces are clean and prepped, it’s time to address the issue of moisture. Moisture is the enemy of fast-drying glue, so ensuring that everything is completely dry before applying Gorilla Super Glue is vital. If you find yourself in a hurry, consider using a hairdryer or a fan to speed up the drying process. However, be cautious not to overheat your materials or hold the device too close to the surface – we certainly don’t want any accidents.
Taking the time to properly prepare and clean your surfaces may seem like an extra step, but trust me, it’s worth it. Not only will it help your Gorilla Super Glue dry faster, but it will also result in a stronger bond between your materials. So put in the extra effort and watch as your projects come together in record time.
It’s important to note that even with these tips and tricks, patience is still key. Rushing the drying process could weaken the bond and leave you with a less-than-stellar result. So take a deep breath, relax, and give your Gorilla Super Glue the time it needs to work its magic.
Applying a Thin Layer of Glue for Faster Drying Times
Well, fret no more. In this comprehensive guide, we will unlock the secret to lightning-fast drying times with Gorilla Super Glue. By mastering the technique of applying a thin layer of this trusted adhesive, you can expedite the drying process and swiftly resume your project.
Step 1: The Power of Cleanliness
Before embarking on the gluing journey, ensure that your surfaces are immaculate and dry. Dirt, dust, and moisture can impede the adhesive’s efficacy and extend drying time. Grab a gentle microfiber cloth and diligently cleanse those surfaces.
Step 2: Precision Application
To achieve a thin layer of Gorilla Super Glue, opt for a small applicator like a toothpick or disposable brush. These tools grant you control over the amount of glue applied, preventing unwelcome drips or pooling. Remember, a little goes a long way when it comes to glue.
Step 3: The Perfect Union
Once you have carefully applied the glue, promptly but gently bring the two surfaces together. Apply gentle pressure for a few seconds to ensure optimum contact between the materials. This step allows the adhesive to evenly spread and forge an unbreakable bond.
Step 4: Handle with Tender Care
Upon joining the surfaces, exercise caution to avoid excessive pressure or excessive movement. These actions can disrupt the bond and prolong drying time. Embrace patience and let the adhesive work its enchantment.
Step 5: Temperature and Humidity Considerations
Bear in mind that temperature and humidity play significant roles in drying time. Warmer temperatures and low humidity levels generally facilitate faster drying. If time is of the essence, seek out a warm and dry environment to work in. However, steer clear of extreme heat, as it can compromise the bond.
Step 6: The Manufacturer Knows Best
Lastly, always heed the instructions provided by Gorilla Super Glue. Different variants of this adhesive may have specific recommendations concerning application and drying times. Adhering to these guidelines ensures optimal results for your projects.
Tips for Optimizing the Drying Time of Gorilla Super Glue
Gorilla Super Glue is renowned for its exceptional bonding strength and fast drying time. However, if you’re seeking to expedite the drying process even further, there are several tips and tricks you can employ. In this article, we will explore five effective ways to optimize the drying time of Gorilla Super Glue, ensuring swift completion of your projects.
Thoroughly Clean Surfaces for a Swift Bond:
Before applying Gorilla Super Glue, it is crucial to meticulously clean the surfaces you intend to bond. Rid the surfaces of any dirt, oil, or moisture that could hinder proper bonding and drying. Utilize a clean cloth or alcohol wipes to ensure a quick and resilient bond.
Apply a Thin Layer for Swift Drying:
While it may be tempting to use an abundance of glue for a stronger bond, this can actually impede the drying process. Excess glue takes longer to cure and can result in messy applications. Instead, apply a small amount of Gorilla Super Glue and evenly spread it across the surface for optimal drying. Remember, in this case, less is more.
Optimize Temperature and Humidity for Rapid Drying:
Temperature and humidity significantly impact the drying time of Gorilla Super Glue. Higher temperatures generally expedite the curing process, whereas lower temperatures decelerate it. Aim for an ambient temperature of approximately 70°F (21°C) to facilitate efficient drying. Additionally, low humidity levels aid in expediting the drying process. Select a well-ventilated area with low humidity for swifter results.
Apply Pressure for Enhanced Bonds:
Applying pressure to the bonded surfaces can accelerate drying time and ensure a stronger bond. Employ clamps or utilize your hands to firmly hold the pieces together while the glue sets. This guarantees maximum contact between the surfaces, expediting the drying process and fortifying the bond.
Consider Using an Activator for Challenging Surfaces:
For tasks involving gap filling or irregular surfaces, consider utilizing an activator or accelerator spray specifically formulated for cyanoacrylate adhesives like Gorilla Super Glue. These products expedite the curing process by instantaneously hardening the adhesive upon application. Apply the activator after applying the glue, and maintain pressure on the surfaces until they are securely bonded.
3oQMFWFbOw8″ >
Also Read: How To Make Super Glue Dry Faster
Conclusion
In conclusion, Gorilla Super Glue is not just your average adhesive. It’s a powerhouse that dries faster than a cheetah on roller skates. With its cyanoacrylate-based formula, this glue forms bonds so strong they could survive a hurricane in a tornado.
To make the drying process even speedier, there are some nifty tricks up our sleeves. First things first, give those surfaces a good scrub-a-dub before applying the glue. Get rid of any gunk or moisture that might slow down the bonding and drying action.
Don’t go overboard with the glue – less is more in this case. Spread it thin like butter on toast using a toothpick or disposable brush. This precision application prevents excess glue from hanging around and making you wait longer than necessary.
Temperature and humidity are like the dynamic duo when it comes to drying time. Warm temperatures and low humidity levels are your best friends here. But be careful not to blast your project with scorching heat – we want a solid bond, not a melted mess.
Put some muscle into it. Apply pressure to those bonded surfaces while the glue does its thing. Whether you use clamps or just squeeze them together with all your might, this extra oomph will speed up drying time and guarantee an unbreakable bond.
For those tricky surfaces or gap-filling challenges, activate the turbo mode with an accelerator spray made for cyanoacrylate adhesives like Gorilla Super Glue. These bad boys instantly harden the glue upon contact, making sure you’re back to business in no time.
Don’t forget to read the instructions – we’re professionals here. Following the manufacturer’s guidelines will ensure optimal results every single time.
So, there you have it – unleash the power of Gorilla Super Glue by implementing these tips and tricks.

