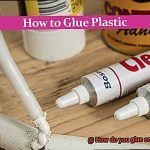
Are you ready to dive into the mesmerizing world of YUPO paper? This magical material has captured the hearts of artists, crafters, and printing pros alike with its waterproof wonders and tear-resistant charm. But wait…how on earth do you glue this slippery sensation? Fear not. We’ve got your back with a step-by-step guide that will have you sticking YUPO like a pro in no time.
Instructions:
- Get the right adhesive: YUPO paper is a bit picky when it comes to glues. It craves solvents like cyanoacrylate or rubber cement for a bond that’s as strong as Hercules. So ditch those subpar glues and grab the good stuff.
- Prep that surface: Before diving into gluing glory, give your YUPO paper a quick wipe-down with a lint-free cloth or an alcohol pad. We want that baby squeaky clean before we start sticking.
- Apply that goo: Armed with a small brush or spatula, delicately spread a thin layer of your chosen adhesive onto one side of the YUPO paper. Remember, less is more here – we don’t want globs ruining our masterpiece.
- Stick it real good: Line up your glued YUPO paper with its destined surface, making sure it’s positioned just right. Gently press down and smooth out any wrinkles or air bubbles by starting from the center and working your way outwards. A little pressure goes a long way.
- Patience is key: Let that glued beauty dry completely before moving on to the next step. Drying times may vary depending on the adhesive, so check those instructions and resist the temptation to rush.
- Trim away excess: Once your glued YUPO paper is dry as a desert, grab a sharp craft knife and trim any excess paper. But hey, remember to be gentle – we don’t want any accidental paper divorces.
- Seal the deal (optional): If you want your YUPO creation to withstand the test of time, consider applying a clear spray sealant or varnish for added protection. This step is especially important if your masterpiece will face moisture or heavy handling.
What is YUPO Paper?
Contents
Prepare to embark on a captivating artistic journey that will awaken your senses and ignite your creativity. Step into the enchanting world of YUPO paper, a revolutionary medium that defies convention and offers endless possibilities for artists of all levels.
Brace yourself for a mesmerizing exploration into the realm of YUPO paper.
What is YUPO Paper?
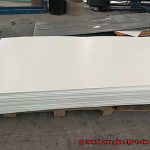
YUPO paper is no ordinary sheet; it is a synthetic marvel crafted from polypropylene, a resilient and versatile plastic. This exceptional composition grants YUPO paper its extraordinary traits: durability, water resistance, and tear resistance.
Unlike traditional paper, YUPO boasts a flawlessly smooth and non-absorbent surface that repels liquids with grace, making it an artist’s dream medium.
Versatility in Artistic Expression:
Prepare to witness the birth of unparalleled artistic expression. YUPO paper’s non-porous nature unleashes a myriad of possibilities when combined with water-based paints and inks. Instead of being absorbed by the paper, these magical mediums dance upon its surface, creating vivid and spellbinding visuals.
The silky smoothness of YUPO paper also lends itself perfectly to techniques such as blending, layering, and color lifting, granting artists complete mastery over their creations.
Exploring Different Mediums:
YUPO paper’s enchantment extends far beyond the realm of painting. It welcomes with open arms the realms of printing, drawing, and even writing.
Its resilience against environmental forces makes it an ideal choice for outdoor signage and packaging ventures. Moreover, the translucent and opaque variations of YUPO paper offer bewitching visual effects that invite artists to push their creative boundaries beyond imagination.
The Art of Adhering YUPO Paper:
To summon the full potential of YUPO paper’s allure, one must master the art of adhesion. Choosing the right adhesive is crucial, favoring solvent-based options that bond seamlessly with non-porous surfaces.
A meticulous cleansing of YUPO paper precedes the application of adhesive, ensuring a flawless union between the two entities. Patience becomes an ally as the drying time varies depending on the chosen adhesive, demanding poise and allowing the bond to flourish.
Why Use Solvent-Based Adhesives for YUPO Paper?
Solvent-based adhesives are the perfect choice for bonding YUPO paper due to its unique composition and characteristics. Let’s explore why these adhesives are the ideal match for this extraordinary medium.
- Non-Porous Nature: YUPO paper, made from polypropylene, is known for its remarkable properties of being waterproof and tear-resistant. However, this non-porous nature presents a challenge when it comes to gluing. Traditional water-based adhesives struggle to bond with YUPO paper because it cannot absorb them. Solvent-based adhesives come to the rescue by being specially designed to bond with non-porous surfaces like YUPO paper.
- Bonding Power: Solvent-based adhesives contain solvents that dissolve the surface of the YUPO paper, creating a strong and lasting bond. Unlike water-based adhesives, which simply sit on top of the paper, solvent-based adhesives penetrate and merge with the material, providing a powerful connection. This ensures that your art pieces will stay securely in place, even under demanding conditions.
- Quick Drying Time: One of the greatest advantages of solvent-based adhesives is their rapid drying time. The solvents in these adhesives evaporate quickly, allowing your glued pieces to dry faster. This not only saves you precious time but also reduces the risk of the adhesive seeping through the paper. As a result, your masterpiece remains intact and free from any unwanted marks or damage.
- Longevity and Resistance: Solvent-based adhesives offer unparalleled durability and resistance to moisture. They are commonly used in applications that require longevity, such as outdoor signage, labels, and packaging. If you’re creating a stunning outdoor mural or designing water-resistant labels for your products, solvent-based adhesives are the go-to choice for ensuring that your artwork withstands the test of time.
However, it’s important to note that proper ventilation is essential when using solvent-based adhesives. These adhesives release potentially harmful fumes during application, so working in a well-ventilated area and taking necessary safety precautions is crucial.
Preparing the YUPO Paper Surface
YUPO paper is a canvas that holds endless creative possibilities for artists and crafters. However, its non-porous surface can present a challenge when it comes to gluing. In this comprehensive guide, we will take you through the step-by-step process of preparing the YUPO paper surface for gluing, ensuring a strong and enduring bond for your artwork.
Cleanse and Purify:
To begin, delicately wipe the surface of the YUPO paper with a soft, lint-free cloth, meticulously removing any remnants of dust particles. Handle the paper with care as it possesses an inherent fragility that demands a gentle touch.
Embrace Texture:
Elevate your art by lightly sanding the YUPO paper’s surface using fine-grit sandpaper. Employing graceful, circular motions, create a subtle roughness that invites the glue to adhere more effectively. Exercise caution, as overzealous sanding may cause irreparable harm.
Exquisite Cleanliness:
After sanding, it is imperative to cleanse the paper once again to eliminate any lingering traces of sanding residue. Utilize a clean cloth or a soft brush to tenderly brush away these particles, ensuring that your canvas is spotless and primed for gluing.
Optional: Amplify Adhesion:
For an extra layer of adhesion enhancement, consider applying a primer or sizing solution tailored specifically for YUPO paper. These specialized products bestow a porous quality upon the surface, facilitating a secure bond with the glue. Use a soft brush or foam roller to evenly apply the primer to every inch of the YUPO paper, allowing it to dry completely as per the manufacturer’s instructions.
The Perfect Bond:
With your YUPO paper surface impeccably prepared, it’s time to apply the adhesive of your choice. Follow the guidelines provided by the glue manufacturer diligently, as each glue may necessitate a specific technique or curing time. Pay keen attention to detail, ensuring your artwork receives the optimum support it deserves.
Applying the Adhesive to the YUPO Paper
Well, get ready to be amazed. As an expert in all things adhesive, I am here to guide you through the step-by-step process of achieving a flawless bond between YUPO paper and other materials.
First, let’s gather our materials. You will need the adhesive itself, which can be acrylic medium, gel medium, or trusty glue sticks. Just make sure you choose an adhesive that plays nicely with YUPO paper for a long-lasting connection.
Now, let’s prepare the surface of the YUPO paper before we dive into the sticky stuff. YUPO paper is non-absorbent, so giving it a gentle sanding with fine-grit sandpaper will create a slightly rough texture that helps the adhesive adhere better. Think of it as a little tender loving care for your YUPO paper.
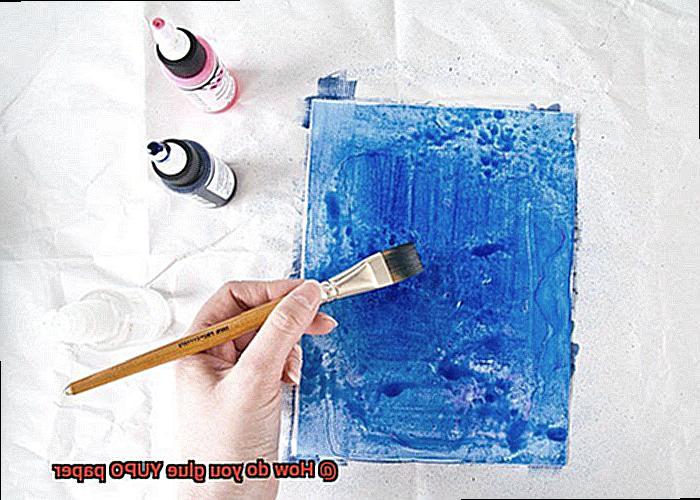
Alright, now comes the exciting part – applying the adhesive. If you’re going with liquid adhesives like acrylic or gel medium, grab a brush or palette knife and spread a thin and even layer onto your YUPO paper. Make sure to cover the entire area where you want to attach another piece of YUPO paper or any other material. A smooth and even application is key to achieving a strong bond.
If you prefer the convenience of glue sticks, fear not. Simply apply the glue stick directly onto the back of the material you want to adhere and press firmly onto the YUPO paper. Smooth out any air bubbles or gaps between the surfaces for a seamless connection.
Remember, less is more when it comes to adhesive application on YUPO paper. Applying excessive amounts can lead to longer drying times and a messy appearance. So keep it thin and even for optimal results.
Now, give your masterpiece some time to dry. The drying time will depend on the type of adhesive used, so be sure to consult the manufacturer’s instructions. And while the glue is doing its thing, resist the temptation to touch or disturb the glued surfaces. We don’t want any smudging or detachment mishaps.
Pressing the Surfaces Together
Gluing YUPO paper can be a challenging task, requiring the right techniques and tools for flawless results. One crucial step in this process is pressing the surfaces together. In this article, we will explore the importance of pressing surfaces together when gluing YUPO paper and provide valuable tips to ensure an effective glue job.
Benefits of Pressing Surfaces Together:
- Stronger Bond: Firmly pressing the surfaces together creates a robust bond between the YUPO paper and adhesive. This ensures long-lasting durability, preserving your artwork or project over time.
- Even Adhesion: Utilizing a roller or brayer to press the surfaces together ensures even pressure distribution across the entire surface. This results in uniform adhesion, preventing air bubbles or gaps that could compromise the bond.
Tips for Effective Surface Pressing:
- Roller or Brayer: Employ a roller or brayer to apply even pressure while pressing the surfaces together. These tools are particularly useful for larger YUPO paper pieces or when precision is required.
- Hand Pressure: If you lack a roller or brayer, using your hands can still yield effective results. Apply even pressure, covering the entire surface to ensure proper adhesion.
- Remove Excess Adhesive: Since YUPO paper is non-absorbent, it’s crucial to remove any excess adhesive before pressing the surfaces together. This prevents smudging and messiness, ensuring a clean final product.
- Work in Sections: For larger pieces of YUPO paper, working in sections is recommended. Apply adhesive and press one section at a time, ensuring firm pressure before moving on to the next section.
- Allow Sufficient Drying Time: After pressing the surfaces together, allow sufficient drying time for the adhesive to set. This promotes a strong and durable bond, ensuring the longevity of your YUPO paper project.
Allowing Enough Drying Time
In this post, we will delve into the crucial concept of allowing enough drying time when working with YUPO paper. Whether you’re a seasoned glue enthusiast or a newcomer looking to create stunning artwork or projects with YUPO paper, this guide is for you.
So, grab your favorite glue bottle and get ready to unlock the secrets of perfect adhesion.
YUPO Paper and Its Unique Surface:
YUPO paper, crafted from polypropylene, boasts a non-porous surface that defies traditional paper’s ability to absorb moisture or glue. Therefore, we must pay extra attention to the drying process to ensure a strong bond.
Factors Affecting Drying Time:
The drying time for gluing YUPO paper can vary depending on factors such as the type of glue used, thickness of application, and environmental conditions. Always consult the instructions on your glue bottle for specific drying times.
The Magic Number: 24 Hours:
To play it safe, allow your glued YUPO paper at least 24 hours to dry completely. This generous timeframe permits any excess moisture in the glue to evaporate and guarantees a robust bond with the non-porous surface.
Lay It Flat:
Promote even drying by laying your glued YUPO paper flat on a clean and dry surface. Avoid stacking or overlapping multiple pieces, as this can hinder proper drying and result in unsightly wrinkles or uneven adhesion.
Need for Speed? Use Gently:
For larger projects or time constraints, use a hairdryer set on low heat or a fan to expedite the drying process. However, exercise caution – too much heat or proximity can cause warping or even melting of the synthetic paper.
Patience is a Virtue:
Resist the temptation to handle or manipulate your glued YUPO paper before it is fully dried. Premature handling can lead to smudging, smearing, or detachment of the glued elements. Remember, waiting will yield magnificent results.
The Tackiness Test:
When in doubt about the dryness of your glue, lightly touch a small inconspicuous area of the glued YUPO paper. If it feels tacky or sticky, additional drying time is necessary. Exercise patience and allow it to dry completely before proceeding.
Longevity Matters:
Remember, allowing sufficient drying time is crucial for the longevity of your glued YUPO paper artwork or project. Rushing the process can compromise the bond between adhesive and non-porous surface, leading to potential issues like peeling or poor adhesion.
Other Adhesive Options for YUPO Paper
YUPO paper, known for its smooth and non-porous surface, has become a favorite among artists and crafters. While traditional glue works well with YUPO paper, there are alternative adhesive options that offer unique advantages. In this article, we will dive into the world of adhesive alternatives for YUPO paper and discover their benefits.
Double-Sided Tape:
For quick and easy bonding, double-sided tape is your go-to option. It provides a strong bond and is perfect for small projects or adhering YUPO paper to flat surfaces like scrapbooking or card making. Simply apply the tape and press firmly for a secure hold. It’s hassle-free and saves you from messy glue mishaps.
Spray Adhesive:
When working on larger projects or irregular surfaces, spray adhesive becomes your best friend. Its aerosol application ensures an even coat, creating a strong bond. Perfect for mixed media artwork, it offers versatility and allows you to experiment with different materials on your YUPO paper canvas.
Adhesive Sheets:
If precision is what you seek, adhesive sheets are your answer. These pre-cut sheets make it easy to apply adhesive to specific areas of your YUPO paper. Whether you’re mounting photographs or adding embellishments, adhesive sheets provide a mess-free and precise solution.
Gel Medium:
Looking to add texture and dimension to your YUPO paper artwork? Look no further than gel medium. Available in different consistencies, it not only provides adhesion but also enhances the visual appeal of your creations. Apply it with a brush or palette knife and watch your artwork come alive.
Heat-Activated Adhesive:
For those seeking unconventional methods, heat-activated adhesive offers a unique approach. Commonly used in fabric crafts, this adhesive can also be utilized with YUPO paper to create layered effects or attach fabric elements. Apply heat using an iron or heat press, and watch the magic happen as the adhesive melts and bonds your materials together.
FmENMgXjxKQ” >
Conclusion
Gluing YUPO paper can be a bit tricky, but with the right techniques and materials, you can achieve a strong and secure bond. Here are some tips to help you glue YUPO paper effectively.
- Choose the right adhesive: Not all adhesives work well with YUPO paper. It’s important to use an adhesive that is specifically designed for non-porous surfaces like YUPO. Look for adhesives that are labeled as suitable for plastics or synthetic materials.
- Prepare the surface: Before applying any adhesive, make sure the surface of the YUPO paper is clean and free from dust or oils. You can use a mild detergent and water solution to gently clean the surface, then pat it dry with a lint-free cloth.
- Apply the adhesive sparingly: YUPO paper is known for its non-absorbent nature, so it’s crucial not to apply too much adhesive. A thin, even layer of adhesive will be sufficient to create a strong bond without causing any damage or warping to the paper.
- Use pressure and time: Once you have applied the adhesive, press the glued surfaces together firmly. Applying pressure helps to ensure that the adhesive spreads evenly and creates a strong bond. Leave the glued item undisturbed for a few hours or overnight to allow the adhesive to fully cure.
- Consider alternative methods: If traditional gluing methods don’t seem to work well with YUPO paper, you may want to explore other options such as heat bonding or using double-sided tape specifically designed for non-porous surfaces.
In conclusion, gluing YUPO paper requires using an appropriate adhesive, preparing the surface properly, applying the adhesive sparingly, using pressure during bonding, and allowing sufficient curing time.