Whether you’re a DIY fanatic or just trying to fix something, nailing plastic bonding is crucial. Trust me, it’s not as intimidating as it seems.
All you need is the right technique and some basic materials to create a super-strong bond. In this blog post, we’ll walk you through the step-by-step process, spill some secrets about best practices, reveal must-have materials, and suggest top-notch adhesive options.
Get ready to revive your broken plastic items like a pro.
Identifying the Type of Plastic
Contents
- 1 Identifying the Type of Plastic
- 2 Selecting the Right Adhesive
- 3 Surface Preparation for a Strong Bond
- 4 Applying the Adhesive
- 4.1 Step 1: Cleanliness is Key
- 4.2 Step 2: Roughen Up for Better Adhesion
- 4.3 Step 3: Choose the Right Adhesive
- 4.4 Step 4: Follow Manufacturer’s Instructions
- 4.5 Step 5: Align and Press Firmly
- 4.6 Step 6: Assess Bond Strength and Reinforce if Needed
- 4.7 Step 7: Special Considerations
- 4.8 Step 8: Safety First.
- 5 Joining the Plastic Pieces Together
- 6 Curing the Adhesive
- 7 Tips for Successful Glueing of Plastic Pieces
- 8 Common Mistakes to Avoid When Glueing Plastic Pieces Together
Gluing plastic may appear deceptively simple, but achieving a robust and long-lasting bond demands careful consideration of the plastic type, adhesive selection, and thorough surface preparation. In this guide, we will explore the various methods for identifying the type of plastic, providing you with invaluable tips to successfully glue plastic pieces together.
Identifying the Type of Plastic:
- Markings and Symbols: Take note of any recycling symbols on the plastic product, often accompanied by a number inside. These resin identification codes offer insights into the type of plastic used, enabling you to make an informed adhesive selection.
- Water Test: Observe how a small droplet of water behaves on the plastic surface. Does it bead up and refuse to spread? If so, it indicates non-porous plastic that may require a specialized adhesive.
- Burn Test (with caution): In a well-ventilated area, carefully burn a tiny piece of the plastic. Pay attention to the flame color, smoke, and smell emitted. This method should only be used as a last resort.
Choosing the Right Adhesive:
- Cyanoacrylate (super glue): Apt for bonding most plastics, including polyethylene (PE) and polypropylene (PP), when used with an appropriate primer or activator.
- Epoxy: Ideal for creating strong bonds between various plastics, offering high strength and chemical resistance. Particularly effective for bonding polystyrene (PS) and acrylic (PMMA) plastics.
- Polyurethane: Provides excellent flexibility and impact resistance, making it suitable for flexible plastics like PVC.
Surface Preparation:
- Cleanse the Surfaces: Eliminate any contaminants or oils by using mild detergent or rubbing alcohol to ensure optimal adhesion.
- Roughen the Surfaces: Create a textured surface using sandpaper or a rough cloth. This enhanced texture allows the adhesive to penetrate and form a strong bond.
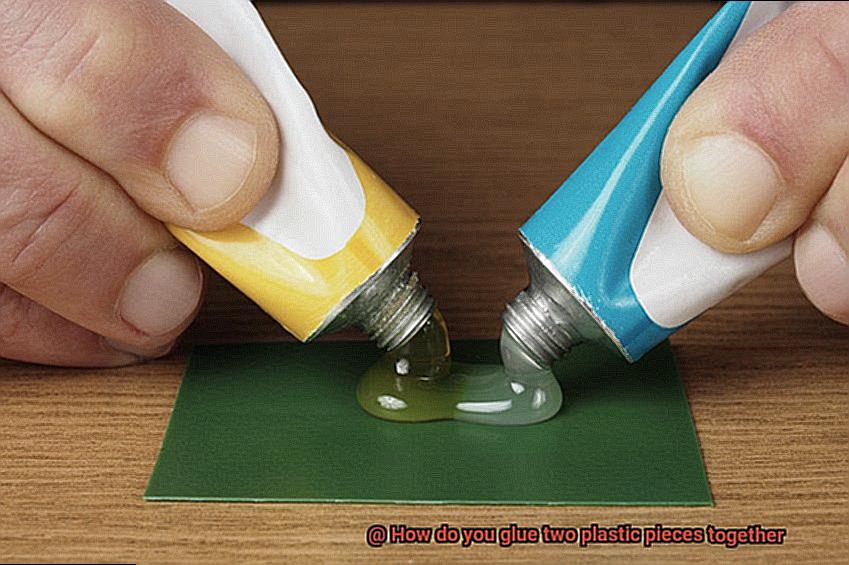
Application Technique:
- Thin Layer of Adhesive: Apply a thin, even layer of adhesive to both surfaces, avoiding excessive amounts that can result in weak bonds or prolonged curing times.
- Maximum Contact: Join the plastic pieces together and apply pressure to ensure maximum contact between the surfaces. Employ clamps, tape, or other suitable methods for this purpose.
- Curing Time: Follow the manufacturer’s instructions for the adhesive’s recommended curing time. Refrain from subjecting the bonded plastic pieces to stress or load during this period.
Selecting the Right Adhesive
Don’t worry, because in this article, we will reveal the secret to selecting the right adhesive for plastic bonding. Whether you’re a DIY enthusiast or a seasoned professional, understanding the importance of adhesive selection is key to achieving a durable bond that lasts.
Decoding Plastic Types:
Plastics come in a multitude of types, each with its own unique chemical composition. This means not all adhesives are created equal when it comes to bonding plastics. Before embarking on your project, take the time to identify the specific type of plastic you’re working with.
Common plastics like acrylic, polycarbonate, and ABS can be effectively bonded using cyanoacrylate adhesives (super glue). On the other hand, PVC, polyethylene, and polypropylene require epoxy adhesives for optimal bonding.
Manufacturer’s Instructions:
Once you’ve identified your plastic type, it’s crucial to consult and closely follow the manufacturer’s instructions for your chosen adhesive. Adhesives have different curing times, temperature requirements, and application methods.
By adhering to these instructions, you’ll ensure optimal results and a bond that stands the test of time.
Surface Preparation:
Properly preparing the surfaces to be bonded is just as important as selecting the right adhesive. Thoroughly clean the surfaces to eliminate any dirt, grease, or contaminants that might interfere with the bonding process.
Some adhesives may require you to roughen or etch the surface to enhance adhesion. Remember, a clean and properly prepared surface is key to achieving a strong bond.
Special Adhesive Solutions:
Certain plastics, such as polyethylene and polypropylene, possess low surface energy. This means they require special adhesives known as polyolefin adhesives for effective bonding. These specialized adhesives are designed specifically for these types of plastics, providing a robust and long-lasting bond.
Consider the Project Requirements:
When selecting an adhesive, it’s essential to consider the specific requirements of your project. Do you need flexibility? Will the bond be exposed to chemicals or UV light? Do you require a transparent bond? These factors can influence your choice of adhesive and ensure it meets the demands of your project, resulting in a bond that withstands any challenge.
Surface Preparation for a Strong Bond
Well, buckle up because we’re about to dive into the world of surface preparation.
When it comes to gluing plastic, one of the most important steps is properly preparing the surfaces. You see, in order for the glue to work its magic and create a strong bond, those surfaces need to be clean and free from any contaminants. So, let’s break down the steps to achieve a perfect surface for bonding.
- Step 1: Clean, clean, clean. Before applying any adhesive, make sure those plastic surfaces are squeaky clean. Grab a mild detergent or soap and water solution and give those pieces a good scrubbing. Get rid of any dirt, dust, or grease that might be lurking around. Rinse them off with clean water and let them dry completely. Patience is key here.
- Step 2: Roughen things up a bit. Smooth plastic surfaces can be like slippery slopes for adhesives. So, grab some sandpaper or a fine-grit abrasive pad and gently roughen up those surfaces. Think of it as giving the glue something to grip onto. Just make sure not to go overboard and scratch or damage the plastic in the process.
- Step 3: Primetime. Applying a primer creates a chemical reaction that promotes adhesion between the plastic surface and the adhesive. It’s not always necessary but can work wonders for certain types of plastics like polypropylene or polyethylene. Follow the instructions on the primer bottle and give it ample time to dry before moving on.
- Step 4: No residue left behind. After all that cleaning and roughening, you want to make sure there are no sneaky residues left on the surfaces. Grab a lint-free cloth or paper towel soaked in rubbing alcohol or an appropriate solvent and give those surfaces a final wipe-down. We don’t want anything interfering with the bonding process, do we?
- Step 5: Masking tape to the rescue. If you’re looking to bond specific areas of the plastic pieces together and keep other areas untouched, masking tape or adhesive-backed films are your new best friends. Use them to cover and protect those areas that shouldn’t come into contact with the adhesive. It’s like creating a little safe zone during the gluing process.
Applying the Adhesive
Today, we embark on a journey into the realm of gluing plastic pieces together. Whether you’re fixing a beloved toy, creating a one-of-a-kind masterpiece, or simply exploring a new hobby, understanding the process of applying adhesive is crucial for achieving a strong and lasting bond. Join us as we dive deep into the secrets of perfecting this art form.
Step 1: Cleanliness is Key
Before embarking on your gluing adventure, cleanliness is paramount. Wipe away any dirt, dust, or debris from the plastic surfaces using a clean cloth and mild detergent. Allow them to dry completely before proceeding to ensure optimal adhesion.
Step 2: Roughen Up for Better Adhesion
Enhance your adhesive’s grip by lightly sanding the plastic surfaces with fine-grit sandpaper or an abrasive pad. This creates a slightly rough texture that promotes better adhesion. A little extra effort in this step can go a long way toward achieving a strong bond.
Step 3: Choose the Right Adhesive
Not all adhesives are created equal in the realm of plastic bonding. For optimal results, consider using cyanoacrylate (super glue), epoxy, or polyurethane adhesives. Select the appropriate adhesive based on the specific type of plastic you are working with.
Step 4: Follow Manufacturer’s Instructions
Once you’ve chosen the right adhesive, carefully adhere to the manufacturer’s instructions for application. This may involve mixing components, applying a thin layer of adhesive to one or both surfaces, or utilizing specific techniques such as dots or lines for precise placement.
Step 5: Align and Press Firmly
After applying the adhesive, align the plastic pieces meticulously and press them firmly together. For added security during curing, consider employing clamps or tape to hold them in place. Allow the adhesive ample time to fully set before handling or placing any stress on the bonded joint.
Step 6: Assess Bond Strength and Reinforce if Needed
Once the adhesive has cured, evaluate the bond strength and durability. Depending on your intended use, you may need to reinforce the joint further. Additional layers of adhesive, reinforcing materials like fiberglass or mesh, or mechanical fasteners such as screws or rivets can all enhance the strength and longevity of the bond.
Step 7: Special Considerations
Certain plastics, such as polypropylene and polyethylene, present challenges for adhesion due to their low surface energy. In these cases, specialized adhesives designed specifically for these plastics may be necessary.
Step 8: Safety First.
Above all, prioritize safety when working with adhesives. Work in a well-ventilated area to ensure proper ventilation. If needed, wear protective gloves and eyewear to shield yourself. Follow storage and disposal guidelines for adhesives to ensure both safety and environmental responsibility.
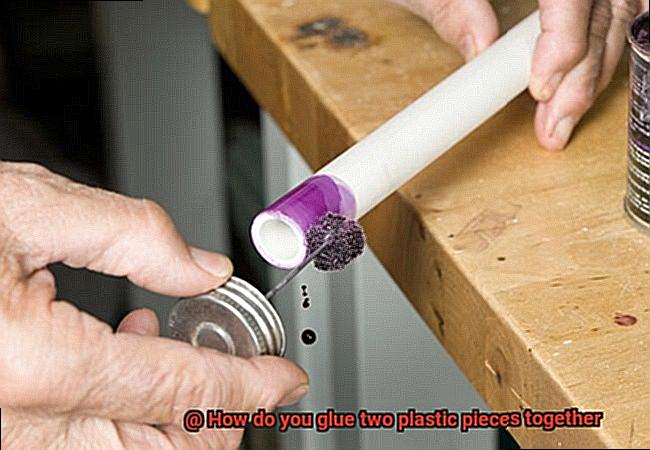
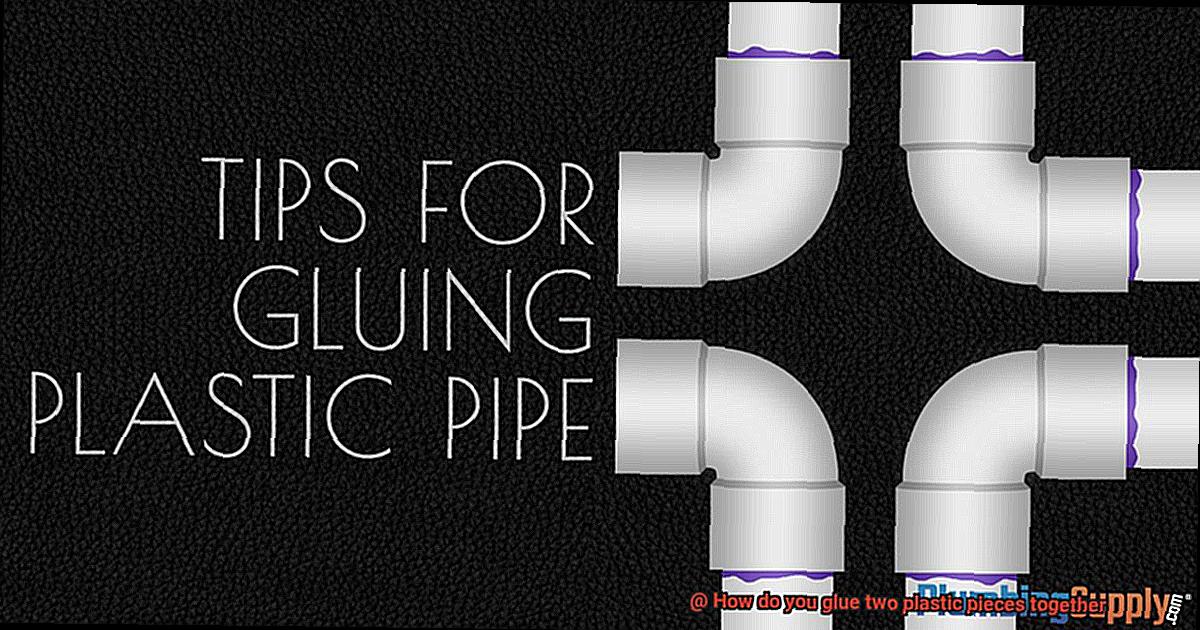
Joining the Plastic Pieces Together
Join me on a fascinating journey as we explore the various methods and techniques for joining plastic pieces together. Today, we’ll focus on the ever-reliable glue, which can work wonders when it comes to bonding plastics.
First things first, cleanliness is crucial. Before applying any adhesive, make sure the surfaces of the plastic pieces are squeaky clean. A quick wipe with isopropyl alcohol or a similar cleaning agent should do the trick. This ensures that no dirt, dust, or grease compromises the bond.
Next up, roughening up the surfaces. This step might sound counterintuitive, but trust me, it helps improve adhesion. Gently sanding or filing the surfaces creates a rough texture that allows the adhesive to grip better.
Now, let’s talk about the star of the show – adhesive. Choosing the right adhesive is essential because different plastics have different properties. Some common types of adhesives for bonding plastics include cyanoacrylate (super glue), epoxy, and polyurethane-based adhesives. Always go for adhesives specifically designed for plastic bonding to ensure a strong and durable bond.
When applying the adhesive, follow the instructions provided by the manufacturer. Usually, a small amount of adhesive is applied to one surface, and then the two plastic pieces are pressed firmly together. It’s important to remove any excess adhesive before it dries to maintain a clean finish.
After joining the plastic pieces together, it’s time to let the magic happen – curing. The adhesive needs time to fully cure and develop its maximum strength. Follow the manufacturer’s instructions regarding the curing time and avoid putting excessive stress on the bonded area during this period.
While glue is an excellent method for joining plastic pieces together, it’s not the only option out there. Welding, heat sealing, and mechanical fastening are also viable alternatives depending on the type of plastic, strength requirements, and the specific application.
Curing the Adhesive
Step into the captivating world of adhesive curing, where the secrets to achieving a strong and durable bond between plastic pieces are unveiled. In this article, we will embark on an exciting journey that explores the various methods of curing and their significance in the gluing process. So fasten your seatbelts, my fellow adhesive enthusiasts, as we dive headfirst into the mesmerizing realm of glue.
Air Drying – The Classic Approach:
Our first destination on this adhesive adventure is air drying, a tried and true method that has withstood the test of time. Simple yet effective, air drying involves allowing the adhesive to naturally dry by exposing it to ambient air at room temperature.
But beware, dear readers, for the curing time can vary depending on factors such as humidity levels, adhesive type, and the thickness of the applied layer. To unlock optimal results, it is vital to heed the instructions provided by the manufacturer.
Heat Curing – The Accelerated Journey:
For those seeking a faster route to bonding bliss, heat curing is the answer. This method involves harnessing the power of heat to expedite the curing process. Ideal for adhesives that require a shorter drying time or when dealing with thicker layers, heat can be applied using various techniques.
Whether you opt for the trusty heat gun or choose to venture into the oven method by placing the bonded plastic pieces inside at a specific temperature, caution is key. Always consult the manufacturer’s guidelines to avoid any mishaps that may compromise your bond.
UV Curing – The Speed Demon:
If you crave rapid results and unmatched precision, UV curing is your ticket to adhesive glory. This specialized method utilizes ultraviolet light to cure specific types of adhesives containing photoinitiators. These magical compounds react with UV light to initiate the curing process.
With UV lamps or LED lights emitting specific wavelengths of light, industries with swift production cycles have eagerly embraced this method. However, my dear readers, tread this path with care, as it requires specialized equipment and a touch of finesse.
The Art of Surface Preparation and Application:
While the curing method serves as the backbone, we must not overlook the importance of proper surface preparation and adhesive application.
Just as a painter primes their canvas, we must ensure our plastic surfaces are pristine – clean, dry, and free from any contaminants that could hinder the curing process. And when it comes to applying the adhesive, precision is key. Spread it evenly and in the recommended thickness to achieve a uniform bond that will withstand the test of time.
Tips for Successful Glueing of Plastic Pieces
By selecting the appropriate type of glue, properly preparing the surfaces, applying the glue sparingly, joining the pieces with even pressure, and allowing sufficient curing time, you can ensure a successful outcome. This comprehensive guide will provide detailed tips in each of these areas to help you achieve a reliable bond between plastic pieces.
Choose the Right Type of Glue
Not all glues are created equal when it comes to bonding plastic. It is essential to choose an adhesive specifically designed for plastic, such as cyanoacrylate (super glue), epoxy, polyurethane, or plastic cement. Each type has its own unique properties and strengths that make it suitable for different types of plastic. Consider the specific characteristics of your plastic material and select a glue that is compatible with it.
Prepare the Surfaces
Prior to applying the glue, it is crucial to thoroughly clean and prepare the surfaces of the plastic pieces. Any dirt, grease, or residue on the surfaces can hinder proper adhesion. Use a mild detergent or rubbing alcohol to clean the surfaces, and ensure they are completely dry before proceeding. For enhanced adhesion, lightly sand the surfaces to create a rough texture that allows the glue to grip better.
Apply the Glue Sparingly
Less is more when it comes to gluing plastic pieces together. Applying too much glue can result in messy and uneven bonds. It is recommended to apply a thin and even layer of glue to one of the plastic surfaces using a brush or nozzle. Ensure that the entire surface is covered with an even coating of glue, but avoid excessive application.
Join the Pieces Together
Once the glue has been applied, carefully align the plastic pieces and press them firmly together. Applying even pressure across the entire bond area is crucial to ensure maximum contact between the surfaces. Consider using clamps or tape to hold the pieces in place while the glue dries, especially for larger or more complex shapes.
Allow Proper Curing Time
Different types of glues require varying curing times to fully bond the plastic pieces together. It is important to read the instructions on the glue packaging to determine the recommended curing time. Avoid disturbing or stressing the bond during this period, as it can weaken the adhesive strength. Patience is key to achieving a strong and durable bond.
Common Mistakes to Avoid When Glueing Plastic Pieces Together
Glueing plastic pieces together may appear to be a straightforward task, but it requires knowledge and careful execution to achieve a strong and durable bond. Whether you’re a novice or an experienced DIY enthusiast, avoiding common mistakes is essential for successful bonding. In this comprehensive guide, we will explore the most prevalent errors to avoid when glueing plastic pieces together, ensuring that your projects are a resounding success.
Choosing the Wrong Glue:
Not all glues are created equal. Using an incompatible adhesive can lead to weak bonds or complete failure. Different types of plastics require specific adhesives that are tailored to their chemical composition. It is crucial to read labels diligently and select a glue that is suitable for the specific plastic you are working with.
Neglecting Surface Preparation:
Proper surface preparation is vital for achieving a strong bond. Thoroughly clean the plastic surfaces to remove dirt, grease, or residue that could impede adhesion. You can use mild detergent or rubbing alcohol for cleaning purposes. Additionally, lightly roughen the surfaces with sandpaper or a file to enhance the bond.
Applying Too Much or Too Little Glue:
Finding the right balance is key when it comes to applying glue. Excessive amounts of glue can result in messy and uneven bonds, while insufficient amounts lead to weak connections. Follow the instructions provided by the glue manufacturer regarding the appropriate amount of adhesive to apply. Generally, a thin and even layer on both surfaces is sufficient for a strong bond.
Rushing the Bonding Process:
Patience is essential when glueing plastic pieces together. Some adhesives require specific drying or curing times to reach their full strength. Hastening this process by handling or stressing the glued pieces prematurely can weaken the bond. Adhere strictly to the recommended drying time provided by the glue manufacturer and allow ample time for curing before subjecting the bond to any stress.
Neglecting Clamping or Securing:
To ensure proper contact and alignment between plastic pieces, apply pressure or use clamps during the curing process. This practice promotes a strong and uniform bond. However, exercise caution to avoid over-tightening the clamps, as excessive pressure can damage the plastic. Consult the instructions provided by the glue manufacturer for proper clamping techniques.
Ignoring Environmental Factors:
Environmental conditions significantly influence adhesive properties. Temperature, humidity, exposure to chemicals, and UV rays can all impact the bond between plastic pieces. Consider these factors when selecting an adhesive and take necessary precautions to shield the glued plastic from potential damage.
8a4dcQFHGDI” >
Also Read: How To Glue Acrylic Together? – Glue Things