Acrylic, the go-to material for artsy projects and creative endeavors, can sometimes leave us scratching our heads when it comes to sticking things onto it. But fret not. In this handy guide, we’ll walk you through the process of gluing something to acrylic with ease and finesse. Get ready to unleash your inner glue guru.
How do you glue something to acrylic?
Contents
- 1 How do you glue something to acrylic?
- 2 What is Acrylic and Why is it Different?
- 3 Choosing the Right Adhesive for Bonding Acrylic
- 4 Preparing the Surfaces to be Bonded
- 5 Applying the Adhesive
- 6 Aligning and Pressing the Objects Together
- 7 Curing Time for a Strong Bond
- 8 Other Adhesives Suitable for Bonding Acrylic
- 9 Conclusion
Prep Like a Pro:
Before diving into the gluing action, make sure both the acrylic surface and the object you’re attaching are squeaky clean. Give them a gentle scrub with mild soap and water, then let them air-dry completely. This ensures a solid bond that’s built to last.
Pick Your Perfect Partner:
Choosing the right adhesive is key to successful adhesion. Look for adhesives specifically formulated for acrylics, like trusty cyanoacrylate (super glue) or methyl methacrylate (MMA) adhesives. These bad boys offer super-strong bonds that won’t let you down.
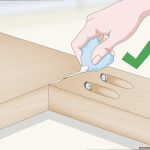
Apply with Precision:
Time to get sticky. Apply a small amount of adhesive to both the acrylic surface and the object you’re gluing on. Less is more in this case – a few dots or a thin line should do the trick without creating a gloopy mess.
Press and Hold (Like You Mean It):
Now comes the satisfying part – press that object onto the acrylic surface with purpose. Make sure it’s aligned just right, then apply firm and even pressure for a couple of seconds. This helps secure that bond like nobody’s business. Oh, and once it’s in place, hands off. No fidgeting allowed while the adhesive does its thing.
Patience is Key:
Take a deep breath and give that adhesive some time to work its magic. Follow the drying and curing instructions provided by the adhesive manufacturer. Don’t rush this step, my friend – patience pays off with a bond that’s as strong as your DIY game.
Tips for Successful Adhesion:
- Test Before You Commit: If you’re working on something precious or delicate, it’s always wise to do a trial run. Grab a scrap piece of acrylic and give it a test gluing before diving into your main project. It’ll save you heartache later on.
- Read the Fine Print: Adhesive manufacturers know best, so read those instructions carefully.
What is Acrylic and Why is it Different?
Acrylic, a remarkable thermoplastic material derived from acrylic acid, has revolutionized the fields of manufacturing, construction, and art. Its unique properties and versatility set it apart from other materials, making it a popular choice for a wide range of applications.
In this blog post, we will delve into the captivating world of acrylic, exploring its distinct qualities and why it stands out among other materials.
Durability and Impact Resistance:
Acrylic’s exceptional durability makes it a safe alternative to fragile materials like glass. Its impact resistance ensures that it can withstand accidental knocks and bumps without shattering. This feature makes acrylic an ideal choice for windows, display cases, and protective barriers where safety is paramount.
Lightweight and Easy to Handle:
Unlike heavier materials such as glass or metals, acrylic is lightweight, making it easier to handle and transport. This characteristic is especially appreciated in construction projects where weight considerations are crucial.
Versatility in Design:
Acrylic’s malleability allows it to be molded into various shapes and sizes with ease. Whether you’re an artist or a DIY enthusiast, acrylic’s flexibility offers endless possibilities for creative expression. It can be cut, drilled, shaped, and bonded together using adhesives without requiring specialized tools or equipment.
Excellent Optical Properties:
Acrylic possesses exceptional light transmission capabilities, providing crystal-clear visibility through the material. Its refractive index closely resembles that of glass, resulting in minimal distortion or refraction of light passing through acrylic. This quality makes acrylic lenses, signage, and lighting fixtures highly sought after.
Weathering and UV Resistance:
Acrylic exhibits remarkable resistance to weathering and UV radiation. Unlike some plastics that degrade or discolor over time when exposed to sunlight or harsh environmental conditions, acrylic maintains its clarity and color stability. This attribute makes it suitable for outdoor applications, including architectural elements and signage.
Cost-Effectiveness:
Acrylic’s affordability compared to glass and certain metals makes it an attractive choice for budget-conscious projects. Its ease of fabrication and customization also contribute to cost savings, as it can be easily manipulated without requiring complex manufacturing processes.
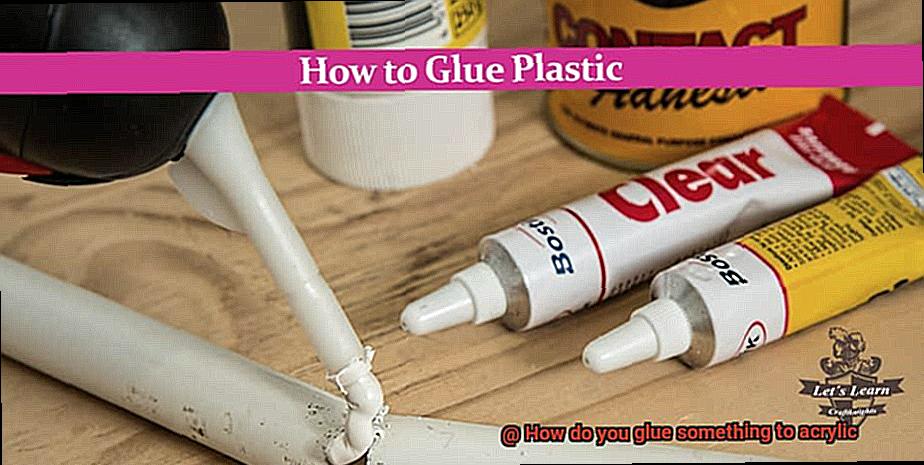
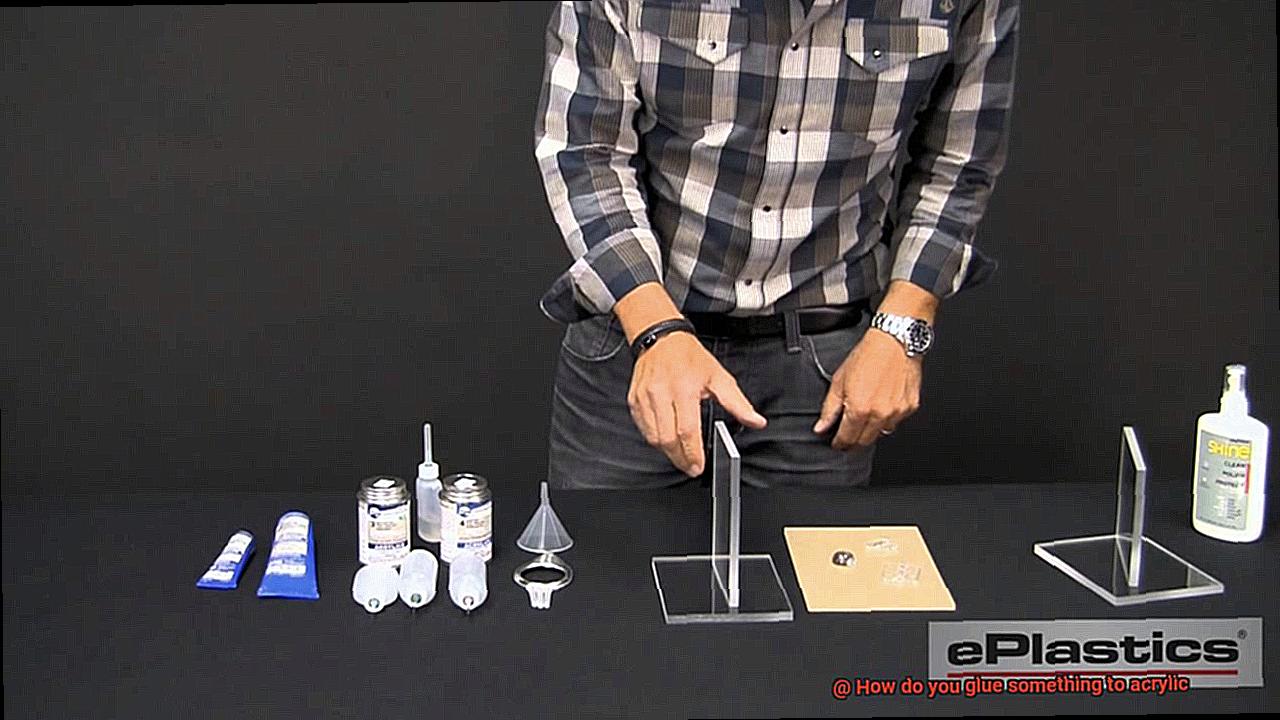
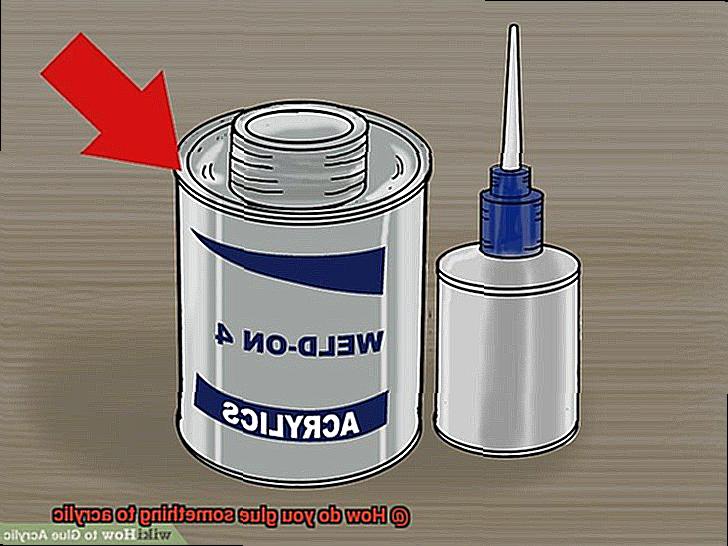
Choosing the Right Adhesive for Bonding Acrylic
When it comes to working with acrylic, finding the perfect adhesive is crucial for achieving a strong and durable bond. Acrylic is a versatile material that can be used in a wide range of applications, from signage and displays to furniture and even art. However, not all adhesives are created equal, and selecting the right one is essential for ensuring a successful bond.
- Solvent-Based Adhesive: Solvent-based adhesives are a popular choice for bonding acrylic. These adhesives work by dissolving the surface of the acrylic, creating a strong bond as the solvent evaporates. The advantages of solvent-based adhesives include fast curing time and high bond strength. However, it’s important to note that they can be quite toxic and require proper ventilation during application.
- Two-Part Epoxy Adhesive: Epoxy adhesives consist of a resin and a hardener that need to be mixed together before application. Once mixed, epoxy provides a strong and durable bond with excellent resistance to heat and chemicals. The advantages of epoxy adhesives include their high bond strength and resistance properties. However, they may have a longer curing time and require precise mixing ratios.
- Acrylic-Based Adhesive: If you’re looking for a more user-friendly option, acrylic-based adhesives are specifically designed for bonding acrylic. These adhesives offer a clear and transparent bond, making them ideal for applications where aesthetics are important. Acrylic-based adhesives come in two forms: liquid or tape. The liquid form allows for precise application and quick drying, while the tape form offers convenience and ease of use.
- UV-Curing Adhesive: For applications that require instant bonding, UV-curing adhesives are an excellent choice. These adhesives cure when exposed to ultraviolet light, providing a fast and strong bond. They are often used in the production of electronic devices where speed is of the essence. However, it’s important to have access to UV light sources for proper curing.
When choosing an adhesive for bonding acrylic, consider factors such as the specific application, desired bond strength, and environmental conditions. It’s also recommended to follow the manufacturer’s instructions and conduct a small test before applying the adhesive to the entire surface.
Preparing the Surfaces to be Bonded
When it comes to bonding materials together, surface preparation is the secret ingredient for a successful and long-lasting bond. Just like finding the perfect partner, you need to ensure that the surfaces are clean, compatible, and ready to stick together. In this article, we will explore the steps and techniques involved in preparing surfaces for optimal adhesion.
Step 1: Cleaning the Surfaces
Thoroughly clean the surfaces before starting any bonding process. Dirt, dust, or oils can interfere with the adhesive bond. Use a mild detergent or soap mixed with water to gently scrub the surfaces using a soft cloth or sponge. Avoid harsh chemicals that can damage the materials.
Step 2: Rinse and Dry
After cleaning, rinse the surfaces with clean water to remove any soap residue. Completely drying the surfaces is essential. Moisture can hinder adhesion, so allow them to air dry or use a clean, lint-free cloth.
Step 3: Lightly Sanding
Create a roughened texture for enhanced adhesion by lightly sanding the surfaces using fine-grit sandpaper. Gently sand in a circular motion, being careful not to apply too much pressure or scratch the materials.
Step 4: Remove Dust and Debris
After sanding, remove any dust or debris using a soft brush or compressed air. This step ensures that no particles interfere with the adhesive bond.
Step 5: Consider Additional Preparations
Depending on the materials and bonding requirements, additional preparations may be necessary. For bonding larger or heavier objects to acrylic, using a solvent-based cleaner or primer designed for acrylic bonding can enhance adhesion.
Step 6: Control Temperature and Humidity
Consider temperature and humidity conditions during surface preparation. Ideal bonding conditions vary depending on the adhesive used, so refer to manufacturer’s instructions for specific recommendations. Working in a well-ventilated area with moderate temperature and humidity levels is generally recommended.
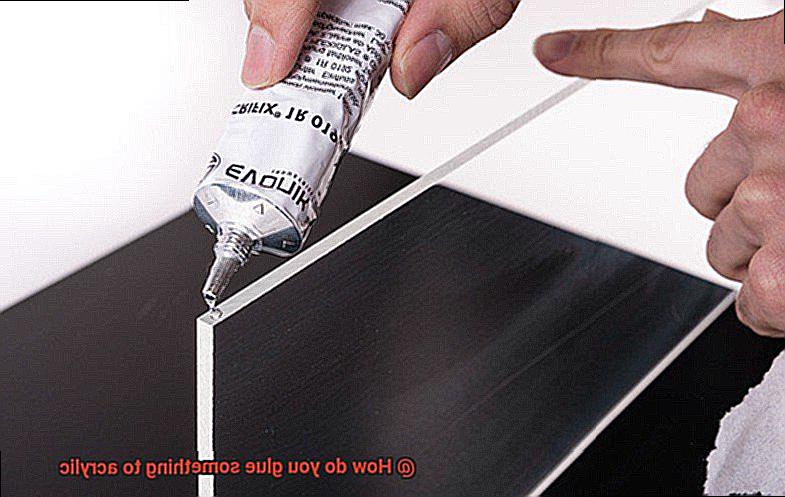
Applying the Adhesive
Gluing objects to an acrylic surface may seem like a daunting task, but fear not. In this article, we will guide you through the necessary steps to ensure a strong and long-lasting bond.
So, grab your glue and let’s embark on this exciting journey.
Step 1: Cleanliness is Key
Before diving into adhesive application, cleanliness is paramount. Take a moment to clean both the acrylic surface and the object you wish to glue. A simple wipe-down with a clean cloth dampened with isopropyl alcohol will banish any dust, dirt, or oils that could hinder adhesion.
Step 2: Choose the Perfect Adhesive
Selecting the right adhesive is essential for achieving a flawless bond. With various options available, such as solvent-based adhesives, epoxy adhesives, or acrylic-based adhesives, it’s crucial to choose an adhesive specifically designed for bonding acrylic. This ensures a connection that is not only strong but also enduring.
Step 3: Test, Test, Test
To avoid any mishaps or damage to your precious acrylic surface, it’s wise to perform a compatibility test on a small, inconspicuous area. This step guarantees that the adhesive won’t cause discoloration or harm your precious acrylic surface.
Step 4: Follow Manufacturer’s Instructions
Once you’ve found the perfect adhesive, it’s time to embark on the application process. Carefully read and adhere to the manufacturer’s instructions. Some adhesives may require mixing or specific application techniques. Remember to apply the adhesive evenly and avoid going overboard as excessive amounts can weaken the bond.
Step 5: Bonding Time.
Align the object you want to glue with the acrylic surface and apply gentle pressure to establish excellent contact between the two surfaces. Depending on the adhesive type, you might need to hold them together for a specific period until the adhesive sets.
Step 6: Patience is a Virtue
After the adhesive has set, exercise patience and refrain from subjecting the bond to stress or strain for at least 24 hours. This allows the adhesive to fully cure, resulting in a robust and long-lasting bond that will stand the test of time.
Step 7: Finishing Touches
If you notice any excess adhesive or smudges, fear not. Simply use a solvent recommended by the adhesive manufacturer to clean them up. Remember to follow safety precautions when handling solvents to ensure a smooth and safe finishing touch.
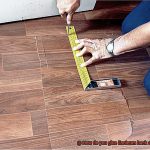
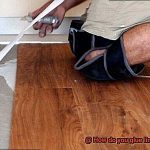
Aligning and Pressing the Objects Together
Aligning and pressing objects together is a crucial step in achieving a strong and secure bond when gluing something to acrylic. To ensure a successful outcome, it is important to follow a few expert tips and techniques. Let’s dive into the exciting world of gluing and discover how to properly align and press objects together for a flawless finish.
The first step in this process is to clean both the acrylic surface and the object you are gluing. Dust, oils, and debris can hinder the bonding process, so it’s essential to wipe them away. A mild detergent or isopropyl alcohol can be used for a thorough cleaning.
Once everything is squeaky clean, it’s time to determine the exact placement and alignment of your object on the acrylic surface. To make this task easier, lightly mark the desired position with a pencil or masking tape before applying the adhesive.
Speaking of adhesive, it’s important to use just the right amount. Applying too much can lead to excess glue seeping out and creating a messy finish. A small amount applied to both the acrylic surface and the object being glued should suffice.
With the adhesive in place, take a deep breath and carefully align your object with the marked position on the acrylic surface. This step requires patience and precision to ensure a perfect fit.
Now comes the exciting part – pressing the objects together. Apply even pressure across the entire surface of your object using your hands, a clean cloth, or even a roller tool specifically designed for this purpose. The key here is to be gentle yet firm, ensuring that the bond between the materials is secure.
If there are any gaps between the object and the acrylic surface, don’t worry. You can use clamps or tape to hold them in place while the adhesive dries. This will guarantee a tight bond between the two materials.
Patience is crucial at this stage – allow sufficient drying time for the adhesive to cure according to the manufacturer’s instructions. Avoid moving or disturbing the glued objects during this time to prevent any potential weakening of the bond.
Once the adhesive has fully cured, it’s time to inspect your masterpiece. Look for any signs of weakness or detachment. If necessary, apply additional adhesive or reinforcement to further strengthen the bond.
Congratulations. You have successfully aligned and pressed your objects together for a strong and durable bond. Take a moment to sit back, relax, and admire your handiwork. With these expert tips and techniques, your glued masterpiece is sure to stand the test of time.
Curing Time for a Strong Bond
Curing time is a critical factor when it comes to achieving a robust and unbreakable bond between two materials. Whether you’re gluing together pieces of acrylic or any other material, understanding the importance of curing time is essential for success in your gluing endeavors. So, let’s dive deeper into this fascinating world of adhesion.
Picture this: you’re crafting a stunning acrylic display case to showcase your most treasured possessions. You’ve painstakingly aligned the pieces, applied the adhesive, and now you hold your breath as you press them together. But here’s the catch – if you don’t allow ample time for the adhesive to cure, your display case might crumble under even the gentlest touch.
One commonly used adhesive for bonding acrylic is cyanoacrylate, also known as super glue. You’re probably familiar with this fast-drying adhesive. However, it’s crucial to keep in mind that the initial curing time of cyanoacrylate doesn’t necessarily indicate its full strength. While it may seem like the bond is rock solid right away, giving it sufficient time to cure is paramount for maximum durability.
Typically, experts recommend letting cyanoacrylate adhesive cure for at least 24 hours before subjecting the bonded materials to any stress or load. This extended curing time allows the adhesive to reach its peak bonding strength. Remember, patience is the secret ingredient when it comes to achieving a rock-solid connection.
But that’s not all. The environment in which you’re working can have a significant impact on curing time. Temperature and humidity levels play crucial roles in how quickly the adhesive dries and hardens. Higher temperatures tend to expedite the curing process, while lower temperatures slow it down. Similarly, higher humidity can prolong the curing time, while lower humidity speeds it up.
Now, let’s discuss surface preparation. Acrylic has a sleek and non-porous surface that poses a challenge for adhesives to penetrate and bond effectively. To enhance the adhesive’s ability to create a robust bond, experts often recommend scuffing the surface of the acrylic before applying the adhesive. This process involves creating small scratches or roughening the surface to provide more contact area for the adhesive to cling to. Keep in mind that scuffing the surface might slightly increase the curing time.
Other Adhesives Suitable for Bonding Acrylic
Put on your safety goggles, and let’s embark on a journey to discover the glue that will elevate your projects to new heights.
Epoxy – The Indestructible Bond:
In the adhesive arena, epoxy reigns supreme. This formidable two-part adhesive, combining resin and hardener, creates an unbeatable bond when mixed. Renowned for its strength and durability, epoxy is the go-to choice for projects that demand longevity and resilience.
Cyanoacrylate – The Superhero Adhesive:
Behold the superhero of adhesives: cyanoacrylate, also known as super glue. With lightning-fast drying properties, this adhesive forms an instantaneous and robust bond between acrylic surfaces. But beware, not all cyanoacrylates are created equal – be sure to select a formula specifically designed for bonding acrylic.
Polyurethane – The Versatile Champion:
In the world of adhesives, versatility is paramount. Enter polyurethane adhesive. With its exceptional bonding capabilities across various materials, including acrylic, polyurethane is a true champion. Its unique blend of strength and flexibility makes it ideal for applications where movement or stress may come into play.
Silicone – Adhesion with Flexibility:
When seeking an adhesive that excels at bonding and sealing tasks, silicone takes center stage. With outstanding adhesion and flexibility, it is perfect for applications involving potential movement or vibration. Additionally, silicone boasts excellent resistance to moisture and chemicals, ensuring a reliable bond.
UV-Curing – The Speed Demon:
For those moments when time is of the essence, UV-curing adhesives come to the rescue. These magical adhesives swiftly cure when exposed to ultraviolet light, making them ideal for situations where rapid bonding is crucial. They are particularly effective when other adhesives fall short, ensuring your projects stay on track.
hT6Ow_cBTps” >
Conclusion
When it comes to gluing something to acrylic, there are a few key steps you need to follow. First and foremost, make sure you have the right adhesive for the job. Acrylic is a smooth and non-porous material, so you’ll want to choose an adhesive that is specifically designed for bonding with plastics.
Next, prepare the surface of the acrylic by cleaning it thoroughly. Any dirt or residue can prevent the adhesive from properly adhering. Use a mild detergent and warm water to gently clean the surface, and then dry it completely with a lint-free cloth.
Once your acrylic is clean and dry, apply the adhesive according to the manufacturer’s instructions. Be sure to apply an even layer of adhesive, avoiding any excess that could seep out when pressure is applied.
Now comes the tricky part – attaching your item to the acrylic. Carefully position it in place and apply steady pressure for a few minutes to allow the adhesive to bond. You may want to use clamps or tape to hold everything in place while it dries.
Finally, give it some time to cure. The drying time will vary depending on the adhesive used, so be sure to check the instructions for specific recommendations. Avoid disturbing or putting stress on the glued area until it has fully cured.
In conclusion, gluing something to acrylic requires careful preparation and attention to detail.