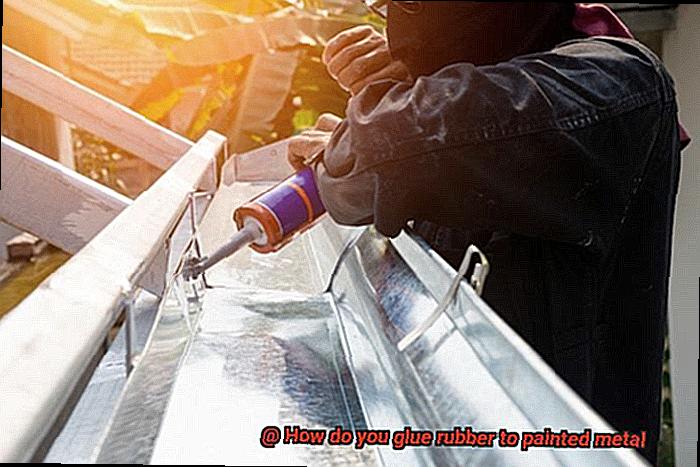
Ever found yourself in a sticky situation, desperately needing to attach rubber to painted metal but clueless about how to achieve a rock-solid bond? Fear not, my friend, for you’ve stumbled upon a goldmine of wisdom. In this all-encompassing guide, we’ll dig deep into the nitty-gritty of successfully gluing rubber to painted metal surfaces – sealing the deal like a true pro.
Picture this: you’ve got a gorgeous vintage car with a gleaming paint job, but oh no. The rubber door trim is starting to loosen its grip. You need a solution that’ll firmly adhere the rubber without damaging the paint. Or maybe you’re knee-deep in a DIY project that involves sticking rubber pads onto painted metal surfaces, and you’re dreading the thought of them peeling off at the slightest touch.
Fret no more, brave souls, for we’re about to unveil the secrets behind bonding rubber to painted metal surfaces. From choosing the perfect adhesive to prepping both materials like an absolute boss, this guide will arm you with all the necessary know-how to tackle this task like a seasoned pro.
In the upcoming sections, we’ll explore key points to consider when bonding rubber to painted metal. We’ll dive into different types of adhesives suitable for this purpose – their strengths and weaknesses laid bare. And let’s not forget about surface preparation – it’s crucial in ensuring an unbreakable bond that stands strong against time’s relentless test.
So get ready to expand your DIY repertoire and achieve flawlessly fused rubber-to-metal attachments that endure through countless projects and repairs. Let’s dive in together and unravel the art of gluing rubber to painted metal surfaces.
Choosing the Right Adhesive
Contents
When it comes to bonding rubber to painted metal, the adhesive you choose can mean the difference between success and failure. In this captivating guide, we will explore the intricate world of adhesive selection for this specific application. From deciphering rubber types to decoding environmental conditions, we will equip you with the knowledge to make an informed decision and achieve a bond that stands the test of time.
Decoding Rubber and Painted Metal:
- To embark on your adhesive journey, identify the type of rubber at hand. Is it natural or synthetic? Each rubber variant may require a different adhesive for optimal bonding.
- Don’t overlook the painted metal surface. Certain paints contain additives that can hinder adhesion. Uncover any compatibility requirements between your rubber and painted metal materials.
Conquering Environmental Challenges:
- The battle against extreme temperatures begins. Consider the range of conditions your bonded materials will face. Some adhesives thrive in blazing heat, while others excel in sub-zero temperatures.
- Beware of moisture and chemicals lurking in the shadows. Check if your adhesive of choice is equipped to handle these formidable foes.
The Heroes of Adhesive Options:
- Enter epoxy adhesives, known for their Herculean strength and unmatched durability. However, tread carefully and ensure that the chosen epoxy adhesive is specifically designed for bonding rubber to painted surfaces.
- Behold polyurethane adhesives, the champions of flexibility and moisture resistance. Ideal for applications where movement or vibration is expected, these heroes deserve a spot on your shortlist.
- Seek out specialized adhesives crafted exclusively for bonding rubber to painted metal. These gems boast excellent adhesion properties and are engineered to withstand even the harshest environmental conditions. Consult with suppliers or manufacturers specializing in these adhesives for expert guidance.
Preparing the Battlefield:
- Before the adhesive showdown, prepare the surfaces for battle. Arm yourself with a mild detergent or cleaning solution to vanquish dust, dirt, grease, and other contaminants from both the rubber and painted metal surfaces.
- For an added advantage, employ the power of sandpaper or a fine-grit sanding block. By creating a roughened surface, you provide the adhesive with a stronghold to cling onto.
Preparing the Surfaces
In our previous section, we delved into the fascinating world of adhesive selection and decoding rubber types. Today, we embark on a new adventure as we explore the crucial steps involved in preparing the surfaces when gluing rubber to painted metal. Get ready to unleash the power of surface preparation and conquer the battle of bonding with our expert tips.
Step 1: The Cleanliness Crusade
Before diving into the realm of adhesion, we must ensure that our surfaces are squeaky clean. Prepare for battle by arming yourself with a mild detergent or solvent recommended for your specific rubber and paint. With a soft cloth or sponge in hand, wage war against dirt, dust, grease, and any residue that dares to interfere with the bonding process. Remember, cleanliness is key to victory.
Step 2: Embrace the Gentle Scuff
Now that our surfaces are pristine, it’s time to give the painted metal a little love. Channel your inner artist as you delicately wield your fine-grit sandpaper or sanding block. With grace and finesse, lightly caress the painted metal surface to create a rough texture that paves the way for superior adhesion. But beware. Like a true virtuoso, exercise caution to avoid damaging the paint or leaving behind unsightly scratches.
Step 3: Enter the Prime Time
Once you’ve achieved a gently scuffed surface masterpiece, it’s prime time. Prepare to lay down a foundation for success by applying a primer specially crafted for metal surfaces. This mighty primer enhances adhesion and provides a stable base for your glue to work its magic. Heed the wisdom of the manufacturer’s instructions as you apply an even and thin coat of primer. And remember, patience is your ally – allow sufficient drying time before proceeding.
Step 4: Roughen Up, Rubber Warrior
Now it’s time to show the rubber some rough love. Equip yourself with your trusty sandpaper or scouring pad and embark on a mission to toughen up the rubber surface. With a warrior’s heart, gently roughen the rubber, creating micro-abrasions that forge a stronger bond with the painted metal. But tread carefully, for too much roughening can weaken or damage the rubber – and that’s a battle we don’t want to lose.
Applying the Adhesive
In our previous battle against dirt and primers, we prepared the battlefield for the ultimate showdown – gluing rubber to painted metal. Today, we’ll dive into the nitty-gritty of applying adhesive with finesse, ensuring a bond that will withstand the test of time. So grab your brushes and spatulas, and let’s get started.
Surface Preparation:
Before embarking on our adhesive adventure, we must first ensure a squeaky clean battlefield. Armed with a trusty mild detergent or rubbing alcohol, we wage war against dirt, grease, and contaminants. Scrub away with determination, rinse with water, and allow the surfaces to dry completely – a clean slate is essential for a victorious bond.
Choosing the Right Adhesive:
Ah, the age-old quest for the perfect adhesive. To achieve a bond that can withstand any challenge, we must carefully select our weapon. Epoxy, cyanoacrylate (super glue), silicone, or polyurethane – each possesses unique strengths and weaknesses. Consider the materials being bonded, desired strength, flexibility requirements, and resistance to water or heat. Choose wisely, my friends.
Applying the Adhesive:
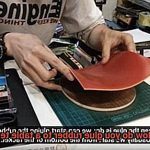
Now comes the moment of truth – applying the adhesive itself. Remember, a little goes a long way. Follow the instructions provided by the adhesive manufacturer for proper application. With brush or spatula in hand, lay down a thin and even layer on both rubber and painted metal surfaces. Beware excess adhesive – too much can weaken our bond. Leave no crevice untouched for maximum effectiveness.
Curing Time:
Patience is a virtue when it comes to adhesive bonding. After applying our chosen adhesive, we must give it ample time to work its magic and cure properly. The curing time varies depending on the adhesive type, so consult the manufacturer’s instructions for guidance. Resist the temptation to test our bond prematurely – let it cure completely before facing any stress or load.
Bonding Pressure:
To achieve a bond that can withstand even the fiercest battles, we must apply pressure during the curing process. Clamps or weights may join our forces, maintaining the perfect squeeze. Fear not, we seek not to crush, but to ensure a steadfast bond that defies all odds.
Bonding the Rubber and Painted Metal
Prepare to be enthralled as we delve into the exhilarating realm of bonding rubber to painted metal. Discover the secrets to creating an unbreakable bond that will conquer any challenge. So, grab your adhesive arsenal and join us on this epic adhesive adventure.
Step 1: Selecting the Perfect Adhesive Weapon
To emerge victorious in the battle of bonding rubber to painted metal, you must choose your adhesive wisely. Enter cyanoacrylate adhesive, also known as super glue. This adhesive boasts lightning-fast curing time and unmatched bond strength. By reacting with moisture in the air, it forms unyielding bonds. But remember, cleanliness is key – ensure your surfaces are clean and dry before applying.
Step 2: Surface Preparation – Roughening the Surfaces
Prepare your surfaces for combat by roughening them up. Arm yourself with sandpaper or a rough cloth and create a textured surface that fortifies adhesion. This step guarantees optimal contact between the rubber and painted metal, forging an indomitable bond. Remember, a warrior is only as strong as their battle armor.
Step 3: Cleaning – The Key to Victory
Cleanliness is paramount for triumphant bonding. Prior to applying the adhesive, eliminate any hint of dust, dirt, grease, or other contaminants from both rubber and painted metal surfaces. A pristine canvas provides the foundation for an unyielding bond. Trust us, cleanliness is not overrated on this battlefield.
Step 4: Applying the Adhesive – Striking with Precision
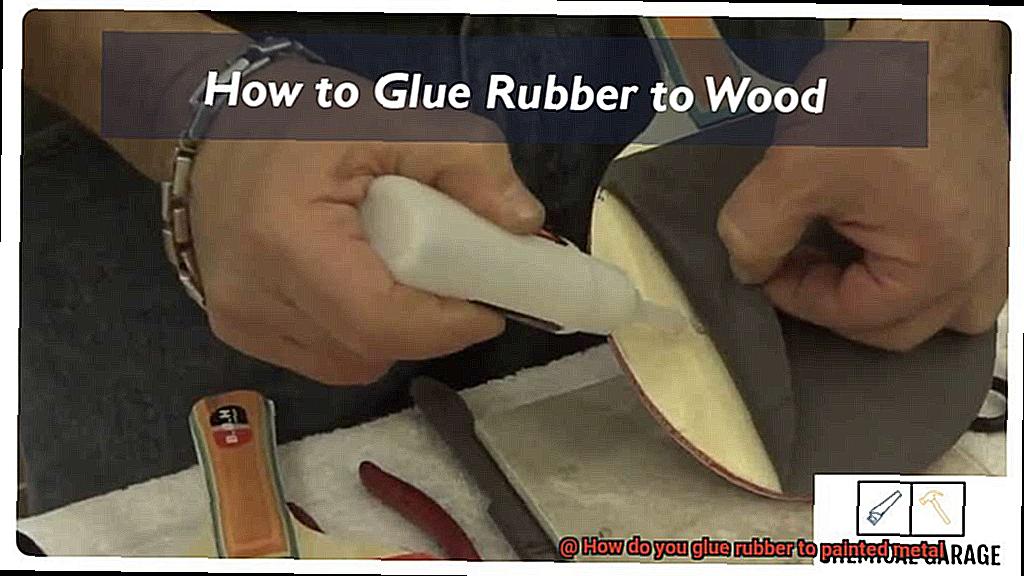
Now it’s time to unleash your adhesive weapon. With precision and finesse, apply a thin layer of cyanoacrylate adhesive onto both rubber and painted metal surfaces. Exercise caution to avoid excess adhesive that may seep out from the bond area. Once applied, press the rubber and painted metal together firmly, ensuring seamless contact between the surfaces. Hold them in place for a few minutes, allowing the adhesive to cure and establish an impenetrable bond.
Curing the Adhesive
In our journey towards mastering the art of bonding rubber to painted metal, we’ve covered the essentials – choosing the right adhesive and prepping our surfaces. But there’s a secret ingredient that ensures our bond stands the test of time: the curing process. Today, as your trusted guide, I’ll unveil the mysteries behind time, temperature, pressure, environmental conditions, and post-curing considerations. Get ready for a transformative adhesive experience.
Time and Temperature: A Delicate Fusion
Curing adhesives is like orchestrating a symphony of time and temperature. Each adhesive has its own unique requirements, demanding unwavering attention to detail. Follow the manufacturer’s instructions diligently, for they hold the key to success. Some adhesives may set in a few hours, but true strength comes with patience – allowing them ample time to cure completely. It’s this harmony that creates a bond capable of withstanding any challenge.
Pressure: The Mighty Embrace
Harnessing the power of pressure during curing is akin to forging an unbreakable embrace between rubber and painted metal surfaces. Whether it’s clamping or strategically placing weights, exerting sufficient force ensures every nook and cranny connects flawlessly. Picture it as a tight squeeze that leaves no room for doubt, forging an indomitable bond.
Environmental Conditions: Nature’s Test
Ah, the whims of Mother Nature – a formidable adversary in our adhesive odyssey. Temperature, humidity, and airflow all play their part in the curing process. Different adhesives have unique preferences when it comes to optimal curing environments. Respect their desires. Some adhesives are versatile and adapt to various conditions, while others demand specific temperature or humidity levels. Remember, content adhesives translate into triumphant bonds.
Post-Curing Considerations: Treasuring the Bond
Congratulations, adhesive conqueror. Your bond has completed its transformative journey, but its strength must be cherished. Handle your glued rubber-to-painted metal creation with care, treating it as a precious relic. Avoid subjecting it to excessive stress or extreme temperatures that could undermine its might. Regular inspections serve as guardians, ensuring the bond remains invincible over time, ready for any trial.
Inspecting the Bond
In our previous section, we delved into the secrets of adhesive bonding, uncovering the factors that contribute to a robust connection between rubber and painted metal surfaces. Today, we shift our focus to the all-important task of inspecting the bond. Why is this step so vital, you ask? Well, my friends, by inspecting the bond, we can uncover any potential weaknesses or issues that may arise over time. So, grab your magnifying glasses and join me as we explore the art of inspecting the bond.
The Three Pillars of Inspection:
Adhesion – A Rock-Solid Connection:
Adhesion, my friends, is more than just sticking two things together; it’s about forging an unbreakable embrace between rubber and painted metal. To ensure a successful bond, choose an adhesive specifically designed for this unique combination. Look for one with Herculean bonding properties that won’t easily break or weaken under stress or environmental conditions.
Flexibility – The Elastic Bond:
Just like relationships, bonds between rubber and painted metal require flexibility. These materials can expand and contract at different rates due to temperature changes or movement. Therefore, the adhesive used should possess the resilience to withstand these fluctuations without losing its adhesive prowess. A flexible bond guarantees that your rubber and painted metal can move in perfect harmony without cracks or separations.
Resistance – Defying the Elements:
Rubber and painted metal face diverse challenges in their environment – moisture, heat, chemicals, UV rays – you name it. That’s why it’s crucial to choose an adhesive with resistance properties tailored to withstand these elements. Regular inspections help identify any signs of degradation or weakening caused by exposure to these environmental foes.
Visual Examination – Eyes Don’t Lie:
Begin your inspection by unleashing your keen eye upon the bond, searching for any visible signs of damage or separation. Look for cracks, gaps, or areas where the rubber might be peeling away from the painted metal surface. The powerful gaze of your eyes will uncover any potential weak points that require your attention.
Common Mistakes to Avoid
You’ve got a project that involves bonding rubber to painted metal. Before you dive in, it’s crucial to be aware of some common mistakes that can compromise the success of your bonding endeavor. In this section, we’ll explore these pitfalls and share valuable tips to help you avoid them. Let’s get started on creating a strong and lasting bond between these two materials.
Choosing the Wrong Adhesive:
Using a generic adhesive is like trying to fit a square peg into a round hole – it just won’t work. To achieve a strong and durable bond, it’s essential to select an adhesive specifically designed for bonding rubber to painted metal surfaces. Take the time to research and choose an adhesive that is suitable for both materials. Trust me; it will save you headaches down the road.
Neglecting Surface Preparation:
Just like building a house on a shaky foundation is asking for trouble, not properly preparing the surfaces before applying the adhesive can lead to disaster. Ensure that both the rubber and painted metal surfaces are clean and free of any dirt, grease, or debris. A quick wash with mild soap or detergent followed by thorough drying will provide the ideal foundation for a successful bond.
Improper Application Technique:
Adhesive application is an art form in itself. To achieve a strong bond, follow the manufacturer’s instructions carefully. Pay attention to the recommended amount of adhesive to use, spread it evenly on both surfaces, and allow sufficient drying or curing time. Rushing through this process or taking shortcuts can compromise the strength of your bond. Remember, patience is key.
Insufficient Pressure During Bonding:
A little pressure goes a long way when it comes to bonding rubber to painted metal. Applying adequate pressure ensures proper contact between the surfaces, allowing the adhesive to work its magic. Don’t be afraid to use clamps or weights to hold the two materials together while the adhesive cures. They won’t mind a little squeeze.
Premature Stress or Load:
Patience is a virtue, my friends. Once you’ve bonded the rubber to the painted metal, it’s tempting to put your creation to the test right away. But hold your horses. Give the adhesive enough time to fully cure before subjecting it to stress or load. Prematurely exposing the bond to pressure can weaken or break it, leading to failure.
Alternatives to Epoxy Adhesives
When it comes to bonding rubber to painted metal, epoxy adhesives have long been the preferred choice due to their strength and durability. However, there exists a world of alternative adhesives that can also provide exceptional bonding capabilities. In this article, we will explore these alternatives and delve into their unique benefits for gluing rubber to painted metal surfaces. Brace yourself for a fascinating journey into the realm of adhesive options.
Polyurethane Adhesives: Flexibility, Strength, and Chemical Resistance
One excellent alternative to epoxy adhesives is polyurethane adhesive. Renowned for its flexibility, high bond strength, and resistance to chemicals and extreme temperatures, polyurethane adhesive creates a robust bond between rubber and painted metal surfaces. Whether you’re tackling automotive repairs or industrial applications, polyurethane adhesives offer a reliable solution that withstands the test of time.
Cyanoacrylate Adhesives: Lightning-Fast Bonding Power
In need of lightning-fast bonding? Look no further than cyanoacrylate adhesives, also known as super glue. These adhesives boast remarkable bonding strength and work wonders on various materials, including rubber and painted metal. Thanks to their rapid-drying nature, cyanoacrylate adhesives are perfect for quick repairs or time-sensitive projects where efficiency is key.
Silicone-Based Adhesives: The Flexible Bonding Solution
For projects requiring a flexible bond, silicone-based adhesives prove to be an excellent alternative. With their flexibility, resistance to extreme temperatures, and exceptional adhesive properties, silicone-based adhesives are commonly employed in applications where flexibility is paramount. Whether you’re sealing windows or assembling delicate electronic components, silicone-based adhesives offer reliability at its finest.
Acrylic Adhesives: Weatherproof and UV-Resistant
When outdoor applications demand resistance to UV radiation, weathering, and aging, acrylic adhesives step up to the plate. Forming a strong bond between rubber and painted metal surfaces, these adhesives are ideal for a myriad of projects. From outdoor signage to repairing outdoor furniture, acrylic adhesives endure the elements and ensure long-lasting results that withstand the test of time.
crzEogUOFrs” >
Conclusion
When it comes to gluing rubber to painted metal, there are a few important things to keep in mind. First and foremost, you’ll need to choose the right adhesive for the job. Look for an adhesive specifically designed for bonding rubber and metal surfaces together.
Before applying the adhesive, make sure both the rubber and painted metal surfaces are clean and free of any dirt or debris. This will ensure a strong bond between the two materials.
Once the surfaces are prepared, apply a thin layer of adhesive onto both the rubber and painted metal surfaces. Be sure to follow the manufacturer’s instructions regarding application and drying time.
Press the rubber firmly onto the painted metal surface, making sure it is evenly distributed. Apply pressure for a few minutes to allow the adhesive to set properly.
After allowing sufficient drying time, test the bond by gently pulling on the rubber. If it holds securely without any signs of detachment or peeling, you’ve successfully glued rubber to painted metal.
Remember, proper surface preparation and using the right adhesive are key factors in achieving a strong and durable bond between rubber and painted metal.