Got a project that demands the fusion of PVC and acrylic? Whether you’re a DIY fanatic, a master fabricator, or an artistic genius, the idea of flawlessly joining these materials may seem like an intimidating mountain to climb. But fear not. We’re here to unveil the secret behind achieving a flawless bond between PVC and acrylic.
Imagine having the power to create mind-blowing displays, intricate structures, or even functional masterpieces that flawlessly blend PVC’s robust versatility with acrylic’s mesmerizing crystal-clear allure. This ultimate guide is your ticket to acquiring the knowledge and techniques needed to make it happen.
But before we dive into the nitty-gritty details, let us enthrall you with a mind-boggling fact: did you know that PVC and acrylic possess inherently contrasting properties, making their combination an intricate dance? While PVC boasts strength and durability as a thermoplastic champion, acrylic shines with its transparency while being delicate. Yet fear not. Combining them is not only possible but can yield jaw-dropping results.
In this comprehensive blog post extravaganza, we’ll explore the most effective methods for uniting PVC and acrylic. From solvent cement adhesives to epoxy resins and UV-curing glues, we’ve got all the secrets covered. Step-by-step processes will be dissected with precision, emphasizing the importance of surface preparation while sharing expert tips to ensure nothing short of an impeccable bond.
So whether you’re a passionate hobbyist or a seasoned pro seeking perfection in every project, get ready to unlock the mysteries of seamlessly bonding PVC and acrylic. Prepare yourself for an elevated level of craftsmanship that will leave onlookers spellbound.
What Types of Adhesives Can Be Used for Glue PVC to Acrylic?
Contents
- 1 What Types of Adhesives Can Be Used for Glue PVC to Acrylic?
- 1.1 Solvent-Based Cement:
- 1.2 Epoxy Adhesive:
- 1.3 Acrylic Adhesive:
- 1.4 Cyanoacrylate Adhesive:
- 1.5 Surface Preparation:
- 1.6 Achieving a strong bond between PVC and acrylic requires careful surface preparation. Before applying any adhesive, ensure both surfaces are clean, dry, and free from contaminants or oils that could hinder the bonding process. To enhance the adhesive’s grip, consider lightly sanding or roughening the surfaces. This simple step will significantly improve the overall bond strength.
- 1.7 Conclusion:
- 2 Preparing the Surfaces Before Applying Adhesive
- 3 Applying the Adhesive
- 4 Pressing the PVC and Acrylic Together
- 5 Curing the Bonded Pieces
- 6 Using Epoxy Adhesives for Glue PVC to Acrylic
- 7 Pros and Cons of Using Solvent Cement vs Epoxy Adhesives
- 8 Tips for a Strong Bond Between PVC and Acrylic
- 9 Conclusion
Creating a sturdy and long-lasting bond between PVC and acrylic requires selecting the right adhesive. In this comprehensive guide, we will explore the various adhesives available for this purpose. From solvent-based cement to epoxy adhesives, we will delve into their unique characteristics and application methods. Let’s embark on this adhesive adventure.
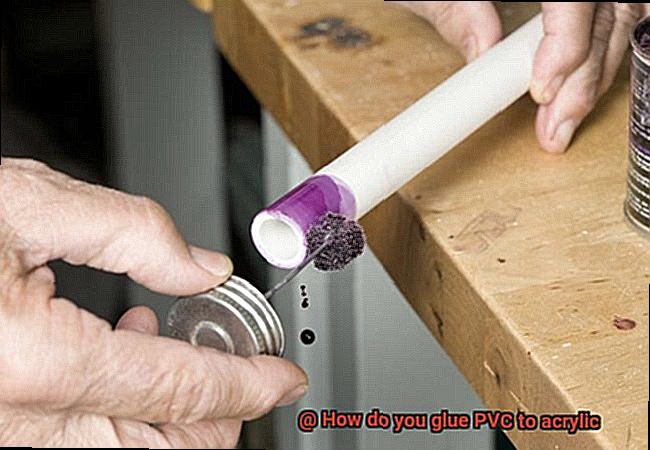
Solvent-Based Cement:
Solvent-based cement is a tried-and-true adhesive for bonding PVC to acrylic. This powerful adhesive works by chemically softening the surfaces of both materials, allowing them to fuse together as the solvent evaporates. Despite its incredible bonding strength and ease of application, solvent-based cement can be a bit messy and emit strong fumes during the curing process. So, it’s essential to use it in a well-ventilated area.
Epoxy Adhesive:
When it comes to strength and versatility, epoxy adhesives are an excellent choice for bonding PVC to acrylic. Comprising a resin and a hardener that must be mixed before application, epoxy adhesives offer remarkable bonding strength and resistance to moisture, heat, and chemicals. However, keep in mind that epoxy adhesives may require clamping or support during the curing process due to their longer setting time. Patience is key.
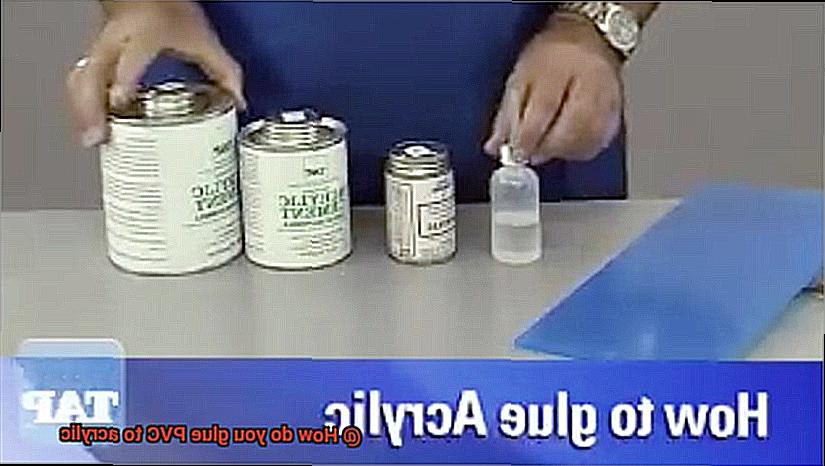
Acrylic Adhesive:
Specifically formulated for bonding acrylic materials, acrylic adhesives are an ideal choice for gluing PVC to acrylic. These adhesives boast good transparency and excellent weather resistance, making them suitable for various applications. They also provide a fast and robust bond. However, if your project requires high strength or load-bearing capabilities, consider exploring other adhesive options.
Cyanoacrylate Adhesive:
If you’re in need of a quick bond, cyanoacrylate adhesives, famously known as super glue, can be used to bond PVC to acrylic. These adhesives bond rapidly and offer decent strength. However, it’s important to note that they may not be the best choice for large or heavy applications, as they can become brittle over time. So, assess your project requirements before opting for super glue.
Surface Preparation:
Achieving a strong bond between PVC and acrylic requires careful surface preparation. Before applying any adhesive, ensure both surfaces are clean, dry, and free from contaminants or oils that could hinder the bonding process. To enhance the adhesive’s grip, consider lightly sanding or roughening the surfaces. This simple step will significantly improve the overall bond strength.
Conclusion:
In conclusion, several types of adhesives can be used to glue PVC to acrylic, including solvent-based cement, epoxy adhesives, acrylic adhesives, and cyanoacrylate adhesives. Each adhesive offers its own advantages and limitations, so it’s crucial to select the one that aligns with your specific project requirements.
Preparing the Surfaces Before Applying Adhesive
In our previous section, we uncovered the secrets of creating unbreakable bonds between PVC and acrylic materials. But before we dive into the world of powerful adhesives, let’s embark on a surface preparation journey that will make your project shine with a bond as strong as steel.
Step 1: Cleaning – Banishing Contaminants
To ensure an impeccable bond, the first crucial step is to clean the surfaces thoroughly. Bid farewell to dirt, grease, and other contaminants that may try to sabotage your adhesive bond. Grab a mild soap or detergent and mix it with warm water. Give those surfaces a vigorous scrubbing to ensure they’re squeaky clean.
Step 2: Dry it Out – Moisture is the Enemy
Moisture can be the Achilles’ heel of your adhesive bond. So after cleaning, make sure to dry the surfaces completely. Take a clean cloth or paper towel and banish every last droplet of moisture from both the PVC and acrylic surfaces. Trust me, a little extra effort here goes a long way in ensuring a strong bond.
Step 3: Rough it Up – Sanding for Success
Step 4: Dust Off – Cleanliness is Key
After sanding, you’ll be left with some dust and debris. We don’t want those interfering with our adhesive bond, do we? Wipe away any remnants of the sanding process with a tack cloth or a lint-free cloth. This extra step ensures a clean and seamless bond, free from any hindrances.
Step 5: Priming – An Extra Boost for the Bond
Sometimes, a little extra boost is needed to achieve the ultimate adhesive bond between PVC and acrylic surfaces. Enter the world of primers. They work wonders in enhancing the adhesive bond, especially when dealing with certain types of adhesives or bonding dissimilar materials. Consult the adhesive manufacturer’s instructions or seek professional advice to determine if a primer is necessary for your specific adhesive.
Applying the Adhesive
In our previous segment, we delved into the importance of surface preparation. Now, prepare to embark on an exhilarating journey as we explore the captivating process of applying adhesive. Grab your brushes and applicators, because it’s time to get hands-on with this crucial step.
Step 1: The Right Adhesive Makes All the Difference:
When it comes to bonding PVC to acrylic, selecting the perfect adhesive is paramount. Our two contenders for the throne are solvent-based adhesives and epoxy-based adhesives. Solvent-based adhesives work their magic by dissolving surfaces and forging a chemical bond upon evaporation. Remember, choose an adhesive specifically tailored for compatibility with PVC and acrylic.
Step 2: A Canvas Ready for Creation – Surface Preparation:
Before we dive into the world of adhesive application, let us ensure that both PVC and acrylic surfaces are pristine. Cleanliness is key. Thoroughly cleanse both surfaces with a mild detergent and water solution, ensuring they are dry and free from any pesky contaminants. For an added touch of perfection, lightly sand both materials using fine sandpaper or a sanding block to enhance adhesion.
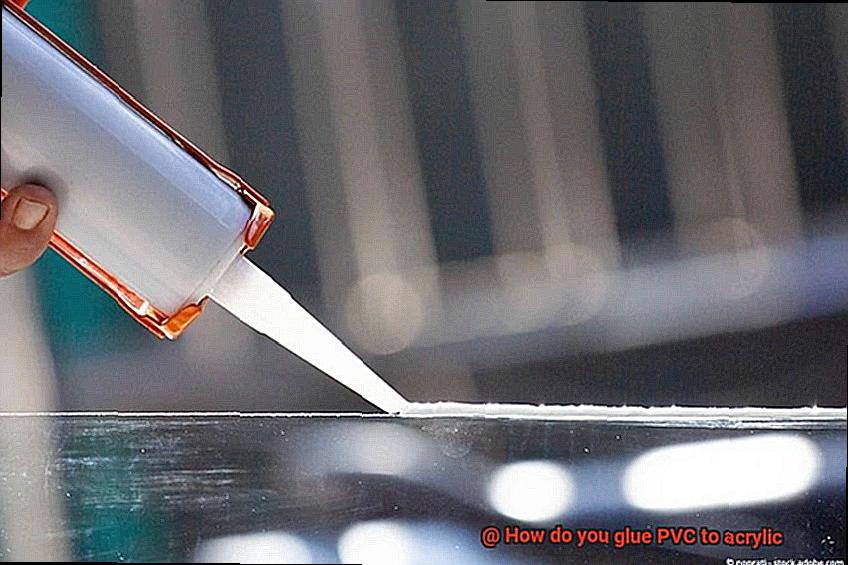
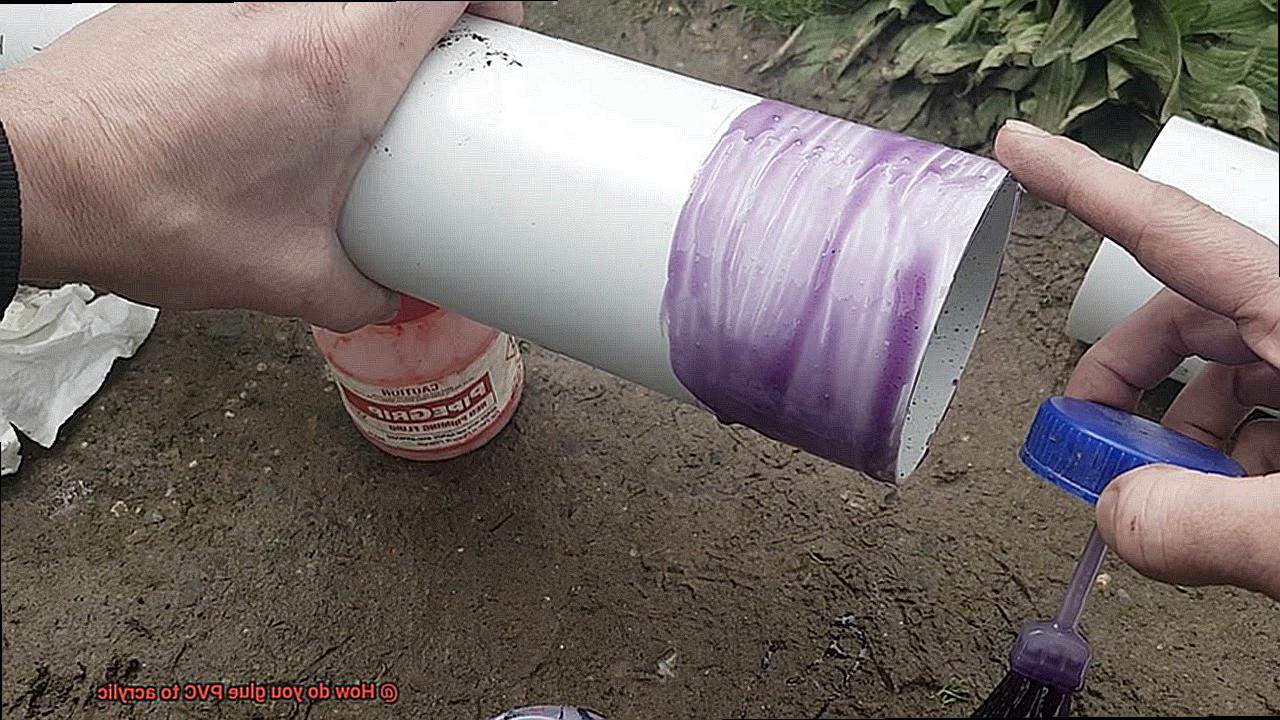
Step 3: Unleash Your Inner Artist – Applying the Adhesive:
Now comes the exhilarating moment we’ve all been waiting for. Follow the sacred instructions bestowed upon us by the adhesive gods. With brush or applicator in hand, apply a small but mighty amount of adhesive to one surface. Spread it evenly over the designated area, ensuring every nook and cranny is covered in this magical elixir.
Step 4: The Dance of Bonding – Bringing It Together:
Behold. The moment of truth has arrived – it’s time to unite PVC and acrylic in a harmonious bond. Gently align the two surfaces, ensuring their perfect alignment. Apply pressure, bestowing your touch of artistry, to ensure a flawless connection. Depending on the adhesive, clamps or tape may be required to hold the materials together while the adhesive works its wonders.
Pressing the PVC and Acrylic Together
Today, we embark on an extraordinary journey as we explore the fascinating process of pressing PVC and acrylic together. Prepare to witness the birth of a bond that is as dazzling as it is unbreakable.
In this guide, I will lead you through the intricate steps required to achieve a powerful connection between these two materials. So, roll up your sleeves, grab your adhesive brushes, and let us create something truly remarkable.
Step 1: Prepare for Perfection
Before we can commence our artistic endeavor, we must meticulously prepare both the PVC and acrylic surfaces. Cleanliness is our guiding principle. Utilize a mild detergent or solvent to banish any dirt, dust, or oils that dare to mar the purity of these materials. Rinse them with water and patiently allow them to dry completely. Remember, even the tiniest contaminants can impede our quest for perfection.
Step 2: Roughen Things Up
Now, let us add a touch of texture to our pristine surfaces. Gently roughen both the PVC and acrylic using sandpaper or a sanding block. This seemingly counterintuitive step enhances the surface area for our adhesive to cling to. Exercise caution, for we seek perfection, not destruction.
Step 3: Choosing the Perfect Adhesive
Ah, the glue that binds us all together. When it comes to uniting PVC and acrylic, selecting the ideal adhesive is paramount. Seek out adhesives specifically formulated for this purpose – solvent-based or epoxy-based adhesives are splendid choices. Ensure your chosen adhesive is compatible with both materials and guarantees a robust bond.
Step 4: Brush on the Magic
With adhesive in hand, let us unleash our brush-wielding magic. Apply a thin layer of adhesive to one surface – either the PVC or acrylic. Employ a brush or applicator to evenly spread the adhesive, enveloping every inch of the surface. Remember, less is more in this case. Drown not our materials in glue, for excess adhesive only tarnishes our masterpiece.
Step 5: The Perfect Union
Now, the moment of truth – pressing our PVC and acrylic together. Align these two materials with utmost care, ensuring their placement is precisely as desired before applying firm pressure. We crave maximal contact between these stunning entities. Exert even pressure across the entire surface area to forge a bond that defies all odds.
Curing the Bonded Pieces
In our pursuit of creating unbreakable connections between PVC and acrylic, we have delved into the meticulous preparation and precise application of adhesives. But our masterpiece is not complete without the final touch – curing the bonded pieces.
Today, I will unveil the significance of proper curing and guide you through this essential process.
So, let us dive into the mesmerizing world of curing and elevate our creations to extraordinary heights.
The Alchemy of Curing:
When we unite PVC and acrylic using adhesives like solvent cement, a captivating chemical reaction unfolds during the curing process. This transformational reaction converts the adhesive into an unyielding bond, ensuring our materials remain inseparable for years to come.
The Dance of Time:
Curing time dances gracefully, playing a pivotal role in achieving the pinnacle of bond strength. The duration varies based on factors such as adhesive type, temperature, humidity, and the size of the bonded pieces. To unlock success, always heed the manufacturer’s instructions regarding curing time for your specific adhesive.
Embrace Tranquility:
During the curing process, bestow upon our bonded pieces a haven of tranquility. Shield them from external forces or disturbances that could undermine or shatter their connection. Let them repose undisturbed, allowing the adhesive to weave its enchantment.
Breath of Fresh Air for Mighty Bonds:
Ventilation becomes an ally in our quest for robust bonds. Adequate airflow in the curing area disperses any fumes or volatile components released by the adhesive during curing. A breath of fresh air not only safeguards your well-being but also nurtures optimal bond strength.
Temperature and Humidity Symphony:
Harmonizing temperature and humidity in our curing environment becomes paramount in shaping formidable bonds. Seek an atmosphere that is neither scorching nor frigid, with moderate humidity levels. This symphony of conditions will empower your bond to reach its full potential.
Unveiling Special Considerations:
Some adhesives demand additional steps or precautions during the curing process. For instance, certain solvent cements may prescribe applying pressure on the bonded pieces using clamps or weights. Always immerse yourself in the instructions provided by the adhesive manufacturer to unlock the finest results.
Using Epoxy Adhesives for Glue PVC to Acrylic
Today, we unlock the potential of epoxy adhesives, a formidable choice for creating unbreakable unions between these two materials. So, gather your tools and prepare to embark on this thrilling adventure together.
Step 1: Prepare for Success
In our quest for greatness, preparation is paramount. Begin by meticulously cleaning both the PVC and acrylic surfaces. Eradicate any dirt, grease, or residue that may obstruct the adhesive’s magical properties. A touch of solvent will suffice. And remember, a gentle sanding of the surfaces will pave the way for a superior bond.
Step 2: The Perfect Potion – A Two-Part Epoxy Adhesive
To achieve a bond that defies time itself, we must harness the power of a two-part epoxy adhesive. This enchanting elixir comprises a resin and a hardener, which must be blended in equal measures. Pay heed to the manufacturer’s instructions regarding ratios and application techniques for your chosen epoxy adhesive.
Step 3: The Dance of Application
With our potion prepared, it is time to apply it with finesse. Take up your brush or spatula and spread the epoxy adhesive evenly across both the PVC and acrylic surfaces. Be generous but not excessive – we seek harmony, not overwhelm. Allow your inner artist to guide your strokes with precision.
Step 4: The Union of PVC and Acrylic
Behold. The grand union beckons as both surfaces merge in perfect harmony. Gently press the PVC and acrylic pieces together, ensuring their alignment is flawless. This moment is pivotal, my friends – the fate of your creation hinges upon this step. Employ clamps or weights to hold the pieces in place as the epoxy adhesive works its enchantment.
Step 5: The Wait – Patience Rewarded
As the epoxy adhesive cures, a transformation occurs. Time becomes our ally, and with each passing moment, the bond grows stronger. Refer to the manufacturer’s instructions to determine the precise curing time for your chosen epoxy adhesive.
Pros and Cons of Using Solvent Cement vs Epoxy Adhesives
Today, we embark on a journey into the realm of PVC and acrylic bonding once again. However, this time, we will explore the pros and cons of using solvent cement versus epoxy adhesives. So, don your safety goggles and prepare to discover the secrets behind these two adhesive powerhouses.
Pros of Using Solvent Cement:
- Invisible Bonding: Solvent cement possesses a magical quality that dissolves the surfaces of PVC and acrylic, creating a seamless and nearly invisible bond. This ensures that your projects maintain their sleek and professional appearance, leaving no trace of adhesive.
- Simple Application: Applying solvent cement is as easy as 1-2-Merely spread it on both surfaces, allow it to soften, and then press them together firmly. This fuss-free process allows for quick assembly, saving you precious time and effort in your projects.
- Impressive Strength: Solvent cement establishes a robust and durable bond that can withstand the rigors of PVC and acrylic applications. Whether it’s plumbing or construction projects, you can rely on this adhesive to keep your creations intact, no matter the stress or strain.
- Moisture and Chemical Resistance: Once cured, solvent cement forms a water-resistant barrier that is perfect for outdoor projects or areas with high humidity. Additionally, it bravely stands strong against various chemicals without weakening or degrading the bond over time.
Cons of Using Solvent Cement:
- Chemical Handling: Due to its chemical nature, proper ventilation is crucial during application to avoid excessive inhalation of potentially harmful fumes. Remember to prioritize safety by ensuring adequate airflow during the adhesive process.
- Longer Curing Time: Unlike some adhesives with fast curing times, solvent cement requires several hours to fully cure and reach its maximum strength. This longer curing time may impact project timelines, so plan accordingly to avoid delays.
Pros of Using Epoxy Adhesives:
Exceptional Strength: Epoxy adhesives boast remarkable bonding strength, making them the go-to choice for applications that require heavy loads and superior durability. When you need a bond that can withstand the test of time and bear substantial weight, epoxy comes to the rescue.
Tips for a Strong Bond Between PVC and Acrylic
Creating a strong bond between PVC and acrylic is essential for ensuring the durability and longevity of your projects. As an expert in this field, I have compiled a list of techniques that will help you achieve a reliable bond between these materials. By following these steps, you can ensure that your PVC and acrylic creations remain intact for years to come.
Prep the Surfaces:
Properly preparing the surfaces of both PVC and acrylic is crucial before applying any adhesive. To remove any dirt, dust, or grease, clean the surfaces thoroughly using a mild detergent or specialized cleaner. Rinse them with water and allow them to dry completely. This ensures that the adhesive can adhere to the surfaces effectively.
Roughen Up:
To enhance the adhesion between PVC and acrylic, lightly roughen the surfaces using fine-grit sandpaper or a sanding block. By creating a textured surface, you provide more area for the adhesive to grip onto. Be cautious not to oversand or apply excessive pressure, as this can cause damage to the materials.
Choose the Right Adhesive:
Selecting the correct adhesive is crucial for achieving a strong bond between PVC and acrylic. Consider using solvent cement or epoxy adhesives specifically designed for bonding these materials. It’s important to ensure that the adhesive you choose is compatible with both PVC and acrylic before using it.
Apply Adhesive Evenly:
When applying the adhesive, ensure an even distribution on both the PVC and acrylic surfaces. Use a brush, applicator, or syringe to spread a thin layer of adhesive. Avoid applying too much adhesive as this can weaken the bond between the materials. Follow the manufacturer’s instructions regarding application techniques and curing times to achieve optimal results.
Clamp or Secure Firmly:
To ensure a strong bond, securely clamp or hold the PVC and acrylic surfaces together while the adhesive cures. This prevents any movement or separation during the curing process, allowing the adhesive to bond the materials effectively. Use clamps, weights, or tapes to hold the surfaces firmly together. However, be cautious not to apply excessive pressure that could potentially damage the materials.
hT6Ow_cBTps” >
Conclusion
When it comes to joining PVC and acrylic, finding the right adhesive is crucial. And lucky for you, there’s a solution that can bond these materials together seamlessly. By using a specialized solvent cement, you can create a strong and durable connection between PVC and acrylic surfaces.
But before you dive into the gluing process, make sure to prepare both surfaces properly. Clean them thoroughly with a mild detergent to remove any dirt, grease, or debris that could interfere with the bonding. Rinse them off and let them dry completely.
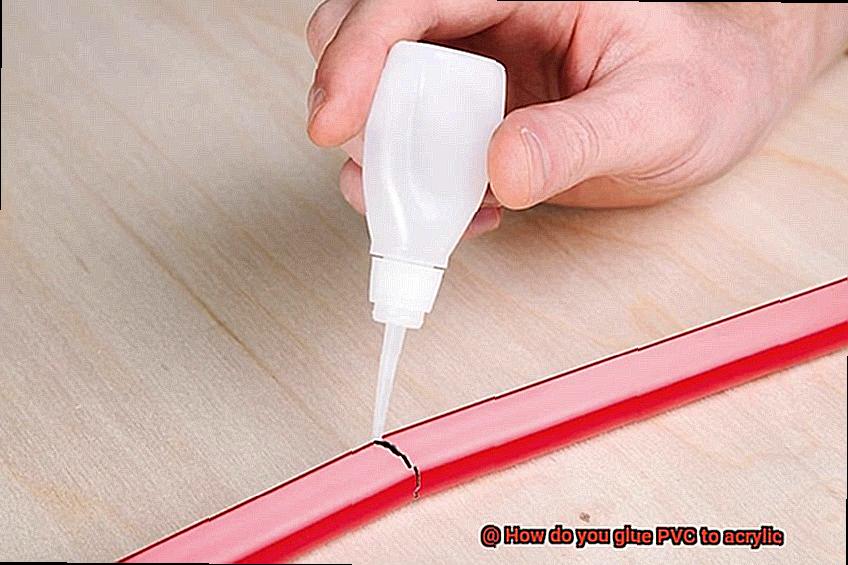
Now it’s time to apply the solvent cement. Start by applying a thin layer on both the PVC and acrylic surfaces using a small brush or applicator. Make sure to cover the entire area that will be joined together.
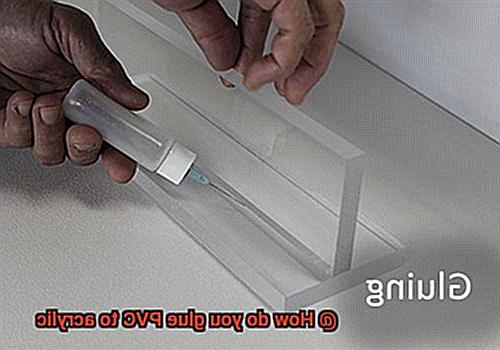
Once you’ve applied the solvent cement, quickly press the two surfaces together firmly. Hold them in place for a few seconds to allow the adhesive to set. This will create an initial bond.
To ensure a strong and long-lasting connection, it’s recommended to let the glued PVC and acrylic cure for at least 24 hours. During this time, avoid putting any stress or pressure on the joint.
And there you have it – a simple yet effective method for gluing PVC to acrylic. With the right preparation and proper application of solvent cement, you’ll achieve a secure bond that can withstand various conditions.