Hey there. Are you sick and tired of that annoying loose linoleum flapping around every time you take a step? Well, fear not because we’re here to help you out. Gluing linoleum back down might sound like a daunting task, but trust us, it’s actually pretty simple. Plus, it’s totally worth it to save yourself from the frustration of tripping over those unruly edges.
In this handy-dandy guide, we’ll take you through each step of the process to ensure your linoleum flooring gets the attention it deserves. We’ll show you how to gather all the necessary tools (don’t worry, no fancy equipment required), prepare the surface like a pro, and apply the adhesive like a boss. With our expert tips and tricks up your sleeve, your linoleum will be flawlessly glued down in no time.
So say goodbye to that loose mess and hello to a beautifully revamped floor that will make all your friends jealous. Let’s get started, shall we?
Why Is It Important to Glue Linoleum Back Down?
Contents
Linoleum flooring is a popular choice for its durability, easy maintenance, and affordability. However, over time, linoleum may start to come loose or lift at the edges, creating potential hazards and compromising its functionality. In this article, we will explore the importance of promptly gluing linoleum back down to prevent further damage and maintain a safe, long-lasting, and hygienic environment.
Tripping Hazards:
The most obvious reason to glue linoleum back down is to prevent tripping hazards. When linoleum lifts at the edges, it creates an uneven surface that can easily catch someone’s foot, leading to potential accidents and injuries. By promptly gluing the linoleum back down, you ensure a flat and secure flooring that reduces the risk of tripping.
Preventing Accumulation of Dirt and Moisture:
Loose linoleum allows dirt, debris, and moisture to accumulate underneath the flooring. This not only damages the linoleum but also provides an ideal environment for mold and mildew growth. By gluing linoleum back down, you can prevent these issues from arising and maintain a clean and hygienic space.
Maintaining Integrity:
Gluing linoleum back down helps maintain the integrity of the flooring. Loose linoleum is prone to further lifting or shifting, which can result in more extensive damage over time. By addressing loose linoleum promptly, you ensure that the flooring retains its functionality and aesthetic appeal for a longer period of time. Timely repairs can save you from more costly repairs or even complete replacement in the future.
Enhancing Safety:
Securely glued linoleum eliminates raised edges or gaps that could potentially cause accidents. This is especially important in high-traffic areas like kitchens, bathrooms, or commercial spaces. Properly glued linoleum contributes to an overall safer environment, reducing the risk of slips, trips, and falls.
Simple Steps for Gluing Linoleum Back Down:
To properly glue linoleum back down, start by cleaning the area thoroughly and repairing any damages or tears. Choose an adhesive that is specifically designed for linoleum flooring and follow the manufacturer’s instructions for application. Apply the adhesive evenly, press the linoleum firmly onto the subfloor, and allow it to dry completely before use.
Preparing the Surface for Glueing
Tripping over loose linoleum tiles is not only hazardous but also an eyesore. To resolve this issue, it is crucial to follow the proper steps in preparing the surface for gluing linoleum. This comprehensive guide will walk you through each step to achieve professional results that will enhance both safety and aesthetics.
Step 1: Thorough Cleaning
Begin by sweeping or vacuuming the entire area to eliminate loose dirt and dust. Pay close attention to corners and edges where debris tends to accumulate. For stubborn stains, use a mild detergent and warm water to gently clean them off. Avoid using harsh chemicals or abrasive cleaners, as these can damage the linoleum.
Step 2: Ensuring a Dry Surface
Moisture hampers the adhesive’s ability to form a strong bond. Allow ample time for the linoleum to air dry naturally or expedite the process with a fan if needed. Remember, patience is key to avoid compromising the bond.
Step 3: Inspecting for Loose or Damaged Areas
Thoroughly examine the surface for any loose edges or corners. If any are found, apply a small amount of adhesive underneath and press down firmly for a secure bond. Additionally, consider replacing damaged sections of linoleum before proceeding with gluing.
Step 4: Enhancing Adhesion (if necessary)
If your linoleum has a glossy finish, lightly scuffing the surface can improve adhesion. Use fine-grit sandpaper or a sanding block with caution to avoid damaging the linoleum while achieving optimal adhesion.
Step 5: Applying the Adhesive
Choose an adhesive specifically designed for linoleum flooring and carefully follow the manufacturer’s instructions for application. Use a trowel or notched spreader to apply the adhesive evenly, working in small sections at a time. Avoid over-application of the adhesive, as it can lead to warping or buckling.
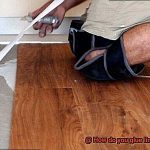
Step 6: Laying Down the Linoleum
Delicately place the linoleum back onto the prepared surface, aligning it precisely with the edges and corners. To ensure excellent contact between the adhesive and flooring, firmly press down using a roller or a heavy object. Work from the center towards the edges to eliminate air bubbles and achieve a smooth, flat surface.
Step 7: Patience for Drying Time
Finally, exercise patience and allow the adhesive to dry completely before walking on or placing furniture on the newly glued linoleum. Each adhesive may have varying drying times, so it is vital to adhere to the manufacturer’s instructions for curing time.
Selecting an Appropriate Adhesive
Don’t let a sticky situation leave you perplexed when it comes to selecting an appropriate adhesive for your linoleum flooring project. Gluing down your linoleum requires the right adhesive for a successful and long-lasting installation. In this article, we’ll explore the importance of choosing the correct adhesive and provide insights into different types of adhesives available.
Types of Adhesives:
- Solvent-based adhesives: Known for their strength and durability, these adhesives offer excellent resistance to moisture, making them ideal for high-traffic areas. However, their powerful odor and harmful fumes require proper ventilation during installation.
- Water-based adhesives: Environmentally friendly with lower levels of volatile organic compounds (VOCs), these adhesives are easier to clean up and have less odor. While they may not be as durable as solvent-based adhesives, they are suitable for most applications. However, they may not be the best choice for areas with high moisture levels.
- Pressure-sensitive adhesives: Versatile and easy to use, these adhesives come in various forms such as sheets, tapes, or sprays. They allow for repositioning during installation and emit no harmful fumes. Perfect for DIY projects, pressure-sensitive adhesives provide convenience and flexibility.
Considerations:
- Linoleum Compatibility: Not all adhesives work well with all types of linoleum flooring. It’s crucial to check the manufacturer’s recommendations for your specific linoleum type to ensure proper adhesion and prevent damage.
- Subfloor Compatibility: Different subfloors may require different adhesives. Consult with a professional or refer to the manufacturer’s guidelines to determine the appropriate adhesive for your specific subfloor material.
- Surface Preparation: Before applying the adhesive, ensure that the surface is clean, dry, and free from debris or contaminants that could affect the bond. Follow the manufacturer’s instructions on how to prepare the surface for optimal adhesion.
Applying the Adhesive
Applying the Adhesive: A Step-by-Step Guide to Glue Linoleum Back Down
Linoleum flooring is a popular choice for homeowners due to its durability and easy maintenance. However, over time, linoleum can start to lift or loosen, causing unsightly gaps or uneven surfaces. But fear not. With the right adhesive and a little know-how, you can easily glue your linoleum back down and restore its original beauty. So, let’s roll up our sleeves and get started.
Step 1: Clean the Surface
Before diving into the adhesive application process, it’s crucial to clean the linoleum and subfloor thoroughly. Banish dirt, dust, or debris using a trusty broom or vacuum cleaner. This ensures a pristine surface for optimal adhesion.
Step 2: Inspect and Repair
Take a close look at your linoleum for any signs of damage such as tears, cuts, or loose edges. Just like tending to wounds before applying a bandage, repair these imperfections before proceeding with the adhesive application. This proactive step prevents future headaches.
Step 3: Choose the Right Adhesive
Selecting the proper adhesive is key to a successful installation. Don’t settle for any old glue; choose an adhesive specifically recommended for linoleum flooring. Whether it’s solvent-based or water-based, make sure it’s tailored to your linoleum needs for optimal performance.
Step 4: Follow Manufacturer’s Instructions
Now it’s time to do some serious reading. Get cozy with the instructions provided by the adhesive manufacturer. Each adhesive may have specific guidelines regarding application techniques, drying time, and temperature requirements. Following these instructions diligently guarantees the best results.
Step 5: Apply the Adhesive
Grab a trusty trowel or notched spreader and let the gluing commence. Apply the adhesive in a thin layer starting from one corner of the linoleum. Be meticulous in your approach, ensuring even coverage across the entire subfloor. Leave no gaps or areas without adhesive. This step is crucial for preventing future lifting or loosening of the linoleum.
Step 6: Lay the Linoleum Back Down
Now comes the moment of truth. Carefully place the linoleum back onto the subfloor, starting from one end. Press down firmly, smoothing out any air bubbles or wrinkles as you go along. This step ensures a seamless and professional finish.
Step 7: Apply Pressure
To create a bond that can withstand the test of time, apply even pressure over the entire surface of the linoleum. Grab a roller or a heavy object and give it all you’ve got. This step helps to cement the relationship between the linoleum and the subfloor.
Placing the Linoleum Back Down
If you’ve recently pulled it up and are wondering how to put it back down, don’t fret. We’ve got you covered with this comprehensive step-by-step guide on placing the linoleum back down, complete with tips for achieving a flawless finish.
Step 1: Prepare the Surface
Before you start, make sure the surface underneath is clean and clear of any debris or dust. A smooth and even surface is essential for proper adhesion. Grab your trusty scraper or putty knife and gently remove any old adhesive or residue from the back of the linoleum sheet. Take your time to avoid damaging the linoleum itself.
Step 2: Apply the Glue
Now that your linoleum is clean, it’s time to apply the glue. Begin by spreading a thin layer of adhesive evenly across the entire surface using a notched trowel. Each adhesive may have specific requirements, so be sure to follow the manufacturer’s instructions for application.
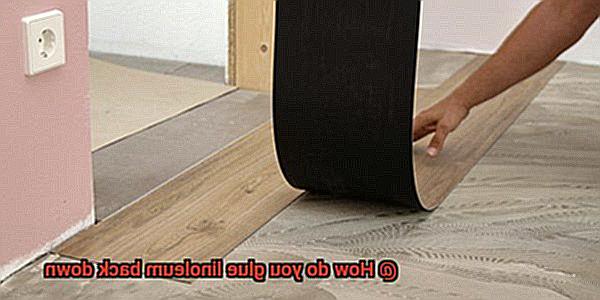
Step 3: Place the Linoleum
With the adhesive in place, it’s time to carefully place the linoleum back down. Start at one corner and gradually work your way towards the opposite corner. Smooth out any air bubbles or wrinkles as you go along using a roller or a clean cloth. Attention to detail is key here.
Step 4: Allow Drying Time
Patience is required at this stage. Allow the adhesive to dry completely before putting any weight on the linoleum or walking on it. The drying time will vary depending on the type of adhesive used, so consult the manufacturer’s instructions for guidance.
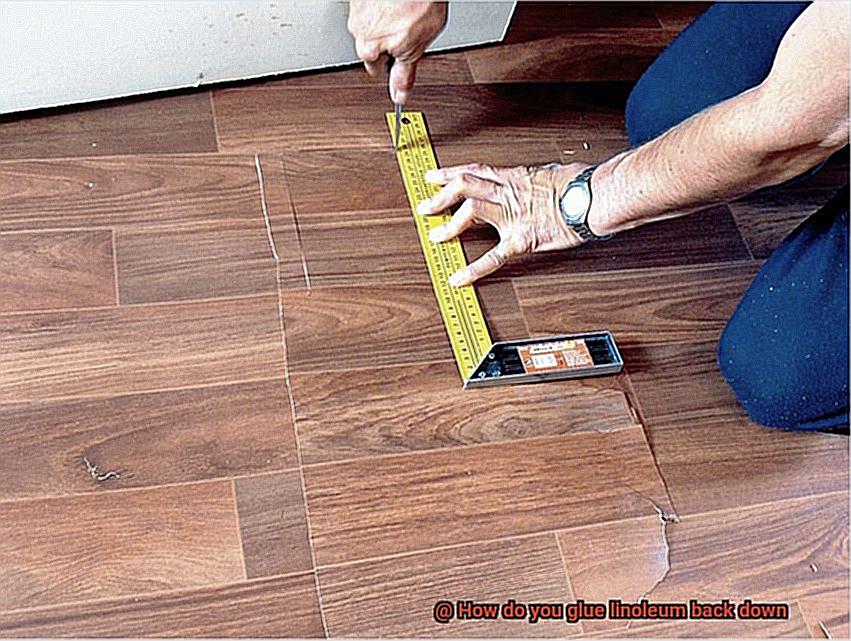
Step 5: Trim Excess Linoleum
Once the adhesive has dried, trim any excess linoleum around the edges for that final professional touch. A sharp utility knife will be your best friend here. Take your time and make precise cuts to ensure a neat finish.
Step 6: Clean Up
To complete the process, grab a damp cloth or sponge and wipe away any remaining glue residue or smudges on the surface of the linoleum. Avoid using excessive water, as it can damage the flooring.
Securing the Bond with Weights
Linoleum is a durable and cost-effective flooring option that adds charm and character to any space. However, over time, it may start to lift or come loose, creating a potential tripping hazard and diminishing its overall appeal.
In this guide, we’ll walk you through the process of securing the bond between your linoleum floor and the subfloor using weights, ensuring a seamless and long-lasting result.
Step 1: Gather Your Materials
- High-quality linoleum adhesive: Look for an adhesive specifically designed for linoleum flooring to ensure a strong bond.
- Trowel or putty knife: These tools will help you apply the adhesive evenly, ensuring proper coverage.
- Weights: Choose heavy, flat objects such as books or dumbbells that can exert pressure on the linoleum while it dries.
Step 2: Prepare the Surface
- Thoroughly clean the area: Remove dirt, dust, or debris from the floor surface using a broom or vacuum cleaner. A clean surface allows for better adhesion.
- Ensure dryness: Make sure the floor is completely dry before proceeding to prevent any moisture-related issues that could affect the bond.
Step 3: Apply the Adhesive
Step 4: Reattach the Linoleum
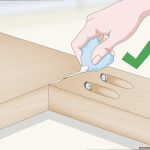
Step 5: Secure with Weights
- Evenly distribute weights: Place weights across the surface of the linoleum, ensuring complete coverage. This will exert pressure and promote a strong bond between the linoleum and the floor.
- Use caution: Avoid using too many weights, as this can cause damage or indentations in the linoleum.
Step 6: Allow Drying Time
- Patience is key: Leave the weights in place for at least 24 hours, allowing sufficient time for the adhesive to dry and bond effectively.
- Avoid heavy traffic and objects: During this period, refrain from walking or placing heavy objects on the linoleum to prevent displacement or damage to the bond.
Allowing Time for the Adhesive to Dry
When it comes to gluing linoleum back down, there is one crucial step that should never be overlooked: allowing sufficient time for the adhesive to dry. This step is vital in creating a strong and long-lasting bond between the linoleum and the subfloor. In this informative essay, we will delve into the importance of allowing proper drying time for the adhesive, exploring factors that affect drying time, helpful tips, and how to ensure a successful installation.
Factors Affecting Drying Time:
The specific product you use will determine the drying time required. Manufacturers provide detailed instructions that must be followed meticulously. Temperature, humidity levels, and ventilation in the room also play a significant role in drying time. Higher temperatures and lower humidity levels expedite drying, while cooler temperatures and higher humidity may prolong it. Adequate ventilation is crucial during the drying process to promote air circulation.
Tips and Recommendations:
- Patience is Key: Rushing the drying process can compromise the bond between your linoleum and subfloor. Resist the temptation to walk or place heavy objects on the newly glued linoleum until it has completely dried.
- Perform a Touch Test: To determine if the adhesive has fully dried, lightly touch a small section of the linoleum with your fingertip. If it feels tacky or sticky, more drying time is needed before proceeding.
- Consider Curing Time: Some adhesive products require a curing period in addition to drying time. Curing refers to the chemical process through which the adhesive reaches its maximum bonding strength. Refer to manufacturer’s instructions to determine if curing is necessary and how long it will take.
Taking the time to allow proper drying and curing of adhesive is crucial when gluing linoleum back down. By closely following manufacturer’s instructions, considering environmental factors, and performing touch tests, you can ensure a secure bond between your linoleum and subfloor. Rushing this process may result in an uneven or loose installation, compromising the longevity and durability of your flooring. So be patient, and allow the recommended time for the adhesive to dry and cure fully. Your linoleum floor will thank you with years of reliable service.
Inspecting the Repaired Floor Regularly
Today, we’re going to explore why it’s absolutely essential to inspect your repaired floor regularly. So grab a cup of your favorite beverage, put on your inspector hat, and let’s embark on this enlightening journey.
- Vigilantly Watch for Lifting and Bubbling: Fluctuations in temperature and moisture levels can spell trouble for linoleum, causing it to lift or bubble. By consistently inspecting your floor, you’ll be able to spot these pesky issues early on and take immediate action to prevent further damage.
- Keep an Eye Out for Wear and Tear: Foot traffic and general usage can leave their mark on linoleum over time. Regular inspections empower you to identify scratches, scuffs, or areas of wear before they worsen and become major problems. Think of it as giving your linoleum a little tender loving care.
- Shed Light on the Situation: Proper lighting is vital during inspections. After all, you don’t want to miss any minute cracks or imperfections that could potentially snowball into larger issues down the road. If necessary, grab a trusty magnifying glass and let those tiny flaws reveal themselves.
- Don’t Overlook the Edges: The edges of your linoleum are the unsung heroes of your floor. Neglecting them could lead to lifting and curling if they weren’t adequately glued down during repairs. Make it a point to keep a close watch on these edges to ensure they remain firmly in place, making any necessary repairs promptly.
Remember, regular inspections are the secret sauce to maintaining the integrity and functionality of your glued linoleum floor. By catching issues early on, you can take proactive measures to address them, ultimately extending the lifespan of your flooring.
o31X8oEAdjI” >
Conclusion
To effectively glue linoleum back down, follow these simple steps.
First, ensure that the surface is clean and free from any debris or adhesive residue. Next, apply a high-quality adhesive specifically designed for linoleum flooring.
Spread the adhesive evenly using a notched trowel to create ridges for better adhesion. Carefully place the linoleum back in position, starting from one edge and smoothing it out as you go along.
Allow sufficient drying time before walking on or applying any pressure to the floor.