Epoxy is a special type of glue that can be used to stick things together. It is made up of two parts – a resin and a hardener. When these two parts are mixed together, they react and become a strong and tough material.
Epoxy can be used on many different types of wood. Whether it’s a hard type of wood like oak or a softer type like pine, epoxy can stick them together. It can also be used to stick wood to other materials like metal or plastic.
Before using epoxy on wood, it’s important to get the wood ready. This means making sure the wood is clean and free from any dirt or dust. You can wash the wood with soap and water and then dry it with a cloth. Next, you need to roughen up the surface of the wood by sanding it with sandpaper. This helps the epoxy stick better to the wood.
There are many different types of epoxy available, so it’s important to choose the right one for your project. Some epoxies are specially made for wood and have extra strength. Make sure to read the instructions on the epoxy package to know which one is best for your project.
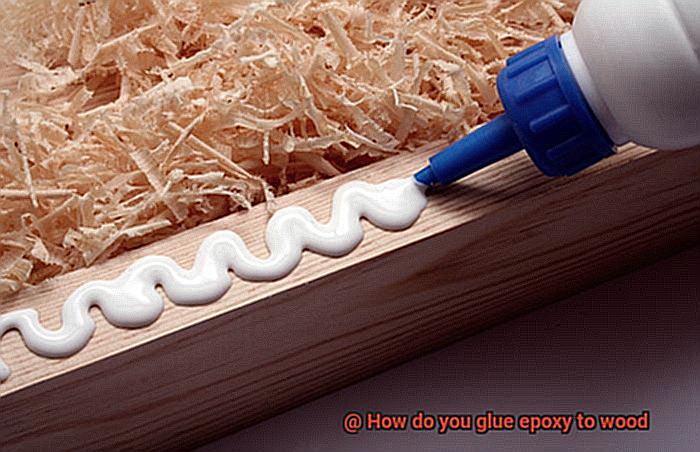
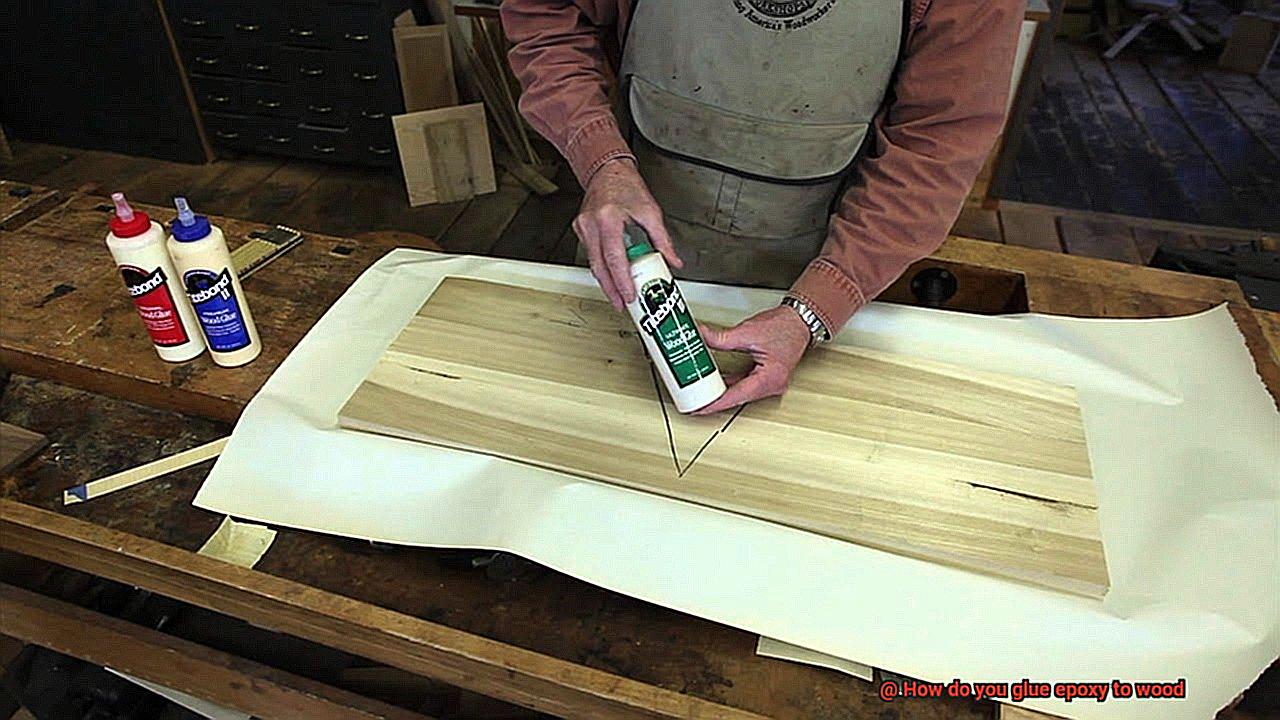
Once you have prepared the wood and chosen the right epoxy, it’s time to apply it. You can use a brush or spatula to spread a thin layer of epoxy onto the wood surface. If you are sticking two pieces of wood together, make sure to put epoxy on both pieces. Then press the pieces together and hold them in place until the epoxy sets.
Epoxy is a strong glue that can be used on many types of wood. By preparing the wood surface, choosing the right epoxy, and following the instructions, you can create a strong bond between wood and epoxy.
Preparing the Wood Surface for Glue Application
Contents
- 1 Preparing the Wood Surface for Glue Application
- 2 Mixing the Epoxy According to Manufacturer’s Instructions
- 3 Applying the Epoxy Evenly
- 4 Joining Two Pieces of Wood with Epoxy
- 5 Curing and Setting the Epoxy Bond
- 6 Maintaining Proper Temperature and Humidity Conditions for Curing
- 7 Inspecting and Reinforcing the Bond
- 8 Considerations for Different Types of Woods
- 9 Conclusion
Before the magic of glue can work its wonders on wood, it is crucial to properly prepare the surface. It’s like laying the foundation for a strong and durable bond. So, let’s dive into the steps you need to follow to prepare the wood surface for glue application.
- Step 1: Clean the surface. Begin by giving the wood surface a thorough cleaning. Banish any dirt, dust, or debris that may be lurking there. Armed with a soft brush or a damp cloth, make sure to wipe away every trace of grime. And don’t forget to eliminate any greasy fingerprints or oily residue that might sabotage the glue’s grip later on.
- Step 2: Sand the surface. Now it’s time to rough things up a bit. Grab some fine-grit sandpaper and gently sand the wood surface along the grain. This will create a texture that allows the glue to cling on for dear life. The sanding opens up the pores of the wood, giving the glue more area to bond with. It’s like giving it little nooks and crannies to snuggle into.
- Step 3: Remove any existing finish. If there’s a stubborn layer of paint or varnish on the wood, it needs to go. You can strip it away using a paint stripper or simply sand it down until it surrenders completely. Make sure not to leave behind any remnants of the old finish—it must be squeaky clean for the glue to work its magic.
- Step 4: Fill any gaps or cracks. Inspect the wood surface carefully for any imperfections—those pesky gaps and cracks that could threaten the bond. If you find any, fill them up with an appropriate wood filler or putty. Smooth out the filler and give it time to dry completely before moving on to the next step. We want our wood surface to be flawless, after all.
- Step 5: Seal porous surfaces. Some wood species are like sponges, eager to soak up all the glue they can find. To prevent this excessive absorption, it’s wise to seal the surface before applying the glue. You can do this by using a sanding sealer or a mixture of glue and water (thinned down, of course). This sealant acts as a barrier, keeping the glue from diving too deep into the wood and weakening the bond.
Mixing the Epoxy According to Manufacturer’s Instructions
Mixing the epoxy according to the manufacturer’s instructions is a crucial step in ensuring a strong and durable bond. You don’t want your woodworking project to fall apart, do you? Of course not. So, let’s dive into the nitty-gritty of this process.
First things first, gather all the materials you need for mixing the epoxy. It’s like gathering all your ingredients before you start cooking up a storm in the kitchen. You’ll need the epoxy resin and hardener, measuring tools like graduated cups or syringes, a clean mixing container, and stirring sticks. Get everything ready before you begin so that you can sail smoothly through the mixing process.
Now, let’s get down to business. Measure out the precise amounts of resin and hardener according to those clever manufacturer’s instructions. We’re talking about being as accurate as a mathematician solving a complex equation. A little too much or too little can spell trouble for your project – weak bonds or incomplete curing are not what we’re aiming for here. So, pour that measured resin and hardener into your pristine mixing container, making sure there are no pesky contaminants lurking around to ruin the show.
Time to get mixing. Grab that stirring stick and dive into the blend-a-palooza. This is where the magic happens – the resin and hardener join forces to create a super-strong bond. Stir slowly, my friend, taking your time to scrape those sides and bottom of the container like a master chef scraping every last bit from the mixing bowl. Keep at it for the time specified by the manufacturer. This allows for proper chemical bonding between the resin and hardener, resulting in maximum strength.
But wait, there’s more. Some epoxy formulations have additional steps during mixing. It’s like adding some secret spices to elevate your dish to another level. You might need to degas or let it rest before using it. These instructions are there for a reason, so follow them carefully to avoid any mishaps during application.
Once your epoxy is mixed according to the manufacturer’s instructions – congratulations. You’re one step closer to a successful woodworking project. Now, it’s time to apply that magical mixture to the wood surface. But here’s a tip: work efficiently because epoxy has a limited working time. It can start to cure before you even know it. So, don’t dawdle. Apply the epoxy to both surfaces that you want to bond together for maximum adhesion and an even stronger bond. Use a brush, roller, or spatula to spread that epoxy goodness evenly.
Hold on tight. After applying the epoxy, firmly clamp the wood pieces together. This is like giving your project a big bear hug. It helps maintain pressure during the curing process and ensures a tight bond. You don’t want any gaps or loose ends, right?
Now, be patient and let nature do its thing. The curing time for epoxy varies depending on different factors like the formulation and environmental conditions. Give it the time it needs to fully cure before subjecting it to any stress or load. We want that bond to be as strong as Hercules.
Last but not least, clean up any excess epoxy immediately after application. Trust me, once it cures, it’s like trying to remove gum from your hair – not an easy task. So, grab a clean cloth or paper towel and wipe away those spills or drips like a superhero saving the day.
Applying the Epoxy Evenly
Achieving a smooth and even application of epoxy on a wood surface is essential for creating a professional finish. To ensure the best results, it is important to follow these steps:
- Prepare the Wood Surface: Before applying epoxy, properly prepare the wood surface. Clean it thoroughly to remove any dirt or dust that could interfere with adhesion. Additionally, sand the wood to create a smooth and even surface. This will provide the epoxy with a solid base to adhere to.
- Choose the Right Tools: To apply epoxy evenly, you’ll need the right tools. A brush or spreader is recommended for this task. These tools will help you distribute the epoxy across the wood surface smoothly and evenly. Make sure they are clean and free from any debris before starting.
- Apply the Epoxy: Pour a sufficient amount of epoxy onto the wood surface, ensuring enough coverage without excessive dripping or pooling. Working in small sections can help ensure even distribution before the epoxy starts to harden.
- Work Quickly and Carefully: Epoxy has a limited working time, so it’s important to work quickly but carefully. Spread the epoxy using your chosen tool, making sure to cover all areas evenly. Pay attention to corners and edges, as these areas can be easily missed. Take your time and avoid rushing, but be mindful of the curing process.
- Consider Temperature and Humidity: Temperature and humidity conditions can affect how epoxy cures. Extreme temperatures or high humidity can lead to uneven results. It’s best to work in a well-ventilated area with moderate temperatures for optimal curing.
- Remove Excess Epoxy: After applying the epoxy, remove any excess or drips before it fully cures. Gently scrape or sand away any unwanted epoxy, being careful not to disturb the applied epoxy. Removing excess epoxy while it’s still pliable will make the process easier.
- Allow for Full Curing: Be patient and allow the epoxy to cure fully according to the manufacturer’s instructions. This may involve leaving the wood in a well-ventilated area for a specific period of time. Rushing the curing process can lead to weak adhesion or other issues with the bond. Give it the time it needs to ensure a strong and durable finish.
Joining Two Pieces of Wood with Epoxy
Joining two pieces of wood with epoxy is a meticulous process that requires careful preparation and attention to detail. By following these steps and considering the additional tips provided, you can achieve a strong and durable bond between the two pieces of wood.
- Prepare the surfaces: Start by ensuring that both surfaces to be joined are clean and free from any dirt, dust, or existing finish. This can be achieved by wiping them down with a clean cloth or using a mild detergent. Lightly sanding the surfaces will create a better bond by providing more surface area for the epoxy to adhere to.
- Mix the epoxy: Epoxy typically comes in two parts, a resin and a hardener. It is crucial to follow the manufacturer’s instructions for the correct ratio when mixing these two components. Mixing too little or too much can compromise the strength and curing time of the epoxy.
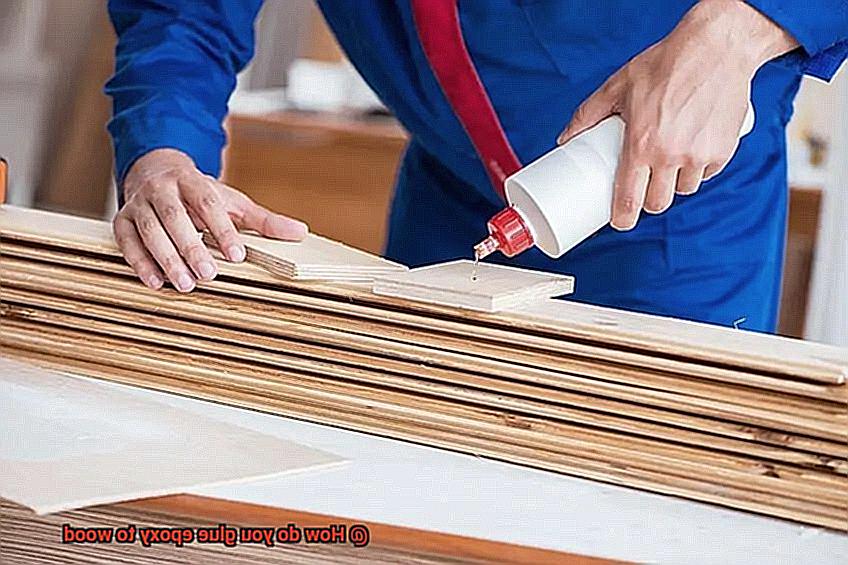
- Apply the epoxy: Use a brush or a disposable spreader to apply the mixed epoxy evenly to both surfaces being joined. It is important to ensure sufficient coverage on both surfaces, but be cautious not to apply too much epoxy as it can drip or run excessively. Take your time to spread the epoxy evenly and avoid any bubbles or air pockets.
- Clamp the pieces together: Once the epoxy is applied, firmly clamp the two pieces of wood together to create pressure and ensure proper bonding. Strategically place clamps along the length of the joint to distribute pressure evenly. The clamps should be tightened enough to hold the pieces together securely, but not so tight that excess epoxy is squeezed out. Wipe away any excess epoxy with a clean cloth before it cures.
- Allow for curing time: The curing time for epoxy can vary depending on factors such as temperature and humidity. It is crucial to follow the manufacturer’s instructions regarding curing time and allow sufficient time for the epoxy to fully cure before handling or applying any additional stress on the joint. Rushing this step can result in a weak bond that may fail over time.
- Sand down any imperfections: Once the epoxy has cured, use sandpaper to smooth down any excess or uneven areas, creating a seamless finish. Be careful not to sand too aggressively, as it may weaken the joint. Take your time and work gradually to achieve the desired result.
Additional tips and considerations:
- Consider using epoxy that is specifically formulated for woodworking projects. These types of epoxy often have longer working times, allowing for better application and positioning of the pieces before the epoxy starts to cure.
- For larger or more complex joints, consider using additional mechanical fasteners such as screws or dowels in conjunction with the epoxy. This will provide extra strength and stability to the joint.
- Take into account the temperature and humidity conditions in your workspace when applying epoxy. Extreme temperatures or high humidity can affect the curing time and overall performance of the epoxy.
- Always wear appropriate protective gear, such as gloves and safety glasses, when working with epoxy.
Curing and Setting the Epoxy Bond
Curing and setting the epoxy bond is a critical step when gluing wood. It ensures that the epoxy achieves its maximum strength and durability, creating a bond that will withstand the test of time. Let’s explore the reasons why curing and setting the epoxy bond is so vital.
Firstly, curing allows the epoxy to reach its full strength, ensuring a strong bond between the wood pieces. Without proper curing, the bond may be weak and prone to failure. This is because when the epoxy resin and hardener are mixed together, a chemical reaction occurs, causing the epoxy to cure and harden. This reaction is essential for achieving optimal bonding properties.
The curing process takes time, usually several hours, but it can vary depending on factors like temperature and humidity. It’s crucial to follow the manufacturer’s instructions for the specific epoxy product being used to ensure proper curing.
To achieve a strong bond, it is important to ensure proper contact between the wood and epoxy. This can be done by clamping the pieces together or using weights to apply pressure during the curing process. This helps eliminate any gaps or air bubbles that may weaken the bond.
In some cases, heat acceleration may be necessary to speed up the curing process. However, caution should be exercised when using heat, as excessive temperatures can damage the wood or compromise the bond’s strength.
Once the epoxy has cured, it’s crucial to allow sufficient time for it to set before subjecting it to stress or load. This can take anywhere from 24 to 48 hours, depending on the epoxy and environmental conditions.
After the epoxy has fully cured and set, any excess glue or residue can be carefully removed by scraping or sanding. Patience is key here, as removing the glue too early may weaken the bond.
To protect the epoxy bond, applying a finish or sealant over it is advisable. This helps prevent moisture penetration and enhances the longevity of the bond.
Maintaining Proper Temperature and Humidity Conditions for Curing
Maintaining proper temperature and humidity conditions is of utmost importance when it comes to curing epoxy. The curing process of epoxy involves a chemical reaction that requires specific temperature and humidity conditions to ensure proper bonding and strength. Failure to maintain these conditions can lead to weak bonds, decreased durability, and potential failure of the epoxy.
Temperature plays a critical role in the curing process. Epoxy cures best at temperatures between 70°F and 80°F (21°C – 27°C). Extreme temperatures can have adverse effects on the curing time and final strength of the bond. Cold temperatures slow down the curing process, while high temperatures can accelerate it. Therefore, it is crucial to maintain a consistent temperature throughout the curing process to avoid stress on the bond that can result in cracking or weakening of the epoxy.
Humidity levels also have a significant impact on epoxy curing. Ideally, the relative humidity should be around 50% during the curing process. High humidity levels can slow down the curing time, while low humidity levels can lead to inadequate curing. It is essential to work in a controlled environment that has regulated humidity levels, avoiding areas with excessive moisture or dryness.
To maintain optimal temperature and humidity conditions, it may be necessary to use additional equipment. If the ambient temperature is too low, a space heater or heat lamp can be used to raise the temperature safely. Conversely, if the ambient temperature is too high, fans or air conditioning can help cool down the area. Similarly, dehumidifiers or air conditioners can be utilized to lower humidity levels if they are too high, while humidifiers or water sprays can be used to increase moisture levels if they are too low.
It is important to note that different types of epoxy may have specific requirements for temperature and humidity during curing. Always refer to the manufacturer’s instructions and recommendations for optimal results.
Inspecting and Reinforcing the Bond
Inspecting and reinforcing the bond between epoxy and wood is crucial for creating a strong and durable connection. The process begins with proper surface preparation, removing any dirt or grease that could hinder the bond. Choosing the right epoxy is also essential, as wood-specific epoxies are designed to withstand the natural movements of wood and provide a reliable bond.
Before applying the epoxy, it is important to inspect the wood for any weak areas, cracks, or splits. These must be addressed and reinforced before proceeding with the gluing process. Fillers or additional materials like dowels or screws can be used to reinforce these weak points.
Mixing the epoxy thoroughly according to the manufacturer’s instructions is vital for achieving a strong bond. Applying a thin layer of epoxy on both surfaces helps increase contact between the epoxy and wood, improving the bond. Once applied, the surfaces should be firmly pressed together using clamps to ensure even pressure distribution.
After gluing, allowing the epoxy to cure undisturbed is crucial. Premature handling can weaken the bond, so it is important to follow the manufacturer’s recommended curing times.
Inspecting the bond after curing is essential to ensure its strength and integrity. Visually inspecting for gaps, cracks, or signs of weakness allows for prompt identification and necessary reinforcement or reapplication of epoxy if needed.
Considerations for Different Types of Woods
- Porosity: The porosity of the wood plays a significant role in how well epoxy can absorb into the material. Some woods, like oak or mahogany, have open pores that allow for better absorption, while others, such as maple or cherry, have closed pores that make it more challenging for the epoxy to penetrate. Adjusting the application technique based on the porosity of the wood is crucial to ensure proper adhesion.
-
Moisture Content: The moisture content of the wood is another essential consideration when gluing epoxy. High moisture content can interfere with the curing process of the epoxy and lead to weak bonds. It is important to ensure that the wood is dry before applying epoxy by acclimating it to the surrounding environment or using a moisture meter to check its moisture levels.
- Surface Preparation: Proper surface preparation is key to achieving a strong bond between epoxy and wood. Before applying epoxy, it is essential to clean the wood surface thoroughly and remove any dirt, dust, or oils that may hinder adhesion. Sanding the surface creates a rough texture that enhances bonding by providing more surface area for the epoxy to grip onto.
- Wood Species: Different wood species have natural oils and resins that can inhibit epoxy bonding. For example, teak or cedar woods contain oils that can prevent proper adhesion. Using special primers or sealers designed for these specific wood species can help overcome this challenge and ensure a strong bond between epoxy and wood.
- Temperature and Humidity: Temperature and humidity conditions can significantly impact the curing process and bond strength of epoxy. Extreme temperatures, whether hot or cold, can affect the curing time and final bond strength. Similarly, high humidity levels can slow down curing and potentially weaken the bond. It is crucial to follow the manufacturer’s guidelines regarding temperature and humidity ranges for optimal results.
Conclusion
Gluing epoxy to wood requires a few simple steps that can ensure a strong and durable bond. First, prepare the wood surface by sanding it gently to remove any roughness or debris. This will help the epoxy adhere better. Next, clean the surface thoroughly with a mild detergent and water to remove any dirt or grease.
Once the wood is prepped, mix the epoxy according to the manufacturer’s instructions. It’s important to follow these instructions carefully to achieve the right consistency and curing time. Apply the epoxy evenly onto the wood using a brush or spatula, making sure to cover all areas that need bonding.
After applying the epoxy, press the wood pieces together firmly. You may want to use clamps or weights to hold them in place while the epoxy cures. Be mindful of any excess epoxy that may squeeze out during this process – you can remove it with a scraper or sandpaper before it hardens.
Allow the epoxy to cure for the recommended time specified by the manufacturer. This usually takes several hours or even overnight. During this time, avoid moving or disturbing the glued wood pieces.
Once fully cured, check for any gaps or weak spots in the bond. If needed, apply additional layers of epoxy and repeat the curing process until you achieve a solid and secure connection between the wood pieces.
In conclusion, gluing epoxy to wood is a straightforward process that requires proper surface preparation, careful application of epoxy, and patience during curing.