Whether you’re a DIY aficionado or a seasoned plumber, knowing how to glue 6 inch PVC pipe is an essential skill for any project. With its durability, longevity, and versatility, PVC pipe is the go-to choice for everything from drainage systems to irrigation lines. But here’s the catch – to ensure a secure and leak-free connection, you need to nail the gluing technique.
In this guide, we’ll take you on a journey through the step-by-step process of gluing 6 inch PVC pipe. Expect insider tips and personal insights that will help you achieve picture-perfect results every single time.
So grab your safety goggles and trusty PVC pipe cutter – it’s time to dive into the captivating world of PVC pipe gluing.
What You Need to Glue 6 Inch PVC Pipe
Contents
When it comes to gluing 6-inch PVC pipe, you will need a few essential supplies to ensure a successful bond. First and foremost, you will need the right type of glue specifically designed for PVC pipes. This adhesive is commonly known as PVC cement or PVC adhesive. It is important to choose a cement that is suitable for the size of your pipe, in this case, 6 inches.
In addition to PVC cement, you will also need a cleaner or primer that is specially made for PVC pipes. This cleaner is used to remove any dirt, debris, or residue from the surface of the pipe, ensuring a clean and smooth surface for the glue to adhere to.
To create a better bonding surface for the glue, you will need sandpaper or emery cloth. Use these materials to roughen up the ends of the PVC pipe and fittings. By roughening up the ends, you are essentially providing more surface area for the glue to grip onto, resulting in a stronger and more secure joint.
Lastly, have some clean rags or paper towels on hand to wipe away any excess glue that may squeeze out during the joining process. It is important to remove any excess glue before it dries as it can be difficult to clean off once it hardens.
To glue 6-inch PVC pipe, follow these steps:
- Clean the surfaces: Use a clean cloth or rag to wipe away any dirt, dust, or debris from the pipe ends and inside the fittings.
- Apply primer: Apply primer to both the pipe and fitting surfaces using a brush or dauber. Ensure that you cover all areas that will be in contact with the glue.
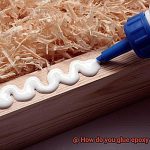
- Apply PVC cement: Open the can of glue and use an applicator brush or dauber to spread a generous amount of cement on both the pipe end and inside the fitting. Make sure to apply an even coat, covering all surfaces that will come into contact with each other when joined.
- Join the pipe and fitting: Insert the pipe into the fitting while twisting it slightly. This twisting motion helps to evenly distribute the glue and ensures a secure bond. Hold the pipe in place for a few seconds to allow the initial bonding to occur.
- Support the joint: Use clamps or braces to hold the pipes in place until the glue fully cures. Follow the manufacturer’s instructions on the glue can for specific curing times.
Preparing the Pipe and Fittings for Gluing
Gluing PVC pipes and fittings is a critical step in creating a secure and leak-proof connection. To achieve a strong bond, it is essential to properly prepare the pipe and fittings before applying the glue. Here’s a step-by-step guide to ensure success:
- Cleanse with Care: Before gluing, it’s vital to thoroughly clean both the pipe and fitting surfaces. Wipe away any dirt, debris, or grease using a clean cloth or rag. A pristine surface is key for optimal adhesion.
- Prime for Perfection: After cleaning, take it a step further by applying a PVC cleaner or primer to further cleanse the surfaces. This step is especially crucial for new or stored pipe and fittings. The cleaner or primer eliminates contaminants and prepares the surfaces for maximum adhesion.
- Roughen Up: To enhance the bond’s strength, gently roughen the surfaces using sandpaper or a fitting brush. Create a rough texture by sanding or brushing the outside of the pipe and inside of the fitting. This textured surface helps the glue penetrate and bond effectively with the PVC material.
- Primer Power: Once the surfaces are properly roughened, apply a layer of PVC primer. The primer softens the PVC material, preparing it for a solid bond with the glue. Use a brush or applicator to apply a thin, even coat of primer to both the pipe and fitting surfaces.
- Dry Time: Allow the primer to dry completely before moving on to applying the glue. The drying time can vary depending on the brand of primer used, so be sure to follow the manufacturer’s instructions. Rushing this step could compromise the bond’s strength, so exercise patience.
- Glue Application: Select a high-quality PVC glue designed specifically for bonding PVC pipes and fittings. Apply an ample amount of glue to both the pipe and fitting surfaces, ensuring comprehensive coverage.
- Join Forces: Swiftly join the pipe and fitting while the glue is wet. Twist and push the pipe into the fitting to achieve a tight and secure fit. Hold the joint in place for a few seconds to allow the glue to set.
- Tidy Up: After joining the pipe and fitting, use a clean cloth or rag to wipe away any excess glue that may have oozed out from the joint. This step lends a neat and professional appearance to your project.
- Cure with Care: Finally, allow sufficient time for the glue to cure and set. The curing time varies based on factors like temperature and humidity, so consult the manufacturer’s instructions for precise guidance. Avoid applying pressure or stress to the joint until the glue has fully cured to ensure a durable and robust connection.
Applying Primer to the Pipe and Fitting Surfaces
Applying primer to the pipe and fitting surfaces is a critical step in the process of gluing 6-inch PVC pipes together. It is a meticulous process that requires attention to detail and proper technique to ensure a strong and reliable bond. By following the steps outlined below, you can confidently apply primer and achieve a secure connection between the pipes and fittings.
The first step is to select the right primer for the job. Choose a primer that is specifically designed for use with PVC pipes. It should be compatible with PVC materials and meet industry standards. Take the time to read the manufacturer’s instructions and consult with a professional if needed to ensure you have the appropriate primer for your project.
Once you have the correct primer, gather all the necessary tools before starting the priming process. These tools may include a brush or applicator, clean cloth or rag, and safety equipment like gloves and goggles. Having everything ready before you begin will make the application process smoother and more efficient.
Before applying primer, it is crucial to prepare the surfaces of both the pipe and fittings. Use a clean cloth or rag to thoroughly wipe away any dirt, debris, or moisture from the pipe and fitting surfaces. This step is essential as it ensures that the primer can effectively bond with the PVC material.
When applying the primer, make sure to do so evenly and thoroughly. Dip your brush or applicator into the primer container, ensuring that it is saturated but not dripping excessively. Start by applying primer to the outside of the pipe, starting just below where the fitting will be placed and extending about 2 inches beyond it. Use smooth strokes to evenly coat the entire circumference of the pipe.
After priming the pipe, move on to priming the inside of the fitting. Apply primer in a similar manner as you did with the pipe, making sure to cover all internal surfaces where the pipe will be inserted. This step is crucial as it ensures a secure bond between the pipe and fitting.
Once the primer has been applied, allow sufficient drying time before proceeding with the gluing process. Refer to the manufacturer’s instructions for the recommended drying time, as it may vary depending on the specific primer used. Rushing this step can compromise the effectiveness of the bonding process.
Before proceeding with gluing, it is essential to check for uniform coverage of primer on both the pipe and fitting surfaces. Inspect carefully to ensure that no areas have been missed, as any missed spots may result in a weak or incomplete bond. If necessary, reapply primer to any missed areas and allow them to dry properly.
Applying PVC Pipe Cement
To ensure a strong and durable bond when using PVC pipe cement, it is essential to follow the correct process. Here is a step-by-step guide to effectively apply PVC pipe cement:
- Preparation: Before applying the cement, make sure the surfaces to be joined are clean and free from dirt, grease, or debris. Use a PVC pipe cleaner or a mixture of warm water and dish soap to clean the surfaces thoroughly. Lightly sand the ends of the pipes and fittings to roughen them up slightly, enhancing the bond between the PVC pipe and the cement.
- Selecting the Cement: Choose the correct type of PVC pipe cement for your project. Regular PVC pipe cement is suitable for most applications, while medium-bodied or heavy-bodied PVC pipe cement is recommended for larger diameter pipes or when extra strength is needed.
- Applying the Cement: Open the can of PVC pipe cement and stir it thoroughly with a stir stick to evenly distribute any settled particles throughout the cement. Using a brush or applicator that comes with the cement, apply a thin layer of cement to the outside of the pipe where it will be inserted into the fitting. Ensure an even coating about 1/8 inch thick. Apply a thin layer of cement to the inside of the fitting as well, again ensuring even coverage without excess cement.
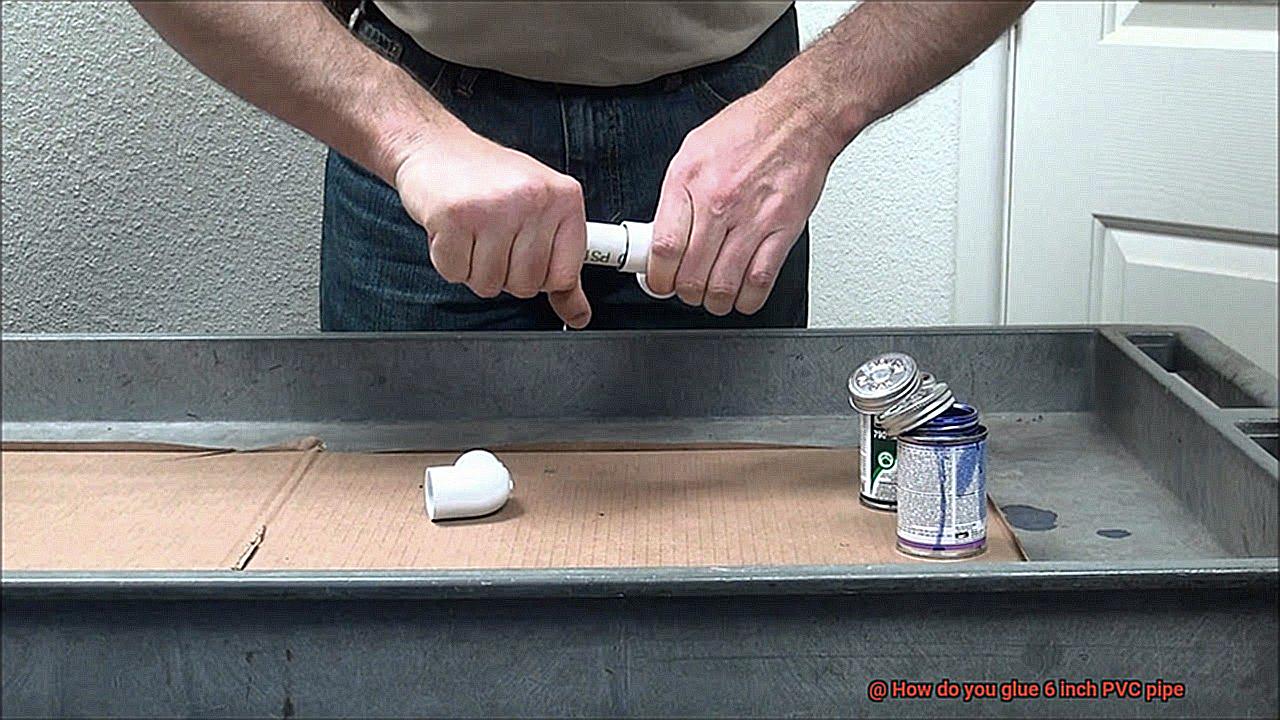
- Inserting the Pipe: Immediately after applying the cement, insert the pipe into the fitting while twisting it slightly. This twisting motion helps spread the cement evenly between the pipe and fitting, creating a strong bond.
- Holding and Cleaning: Hold the pipe and fitting together firmly for about 30 seconds to allow the cement to set. Wipe away any excess cement that may have squeezed out from the joint using a clean cloth or rag.
- Repeat and Cure: Repeat these steps for each joint in your PVC project, ensuring consistent application of primer and cement throughout. Once all joints are complete, allow at least 24 hours for the cement to fully cure before subjecting it to any pressure or stress.
Safety Precautions:
- Always wear protective gloves and safety glasses when working with PVC pipe cement.
- Work in a well-ventilated area to avoid inhaling fumes.
- Avoid applying too much cement, as excess glue can weaken the joint.
- If you need to remove a pipe from a fitting after it has been glued, it is best to cut the pipe and fitting apart rather than trying to separate them.
- Practice on scrap pieces of PVC pipe before working on your actual project to get a feel for the application process.
Joining the 6 Inch PVC Pipes Together
Joining 6 inch PVC pipes together requires a few simple steps to ensure a strong and reliable connection. Here’s a step-by-step guide to help you join your pipes using glue:
- Prepare the surfaces: Start by cleaning the ends of the pipes and the inside of the fittings. Use a pipe cleaner or sandpaper to remove any rough edges or burrs. It’s important to have clean and smooth surfaces for the glue to adhere properly.
- Apply PVC primer: Once the surfaces are clean, apply a liberal amount of PVC primer to both the inside of the fitting and the outside of the pipe. The primer helps soften the PVC and prepares it for the adhesive. Allow the primer to dry for a few seconds before moving on to the next step.
- Apply PVC cement: After the primer has dried, apply a generous amount of PVC cement or adhesive to both the fitting and the pipe. Make sure to cover all surfaces evenly to ensure a strong bond. It’s important to work quickly at this stage, as the cement starts to set rapidly.
- Insert and twist: Now, insert the pipe into the fitting, twisting it slightly as you push it in. This twisting motion helps spread the adhesive evenly and ensures a proper fit. Hold the joint firmly in place for a few seconds to allow the adhesive to bond.
- Wipe away excess cement: After joining the pipes together, use a clean rag or cloth to wipe away any excess cement. It’s crucial to remove any excess adhesive as it can harden and become unsightly if left on the surface.
- Allow curing time: Finally, it’s recommended to let the joint cure for at least 24 hours before subjecting it to any pressure or stress. This allows the adhesive to fully set and ensures a strong and reliable connection.
Supporting the Joint Until the Glue Fully Cures
Supporting the joint until the glue fully cures is a crucial step when working with 6-inch PVC pipes. This ensures that you achieve a strong and durable bond between the pipe and fitting, minimizing the risk of leaks or failure. There are several reasons why supporting the joint during the curing process is important.
Firstly, supporting the joint prevents any movement or shifting that can weaken the bond. Think of it like holding two puzzle pieces together until the glue dries – if you let go too soon, the pieces could shift and not fit together properly. By supporting the joint, you ensure that it remains secure and in alignment, resulting in a strong bond.
Secondly, supporting the joint reduces stress on it during the curing process. Excessive force or pressure can compromise the integrity of the bond, increasing the risk of leaks or joint failure. By providing support, you minimize the risk of any external factors interfering with the curing process.
Thirdly, supporting the joint allows for sufficient curing time. Different types of PVC glue have varying curing times, typically ranging from a few hours to a full day. By supporting the joint until the glue fully cures, you ensure that it has enough time to set and form a strong bond between the pipe and fitting.
To effectively support the joint, you can use clamps or braces. Clamps exert pressure on both sides of the joint, holding it securely in place until the glue sets completely. Choose clamps that are appropriate for 6-inch PVC pipes to ensure an adequate hold. On the other hand, braces are custom-made supports typically made from wood or other sturdy materials. They hold the joint in place from multiple angles and are particularly useful for larger joints or situations where clamps may not be suitable.
Remember to refer to the manufacturer’s instructions for specific curing times and avoid applying excessive force or pressure on the joint during this period. Additionally, keep the joint away from water exposure as moisture can interfere with the curing process and weaken the bond.
Tips for Gluing PVC Pipes
- Surface Preparation: The first step in gluing PVC pipes is to ensure that the surfaces to be bonded are clean and free from any dirt, grease, or moisture. This can be done by using a cloth soaked in isopropyl alcohol or a cleaner specifically designed for PVC pipe. It is important to remove any debris or rough edges from the pipe ends using sandpaper or a pipe cleaner. This will create a smooth and clean surface for better adhesion.
- Choosing the Right Glue: Selecting the appropriate adhesive is crucial for a strong and durable bond. There are different types of PVC glues available, such as solvent-based cement and adhesive tapes. It is important to choose a glue that is specifically designed for PVC pipes and is suitable for the size of the pipe you are working with. Reading the instructions provided by the glue manufacturer will help in selecting the right product.
- Applying Primer (If Required): In some cases, especially when dealing with larger diameter pipes or high-pressure applications, applying a primer before gluing is recommended. The primer helps to clean and soften the surface of the PVC, allowing better adhesion of the glue. It is important to check the instructions provided with the glue to determine if primer application is necessary.
- Applying Glue Evenly: Once you have selected the appropriate glue, it is important to apply it evenly on both the inside of the fitting socket and the outside of the pipe end. Using a brush or applicator that comes with the glue will ensure proper coverage. It is important not to apply too much glue as it can result in excess buildup or messy joints.
- Assembling Quickly: After applying the glue, it is crucial to assemble the pipes quickly. Insert the pipe into the fitting socket and twist it slightly to ensure even distribution of the adhesive. Hold the joint firmly for a few seconds while the glue sets. It is important to work swiftly as PVC glues typically have a short curing time.
YwPS1R_Cr1I” >
Conclusion
When it comes to gluing 6 inch PVC pipe, there are a few key steps you need to follow.
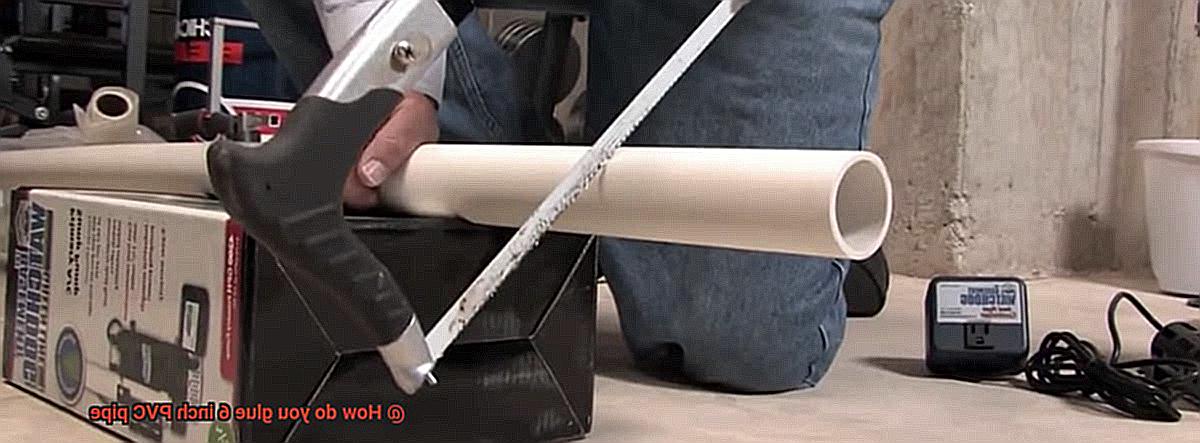
First, make sure you have all the necessary materials on hand: PVC primer, PVC cement, and a clean rag. Next, use a saw or pipe cutter to cut your pipe to the desired length. Once you have your pieces ready, start by applying the primer to the outside of the pipe and the inside of the fitting.
This will help remove any dirt or debris and ensure a strong bond. After allowing the primer to dry for a few seconds, apply a generous amount of PVC cement to both surfaces.
Then, quickly insert the pipe into the fitting and twist it slightly to spread the cement evenly. Hold the joint together firmly for about 30 seconds to allow it to set. Finally, wipe away any excess cement with a clean rag and let the glue cure for at least an hour before testing its strength.
To summarize, gluing 6 inch PVC pipe requires careful preparation and precise execution. By following these steps and using high-quality materials, you can create strong and durable joints that will withstand pressure and last for years to come.
Remember: safety is paramount when working with PVC cement, so always wear protective gloves and work in a well-ventilated area.