Welcome to our blog, where we explore the captivating world of resin art.
Today, we’re about to unravel the mystery behind connecting two resin pieces together. It’s like piecing together a jigsaw puzzle, requiring finesse and precision.
As resin art enthusiasts ourselves, we understand the magical allure of intertwining these exquisite pieces to create a seamless whole. We know that selecting the perfect adhesive and mastering the technique of aligning the pieces flawlessly are key steps in elevating your resin artistry to new heights.
So, let’s embark on this creative journey together and unveil the secrets of connecting two resin pieces in a way that truly captivates the eye. Are you ready?
Let’s dive in.
Preparing the Resin Surfaces
Contents
- 1 Preparing the Resin Surfaces
- 2 Choosing an Appropriate Glue
- 3 Applying the Glue
- 4 Securing the Pieces in Place
- 5 Allowing Enough Time for Curing
- 6 Joining Resin Pieces with Dowels or Pegs
- 6.1 Step 1: Prepare for the Spell
- 6.2 Step 2: Mark Your Spellcasting Spots
- 6.3 Step 3: Channel Your Inner Sorcerer with a Drill
- 6.4 Step 4: Unleash the Magic Potion – Adhesive Application
- 6.5 Step 5: Align the Stars (and Resin Pieces)
- 6.6 Step 6: The Magical Connection
- 6.7 Step 7: Seal Your Spell with Clamps
- 6.8 Step 8: The Grand Reveal
- 6.9 Step 9: Bonus Magic – Extra Reinforcement (Optional)
- 7 Heat Welding for Smaller Pieces
- 8 Conclusion
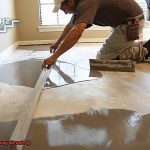
Achieving a strong and durable bond when working with resin surfaces requires proper preparation. Whether you’re tackling a DIY project or a professional application, following the right steps is essential to ensure that your adhesive adheres well and creates a seamless connection. In this comprehensive guide, we will delve into the key steps involved in preparing resin surfaces for successful bonding.
Step 1: Thoroughly Clean the Surfaces
Before you begin bonding, it is crucial to clean the resin surfaces thoroughly. Dust, dirt, and contaminants can hinder adhesion, so use mild detergent or soap and warm water to gently scrub the surfaces with a soft brush or cloth. Rinse them with clean water and pat dry with a lint-free cloth. This step ensures a pristine surface for optimal adhesion.
Step 2: Lightly Sand the Surfaces
Lightly sanding the resin surfaces provides texture for the adhesive to grip onto. Use fine-grit sandpaper (around 180-220 grit) and sand in a circular motion. Be cautious not to apply excessive pressure or sand too aggressively, as this could damage the resin. After sanding, remove any dust or residue using a tack cloth or a lint-free cloth slightly dampened with rubbing alcohol.
Step 3: Apply a Primer or Bonding Agent
To further enhance adhesion, applying a primer or bonding agent is beneficial. Choose a primer specifically designed for resin materials and follow the manufacturer’s instructions for application. Apply a thin, even coat of primer to both surfaces and allow it to dry completely before proceeding. This step enhances bonding strength and creates a robust connection between the resin pieces.
Step 4: Align and Clamp the Resin Pieces
Proper alignment is crucial for creating a seamless connection between resin pieces. Ensure that the pieces fit together accurately before applying adhesive. Once aligned, use clamps or suitable tools to hold the pieces in place while the adhesive cures. Follow the adhesive manufacturer’s instructions for curing time and avoid disturbing the resin pieces during this period.
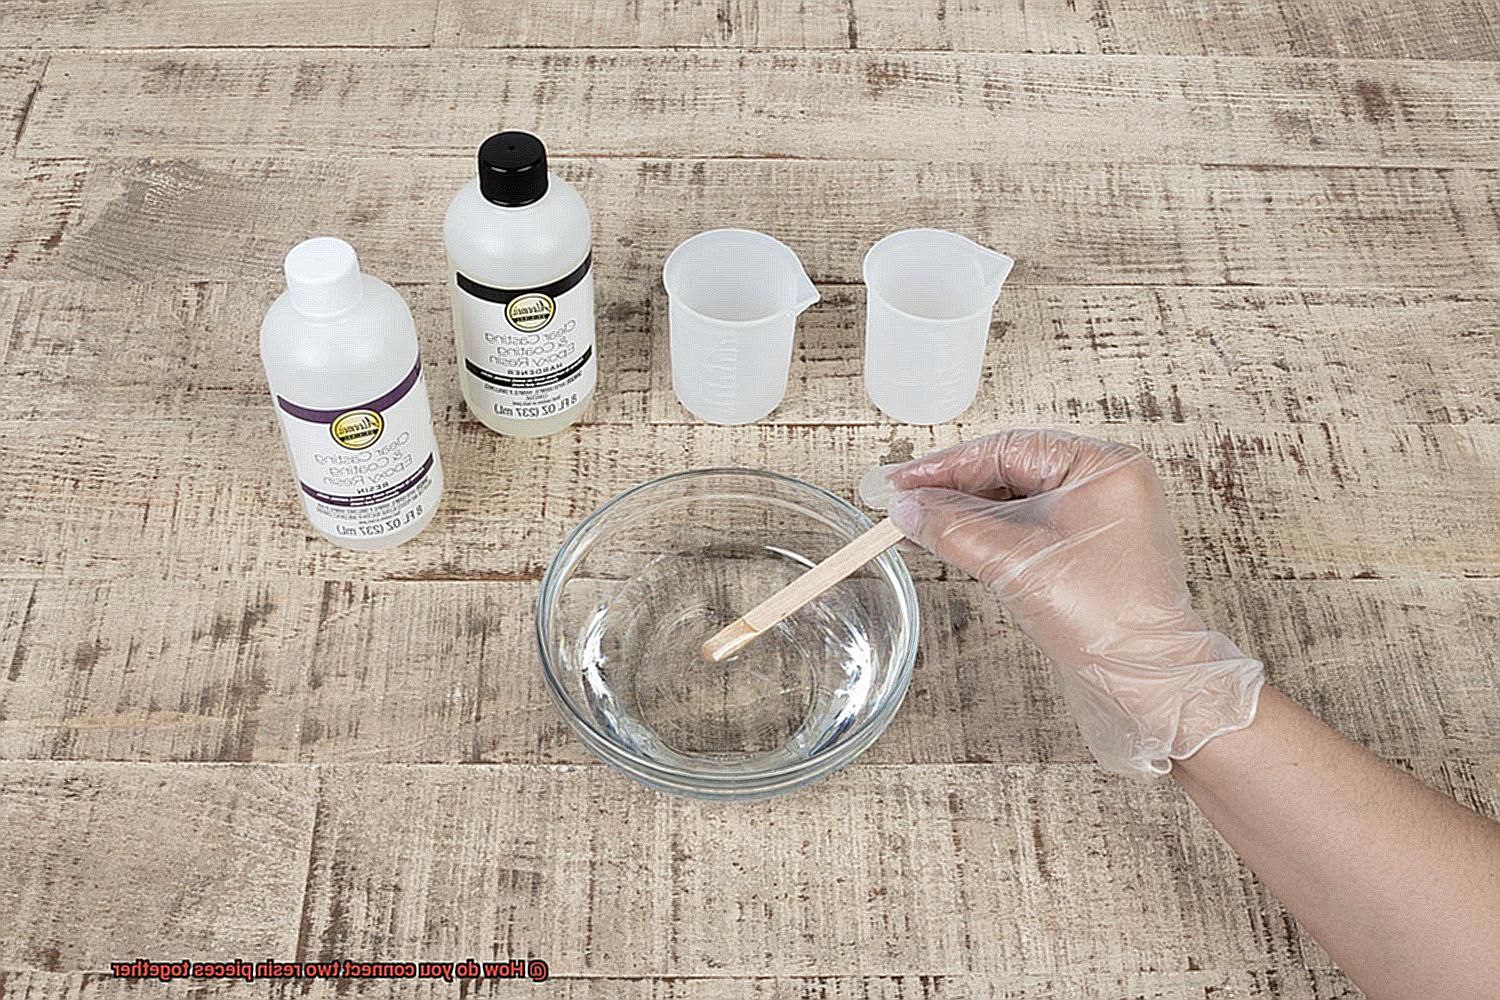
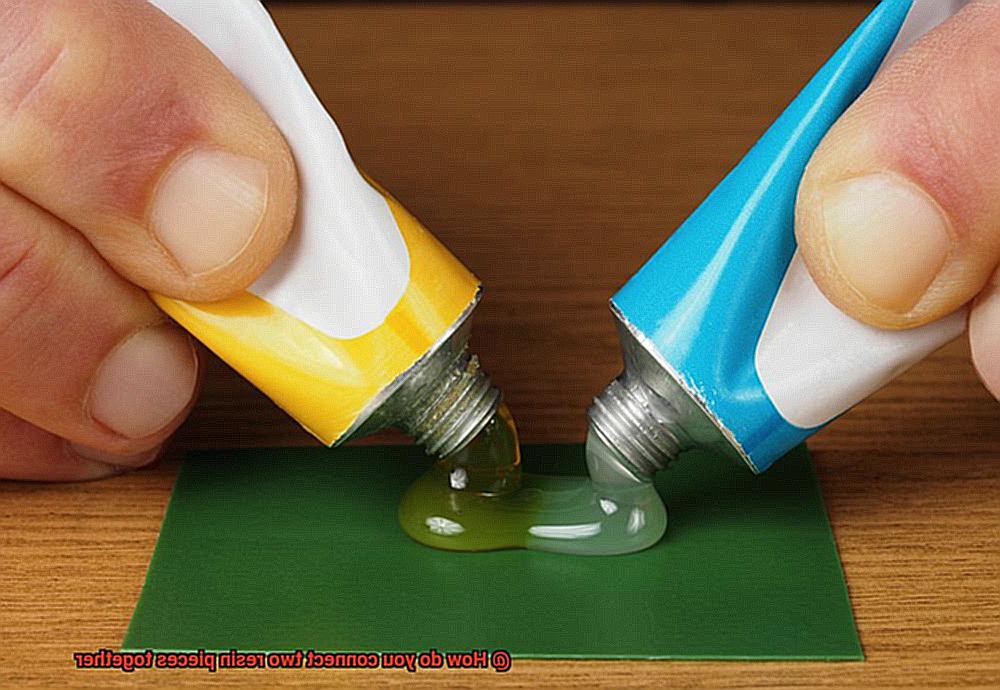
Choosing an Appropriate Glue
Look no further. This article will guide you through the essential steps in choosing an appropriate adhesive for your resin projects. So, roll up your sleeves, unleash your creativity, and let’s get started.
Step 1: Cleanse for Success
Before applying any glue, it is vital to thoroughly clean the surfaces of your resin pieces. Banish dirt, dust, and grease that can weaken the bond. Use a gentle cleaner or rub down with rubbing alcohol to create a pristine canvas for your adhesive.
Step 2: Roughen Up and Get a Grip
To maximize bonding strength, lightly roughen the surfaces of your resin pieces using sandpaper or a file. This adds texture, providing more surface area for the adhesive to grip onto. Think of it as giving your masterpiece a firm handshake.
Step 3: Selecting the Superstar Glue
Epoxy resin glue reigns supreme for bonding resin pieces due to its exceptional adhesion and strength. It’s tailor-made for various materials like plastics, ceramics, and metals. However, if you’re working on smaller projects or require an instant bond, super glue (cyanoacrylate) can also be an excellent choice.
Step 4: Mastering Application Techniques
Different adhesive application methods may be necessary depending on the size and shape of your resin pieces. For larger ones, apply glue evenly across the entire surface area. For smaller or intricate pieces, channel your inner artist and use a toothpick or fine brush for precise application. Picture yourself delicately adding the final strokes to your artwork.
Step 5: The Magic of Bonding
Once glue has been applied, carefully press the resin pieces together, ensuring perfect alignment. Apply gentle pressure for a few minutes to allow the adhesive to work its magic. Avoid excessive force, as it may cause glue to ooze out. Imagine yourself gently molding the pieces together like a sculptor.
Step 6: The Virtue of Patience
After joining the resin pieces, exercise patience and allow them to dry completely before handling or subjecting them to stress. Follow the manufacturer’s instructions for curing time and resist the urge to disturb the bond during this period. Remember, patience is key when creating your resin masterpiece.
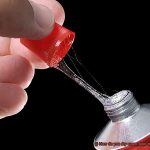
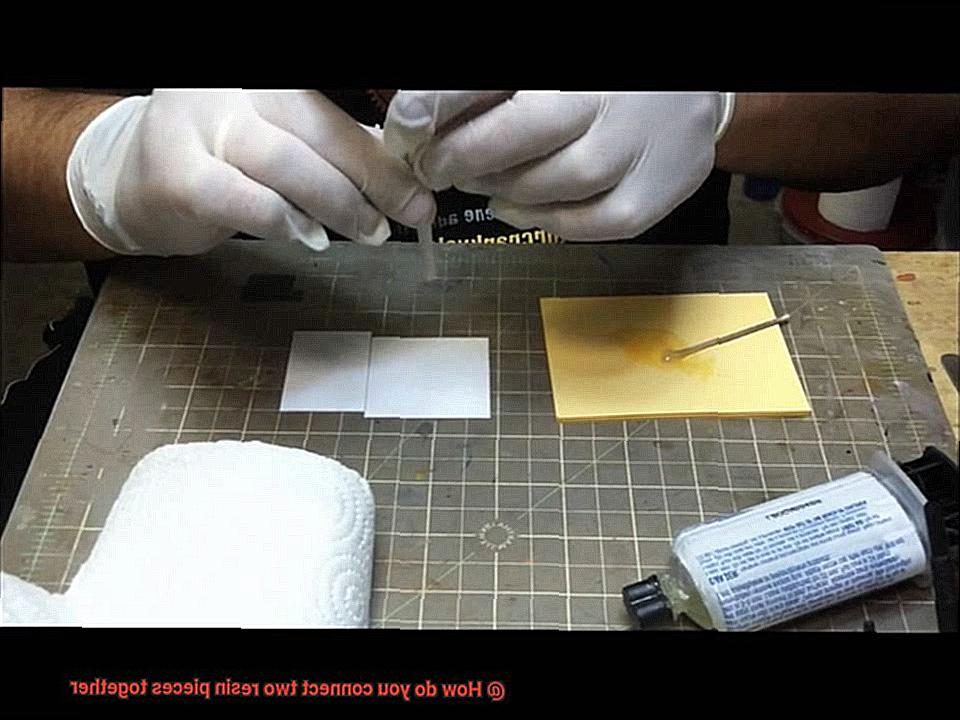
Applying the Glue
If you’re ready to embark on a journey of artistic connection, you’ve landed in the right place. In this comprehensive guide, we will take you through the intricate process of applying glue like a true professional. So, gather your gloves, put on your creative hat, and let’s dive in.

- Choosing the Perfect Bond: The first step in mastering the art of gluing resin is finding the ideal adhesive match. Seek out a robust glue specifically formulated for bonding plastics, such as epoxy or cyanoacrylate (super glue). These exceptional adhesives possess the power to create an enduring connection that withstands the test of time.
- Preparing Surfaces with Tender Care: Before immersing yourself in the adhesive magic, indulge your resin pieces with some tender loving care. Cleanse them gently with a mild detergent and water to banish any unwelcome dirt or grease. For a steadfast grip, lightly roughen the surfaces with sandpaper. Imagine it as treating your resin pieces to a delightful exfoliation session.
- Unleashing Your Glue Magic: Now it’s time to work your enchanting glue magic. Apply a thin and even layer of glue to one surface of each resin piece. Don’t hold back on your artistic flair – employ a small brush or even a toothpick for precise application. Ensure every nook and cranny is covered, leaving no surface untouched by your adhesive spell.
- A Match Made in Resin Heaven: Picture yourself playing the role of matchmaker for resin pieces. Meticulously align the resin pieces and apply gentle pressure to bring them together. It’s like a tender embrace between long-lost friends. Maintain this connection for a few minutes as the glue initiates its captivating bonding dance.
- The Gift of Patience: Ah, the virtue of patience comes into play. Different glues require varying curing times, so consult the instructions provided with your chosen adhesive for an approximate estimate. Resist the urge to rush the process by moving or stressing the bonded pieces too soon. Remember, greatness awaits those who master the art of waiting.
- A Flawless Finish: It’s time to marvel at your masterpiece. If any excess glue seeped out during the bonding process, fret not. Grab a damp cloth or a cotton swab drenched in acetone (for epoxy) or nail polish remover (for cyanoacrylate glue) and delicately wipe away the surplus. Behold the enchantment of a flawlessly clean finish.
- Safety First, Glue Lovers: Let us not forget the importance of safety precautions, dear glue enthusiasts. Shield your precious hands with gloves and ensure proper ventilation in your workspace. And, of course, always read and adhere to the instructions provided by the glue manufacturer for optimal results.
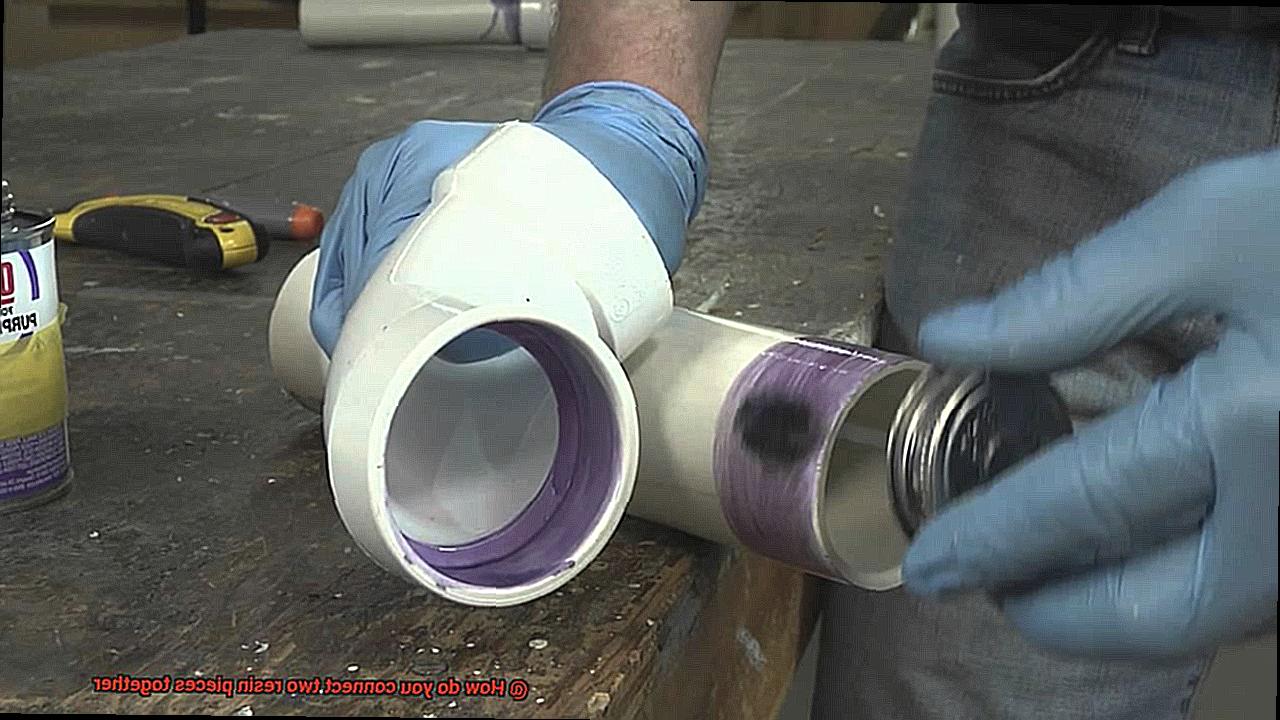
Securing the Pieces in Place
Today, we embark on a journey to unravel the secrets of securely connecting resin pieces. Whether you’re a seasoned pro or taking your first steps into the world of resin art, this comprehensive guide will equip you with the knowledge and techniques needed to create strong and lasting connections.
- Adhesive Bonding – The backbone of resin bonding lies in adhesive bonding. It is imperative to select a specialized adhesive or glue designed specifically for resin materials. Apply the adhesive evenly on both surfaces, adhering strictly to the manufacturer’s instructions regarding curing time and conditions. Epoxy resin reigns supreme for its exceptional adhesion and durability.
- Mechanical Fastening – When screws, bolts, or other fasteners are the perfect match for your resin pieces, mechanical fastening comes to the rescue. Ensure compatibility by selecting fasteners suitable for resin materials. Remember to drill holes as needed and choose the appropriate length and diameter for a secure connection that withstands the test of time.
- Heat Welding – For those seeking a touch of artistry, heat welding offers an alternative approach. This technique involves delicately heating the surfaces until they melt slightly, then pressing them together as they cool down. However, it is important to note that heat welding requires precise temperature control and should be left in the hands of experienced professionals.
- Compatibility Testing – Resins have their quirks; not all play well together. Before committing to a full connection, perform compatibility testing on a small, inconspicuous area with your chosen bonding method. This precaution ensures an absence of surprises further down the line.
- Surface Preparation – To achieve an unyielding bond, meticulous surface preparation is key. Cleanliness reigns supreme. Ensure surfaces are pristine, dry, and devoid of any contaminants or residues that might compromise the bonding process.
Allowing Enough Time for Curing
Today, we embark on a journey into the realm of resin bonding to uncover the significance of allowing enough time for curing. This step is paramount if you desire your resin pieces to fuse together seamlessly, as if they were destined to be one.
Let’s begin by delving into what exactly curing entails. It is the transformative process where liquid resin solidifies, granting your bond the strength and durability it needs. Hastening through this crucial stage may result in a feeble connection that fails to endure the test of time.
Now, each type of resin possesses its own unique curing time, which can be influenced by factors like temperature and humidity. To obtain precise information, consult the manufacturer’s instructions. Generally, most resins necessitate a minimum of 24 hours for full curing. However, some resins may require even more time, so patience becomes the key.
Temperature and humidity also wield an intriguing influence over the curing process. Higher temperatures hasten it, while lower temperatures elongate it. Similarly, higher humidity expedites curing, whereas lower humidity decelerates it. Thus, ensure that your work environment maintains controlled conditions to achieve optimal results.
Here’s another vital pointer – refrain from disturbing or relocating your resin pieces while they are curing. Trust me, you wouldn’t want to disrupt the enchanting bond developing within. Grant them their space and allow them to work their magic undisturbed.
Once your resin has fully cured, congratulations are in order. You have successfully attained a sturdy bond between your cherished pieces. However, exercise caution when handling them to prevent any accidental damage. Remember, you’ve invested your time and effort into crafting something remarkable – don’t let it go to waste.
Thus concludes our exploration into why allowing sufficient time for resin to cure properly holds such significance. It all revolves around ensuring a robust bond that withstands the trials of time. Take it from me, never rush this vital step. Provide your resin with the time it requires to transform into the super glue of your dreams.
Joining Resin Pieces with Dowels or Pegs

Today, we’ll delve into the mystical process of joining resin pieces with dowels or pegs, ensuring your masterpieces stay together like never before. Grab your cauldron of creativity and let’s embark on this spellbinding journey.
Step 1: Prepare for the Spell
Cleanse your resin pieces from any unwanted residue, ensuring a strong bond. Remember, cleanliness is key.
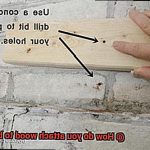
Step 2: Mark Your Spellcasting Spots
Mark the positions where you want to insert dowels or pegs on both resin pieces. Balance and stability are essential, so place your marks equidistant from the edges.
Step 3: Channel Your Inner Sorcerer with a Drill
Wield your trusty drill. Use an appropriately sized drill bit to create holes in the marked positions on both resin pieces. Embrace your inner sorcerer as you drill those holes.
Step 4: Unleash the Magic Potion – Adhesive Application
Prepare your adhesive potion (such as epoxy resin or strong glue). Apply it to the holes in both resin pieces, ensuring even coverage and full coating. This step is crucial for a spellbinding bond.
Step 5: Align the Stars (and Resin Pieces)
Insert the dowels or pegs into one resin piece, ensuring a snug fit. Align this piece with the other resin piece, making sure the dowels or pegs align with their respective holes. Perfect alignment is key.
Step 6: The Magical Connection
Gently press the two resin pieces together, allowing the adhesive to secure the dowels or pegs in place. Marvel at the connection forming before your eyes. Wipe away excess adhesive for a neat finish.
Step 7: Seal Your Spell with Clamps
Use clamps to hold the joined resin pieces tightly while the adhesive cures. Follow the manufacturer’s instructions for curing time. This step seals the spell and fortifies the connection.
Step 8: The Grand Reveal
Remove the clamps once the adhesive has fully cured. Behold your masterpiece. Check the strength of the joint – it should be solid and secure, thanks to the dowels or pegs.
Step 9: Bonus Magic – Extra Reinforcement (Optional)
For those seeking even more magical strength, reinforce the joint by applying additional adhesive around the edges of the joined resin pieces. This adds extra stability and fortifies your creation.

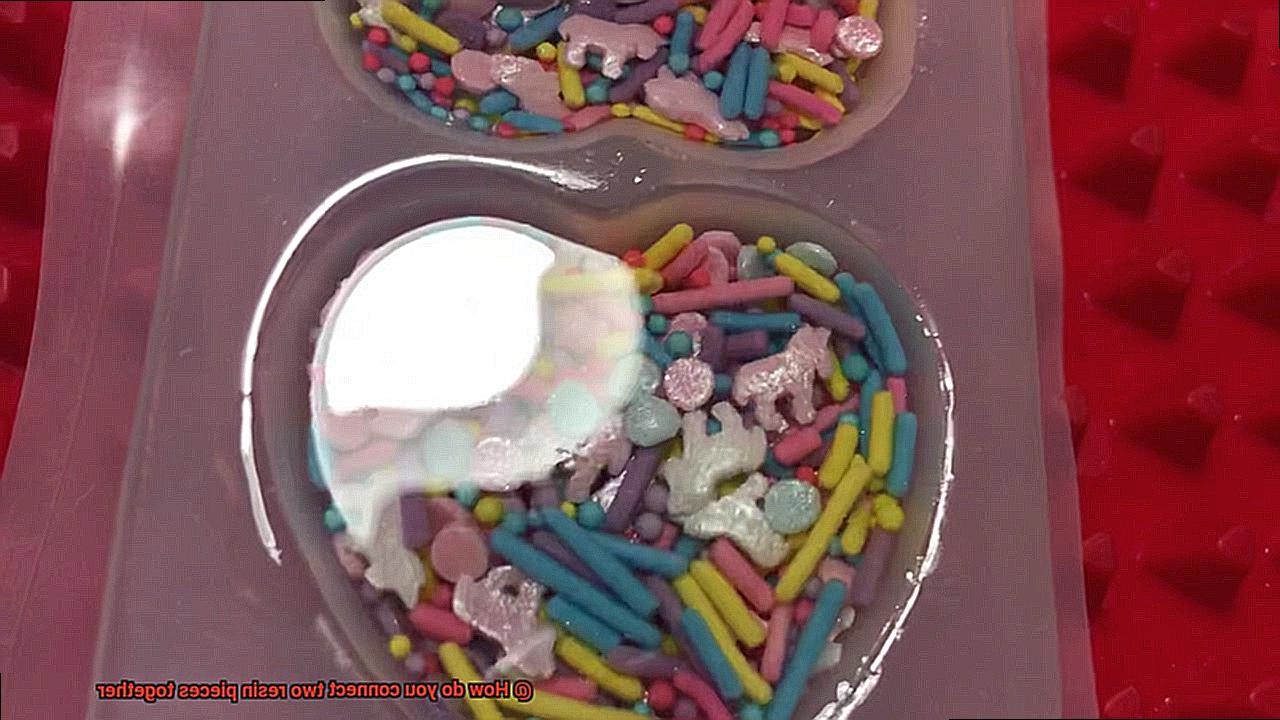
Heat Welding for Smaller Pieces
Heat welding is a versatile and captivating technique that can be utilized to bond smaller resin pieces together. Whether you are an enthusiast in the world of crafting or a skilled jewelry maker, heat welding has the potential to revolutionize your creative process. So, gather your materials and prepare to venture into the enchanting realm of heat welding.
First and foremost, preparation is paramount. Before even considering applying heat, it is essential to ensure that your resin pieces are impeccably clean and free from any pesky dust or debris. The last thing you want is for these intruders to disrupt the bond you are about to forge. A swift wipe with a pristine cloth or a gentle cleaning solution should effectively eliminate any contaminants. Furthermore, don’t forget to delicately roughen the surfaces of the resin pieces using sandpaper. This seemingly simple step will significantly enhance the strength of the connection between the two pieces.
Now that your resin pieces are primed and ready, it is time to introduce the star of the show – the heat gun. Position the two resin pieces together in the desired alignment and unleash the power of your trusty heat gun or torch. It is imperative to utilize a tool specifically engineered for working with plastics and resins, ensuring both safety and optimal outcomes.
As you apply heat evenly to both sides of the joint where the pieces will be united, something truly magical transpires. The resin material gradually softens, becoming increasingly pliable and eagerly awaiting its chance to unite with its counterpart. With utmost care, gently press the two pieces together, exerting just enough force to create a robust connection without compromising the integrity of the material.
However, my dear reader, it is vital to acknowledge that this task is not for the faint of heart. Heat welding can be an intricate process, especially when working with smaller resin pieces. It necessitates precision and control to evade overheating or damaging the material. Therefore, before embarking on your grand project, it is advisable to practice on scrap resin pieces. This will allow you to familiarize yourself with the process, determine the optimal temperature and duration required for a successful weld, and ultimately refine your technique.
Mlt8O6YurWU” >
Conclusion
In conclusion, connecting two resin pieces together is a meticulous process that demands careful preparation, the right adhesive selection, and proper technique. To begin, it is crucial to thoroughly clean and lightly sand the surfaces of the resin pieces, allowing the adhesive to find a firm grip. Enhancing adhesion can be achieved by applying a primer or bonding agent.
The choice of glue plays a pivotal role in achieving a successful connection. For exceptional adhesion and strength, epoxy resin glue is highly recommended. However, for smaller projects or when an instant bond is desired, super glue (cyanoacrylate) can be used. The size and shape of the resin pieces may require different application techniques.
Securing the pieces together can be accomplished through adhesive bonding, mechanical fastening with screws or bolts, or even exploring heat welding for an artistic touch. It is essential to conduct compatibility testing before fully committing to a connection.
Allowing sufficient curing time is paramount for ensuring a robust bond. Curing times vary depending on the type of resin utilized and can be influenced by temperature and humidity factors. During this critical period, it is important to avoid disturbing or stressing the bonded pieces.
For joining resin pieces with dowels or pegs, precise drilling and application of adhesive are key elements. Holding clamps should be employed to tightly secure the joined pieces while the adhesive cures.
Heat welding presents another option for smaller resin pieces but requires meticulous preparation using a heat gun or torch specifically designed for plastics and resins. Precise control must be exercised to prevent overheating or damaging the material.
By diligently following these steps and employing these techniques, you will seamlessly connect two resin pieces together, creating awe-inspiring works of art that will captivate any viewer’s gaze.