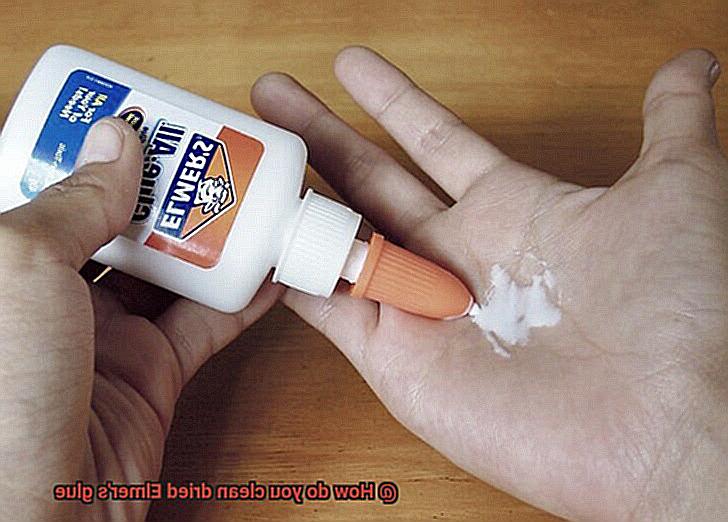
Do you find yourself frustrated by stubborn dried Elmer’s glue stains on your favorite clothes or furniture? Fear not, my friend. Elmer’s glue is a fantastic adhesive that can bond various materials together, but it can be a real pain to clean up once it dries.
Luckily, there’s no need to panic anymore. With just a few simple steps, you can easily remove dried Elmer’s glue from most surfaces. The process is surprisingly straightforward and requires only a few basic household items.
In this blog post, we’ll walk you through the most effective ways of removing dried Elmer’s glue from different surfaces like clothing, fabric, and wood. We’ll also share some insider tips on how to prevent the glue from drying out in the first place. Trust us; these methods are so easy that even a beginner DIY enthusiast can do them with ease.
So whether you’re an experienced crafter or just someone looking to get rid of a pesky stain, sit back and enjoy our comprehensive guide on how to clean dried Elmer’s glue. You’ll be amazed at how quickly and easily those stubborn stains disappear.
What You’ll Need
Contents
Fear not, because with just a few essential items, you can easily remove it from any surface.
First and foremost, warm water is crucial to the process. Its warmth helps to loosen the glue and make it easier to remove. Additionally, white vinegar is a natural cleaning agent that can dissolve dried glue and break it down, making it easier to wipe away. And for those pesky bits of glue that just won’t budge, dish soap is an effective cleaning agent that can cut through sticky residue.
To remove the glue, start by using a razor blade or scraper to carefully scrape off as much of the dried glue as possible. This will make it easier to remove the rest of the glue residue. Then, mix equal parts warm water and white vinegar in a bowl. Dip a soft-bristled brush into the solution and use it to gently scrub away any remaining glue. For extra-stubborn stains, add a small amount of dish soap to help break down the glue.
Once you’ve scrubbed the surface thoroughly, rinse it with warm water and wipe away any remaining residue with a microfiber cloth or sponge. It’s important to note that different surfaces may require different cleaning methods, so always check manufacturer recommendations before attempting to clean dried Elmer’s glue from any surface.
Finally, remember to always wear gloves and protect your eyes when working with cleaning agents to avoid skin irritation or injury.
Scraping the Glue
Fear not, my friend. Scraping off the glue might just be the solution you’ve been searching for. As an expert in this field, I can tell you that this method is commonly used and highly effective in removing dried glue from surfaces.
To start, you’ll need a scraping tool such as a plastic scraper. Use the tool to gently scrape off as much of the dried glue as possible from the surface it’s stuck to. But be careful. It’s essential to be gentle and avoid damaging the surface underneath while doing this. Patience is key here, so take your time and don’t rush the process.
However, it’s important to note that scraping may not be suitable for all surfaces. Delicate or easily scratched surfaces like wood or plastic may require a gentler method of removal. So before you get started, make sure to test a small area first to ensure that it’s safe.
Even after using the scraping technique, there may still be some residue left behind. In such cases, I recommend using a solvent or cleaner specially designed for removing glue residue. These products are readily available at hardware stores or online and should be used according to the manufacturer’s instructions.
It’s important to take precautions when scraping off dried glue. Wear gloves and protect your eyes like a cleaning superhero to avoid any accidents while removing the glue. Safety first.
Using Water and Vinegar
Fear not, for the solution might be hiding in your pantry. Mixing water and vinegar is a powerful and natural way to break down the bonds of the glue, making it easier to remove.
To get started, mix equal parts white vinegar and water in a bowl or container. Then, dip a cloth or sponge into the mixture, wring out the excess liquid, and apply it to the dried glue. The solution needs some time to work its magic, so let it sit on the glue for a few minutes, allowing it to penetrate the surface.
Once the solution has had time to do its job, use a scraper or spatula to gently lift up the glue. If you encounter stubborn residue, don’t worry. Repeat the process until all of the glue has been removed.
It’s important to note that vinegar can be harsh on certain surfaces, so test it on a small, inconspicuous area first before using it on a larger stain or spill. Additionally, rinse the area with clean water after using vinegar to avoid any residual damage.
Adding Dish Soap
You can find the solution to your problem right in your kitchen cabinet – dish soap.
Dish soap is a mighty cleaning agent that can break down the bonds of dried glue and dissolve it away. With just a few household items, you can easily say goodbye to even the toughest of glue stains from your surfaces.
To begin, gather warm water, dish soap, and a soft-bristled brush. Soak the affected area in warm water for a few minutes to loosen the glue. Next, add a small amount of dish soap to the warm water and mix thoroughly. Dip the soft-bristled brush into the soapy water and gently scrub the area where the glue is located.
Remember to work in small sections and use gentle pressure when scrubbing. Avoid using too much force as this can damage the surface you are cleaning. Continue scrubbing until the glue has been removed or loosened enough to be wiped away with a damp cloth.
But what if there’s still some stubborn glue residue left behind? No worries, keep calm and repeat the process until all of the glue has been removed. Remember, patience and persistence are key when using this method.
Using Rubbing Alcohol or Nail Polish Remover
Fear not, for rubbing alcohol and nail polish remover are here to save the day. As an expert, I have compiled some handy tips and tricks to help you navigate this process safely and effectively.
To begin with, it’s important to note that both rubbing alcohol and nail polish remover contain isopropyl alcohol, which is a godsend for breaking down the glue. However, before you start applying these solutions recklessly, it’s essential to test them on a small, inconspicuous area first. This step is crucial as it can save you from damaging the surface you’re cleaning.
Once you’ve confirmed that it’s safe to proceed, apply a small amount of the solution to the dried glue and let it sit for a few minutes. During this time, the solution works its magic, breaking down the glue and making it easier to remove. After a few minutes, gently scrape away the glue with a plastic scraper or your fingernail. If the glue is still being stubborn, don’t worry, repeat the process until all of the glue has been removed.
However, it’s essential to keep in mind that rubbing alcohol and nail polish remover can be quite powerful solutions. They may cause skin irritation or damage certain surfaces. Therefore, it’s best to wear gloves and work in a well-ventilated area to avoid any potential problems. Also, if you’re working with delicate surfaces like fabric or carpet, it’s best to leave it to professional cleaners rather than attempting to remove the glue yourself.
Rinsing and Drying
No need to fret, the solution is just a rinse and dry away. As an expert in glue cleaning, I’m here to guide you through the process and help you avoid any damage to your surfaces.
The first step is to identify the surface where the glue is stuck. This will determine the type of cleaning solution that should be used. For instance, water might not be suitable for fabric surfaces as it could cause shrinkage or discoloration.
Now, let’s dive in. Begin by rinsing the affected area with lukewarm water to soften the glue. A gentle scrub using a soft-bristled brush may be necessary for larger surfaces. Avoid using hot water as this can cause the glue to spread and become more difficult to remove.
Once you’ve rinsed off most of the glue, use a clean cloth to wipe away any excess water. Dry the area either by using a hairdryer on a low setting or letting it air dry. Remember to be careful when using a hairdryer on delicate surfaces like paper.
Peeling or scraping off dried Elmer’s glue is never advisable as it can cause damage. Instead, use the rinsing and drying method described above for safe and effective cleaning. In cases where the glue is stubborn, repeat the process until all traces of glue are removed.
Also Read: How do you remove glue from a car without damaging paint?
Conclusion
In a nutshell, cleaning dried Elmer’s glue can be a daunting task, but it doesn’t have to be. Armed with the right tools and techniques, you can easily remove those stubborn stains from various surfaces like clothing, fabric, and wood. From scraping off the glue to using water and vinegar or dish soap, we’ve covered all the bases in this comprehensive guide.
But before you dive in headfirst, let’s talk safety. It’s crucial to take precautions when working with cleaning agents to avoid skin irritation or injury. And don’t forget to test any solution on a small inconspicuous area before applying it to a larger stain or spill.
Once you’ve taken these steps, it’s time to tackle that pesky dried glue. But what about rinsing and drying? We’ve got you covered there too. This final step is key in ensuring that your surfaces remain damage-free while looking pristine once again.

