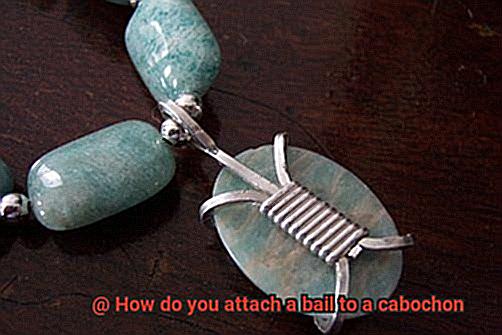
If you’re a jewelry enthusiast, then you know that cabochons are a must-have in your collection. These smooth, polished stones with a flat bottom can add an extra touch of elegance to any piece of jewelry. But have you ever wondered how to attach a bail to a cabochon and transform it into a stunning pendant?
Don’t worry, attaching a bail to a cabochon may seem challenging at first, but it’s actually quite simple. There are different methods available depending on the type of bail and the size and shape of your cabochon.
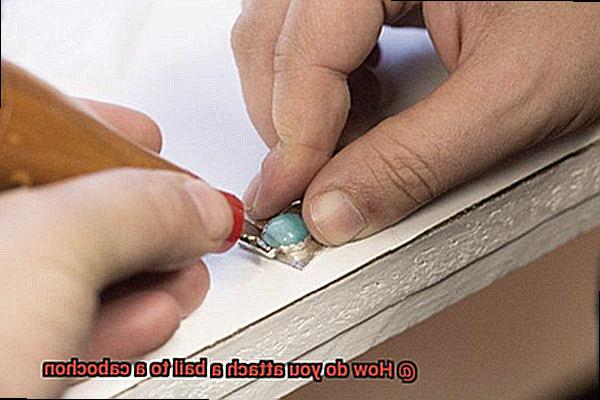
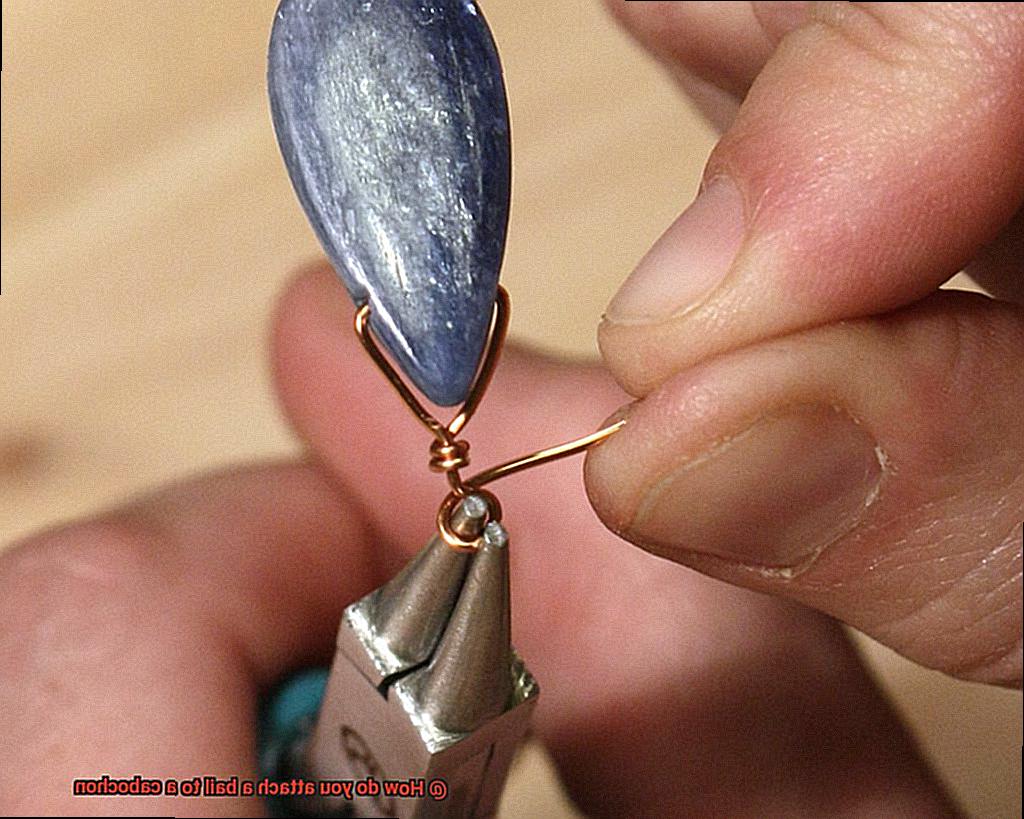
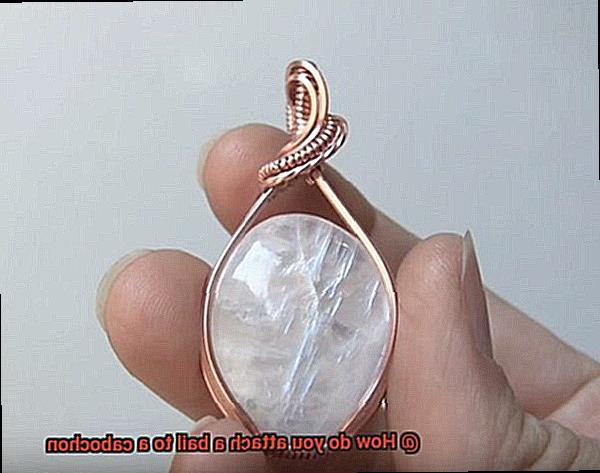
One way is by using glue to attach the bail directly onto the back of the cabochon. This technique works well for smaller or lighter stones or bails with flat surfaces that can be easily glued. Another popular method is wire wrapping. This involves wrapping wire around the top of the cabochon and forming a loop for the chain or cord to go through.
Regardless of which method you choose, attaching a bail to your favorite cabochon is an exciting project that allows you to showcase your creativity and make unique jewelry pieces. So grab your favorite stone and let’s dive into creating wearable art together.
What You Will Need
Contents
To do so, you’ll need to know what tools and materials are essential for attaching a bail to a cabochon. Let’s dive in.
Firstly, you’ll need a bail that fits your cabochon’s size and shape. Bails come in various sizes, shapes, and materials, such as sterling silver or gold-plated brass. The right bail should complement the cabochon’s curvature and enhance its overall look.
Once you’ve selected your bail, it’s time to choose the right glue. Jewelry-specific epoxy or super glue are two popular options that provide a strong bond that can withstand the weight of your pendant. Be sure to choose an adhesive that is specifically designed for attaching metal findings to stones.
To apply the glue, you may need a toothpick or small brush to ensure a precise application. It’s crucial to work in a clean and dry area as any dirt or moisture can weaken the bond between the bail and cabochon.
Additionally, basic jewelry-making tools such as pliers or wire cutters may come in handy when adjusting the bail’s size or manipulating it to fit your cabochon.
Choosing the Right Bail
Transforming a cabochon into an exquisite pendant is an art that requires careful consideration of every detail. One such detail is choosing the right bail for your cabochon. The bail is the component that connects the cabochon to the chain or cord, making it essential to select a bail that is strong and secure. With a wide range of bails available in different shapes, sizes, and materials, it can be overwhelming to choose the best one. But don’t worry, I’m here to guide you through the process of selecting the ideal bail for your cabochon.
Size matters. When choosing a bail, consider the size of your cabochon. A bail that is proportionate to the stone’s size will not look overpowering or too small. If you have a larger cabochon, choose a sturdy bail that can support its weight without compromising on aesthetics.
The material of the bail also plays a crucial role in determining its suitability. Bails can be made from metal, plastic, or leather, each with its own unique characteristics. Metal bails are durable and come in various finishes like silver, gold, or copper. Plastic and leather bails are lightweight and flexible but may not be as strong as metal ones. Consider the weight of your cabochon and the style you want to achieve when selecting the bail’s material.
A bail’s design can add visual interest to your jewelry piece or complement the cabochon’s natural beauty. Some bails have simple loops that attach directly to the chain or cord, while others have intricate designs that enhance the overall appeal of your pendant. Choose a bail design that complements your cabochon and adds an extra layer of aesthetic value to your final product.
Finally, how the bail attaches to the cabochon is also critical. Some bails have prongs that grip onto the stone, while others use glue or wire wrapping techniques. Whichever method you choose, ensure that it is secure and will not damage your cabochon.
Applying Jewelry Glue
Look no further than jewelry glue – the secret ingredient to secure and long-lasting bonds.
But before you start gluing, it’s important to prep your surfaces. Clean both the cabochon and bail with rubbing alcohol to ensure a debris-free surface. Once dry, it’s time to apply the glue.
Using a small brush or toothpick, apply a thin layer of jewelry glue to both surfaces. Be careful not to overdo it, as too much glue can make a mess.
Now for the moment of truth: gently press the bail onto the cabochon and hold it firmly in place for at least 30 seconds. Avoid moving or disturbing the piece during this time, as any shifting can affect the outcome.
After waiting 24 hours for the glue to dry completely, check your bond by giving the bail a gentle tug. If it’s secure, you’re good to go. If not, repeat the process until you achieve a strong bond.
Remember, following these steps is key, but choosing the right jewelry glue is just as important. Make sure to select a glue specifically formulated for metal, glass, and gemstones.
Positioning the Bail
As a jewelry maker, you understand that positioning the bail is a crucial step in creating a stunning and functional piece. The placement of the bail can greatly impact the overall appearance and wearability of your creation. To ensure success with this task, there are several factors to consider.
First, it’s essential to determine the orientation of your cabochon. Depending on its shape, it may need to be positioned horizontally or vertically. Take your time to carefully assess this before moving on to placing the bail.
Now comes the fun part – positioning the bail itself. Applying a small amount of glue or adhesive, place the bail towards the top of the cabochon. Ensure that it is centered and aligned correctly before pressing it firmly onto the surface. This will create a strong bond and prevent any mishaps when wearing the piece.
However, don’t forget about the size and weight of your cabochon. If it’s particularly heavy or large, you may need to opt for a larger or stronger bail to properly support it. Don’t risk an awkwardly hanging piece or worse – a broken one.
Overall, positioning the bail requires careful attention to detail and proper placement for both functionality and aesthetics. By following these steps and taking your time, you can create a beautiful and functional piece of jewelry that will leave your customers in awe.
Securing the Bail
When it comes to crafting stunning jewelry, the finishing touch often lies in securing the bail to the cabochon. But how do you ensure that your hard work doesn’t fall apart? The answer lies in properly securing the bail using jewelry glue.
Firstly, it’s essential to clean both the cabochon and the bail thoroughly before attaching them to one another. Any dirt or oil can hinder the adhesive’s ability to stick, making it crucial to ensure that both surfaces are clean and dry.
Once you’re satisfied with the cleanliness of your materials, it’s time to apply a small amount of jewelry glue onto the bail’s flat surface. Be careful not to use too much glue, as it can overflow and create a mess.
Next, carefully place the bail onto the cabochon’s backside, ensuring that it’s centered and aligned correctly before pressing down firmly. Hold the bail in place for at least 30 seconds to allow the glue to adhere properly.
If you’re using a bail with prongs, gently push them into the cabochon’s sides until they’re secure. Be careful not to apply too much pressure as it can crack or damage the cabochon.
After attaching the bail, it’s essential to let it dry completely before handling or wearing the piece. This ensures that the bond is strong and won’t come loose.
Finally, test the strength of the bond by gently pulling on the bail. If it feels loose or wobbly, reapply glue and let it dry again.
By following these steps, you can create beautiful and functional jewelry that will stand the test of time. It’s important to note that while using jewelry glue is an effective method for securing a bail, there are other ways depending on your materials’ type. However, for most jewelry makers, using glue is a simple and reliable way to attach a bail.
Wiping Away Excess Glue
Wiping away excess glue is a simple and vital step in achieving a clean and professional finish. Here are some expert tips to become a pro at removing excess glue.
Firstly, using a damp cloth or paper towel is the easiest and most common method to remove excess glue. But remember, the cloth or towel must only be slightly damp to avoid damaging the cabochon or bail. Gently wipe away any excess glue, taking care not to touch the glue that’s still setting.
If the glue stain persists, try using rubbing alcohol. Dip a toothpick or cotton swab into rubbing alcohol and gently rub away any remaining glue residue. Rubbing alcohol dissolves most types of adhesive and will leave your piece looking flawless. However, make sure to rinse the cabochon and bail thoroughly with warm water after using rubbing alcohol, as it can be harsh on certain materials.
Want a more natural approach? Vinegar can also be used to remove excess glue. Mix equal parts vinegar and water in a small bowl, then dip a cloth or cotton swab into the solution. Wipe away any excess glue, being careful not to let the vinegar come into contact with any metal components.
Drying Time
Then you know that choosing the right glue is essential to create a lasting bond. But did you know that drying time is just as crucial? Let’s explore why.
Epoxy glue is a common choice for attaching bails to cabochons due to its strength and durability. However, it can take several hours to dry completely, and even longer in humid conditions. On the other hand, super glue dries much faster, but may not be as strong and could fail over time.
When selecting a glue, consider the weight of the cabochon and bail and how it will affect drying time. Properly aligning the pieces during the drying process is also important. Use clamps or tape to secure them until the glue has fully dried.
Allowing enough time for the glue to dry fully before handling or wearing the piece is vital. Otherwise, you risk breaking the bond and ruining your hard work. Take into account any humidity in your workspace as it can impact drying time.
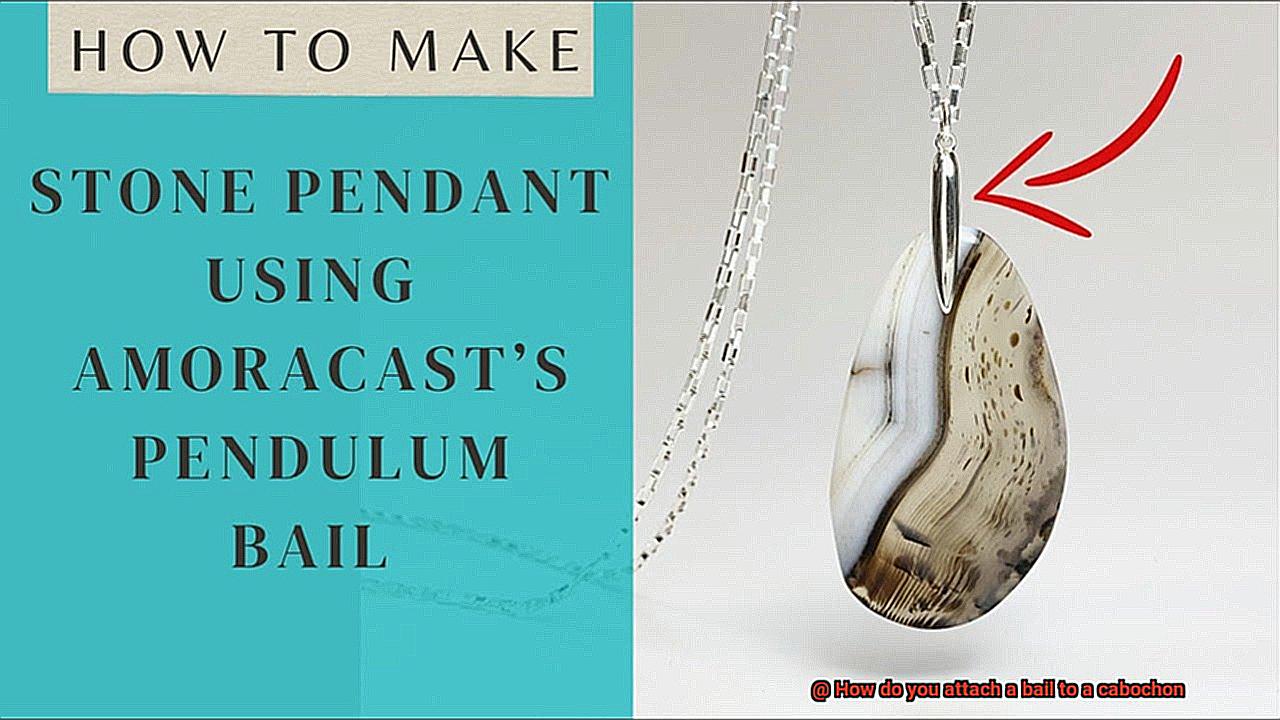
Creating Jewelry Pieces
Then it’s essential to master the art of attaching a bail to a cabochon. A bail is the loop or hook that connects a pendant to a chain or cord, while a cabochon is a polished gemstone or material that lacks facets. Let’s delve into the different methods of attaching a bail to a cabochon.
The most common method is using glue, but selecting the right glue is crucial. We recommend epoxy glue because it creates a strong bond between the cabochon and the bail. However, before applying any glue, ensure that both surfaces are clean and dry. Allow enough time for the glue to dry entirely before handling the piece, as the drying time is crucial.
Wire wrapping is another popular technique. It involves wrapping wire around the cabochon and then attaching the bail to the wire. Wire wrapping requires skill and precision, but it can result in beautiful and unique jewelry pieces. This method is ideal when working with delicate or irregularly shaped cabochons.
When choosing your bail size or strength, consider the weight of your pendant carefully. An excessively heavy pendant may require a more substantial or sturdier bail to support it properly. Additionally, ensure that your bail is securely attached to prevent the pendant from falling off.
ox3q3GCYKhE” >
Conclusion
In conclusion, attaching a bail to a cabochon is a thrilling project that allows jewelry enthusiasts to unleash their creativity and craft one-of-a-kind pieces. The process involves various methods depending on the bail type and cabochon size and shape. Whether you opt for glue or wire wrapping, there’s always an approach that suits your preferences.
To attach a bail to your beloved cabochon, you need essential tools such as pliers or wire cutters, the right size and shape of bail, and jewelry-specific epoxy or super glue. Selecting the perfect bail entails considering factors like material, design, attachment method, and cabochon size.
It’s crucial to secure the bail using quality jewelry glue for long-lasting results. Wiping off excess adhesive ensures a polished finish that screams professionalism. Don’t forget that drying time is just as vital as choosing the appropriate glue when connecting bails to cabochons.
By following these steps meticulously and taking your time, you can create stunning jewelry pieces that will leave your customers in awe.