Smartphones have become an extension of our lives, and we rely on them for pretty much everything. But what happens when your trusty device takes a tumble and the screen shatters into tiny pieces? The thought of replacing it can be daunting, but fear not. There’s a way to save your phone and your bank account – by gluing the screen back together.
Now, we know what you’re thinking: “Gluing my phone screen back together? That sounds risky.” But hear us out. This DIY project could save you hundreds of dollars, and we’re here to guide you through the process step-by-step.
In this blog post, we’ll cover everything you need to know about gluing your phone screen back together. We’ll discuss the different types of glue that work best for this project, how to properly prepare your phone screen for gluing, and walk you through the actual process itself. Plus, we’ll share some tips and tricks to make sure everything goes smoothly.
We get it – a shattered phone screen can cause major anxiety. That’s why we want to help you tackle this issue head-on with confidence. So grab your phone (carefully.) and let’s dive into the world of DIY phone repairs.
What Materials Are Needed to Glue a Phone Screen Back?
Contents
- 1 What Materials Are Needed to Glue a Phone Screen Back?
- 2 Preparing the Phone Screen for Glue Application
- 3 Applying the Adhesive to the Phone Screen
- 4 Letting the Adhesive Dry Completely
- 5 Tips for Successfully Gluing a Phone Screen Back Together
- 6 What If You Cannot Repair Your Phone Screen?
- 7 Different Types of Adhesives and Their Uses for Gluing a Phone Screen Back Together
- 8 Professional Alternatives to DIY Repairs
- 9 Conclusion
If you’ve accidentally dropped your phone and shattered the screen, don’t panic. Repairing it yourself might be easier than you think with the right materials on hand. Here are the essential materials you’ll need to glue your phone screen back together:
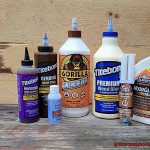
Firstly, you’ll need a high-quality adhesive that’s suitable for your phone screen. You can choose from clear epoxy, super glue, or a special adhesive designed specifically for mobile screens. The adhesive is the most crucial material in this repair process.
Next, to align the pieces of your broken phone screen before applying the adhesive, you’ll require a pair of tweezers. They can also be useful in removing any small pieces of glass or debris that may be stuck in the cracks.
A microfiber cloth will come in handy when cleaning your phone screen before applying the adhesive. Make sure to use a lint-free cloth to ensure that no fibers are left behind that could interfere with the repair.
After gluing the screen back together, you may need a razor blade or box cutter to remove any excess adhesive from around the edges of your phone screen. This ensures a clean and professional finish.
It’s always a good idea to wear gloves when working with adhesives to avoid getting any on your skin. And safety glasses can protect your eyes from any flying glass shards while you work on your phone screen.
Remember, having these materials on hand before starting your phone screen repair will help ensure a smooth and successful repair process. Just be patient and let the adhesive dry completely before using your phone again, which may take several hours or even overnight.
Preparing the Phone Screen for Glue Application
It’s a frustrating experience that can ruin your day, but fear not – with the right materials and some helpful tips, you can fix your phone screen yourself. Let’s dive into the essential steps to prepare your phone screen for glue application.
The first step is crucial: before applying any adhesive, you must thoroughly clean the screen. A microfiber cloth or alcohol wipes work great for removing any dirt, dust, or debris that could interfere with the bonding process. However, it is essential to be gentle while cleaning as using too much pressure can cause further damage to the screen. Focus on the edges of the screen where the glue will be applied.
With a clean screen, it’s time to prepare it for gluing. If your phone comes with a pre-cut adhesive strip, remove it and apply it onto the edges of the screen where it will be glued. For those without a pre-cut strip, use a small brush or toothpick to apply a thin layer of adhesive around the edges of the screen. The key here is to avoid applying too much glue as this can create a mess and interfere with the screen’s touch sensitivity.
Before applying any pressure to the screen, ensure that it is correctly aligned with the phone’s body. Once you are satisfied with its placement, gently press down on the screen’s edges to secure it in place. You can use clamps or tape to hold down the screen while it dries if necessary.
Applying the Adhesive to the Phone Screen
If you’re looking to fix your cracked phone screen like a pro, then it’s important to understand the critical step of applying adhesive to the phone screen. The process involves more than just slapping on glue and hoping for the best. It requires attention to detail, patience, and precision.
First and foremost, before applying any adhesive, it’s crucial to ensure that both the phone screen and replacement screen are free of debris or dust that could negatively impact adhesion. Take the time to thoroughly clean both surfaces to guarantee proper bonding.
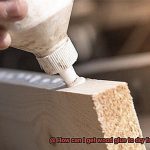
Once you’ve prepped your surfaces, it’s time to apply the adhesive. Using a small amount of glue, spread it evenly across the surface of the phone screen. Depending on your adhesive of choice, there may be a brush or applicator provided to help with this process. Follow the manufacturer’s instructions carefully and apply the adhesive as directed.
With the adhesive applied, it’s time to carefully align and place the replacement screen onto the phone. Take your time and make sure everything is properly aligned before pressing down firmly to ensure proper adhesion. Be aware that some adhesives may require additional pressure or time to fully set, so follow any instructions provided by the manufacturer in this regard.
After applying the adhesive and placing the replacement screen onto the phone, it’s important to allow sufficient time for the adhesive to cure fully before using your device again. The length of time required for curing may vary depending on factors such as temperature and humidity, but it’s recommended to wait at least a few hours or up to a full day for optimal results.
Letting the Adhesive Dry Completely
Rushing this step can lead to a botched repair job or even further damage to your phone. So, take a deep breath, be patient, and follow these tips for a flawless phone screen repair.
First and foremost, it’s important to wait at least 24 hours before handling your phone. This may seem like an eternity, but it’s necessary for the adhesive to cure and set properly. During this time, keep your phone in a safe and secure location where it won’t be disturbed or accidentally bumped.
It’s also critical to avoid any pressure or force on your phone during this time. Resist the urge to test if the screen is securely attached by pressing on it or putting it in a tight pocket or purse. Any pressure or movement can disrupt the drying process and affect the final result of your repair.
Remember that drying time can vary depending on the type of adhesive used and the ambient temperature and humidity levels. To ensure you’re following the correct drying times and recommendations, consult the manufacturer’s instructions for your specific adhesive.
Tips for Successfully Gluing a Phone Screen Back Together
Dropping your phone and shattering the screen can be a nightmare, but it doesn’t have to be a costly one. With just a few tools and some adhesive, you can fix it yourself. Here are some tips to help you successfully glue your phone screen back together.
Gather Your Tools
Before you begin, make sure you have all the necessary tools and supplies. You will need a screen replacement kit, a small screwdriver or pry tool, a clean microfiber cloth, and a good quality adhesive.
Clean the Screen
Clean the shattered screen with a microfiber cloth to remove any dirt or debris that may interfere with the adhesive. Make sure the screen is completely dry before applying any adhesive.
Choose the Right Adhesive
Choosing the right adhesive is crucial for success. A cyanoacrylate-based adhesive, also known as super glue, bonds quickly and strongly but can be brittle. A clear epoxy adhesive provides a strong bond while remaining flexible.
Apply Adhesive Carefully
Apply a small amount of adhesive to the broken edges of the screen. Too much adhesive can cause it to seep out from under the edges of the screen, creating a mess or interfering with touch sensitivity. A small bead of adhesive around the edges should be sufficient.
Align and Apply Pressure
Carefully align the broken edges of the screen with the rest of the phone’s body. Make sure it is properly aligned before pressing down on the screen. Once aligned, apply pressure evenly across the entire surface of the screen for a few minutes to help ensure a strong bond. Use a clamp or heavy object to hold the screen in place while it dries.
Let it Dry
Allow ample time for the adhesive to dry completely before using your phone again. The drying time may vary depending on the type of adhesive used.
What If You Cannot Repair Your Phone Screen?
Cracking your phone screen can be a frustrating and stressful experience. Despite your best efforts, you may not be able to repair it yourself. But don’t fret. There are still options available to you that won’t cost you an arm and a leg or take up too much of your time. Gluing your phone screen back together is one of those options, and it’s more affordable and convenient than going to a repair shop or contacting the manufacturer.
Before diving into gluing your phone back together, remember that it’s not a long-term solution. Over time, the glue may weaken or become discolored, and your phone screen may crack again. Using the wrong type of glue or applying it incorrectly could also potentially damage your phone further.
If you’ve already attempted to repair the screen yourself and have not been successful, don’t panic. It can be a difficult task, and sometimes it’s best to leave it to the professionals. You can take your phone to a repair shop or contact the manufacturer for assistance, but these options can be costly and time-consuming.
So, if you’re considering gluing your phone screen back together, keep in mind that there are several types of glue that you can use for this purpose, such as superglue or epoxy. Before applying any glue, make sure that the surface of the screen is clean and dry.
Different Types of Adhesives and Their Uses for Gluing a Phone Screen Back Together
When it comes to fixing a broken phone screen, using the right adhesive is crucial for a successful repair. There are several types of adhesives available, each with its own unique properties and uses. Let’s explore each type in further detail.
Cyanoacrylate Glue (Superglue):
Cyanoacrylate glue, also known as superglue, is a fast-drying adhesive that is commonly used for small cracks or breaks in the phone screen. It creates a strong bond between surfaces, but it can be brittle and may not hold up well under pressure. Superglue is easily accessible as it can be found in most hardware or craft stores.
Epoxy Resin:
Epoxy resin is a two-part adhesive that consists of a resin and a hardener. When mixed together, these components form a strong and durable bond that is ideal for larger cracks or breaks in the phone screen. Epoxy can fill in gaps and create a smooth surface, but it takes longer to set than other adhesives and may be more difficult to work with.
Silicone Glue:
Silicone glue is a flexible adhesive that can withstand movement and flexibility without breaking or cracking. This makes it an ideal choice for phone screens that are prone to bending or flexing. However, silicone glue may not be as strong as other types of adhesives and may take longer to dry.
UV-Curing Adhesive:
UV-curing adhesives require a UV light to cure and create a strong and clear bond that is perfect for repairing glass surfaces like phone screens. They are often more expensive than other types of adhesives and require additional equipment to use properly.
It’s important to note that not all adhesives are suitable for use on phone screens. Some adhesives can damage the screen or interfere with touch sensitivity. Always read the manufacturer’s instructions carefully before using any adhesive on your phone screen.
Professional Alternatives to DIY Repairs
While attempting a DIY fix may seem like the solution, it’s important to note that it can lead to further damage and void your warranty. So, what are the professional alternatives? Let’s explore.
Authorized Repair Centers or Service Centers
Taking your phone to an authorized repair center or the manufacturer’s service center is a safe bet. These professionals have the necessary expertise and tools to repair your phone screen without causing additional damage. Plus, getting your phone fixed by authorized professionals won’t void your warranty.
Third-Party Repair Shops
Third-party repair shops specializing in phone repairs offer more affordable options than authorized repair centers. However, it’s crucial to do proper research and read reviews before choosing a shop to ensure they are reputable and provide quality repairs.
Insurance Providers
If you have insurance on your phone, check with your provider to see if they offer screen repair services. Some insurance plans may cover the cost of repairs or offer a discounted rate for repairs through authorized repair centers.
Wy59RzBwjQE” >
Conclusion
In conclusion, the frustration of dropping your phone and shattering the screen can be overwhelming. But fear not, repairing it yourself might be a simpler task than you expect with the right tools at your fingertips. Opting to glue your phone screen back together is a cost-effective and convenient solution that won’t take up too much of your time. To get started, gather essential materials such as high-quality adhesive, tweezers, microfiber cloth, razor blade or box cutter, gloves, and safety glasses.
Before applying any adhesive, it’s crucial to clean the screen thoroughly using a microfiber cloth or alcohol wipes to remove dirt, dust or debris that could hinder the bonding process. Once cleaned properly, apply a small amount of adhesive around the edges of the screen using a small brush or toothpick.
It’s important to allow sufficient time for the adhesive to cure fully before using your device again. The curing time may vary depending on factors such as temperature and humidity. Therefore, it’s recommended to wait for at least several hours or even up to an entire day for optimal results.
If you’re considering gluing your phone screen back together but feel overwhelmed by the DIY approach or unsuccessful attempts in past repairs, professional alternatives are available options to consider. Authorized repair centers or service centers, third-party repair shops and insurance providers can provide reliable solutions.
Remember that there are different types of glue that you can use for this purpose such as superglue or epoxy resin. Choose wisely according to your needs and preferences.