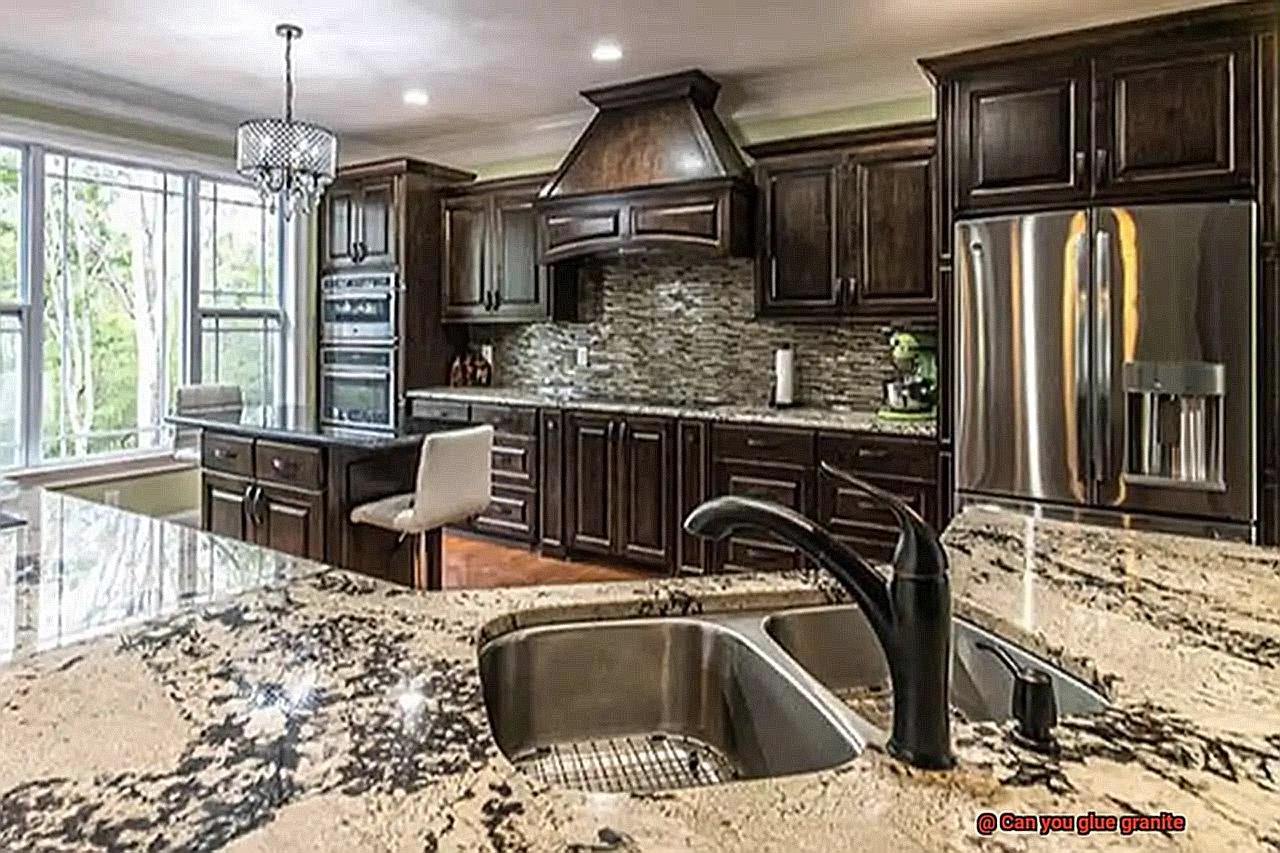
Picture yourself stepping into a kitchen that oozes opulence, with countertops that radiate an air of elegance and sophistication. When it comes to luxurious kitchen upgrades, one material has always reigned supreme: granite. Renowned for its durability and enchanting natural allure, granite has become a go-to choice for homeowners and designers alike. But amidst all the glowing praise, one burning question remains: can you actually glue granite?
In this comprehensive guide, we’ll dive deep into the pros and cons of gluing granite, exploring its feasibility and potential pitfalls. But before we plunge headfirst into the nitty-gritty details, it’s crucial to grasp the complexities of using adhesive substances on these majestic stone surfaces.
Join us on this journey as we unravel the mysteries behind gluing granite, empowering you to make an informed decision when it’s time to revamp your kitchen or bathroom. Get ready to discover the secrets of adhesive bonding like never before.
What is Granite?
Contents
Granite, a mesmerizing marvel of nature, has captivated humanity for centuries with its unparalleled strength, enduring durability, and breathtaking beauty. Whether contemplating granite for countertops, flooring, or other applications, delving into its composition and properties is essential. Join us on a journey to unravel the secrets of granite and discover the art of gluing this extraordinary stone.
The Formation and Composition of Granite:
- Born from the molten embrace of magma deep within the Earth’s crust, granite emerges as an igneous rock.
- Quartz, feldspar, and mica minerals dominate its composition, harmoniously intermingling with traces of amphiboles and pyroxenes.
- The coarse-grained tapestry of granite is a testament to the unhurried cooling process that allows each mineral grain to blossom into prominence.

The Mesmerizing Splendor of Granite’s Appearance:
- Behold the spellbinding allure of granite’s speckled or mottled visage, a testament to its celestial composition.
- Like an artist’s palette, granite’s colors span a kaleidoscope of possibilities, dictated by the minerals entwined within.
- From ethereal hues of luminous gray and creamy beige to brooding tones of ebony and mahogany, granite offers an astounding array of choices to satiate any design appetite.
The Versatility that Defies Boundaries:
- Unyielding in strength and resilience, granite stands as the material of choice for architectural wonders such as bridges, buildings, monuments, and countertops.
- Its imperviousness to heat, scratches, and stains renders it peerless for kitchen countertops and bathroom vanity tops.
- Not merely a practical stone but a work of art in itself, granite adorns floors with an exquisite touch, embellishes walls with a regal presence, and breathes life into statues with its eternal charm.
Practical Utilization that Transcends Imagination:
- Crushed granite, an embodiment of versatility, finds purpose as aggregate for concrete mixtures or as a robust foundation for roads and driveways.
- Its unwavering compressive strength grants it the honor of paving roads and walkways as dimensional stone.
- Granite’s steadfastness manifests in other realms too, serving as ballast for railroad tracks and lending its essence to the production of asphalt.

The Artistry of Gluing Granite:
- To bond granite, one must navigate the treacherous terrain of its porous nature and weighty demeanor.
- With meticulous cleansing, judicious adhesive selection, and thorough surface preparation, a formidable bond can be forged.
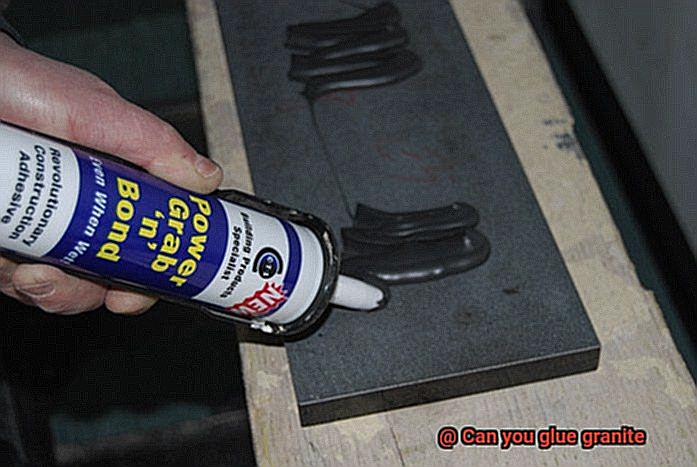
- Epoxy adhesives, revered for their tenacity, moisture resistance, and tolerance to scorching heat, emerge as the chosen alchemical agent for gluing granite.
Why Glue Granite?
Today, we will explore why it is necessary to glue granite when installing countertops or other surfaces, and uncover the secrets behind a strong and beautiful installation.
Strengthening Structural Integrity
Granite, known for its durability, can still crack or break if not handled with care. By using a high-quality adhesive, we create a strong bond that reinforces the overall structure of the countertop or surface. This ensures its longevity and prevents potential damage.
Filling in Gaps and Seams
Even with careful cutting, there may be slight variations in size or shape between granite slabs. These variations can result in small gaps or seams when installed together. Gluing granite helps fill these gaps, creating a seamless and aesthetically pleasing appearance.
Hygiene at its Finest
In areas like kitchen countertops, hygiene is paramount. An appropriate adhesive creates smooth, non-porous glued seams, preventing food particles or liquids from seeping into gaps. This ensures a hygienic environment and makes cleaning and maintenance easier.
Design Flexibility Unleashed
Gluing allows architects and designers to create intricate patterns or custom designs using different colors or types of granite. The possibilities are endless when it comes to creating unique surfaces that reflect individual styles and preferences.
Cost-Effective Brilliance
Using smaller pieces bonded together reduces the cost of larger installations without compromising quality or durability. This makes granite more accessible to different budgets, enabling affordability in home renovations or commercial projects.
Preparing the Surface of Granite for Gluing
In this blog post, we will delve into the step-by-step procedure of preparing the surface of granite for gluing. From meticulous cleaning to temperature compatibility and precise application, we will unlock the secrets that guarantee an unyielding and enduring bond.
Step 1: Cleanse the Surface
To commence, it is imperative to thoroughly cleanse the granite surface before applying any adhesive. Utilize a gentle detergent or specialized stone cleaner in conjunction with a soft cloth or sponge to delicately wipe down the surface. This meticulous act eradicates debris and contaminants that could jeopardize the bond’s integrity.
Step 2: Dry Thoroughly
After cleansing, it is crucial to ensure that the granite surface is completely dry. Employ a pristine, dry cloth to eradicate any traces of moisture or residue. It is vital to eliminate all remnants of moisture as it can interfere with the adhesive’s ability to adhere effectively.
Step 3: Create Surface Texture (if necessary)
Depending on the chosen adhesive and desired level of adhesion, it may be necessary to create a textured surface on the granite. This can be achieved through sandpaper or a diamond abrasive pad. Adhere strictly to the manufacturer’s guidelines in determining the appropriate grit size for your specific adhesive.
Step 4: Eliminate Dust and Debris
After creating surface texture, it is imperative to meticulously remove any dust or debris that may have accumulated during this process. Employ a clean, dry cloth or utilize compressed air to disperse loose particles. This meticulous step ensures an immaculate and smooth bonding surface.
Step 5: Ensure Temperature Compatibility
Thoroughly scrutinize the temperature requirements stipulated by the adhesive manufacturer. Both the granite surface and adhesive must conform to the recommended temperature range for optimal bonding. Neglecting these guidelines may compromise the bond’s strength and durability.
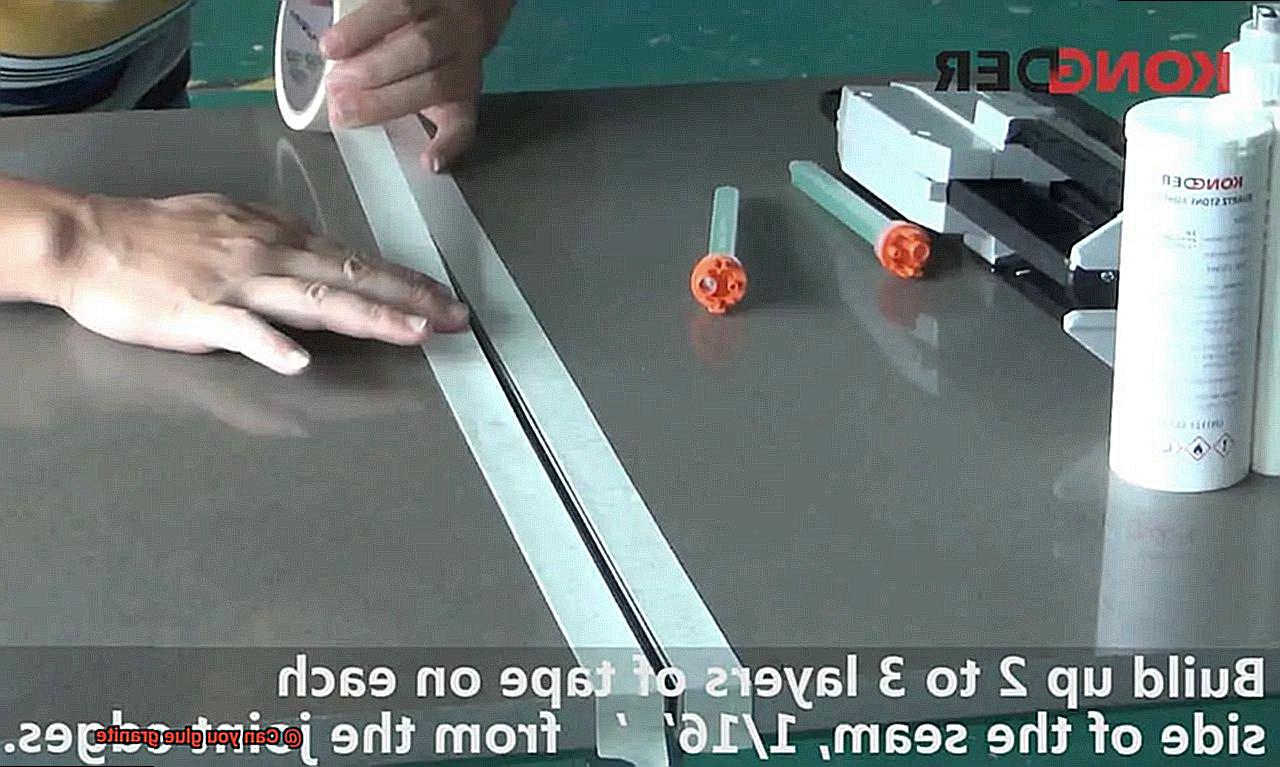
Step 6: Conduct Compatibility Assessment
Before applying the adhesive to the entire surface, it is prudent to conduct a compatibility assessment on a small, inconspicuous region of the granite. This preliminary test allows for adjustments to be made, ensuring a seamless and steadfast bond throughout.
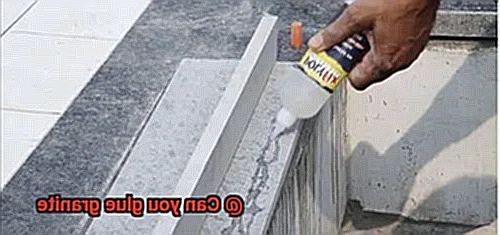
Step 7: Apply Adhesive
Adhere meticulously to the manufacturer’s instructions in regard to application technique and quantity of adhesive. Excessive application may result in superfluous squeeze-out, potentially damaging the surrounding area. Apply the adhesive evenly and consistently across the surface.
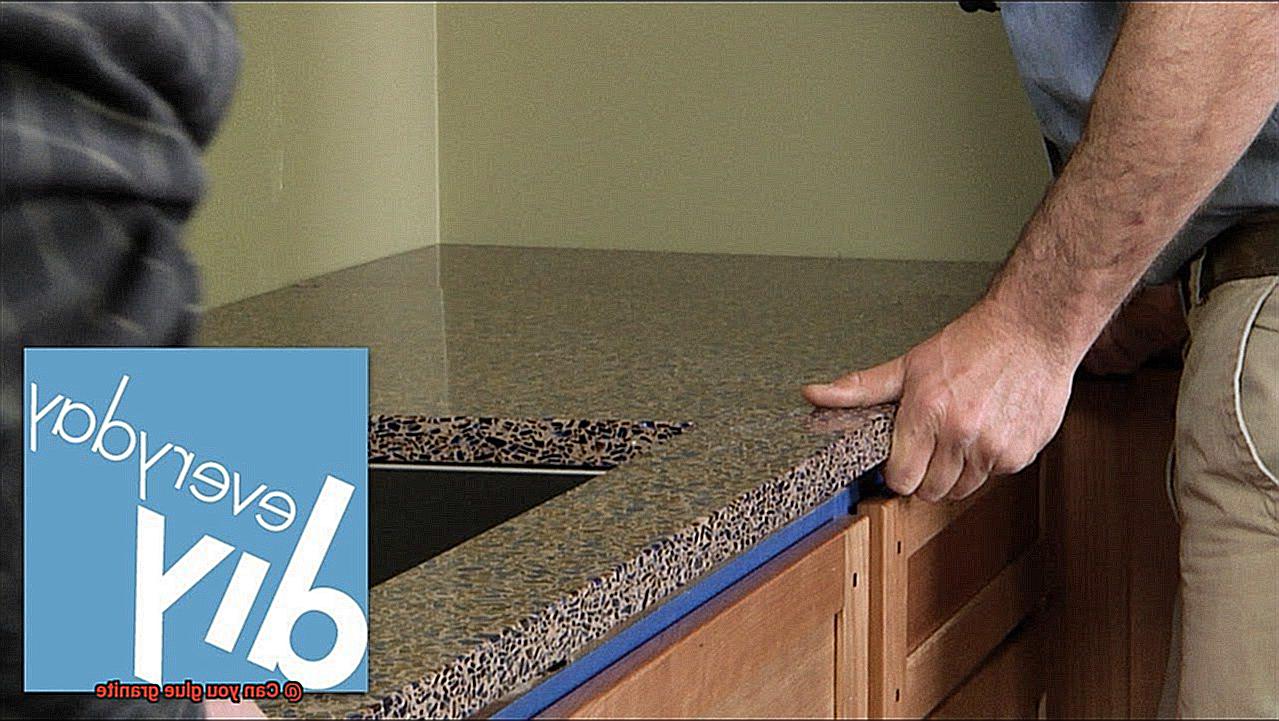
Step 8: Firmly Press Surfaces Together
Once the adhesive has been applied, firmly press the two surfaces together to forge an unyielding bond. Depending on the size and shape of the granite surface, employ clamps or weights to exert pressure. This meticulous act facilitates an even and secure bond between the surfaces.
Choosing the Right Adhesive
Planning to add a touch of opulence to your kitchen or bathroom with stunning granite countertops or flooring? Before you embark on this exciting project, let’s dive into the crucial element that can make or break your masterpiece – selecting the right adhesive. The last thing you want is for your beautiful granite pieces to come crashing down.
The Strength Test:
Picture this: after hours of meticulous selection and investing in top-quality materials, you use a weak adhesive and disaster strikes. To avoid this nightmare scenario, choose an adhesive with exceptional bonding strength. Granite is heavy, and without a robust adhesive, it won’t stay put for long.
Compatibility Matters:
Granite is a porous material, meaning it can absorb liquids and chemicals. Using the wrong adhesive could lead to discoloration or damage. To prevent this, opt for an adhesive specifically formulated for natural stones like granite. This ensures effective penetration and bonding without any harm.
Durability for the Long Haul:
Your granite masterpiece will endure spills, heat, and everyday wear and tear. That’s why durability is a top concern when selecting an adhesive. It should withstand moisture, high temperatures, and common household chemicals found in kitchens and bathrooms. You want a bond that stays strong through thick and thin.
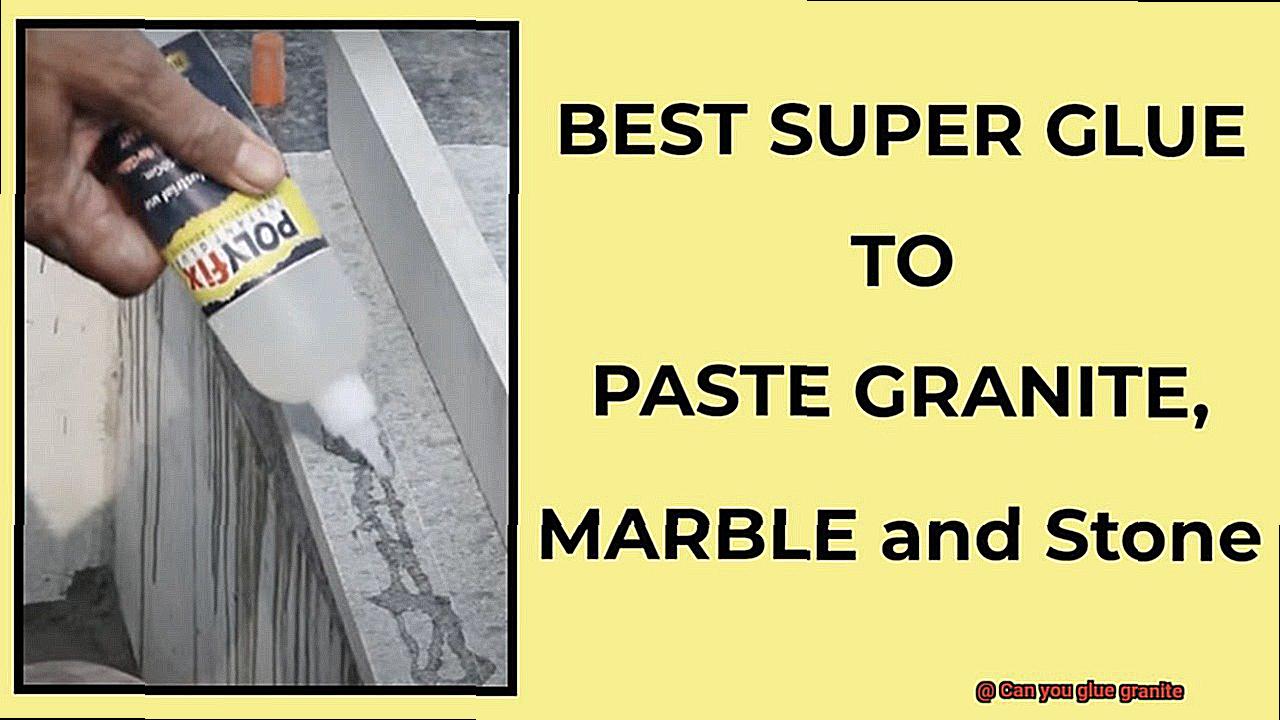
The Best Adhesive Options:

Enter epoxy adhesives, the superheroes of granite bonding. With outstanding bonding strength, resistance to moisture and chemicals, and various formulations for quick installations, they’re an excellent choice. Another reliable option is polyurethane adhesives, offering impressive bonding strength and flexibility.
Remember: Not All Glues Are Created Equal:
Don’t be fooled by adhesives labeled for general use. Granite requires a specialized adhesive. Always double-check the manufacturer’s guidelines or consult professionals to choose the right adhesive for your project. It’s better to be safe than sorry.
Applying the Adhesive
In this comprehensive guide, we will walk you through the process step by step, ensuring that you can confidently glue your granite surfaces.
Choosing the Right Adhesive:
To match the strength and durability of granite, it is essential to select an adhesive that can withstand heavy loads and provide a long-lasting bond. Epoxy resin adhesives are highly recommended for bonding granite due to their exceptional strength. Look for epoxy resins specifically formulated for granite bonding for optimal results.
Surface Preparation:
Before diving into the gluing process, it is vital to ensure that your surfaces are clean and ready for bonding. Remove any dirt, dust, or grease using a mild detergent or solvent. Thoroughly dry the surfaces before proceeding to ensure proper adhesion.
Mixing and Application:
Now comes the exciting part – mixing and applying the adhesive. Follow the manufacturer’s instructions carefully when mixing your epoxy resin, paying close attention to the recommended mixing ratio for proper curing and bonding. Some epoxy resins require the addition of a hardener, while others come pre-mixed for convenience.
Using a putty knife or a small brush, apply a thin and even layer of adhesive onto both surfaces that need to be bonded. Remember, less is more. Avoid applying excessive amounts of adhesive as it may squeeze out when pressure is applied.
Bonding and Curing:
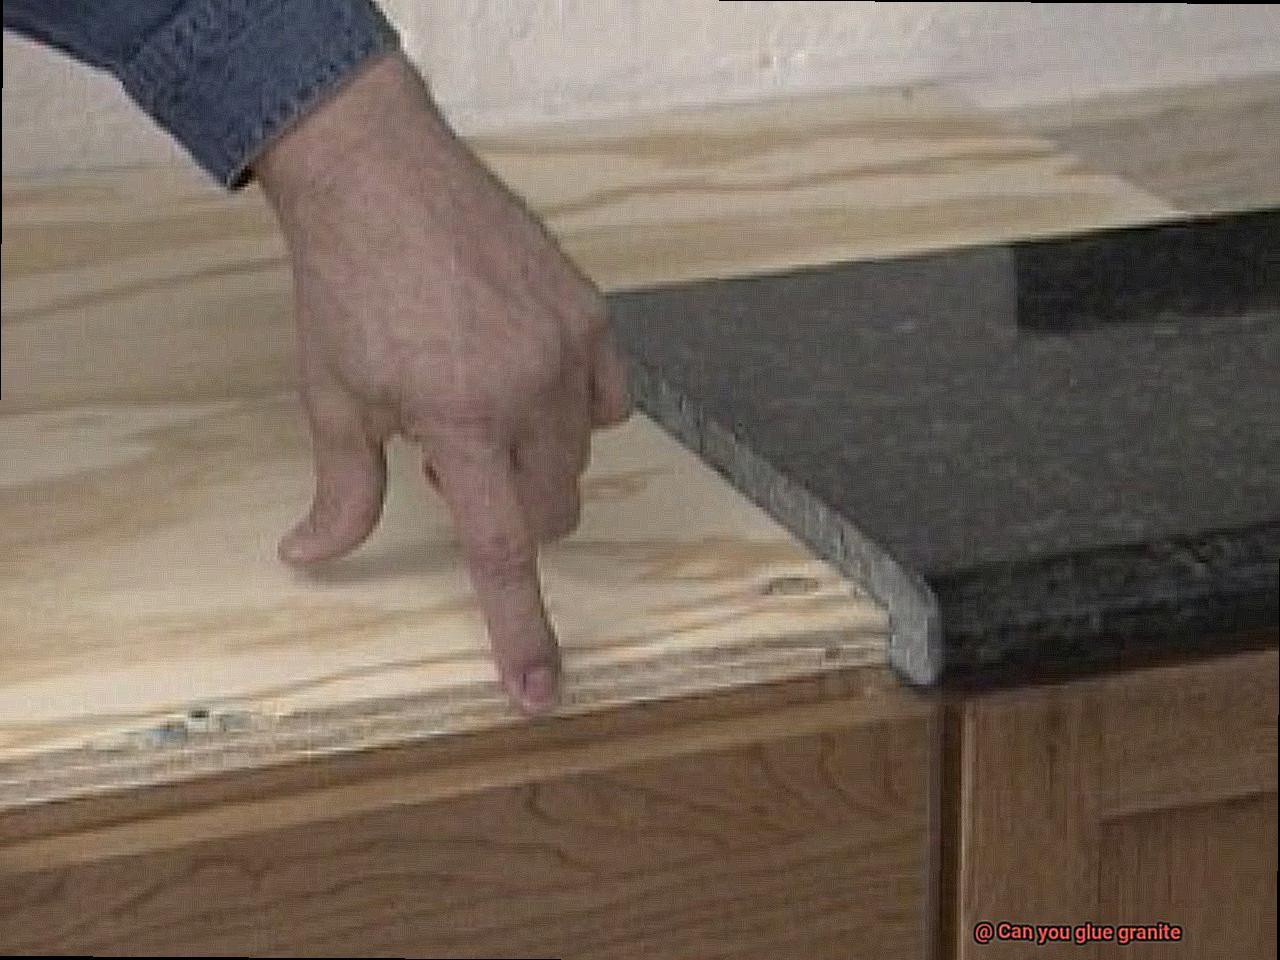
Align the two surfaces carefully and press them together firmly. Apply constant pressure for a few minutes to ensure a secure bond. To hold the pieces in place during the curing process, consider using clamps or heavy objects.
Patience is key – allow sufficient time for the adhesive to cure. Curing times can vary depending on the epoxy resin used, but it is generally recommended to wait at least 24 hours before subjecting the bonded granite to any stress or load.
Finishing Touch:
Once the adhesive has fully cured, it is time to remove any excess glue that may have squeezed out during the bonding process. Use a razor blade or sandpaper to carefully remove the excess adhesive, taking caution not to scratch the surface of the granite.
Pressing and Curing Time
Gluing granite may appear to be a daunting task at first, but fear not. With the right knowledge and techniques, you’ll be able to forge bonds that are not only strong but also capable of withstanding the test of time. And one of the most crucial elements in this process is none other than pressing and curing time.
Pressing time is like the gentle embrace that ensures a perfect connection between the granite pieces. It’s akin to meticulously hugging every nook and cranny, leaving no room for air bubbles or unsightly gaps. By exerting pressure, you ensure that the adhesive is evenly distributed, resulting in a solid and seamless bond. Remember, the amount of pressure required may vary depending on factors such as the size of the granite pieces and the type of adhesive being used. So, it’s always wise to consult the manufacturer’s guidelines to achieve an optimal connection.
Once you’ve pressed those pieces together, it’s time to let them rest and cure. Curing time is like giving your bond some alone time to evolve and toughen up. During this period, chemical reactions take place within the adhesive, transforming it from a liquid state to a robust solid. The duration of this process can range from a few hours to several days, depending on variables like temperature, humidity, and adhesive thickness. Patience is key here because rushing this step can lead to a weaker bond.
To expedite the curing process, some professionals employ additional techniques such as heat or UV light. These methods accelerate the chemical reactions within the adhesive, reducing overall curing time. However, it’s crucial to exercise caution and adhere to safety guidelines when utilizing these techniques.
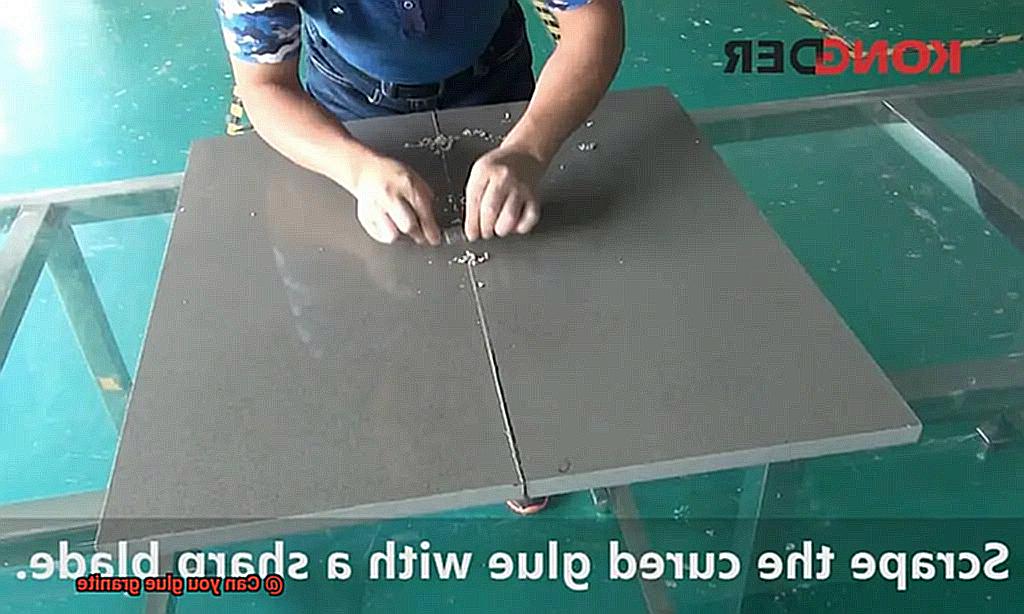
Removing Excess Glue
Like a skilled detective, armed with knowledge and finesse, you can unravel the mysteries of glue removal and restore your granite surfaces to pristine beauty. So, let us embark on this sticky adventure together.
Step 1: Patience is Key
Before diving headfirst into glue removal, exercise patience and allow the glue to fully cure. Give it a solid 24 hours, following the manufacturer’s instructions to ensure complete drying. Remember, great things come to those who wait.
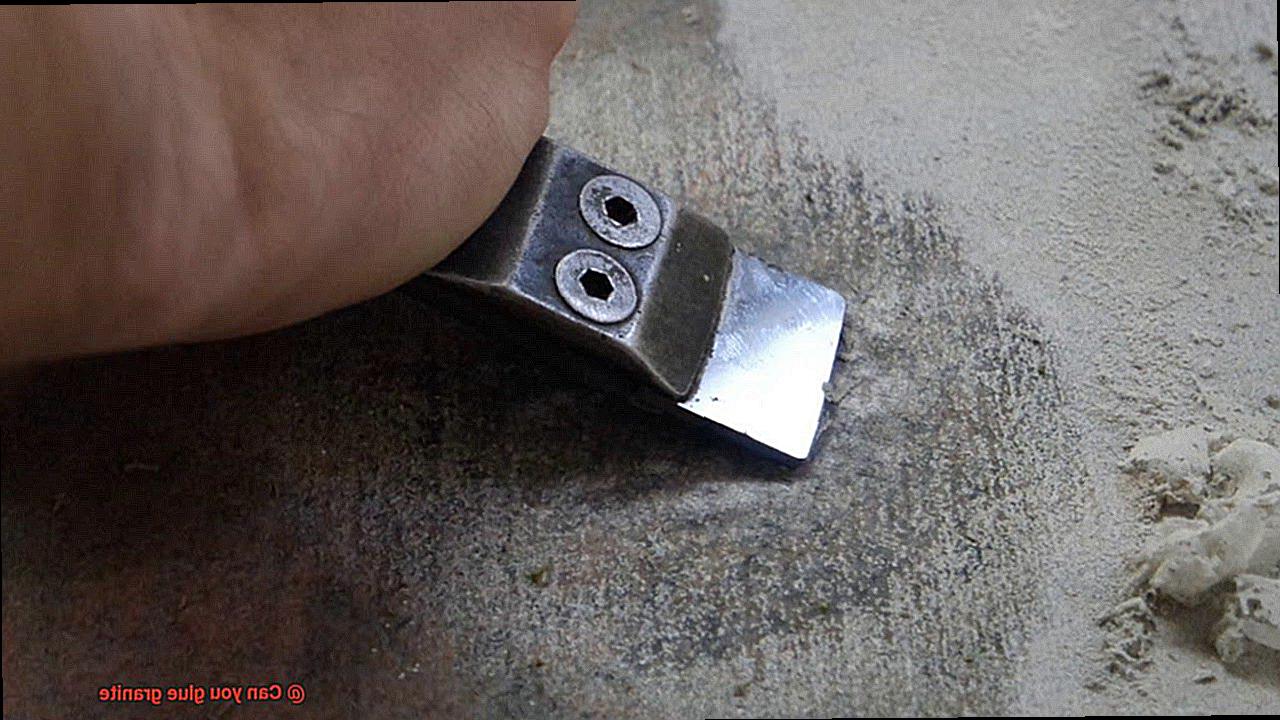
Step 2: Scraping Away the Chunky Stuff
Armed with a trusty plastic scraper or putty knife, gently scrape away any larger pieces of excess glue. Take care not to harm the exquisite granite surface while liberating it from these unsightly clumps.
Step 3: The Solvent Showdown
Now, the time has come for the main event – selecting the perfect solvent or adhesive remover. Acetone, a popular choice, can work wonders. However, always test it in a small inconspicuous area first to avoid any unpleasant surprises. Apply it using a soft cloth or sponge, granting it a few minutes to unleash its magic.
Step 4: Persistence Pays Off
In some cases, a single application of acetone may not suffice. Fear not. Stubborn glue residue often puts up a fight. Simply repeat the process until you have banished every last trace of excess glue from your beloved granite surface.
Step 5: Cleaning Time
Once you have successfully removed all that pesky glue, give your granite surface a thorough cleaning. Utilize a mild dish soap and warm water solution to gently scrub away any residue left behind by the solvent or adhesive remover. Dry it off with a soft cloth, and behold – a squeaky clean granite surface awaits.
Step 6: Seal the Deal
To safeguard your newly liberated granite and maintain its impeccable appearance, apply a granite sealer. This not only prevents future glue mishaps but also enhances the natural beauty of the stone. It’s akin to treating your granite to a rejuvenating spa day.
Permanent Solution or Repairs/Replacements
When faced with a damaged granite surface, the decision between a permanent solution or repairs/replacements can be a daunting one. Let’s delve into the pros and cons of each option to help you make an informed choice.
Gluing granite can be a cost-effective and convenient option for minor damages like small chips or hairline cracks. It offers advantages such as saving money on professional services and providing a quick fix without replacing the entire surface. However, the success of gluing depends on factors like the severity of the damage and the quality of adhesive used. Extensive or severe damage may require more than just gluing to restore structural integrity and aesthetics. To achieve a strong and long-lasting bond, it is recommended to use epoxy adhesives specifically designed for stone or granite.
On the other hand, repairs or replacements may be necessary for more extensive or severe cracks or breaks. Professional stone restoration and repair services have expertise and specialized tools to assess damage and recommend appropriate solutions. While repairs or replacements may involve additional costs compared to gluing, they ensure high-quality and long-lasting results.
When deciding between gluing, repairs, or replacements, consider factors like the severity of the damage and appearance requirements. For minor damages, gluing can provide a satisfactory solution. However, for significant damages or situations where appearance is critical, repairs or replacements may be necessary.
Z_mXLTVMx2k” >
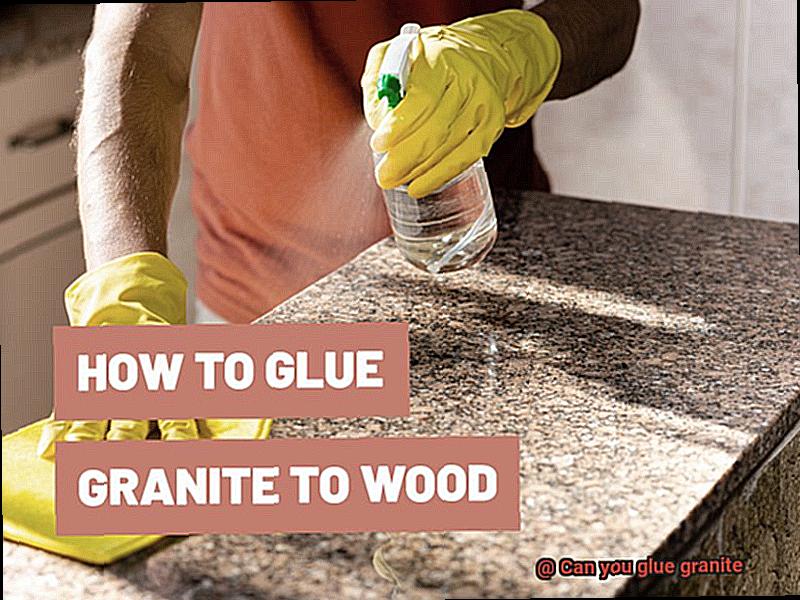
Also Read: How To Glue Granite To Wood?
Conclusion
Yes, you can indeed glue granite. Granite is a durable and beautiful natural stone that can be used in various applications, such as countertops, flooring, and even decorative pieces. When it comes to bonding granite together or repairing any cracks or chips, using the right adhesive is crucial.
There are several types of adhesives specifically designed for bonding granite. Epoxy resin-based adhesives are commonly used due to their strong bond and ability to withstand heavy loads. These adhesives come in different colors to match the color of your granite, ensuring a seamless and aesthetically pleasing result.
Before applying the adhesive, it’s essential to clean the surfaces thoroughly and remove any dirt or debris. This will ensure proper adhesion and a long-lasting bond. Once the surfaces are clean, apply the adhesive evenly on both sides that need to be bonded together.
After applying the adhesive, carefully align the pieces of granite and press them firmly together. It’s crucial to hold them in place for a sufficient amount of time as per the manufacturer’s instructions. This allows the adhesive to cure properly and create a strong bond between the two surfaces.
Once cured, the glued granite should have a secure bond that can withstand normal use and provide an aesthetically pleasing finish. However, it’s important to note that glued granite may not be as strong as one solid piece of stone. Therefore, it’s always recommended to consult with professionals or experts in granite installation for larger projects or critical areas.
In conclusion, gluing granite is indeed possible with the right adhesive and proper technique. It allows for repairs and bonding of this exquisite natural stone while maintaining its beauty and durability.