Picture this: your favorite teapot slips from your grasp and shatters into a million heartbreaking fragments. But don’t despair. We’re here to tell you that all is not lost. Get ready to join us on an epic journey of restoration as we explore the art of gluing shattered ceramics back together.
We get it – the idea of fixing broken ceramics might seem like a Herculean task. But fear not, dear readers. Armed with just the right know-how and some trusty tools, you can resurrect those fractured treasures with style and grace. In this blog post, we’ll be your trusty guides, leading you through every step of the process – from prepping your materials to adding those final touches that will make your repaired piece shine.
Now, let’s address some common challenges you may encounter along the way. Seamlessly joining those fractured pieces? Yep, we’ve got you covered. Matching colors so that no one will ever suspect it was once broken? Consider it done. And durability? Oh boy, do we have some tricks up our sleeves for that too.
But wait, there’s more. By the time you reach the end of this post, you’ll not only be well-versed in adhesive techniques but also know which glue is best suited for different types of ceramic materials. Plus, we’ll share some insider secrets on how patience, precision, and gentle handling can work wonders when dealing with delicate ceramics.
Whether you’re a DIY enthusiast yearning for a challenge or an avid collector desperate to salvage a beloved item – get ready for an adventure where art meets science meets pure skill. Stay tuned for our upcoming blog post where we kick off our step-by-step guide on how to expertly glue broken ceramic pieces back together.
So, grab your glue, gather those shattered fragments, and let’s embark on a journey that will leave you in awe of your own restoration superpowers. Trust us, the magic is about to happen.
What is Broken Ceramic?
Contents
Ceramic objects are renowned for their delicate beauty, but their brittle nature makes them susceptible to breaking. In this article, we will explore what broken ceramic is, the reasons behind its fragility, and how to repair it effectively.
What is Broken Ceramic?
Broken ceramic refers to ceramic objects that have been damaged and are no longer in one piece. It can take the form of shattered pieces, chipped edges, or completely separated sections. Common examples include broken dishes, vases, figurines, tiles, and pottery. The extent of the damage depends on the force applied and the type of ceramic used.
The Fragility of Ceramic:
Ceramic is made from a mixture of clay, minerals, and other natural materials. Through shaping and firing at high temperatures, it becomes a hard and durable material. However, ceramic is inherently brittle. Its delicate structure and arrangement of particles within the material make it prone to cracking and breaking when subjected to force or impact.
Challenges in Repairing Broken Ceramic:
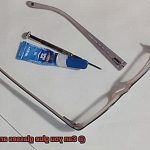
Repairing broken ceramic requires careful handling and the right adhesive. Gather all broken pieces and ensure they align perfectly before proceeding with gluing. Epoxy adhesives are commonly recommended for bonding ceramic due to their strength and durability. Thoroughly clean the broken edges before applying adhesive to ensure proper bonding. Apply a thin layer of epoxy adhesive to both sides of the broken edges and press the pieces together firmly. Allow sufficient curing time as specified by the adhesive manufacturer before testing the bond’s strength.
Handling Broken Ceramic with Caution:
Broken ceramic often leaves sharp edges that can be dangerous if not handled properly. Use protective gloves when working with broken ceramic to avoid cuts or injuries. Properly dispose of any small or sharp fragments to prevent accidents.
Limitations and Alternatives:
Gluing broken ceramic may not always result in an invisible repair, depending on the size and complexity of the break. Some ceramics, such as porous or intricately designed pieces, may present challenges in achieving a strong bond. In such cases, consulting a professional or considering alternative methods like ceramic welding or replacement may be necessary.
Can You Glue Broken Ceramic Back Together?
Ceramic, with its delicate nature, is prone to breaking. But fear not. Gluing broken ceramic back together is absolutely possible with the right adhesive and technique. In this comprehensive guide, we will explore the necessary steps and considerations to ensure a successful restoration that withstands the test of time, allowing you to once again admire the beauty of your beloved ceramic pieces.
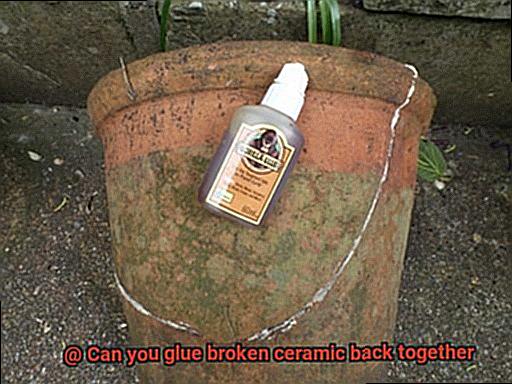
Choosing the Right Adhesive:
When embarking on the journey of repairing broken ceramic, two adhesives are commonly recommended: epoxy and cyanoacrylate (super glue). These adhesives possess strong bonding properties, enabling them to create reliable and long-lasting bonds. However, it is critical to carefully follow the manufacturer’s instructions for proper application to maximize their effectiveness.
Preparing the Surface:
Before applying any adhesive, it is essential to thoroughly clean the broken ceramic pieces. Remove dirt, dust, or debris from the surfaces that need to be glued together using a gentle cleanser or rubbing alcohol. This meticulous cleaning process ensures a clean and secure bond between the pieces.
Aligning the Broken Pieces:
Achieving a seamless repair requires patience and precision. Take your time aligning the broken pieces as accurately as possible. Carefully match the edges, ensuring they fit snugly together. This attention to detail minimizes visible gaps and creates a visually appealing result.
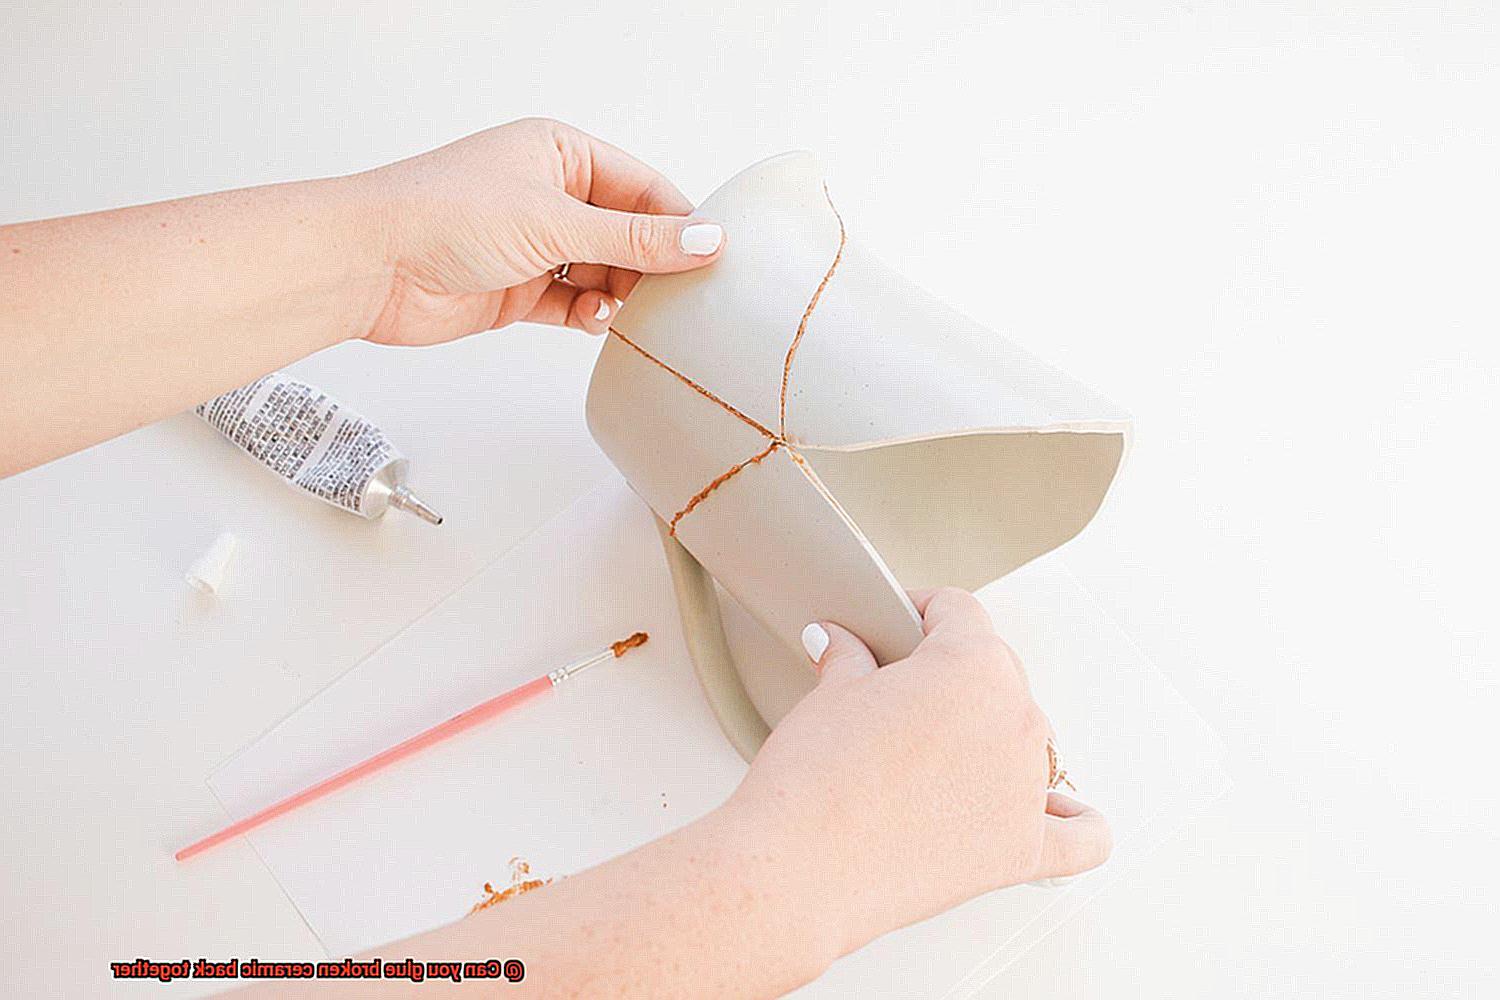
Applying the Adhesive:
To achieve optimal results, apply a small amount of adhesive to one of the surfaces and press the broken pieces together firmly. Following the adhesive manufacturer’s instructions for the correct application method is crucial. Generally, a thin layer of adhesive suffices for ceramic repairs.
Curing Time:
After joining the broken pieces, allow the adhesive to cure for the specified amount of time provided by the manufacturer. The curing period can range from a few hours to several days, depending on the adhesive used. During this time, it is important to refrain from handling or exposing the repaired ceramic to stress or temperature changes.
Reinforcing Weak Areas:
Once the adhesive has fully cured, inspect the repair for any gaps or weak spots. If necessary, apply additional adhesive to reinforce these areas. Sanding or polishing may also be required to smoothen rough edges or remove excess glue. These finishing touches ensure a seamless restoration.
Considerations and Precautions:
While gluing broken ceramic can restore its appearance and functionality, it is important to note that the repaired ceramic may not regain its original strength. Handle the repaired ceramic with care and avoid subjecting it to excessive force or temperature changes to prevent further damage.
When to Seek Professional Help:
For valuable or intricate ceramic pieces, seeking professional help from ceramic restoration experts may be a more practical choice. These experts possess specialized knowledge and techniques to ensure a high-quality repair that can endure over time.
Steps for Gluing Broken Ceramic
Restoring a broken ceramic piece to its former glory may seem like a daunting task, but fear not. With a few simple steps and the right adhesive, you can bring that shattered ceramic back to life. So let’s dive into the process and get started on your ceramic restoration project.
Step 1: Gather the broken pieces
Carefully collect all the broken fragments of the ceramic item, handling them with the utmost care to avoid further damage or injury. Give any small fragments or dust a gentle cleaning with a soft brush or cloth.
Step 2: Roughen the edges
Before applying any adhesive, it’s crucial to roughen or sand the edges of the broken ceramic. This step creates a better surface for the glue to adhere to, ensuring a strong bond between the pieces. Grab some sandpaper or a file and get ready to prepare those edges.
Step 3: Choose the right adhesive
Not all glues are created equal, especially when it comes to ceramics. Select an adhesive specifically designed for ceramics, such as epoxy, super glue, or specialized ceramic adhesive. These options provide a strong bond that will withstand the test of time.
Step 4: Test fit the pieces
Before applying any glue, do a test fit by aligning the broken pieces together without adhesive. This ensures that everything fits properly and gives you a glimpse of how the final result will look.
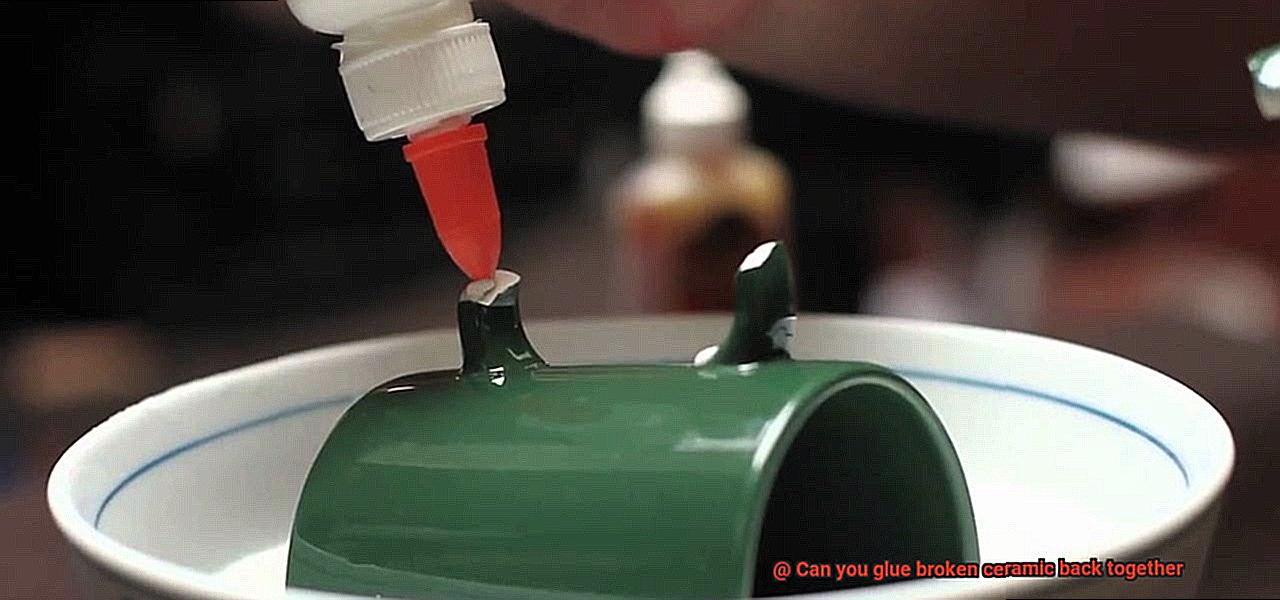
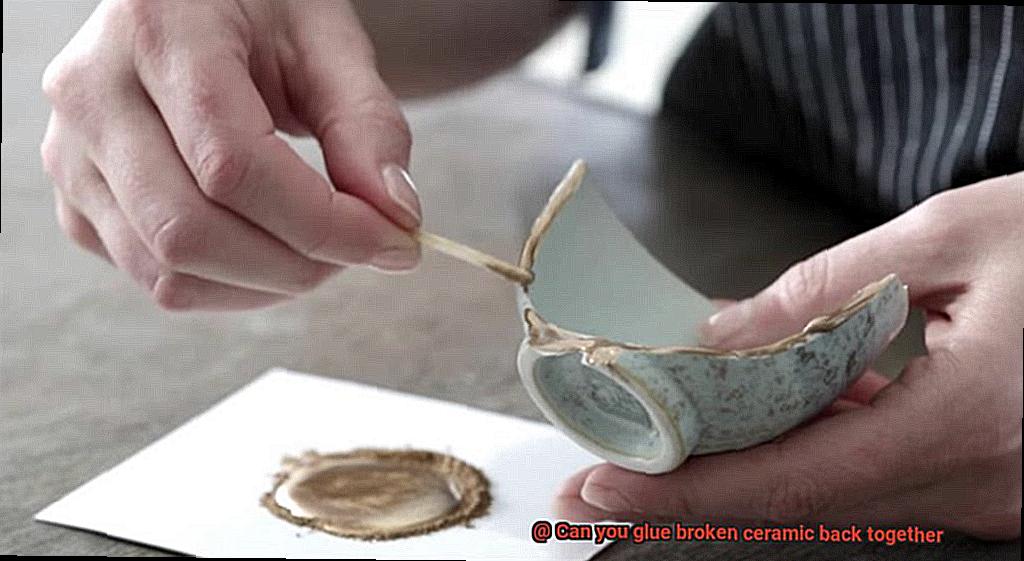
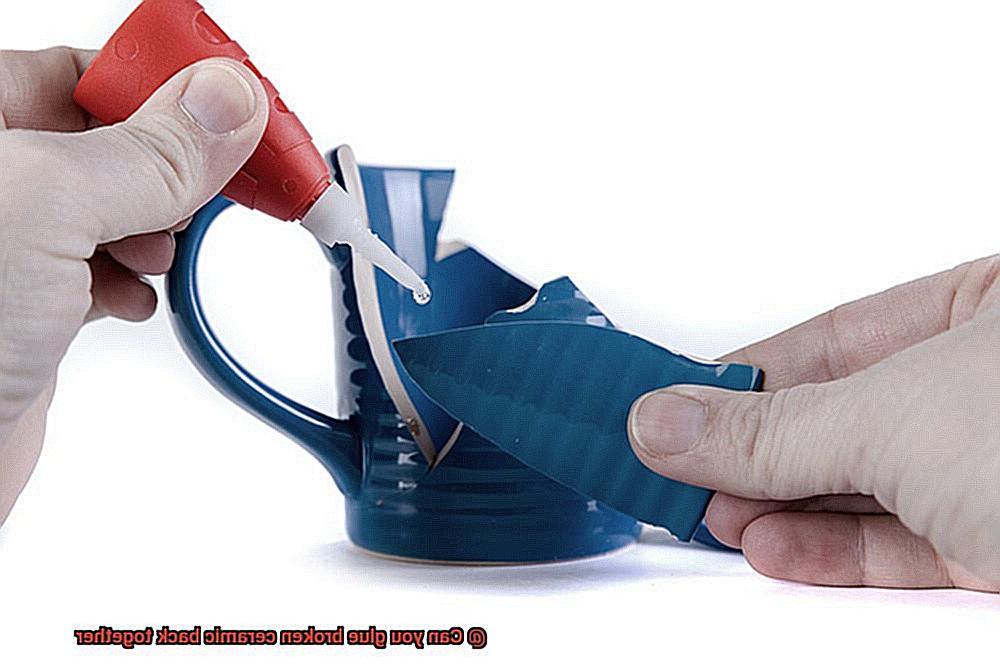
Step 5: Apply the glue
Using a small brush or applicator, apply a thin and even layer of glue to one of the broken edges. Be mindful not to use excessive glue, as it can ooze out when the pieces are pressed together.
Step 6: Press and hold
Carefully align the broken pieces and firmly press them together. Hold them in place for a few minutes to allow the glue to set properly. Depending on the adhesive used, longer curing times may be necessary, so follow the manufacturer’s instructions.
Step 7: Let it dry
Once the initial bonding is complete, let the glued ceramic piece dry for at least 24 hours before handling or subjecting it to stress. This ensures that the adhesive has fully cured, guaranteeing a strong bond.
Step 8: Fill any gaps
If there are any gaps or missing pieces, you can use a gap-filling adhesive or epoxy putty to fill them. These materials can be shaped and molded to seamlessly match the surrounding ceramic surface.
Step 9: Clean up
After the glued ceramic has fully dried, remove any excess adhesive or residue using a gentle solvent or carefully scrape it off with a sharp blade. Be cautious during this step to avoid scratching or damaging the ceramic surface.
Step 10: Enhance the finish (optional)
To further elevate the repaired ceramic piece, consider applying paint or glaze to match the original color and finish. This optional step allows you to restore not only the structure but also the aesthetic appeal of the ceramic item.
Choosing the Right Adhesive
Think about it – you stumble upon a stunning ceramic vase that has tragically met its demise in a fall. But fret not. With the perfect adhesive, you can resurrect it and proudly display it once more.
Not all adhesives are created equal, especially when it comes to ceramic repairs. Let’s start with the heavyweight champion: epoxy. This two-part adhesive boasts incredible strength and durability. Resistant to moisture and heat, it’s the ideal choice for those cherished ceramic pieces.
Next up is the speedy superhero of adhesives – super glue, or cyanoacrylate adhesive. This fast-drying adhesive creates a robust bond between surfaces, making it perfect for small ceramic repairs. While it may not match epoxy’s long-term durability, its convenience and ease of use cannot be beaten.
Now, let’s talk about silicone adhesive – the flexible friend you need for your ceramic repairs. This versatile adhesive forms a strong bond and is resistant to moisture and temperature changes. If your ceramic piece will be exposed to water or varying temperatures, silicone adhesive is your go-to companion.
But why is choosing the right adhesive so crucial? Well, using the wrong one can result in a weak bond or further damage to your beloved ceramic piece – a disaster no one wants on their hands.
Not all adhesives labeled as “super glue” or “epoxy” are suitable for ceramic repairs. Look for adhesives specifically designed for ceramics or similar materials. These specialized adhesives often possess properties that make them more compatible with ceramics, such as high strength and resistance to temperature fluctuations.
Before applying any adhesive, make sure to thoroughly clean the surfaces of the broken ceramic pieces. Dirt, grease, or residue can interfere with the bonding process. Use a mild detergent or rubbing alcohol to cleanse the surfaces, ensuring they are bone dry before applying the adhesive.
When it’s application time, follow the adhesive manufacturer’s instructions diligently. Different adhesives may have specific curing times or application techniques. Compliance with these instructions will yield the best results and a robust bond between the fractured pieces.
Now, let’s address the limitations. While adhesives can work wonders in repairing ceramics, there are cases where achieving a seamless repair may be challenging. Multiple or large fractures may pose difficulties, as well as ceramics with glazes or finishes that hinder effective adhesive bonding. In such instances, seeking professional assistance or considering alternative repair methods like ceramic welding or replacement may be necessary.
Cleaning the Broken Edges
In this article, we’ll walk you through the process, from removing debris to creating the perfect surface for bonding.
Step 1: Remove Loose Debris
To start, delicately brush away any loose debris or shards from the broken pieces. This crucial step prevents interference with the adhesive bond later on. Gently sweep away the fragments with a soft brush or cloth, making sure to clear every nook and cranny.
Step 2: Wash with Warm Soapy Water
Eliminate dirt, grease, or residue that may affect the adhesive’s effectiveness by washing the broken edges with warm soapy water. Immerse the ceramic pieces in a gentle bath of cleansing suds, ensuring a thorough cleanse. This simple step will provide a clean surface for the glue to bond to, maximizing its strength and durability.
Step 3: Ensure Complete Dryness
Before proceeding with gluing, ensure that the broken pieces are completely dry. Moisture can compromise the adhesive’s durability and effectiveness. Exercise patience and allow ample time for drying. Air-drying is recommended over using heat sources, as excessive heat can cause cracks or warping in delicate ceramics.
Step 4: Address Stubborn Stains or Residue
If any stubborn stains or residue linger on the broken edges, treat them with care. Use a mild abrasive cleaner or rubbing alcohol to gently scrub away the remnants of past mishaps. Be cautious and avoid using harsh chemicals or abrasive materials that could inflict further damage upon your cherished ceramics.
Step 5: Lightly Sand the Edges
Enhance the bond between the adhesive and the ceramic by lightly sanding the cleaned broken edges. Take fine-grit sandpaper and gently rub it against the surface, creating a slightly rough texture. This roughness promotes better adhesion, reducing the risk of future breaks or cracks.
Step 6: Remove Sanding Dust
After sanding, meticulously clean away any dust or particles generated during the process. Employ a soft brush or cloth to sweep away the remnants, ensuring a pristine surface for gluing. Pay close attention to every crevice and groove, leaving no room for debris to compromise the repair.
Step 7: Inspect Under Good Lighting
Before applying the adhesive, inspect the cleaned broken edges under good lighting conditions. This final check ensures that no dirt, debris, or residue remains that could compromise the bonding strength of the adhesive. Shine a bright light on every angle and examine with meticulous detail, leaving no stone unturned.
Applying the Adhesive
In this comprehensive guide, we will walk you through the essential steps of applying adhesive correctly to broken ceramic pieces, ensuring a secure bond that will withstand the test of time.
Choosing the Right Adhesive:
When it comes to ceramic repairs, not all adhesives are cut from the same cloth. To achieve optimal results, it is crucial to select a specialized ceramic adhesive that possesses key characteristics:
- High bond strength to securely hold the broken pieces together.
- Resistance to water and heat to withstand everyday use.
- Transparent drying for an unblemished finish that showcases the ceramic’s beauty.
Preparing the Surface:
Before diving into the adhesive application process, proper surface preparation is paramount. Follow these steps for pristine surfaces:
- Thoroughly cleanse both broken surfaces, removing any debris or oil.
- Utilize rubbing alcohol or a mild detergent for a gentle yet effective cleaning.
- Allow ample drying time to ensure a clean foundation for bonding.
Applying the Adhesive:
Achieving perfection requires finesse during this crucial step. Maximize your chances of success by following these expert tips:
- Apply a thin layer of adhesive onto one surface of the broken ceramic, ensuring full coverage without excess that could lead to oozing or residue.
- With steady hands, firmly press and hold the broken pieces together for several minutes. This allows the adhesive to forge a strong and lasting connection.
Drying Time:
Patience becomes your greatest ally during the drying process. Each adhesive type may have varying drying times, so it is vital to consult the manufacturer’s instructions. As a general rule of thumb:
- Allow at least 24 hours for the adhesive to fully set and bond the ceramic pieces together.
- Refrain from moving or applying pressure to the repaired ceramic until it has thoroughly dried.
Finishing Touches:
Elevate your repair job from functional to flawless with these final touches:
- Use sandpaper or a nail file to gently smooth out any rough edges or excess adhesive, ensuring a seamless, polished finish.
- Consider applying a clear sealant over the repaired area to safeguard it against moisture and potential damage.
Safety First:
Remember to prioritize safety throughout the repair process:
- Wear protective gloves to shield your hands from potential irritation.
- Maintain proper ventilation in your workspace to prevent inhalation of fumes.
- Adhere to any specific safety instructions provided by the adhesive manufacturer.
Curing the Bond
In this guide, we will unravel the secrets of curing the bond, enabling you to seamlessly restore broken ceramics. Join us on this journey as we delve into the art of bringing these delicate works of art back to life.
Selecting the Perfect Adhesive:
The first crucial step on this restorative path is choosing the right adhesive. Consider the type of ceramics, extent of damage, and desired level of transparency. Opt for epoxy adhesives for their strength and versatility, ensuring a reliable bond.
Adhering to Manufacturer’s Instructions:
Once armed with your chosen adhesive, carefully follow the manufacturer’s instructions regarding curing time. Patience is key in achieving a solid bond that will endure the test of time.
Securely Holding the Pieces:
During the curing process, it is imperative to securely hold the glued ceramic pieces together. Utilize clamps, tape, or other suitable methods to maintain alignment until the glue has fully dried.
Creating an Optimal Curing Environment:
Temperature and humidity play a significant role in the bonding process. Select an environment free from extreme conditions that may hinder curing. Moderate temperatures and low humidity are ideal for optimal results.
Conducting a Thorough Post-Curing Inspection:
Once cured, meticulously inspect your repaired ceramic piece for imperfections or weak spots. If necessary, apply additional adhesive or explore alternative repair methods to ensure a flawless outcome.
Enhancing Aesthetic Appeal:
While gluing ceramics restores functionality, visible signs of repair may remain. To achieve a seamless finish, consider painting or applying a finish that seamlessly blends the repaired area with the surrounding ceramic surface.
Checking the Strength of the Bond
You’ve painstakingly reassembled your shattered ceramic piece, entrusting its revival to an adhesive claiming unwavering strength. But how can you be certain that the bond will endure the test of time? In this article, we delve into a realm of testing methods that unveil the true strength of the bond, safeguarding your ceramic masterpiece for years to come.
Method 1: The Tug Test
Once the adhesive has dried according to the manufacturer’s instructions, exercise gentle yet calculated pulls on the glued pieces in multiple directions. A robust bond will proudly withstand these gentle tugs without yielding or showing any signs of separation. Should you detect any inkling of give or separation, it is a telltale sign of a feeble bond that may necessitate reapplication.
Method 2: The Tap Test
Employ the aid of a metallic object, such as a spoon or a coin, and tenderly tap on the repaired area. A tenacious bond will emit a crisp and resonant sound, an auditory testament to the sturdy connection between the ceramic fragments. Conversely, a lackluster or hollow echo suggests a weak bond yearning for reinforcement.
Method 3: Visual Inspection
Conduct an astute examination of the repaired area, meticulously scrutinizing for any visible blemishes such as gaps, cracks, or indications of vulnerability. A robust bond should showcase seamless cohesion, devoid of any visible flaws. The presence of irregularities necessitates a reevaluation of the adhesive employed or additional reinforcement measures.
Method 4: Stress Testing
Apply slight pressure or gently tap on the repaired region with your fingers. A formidable bond will remain steadfast under these tests without exhibiting any movement or instability. If you perceive any malleability or instability, it serves as an unmistakable indicator of a frail bond requiring further attention.
oMyx4PqBLJQ” >
Also Read: How To Glue Ceramic Back Together?
Conclusion
Yes, it is possible to glue broken ceramic back together. With the right adhesive and technique, you can restore your shattered ceramic piece to its former glory. Whether it’s a cherished heirloom or a beloved decorative item, don’t despair when accidents happen. Instead, gather the broken fragments and embark on a journey of repair.
The key to successfully gluing ceramic is selecting the appropriate adhesive. Epoxy or cyanoacrylate (super glue) are often recommended for their strong bond and ability to withstand heat and moisture. These adhesives ensure that your repaired ceramic will not only hold together but also endure daily use.
Before applying the adhesive, make sure the broken surfaces are clean and free from any dust or debris. A gentle wipe with a damp cloth should suffice. Then, carefully apply a thin layer of adhesive to one of the broken edges and press the pieces firmly together. Hold them in place for a few minutes until the glue starts to set.
Patience is crucial during this process as rushing could lead to misalignment or weak bonds. Allow ample time for the adhesive to fully cure before handling or using your repaired ceramic piece again. This may take anywhere from a few hours to several days depending on the type of adhesive used.
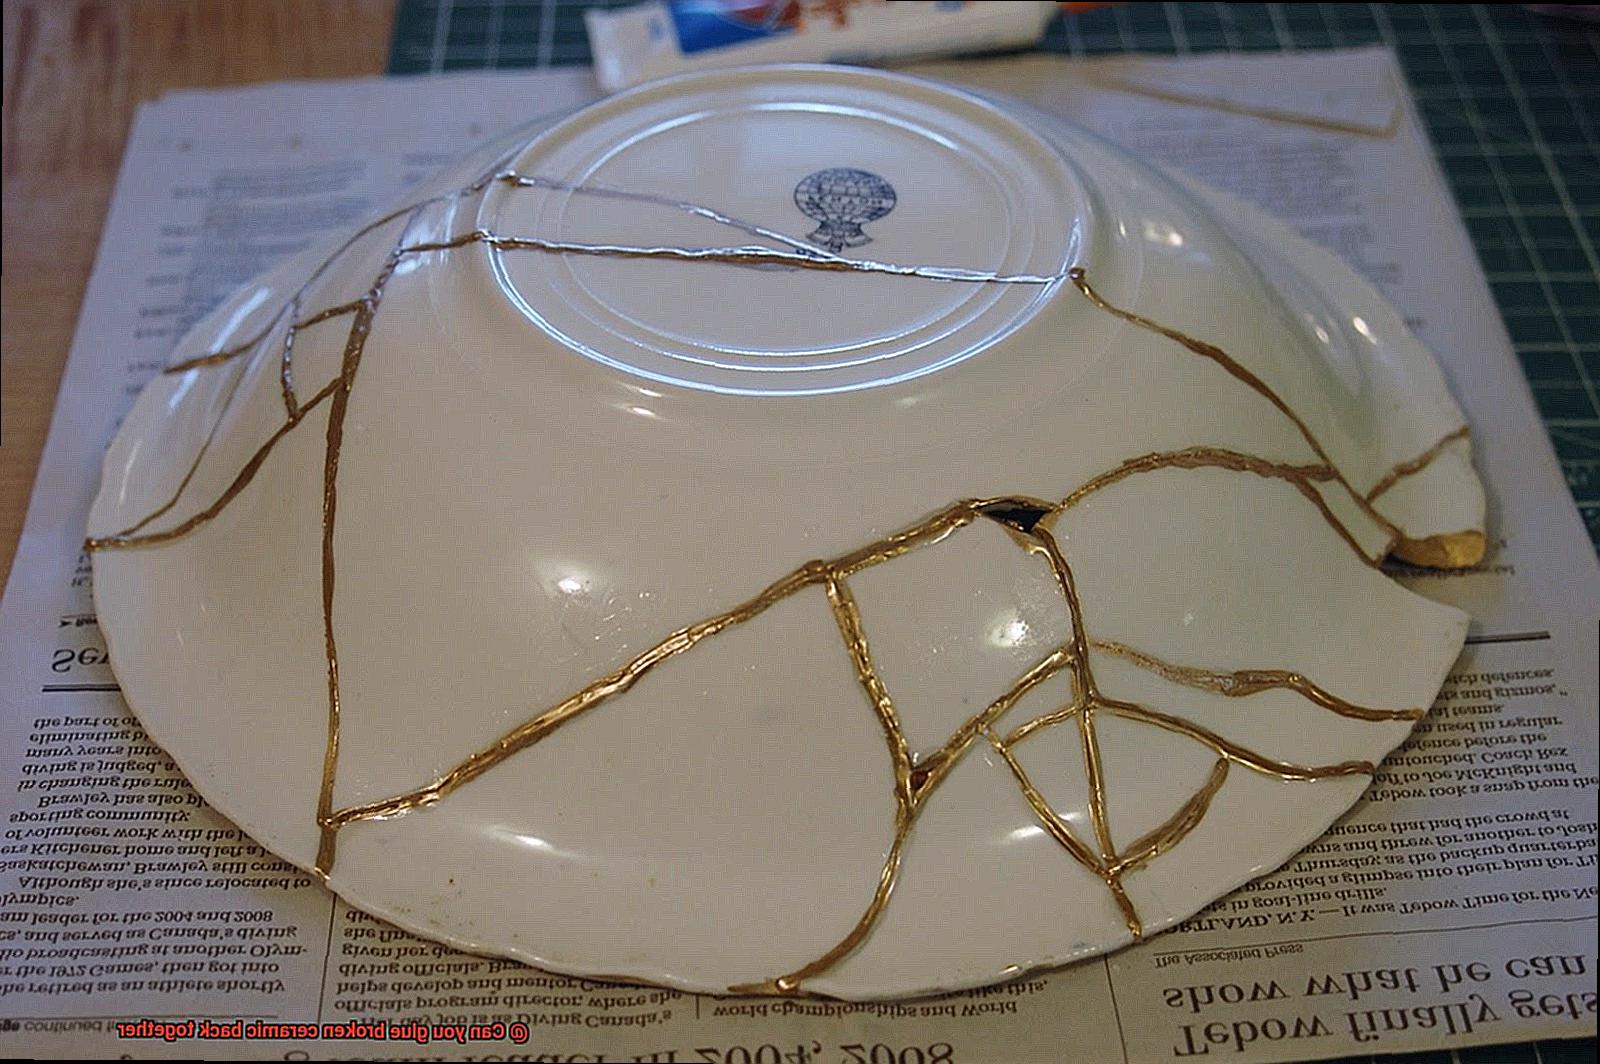
It’s important to note that while gluing ceramics back together can be successful, it may not always result in an invisible repair. Depending on the severity of the break and the skill of the person doing the repair, there may be some visible lines or imperfections after gluing.
In conclusion, don’t let a broken ceramic piece be cause for despair. With proper technique and suitable adhesives, you can bring your shattered treasure back to life.