Are you a DIY enthusiast, always on the lookout for new projects to unleash your creative side? If so, you’ve probably wondered if Gorilla Glue is compatible with acrylic materials. Well, wonder no more.
In this blog post, we’ll dive into the world of adhesives and acrylics, giving you all the info you need to confidently bond these two materials together. So let’s get started and discover why Gorilla Glue is the perfect choice for your acrylic projects.
What is Acrylic?
Contents
- 1 What is Acrylic?
- 2 Why Gorilla Glue Should Not Be Used on Acrylic
- 3 Adhesives Suitable for Use on Acrylic
- 4 Solvent-Based Adhesives
- 5 UV-Curing Adhesives
- 6 Preparing Surfaces for Bonding with Adhesive
- 7 Applying the Adhesive and Allowing Curing Time
- 8 Testing the Adhesive on a Small Area
- 8.1 Understanding Acrylic: The Beauty and Brawn of Clarity, Strength, and Durability
- 8.2 The Power of Gorilla Glue: A Force to be Reckoned With
- 8.3 Why Test on a Small Area? Preempting Potential Pitfalls
- 8.4 Performing the Test: A Step-by-Step Guide to Bonding Bliss
- 8.5 Observing the Results: Decoding the Language of Bonding
- 8.6 Interpreting the Results: A Gateway to Success or Alternate Paths
- 9 Conclusion
It finds extensive use across various industries due to its ability to provide visibility without distortion, withstand impact better than glass, and resist weathering, UV radiation, and chemicals. In this blog post, we will delve into the properties and uses of acrylic, explore its versatility and customization options, and emphasize the importance of selecting the right adhesive for bonding acrylic materials.
Properties and Uses of Acrylic:
Transparency and Optical Clarity:
- Ideal for applications requiring unobstructed visibility without distortion.
- Widely used in windows, skylights, aquariums, and display cases.
Impact Resistance:
- Surpasses that of glass, ensuring safety in building materials and automotive parts.
Weatherability and Chemical Resistance:
- Withstands harsh outdoor conditions and exposure to chemicals.
Versatility and Customization:
Molding Options:
- Easily molded into various shapes and sizes.
- Enables the production of complex designs with precision through injection molding, extrusion, or casting.
Lightweight Nature:
- Enhances handling and transportation compared to other materials.
Choosing the Right Adhesive:
Avoid Gorilla Glue:
- Moisture-activated formula can stress the acrylic surface, leading to cracks or damage.
Opt for Adhesives Formulated for Acrylic Bonding:
- Solvent-based adhesives dissolve the surface of acrylic, ensuring a strong bond without compromising integrity.
- UV-curing adhesives require exposure to ultraviolet light for excellent clarity.
Tips for Successful Bonding:
Proper Surface Preparation:
Follow Manufacturer’s Instructions:
- Adhere to recommended application techniques and curing times.
Test Before Application:
- Apply adhesive to a small, inconspicuous area for compatibility testing.
Consider Project Requirements:
- Take into account temperature and moisture resistance for optimal bonding.
Why Gorilla Glue Should Not Be Used on Acrylic
Now, we all know Gorilla Glue is a powerful adhesive that can bond various materials together. But when it comes to acrylic, it’s a recipe for disaster. Let me break it down for you.
First and foremost, let’s talk about the delicate nature of acrylic. This lightweight plastic is renowned for its clarity and durability, making it perfect for windows, displays, and signage. However, Gorilla Glue can actually harm acrylic instead of bonding it.
You see, Gorilla Glue is a polyurethane adhesive that expands as it cures. Sounds impressive, right? Not so much when it comes to acrylic. The expansion creates pressure on the surface, leading to cracks or even complete breakage. Yikes.
Gorilla Glue dries to a yellowish color. And let’s be honest – that’s not a good look for clear acrylic surfaces. On top of that, the glue may leave behind residue or stains that are a real pain to remove. Talk about a major fashion faux pas for your acrylic masterpiece.
Now let’s talk about bonding strength. Gorilla Glue is known for its strong bond, but here’s the catch – it may not adhere well to acrylic surfaces. Why? Well, acrylic is smooth and non-porous, which poses a challenge for Gorilla Glue. Weak or unreliable adhesion can spell disaster for your project.
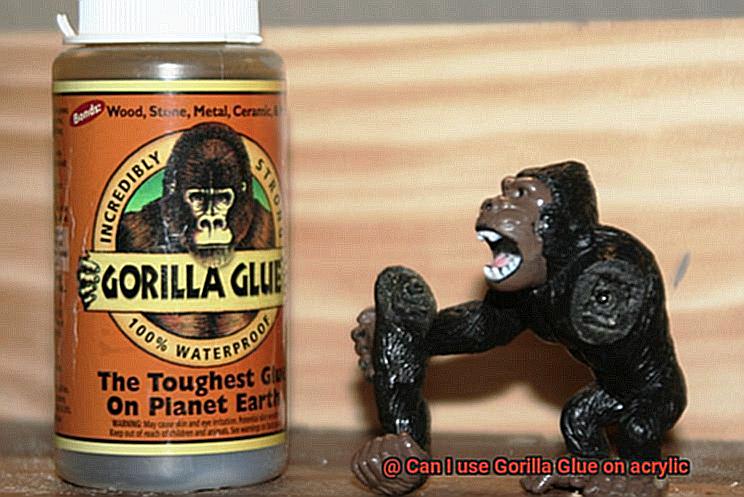
So here’s the bottom line: Gorilla Glue wasn’t designed for plastics like acrylic. It’s better suited for wood, metal, ceramics – you name it. If you want a successful bond without damaging your precious acrylic, opt for adhesives specifically formulated for plastics.
Luckily, there are plenty of awesome alternatives out there, my friends. Solvent-based adhesives like Weld-On create a strong and transparent bond without causing any damage. And if you’re craving that crystal-clear finish, UV-curing adhesives are your best bet. They provide exceptional clarity under ultraviolet light, making your acrylic project shine like a star.
Remember, always test your adhesive on a small, inconspicuous area of the acrylic before going all-in. This way, you can ensure compatibility and avoid any glue-related disasters.
Adhesives Suitable for Use on Acrylic
Acrylic, the versatile plastic renowned for its transparency and durability, is a popular choice for a wide range of applications. Whether you’re embarking on a DIY project or need to bond acrylic for professional purposes, selecting the right adhesive is absolutely crucial.
In this comprehensive guide, we will explore the adhesives specifically designed for use on acrylic surfaces. Say goodbye to weak bonds and damaged acrylic – let’s dive in and discover the best adhesives for a strong and long-lasting bond.
Solvent-Based Adhesives:
At the top of the list is the tried-and-true solvent-based adhesive, Weld-On This exceptional adhesive works by dissolving the surface of the acrylic, creating an incredibly strong bond as it evaporates. Widely used in industries like signage and construction, Weld-On 4 is renowned for its excellent adhesion properties.
Cyanoacrylate Adhesives:
Enter the superhero of adhesives – cyanoacrylate adhesives, or super glue as it’s commonly known. When it comes to bonding acrylic surfaces, look for cyanoacrylate adhesives specifically formulated for plastics. These remarkable adhesives bond quickly and provide an unyielding hold that ensures your acrylic projects stay intact.
Epoxy Adhesives:
For a robust bond that can withstand moisture and temperature changes, epoxy adhesives are your go-to choice. Comprising two components – resin and hardener – that must be mixed prior to use, epoxy forms an incredibly strong bond suitable for both indoor and outdoor settings.
Surface Preparation:
To ensure an impeccable bond, proper surface preparation is key. Begin by cleaning the acrylic surfaces meticulously, removing any trace of dirt, grease, or oils. For enhanced adhesion, consider lightly sanding the surfaces as well.
Remember: Gorilla Glue is not your go-to:
While Gorilla Glue has earned its reputation for strength and versatility, it’s not the adhesive you want to use on acrylic surfaces. The foaming action of Gorilla Glue can create uneven pressure, resulting in weak bonds or even damage to the acrylic. Save your Gorilla Glue for other projects and opt for the recommended adhesives instead.
Solvent-Based Adhesives
When it comes to bonding acrylic surfaces, choosing the right adhesive is paramount. While solvent-based adhesives, such as the renowned Gorilla Glue, are not explicitly marketed for use on acrylic, they have garnered a reputation for their effectiveness.
In this comprehensive exploration, we will delve into the advantages and potential drawbacks of using solvent-based adhesives on acrylic surfaces, equipping you with valuable insights to make an informed decision.
Versatility Unleashed:
One of the most striking advantages of solvent-based adhesives like Gorilla Glue is their remarkable versatility. These adhesives are capable of bonding a wide range of materials, encompassing wood, metal, plastic, and even stone. With this adhesive in your arsenal, you can confidently tackle multiple projects involving different materials, knowing that one adhesive will suffice.
The Art of Preparation:
Before applying any solvent-based adhesive to acrylic, proper surface preparation is crucial. Ensure that both the acrylic surface and the application area are pristine, free from dust, grease, or debris. A meticulous wipe down with a mild detergent or rubbing alcohol will set the stage for a flawless bond.
Application Techniques for Success:
To achieve optimal results with Gorilla Glue on acrylic surfaces, precise application is key. Start by applying a small amount of adhesive and spread it evenly across the surface using a brush or applicator. It is imperative to resist the temptation to over-apply as excess glue can mar the final outcome and weaken the bond. Once applied, firmly clamp or hold the materials together until the adhesive has fully cured.
Specialty Adhesives for Acrylic Perfection:
While Gorilla Glue can yield impressive results on acrylic surfaces, it is worth considering specialty adhesives specifically formulated for bonding acrylic. These specialized options often offer even stronger bonds and superior clarity, making them ideal for applications where aesthetics are paramount.
UV-Curing Adhesives
Look no further than UV-curing adhesives. In this blog post, we will explore the advantages of using UV-curing adhesives for bonding acrylic. From lightning-fast curing times to unmatched bond strength and versatility in bonding various substrates, UV-curing adhesives are the ideal choice. Let’s dive in.
Lightning-fast Curing Times:
UV-curing adhesives are renowned for their ability to cure rapidly under UV light exposure. Unlike traditional adhesives that can take hours or even days to fully cure, UV-curing adhesives harden almost instantly when exposed to the correct wavelength and intensity of UV light. Say goodbye to waiting around and hello to increased efficiency and productivity.
Unmatched Bond Strength:
Strength is paramount when bonding acrylic, and UV-curing adhesives deliver exceptional results. Through a chemical reaction triggered by UV light exposure, these adhesives form an incredibly strong and durable bond. Your acrylic substrates will stay securely bonded for the long haul, ensuring your projects withstand the test of time.
Versatility at its Finest:
UV-curing adhesives are not limited to bonding acrylic alone; they are highly versatile and can bond a wide range of substrates. From plastics and metals to glass and ceramics, UV-curing adhesives can handle it all. Whether you’re working on display cases, signage, or even medical devices, UV-curing adhesives have got you covered.
Excellent Optical Clarity:
If transparency is crucial for your project, then UV-curing adhesives are your best friend. These adhesives offer exceptional optical clarity, making them perfect for bonding acrylic glass or display cases. Bid farewell to unsightly glue lines or hazy bonding areas, and welcome a crystal-clear finish that showcases the beauty of your acrylic substrates.
Preparing Surfaces for Bonding with Adhesive
Imagine the moment when your meticulously crafted project is finally ready to come together, held in place by a bond that is as strong as it is lasting. But before you reach for that adhesive superhero, let’s delve into the crucial steps required to properly prepare your surfaces. After all, a solid foundation is the key to success.
Step 1: Cleanliness is Key
Before anything else, grab a mild soap or detergent and give those surfaces a thorough cleaning. Dust, dirt, grease, or any other contaminants can hinder the bonding process. Gently scrub with warm water, avoiding harsh chemicals or abrasive cleaners that could damage the material.
Step 2: Dry, Dry, Dry.
Moisture is the nemesis of adhesives. Ensure your surfaces are bone dry by rinsing them with clean water and patting them down with a soft cloth. Remember, even the tiniest bit of moisture can compromise the adhesive’s performance.
Step 3: Roughen Things Up
Smooth and non-porous surfaces can pose a challenge for adhesives to grip onto. To overcome this issue, grab some sandpaper or a sanding block and gently roughen the surface in a circular motion. Be cautious not to create scratches or damage.
Step 4: Dust Off the Debris
Now that your surface is roughened up, remove any dust or debris. A soft cloth or a burst of compressed air will do the trick. We want that surface squeaky clean and ready for bonding.
Step 5: Primer Power-Up (optional)
For an extra boost in adhesion, consider applying a primer specifically formulated for your chosen adhesive. These primers create a chemical bond between the adhesive and the material, ensuring a stronger connection. Follow the manufacturer’s instructions and allow ample drying time before moving forward.
Step 6: Align and Conquer
Before applying the adhesive, ensure that both surfaces fit together perfectly. Double-check alignment and make any necessary adjustments. This step ensures an even distribution of adhesive and prevents any gaps or uneven bonding.
Applying the Adhesive and Allowing Curing Time
Today, we embark on a journey to master the art of applying Gorilla Glue to acrylic and allowing it to cure with confidence. Whether you’re a DIY enthusiast or a professional artist, this guide will equip you with the know-how to achieve seamless and durable bonds that will stand the test of time. So, let’s dive in and unlock the secrets of this adhesive superhero.
Step 1: Prepare for Success
To start off on the right foot, cleanliness is key. Ensure your surfaces are free from dust, dirt, and grease by using a gentle soap or detergent. Rinse with warm water and dry thoroughly with a soft cloth. Remember, even the tiniest speck of dirt can compromise your bond.
Step 2: Roughen Up for Victory
Smooth acrylic surfaces can be tricky for adhesives to grip onto. Fear not. Grab some sandpaper or a sanding block and create a textured surface by gently rubbing in circular motions. Be careful not to damage your masterpiece – we’re aiming for just the right amount of roughness to enhance the bond.
Step 3: Banish Debris Like a Hero
After roughening up your surface, it’s essential to remove any lingering debris. A soft cloth or a burst of compressed air can do wonders in ensuring a pristine bonding surface. No stray particles shall stand in our way.
Step 4: Prime Time Power-Up (Optional)
For an extra boost in adhesion strength, consider using a specially formulated primer. Apply according to the manufacturer’s instructions and allow ample drying time before moving forward. This superheroic primer creates an unbreakable chemical bond between adhesive and material, guaranteeing an even stronger connection.
Step 5: Align and Conquer
Before applying the adhesive, double-check that your acrylic pieces align flawlessly. This step ensures an even distribution of the adhesive, preventing unsightly gaps or uneven bonding. Attention to detail is the secret to a seamless masterpiece.
Step 6: Apply Sparingly, Cure Confidently
Now comes the moment we’ve all been waiting for – applying Gorilla Glue. Remember, a little goes a long way. Apply a thin layer of adhesive to one surface, then carefully press the acrylic pieces together, ensuring even pressure across the joint. Clamping or using weights can be helpful in holding everything in place while the glue works its magic.
Step 7: Time for Patience
Allow your creation to rest undisturbed for at least 24 hours or follow the specific product’s instructions for accurate curing time. Temperature and humidity can affect the curing process, so make sure to adhere to the manufacturer’s recommendations for optimal bonding results.
Testing the Adhesive on a Small Area
Whether you’re a DIY aficionado or a seasoned professional in the signage or construction industry, testing the adhesive on a small area is a pivotal step towards achieving successful bonding. Join us as we unravel the significance of this test and arm ourselves with the knowledge needed to conquer any project involving Gorilla Glue and acrylic.
Understanding Acrylic: The Beauty and Brawn of Clarity, Strength, and Durability
Acrylic, a transparent plastic marvel, boasts exceptional clarity, formidable strength, and remarkable durability. Its versatility shines in applications such as signage, displays, and construction projects.
The Power of Gorilla Glue: A Force to be Reckoned With
Enter Gorilla Glue, the adhesive juggernaut renowned for its exceptional bonding prowess. This versatile adhesive works wonders on a multitude of materials, making it a go-to choice for many.
Why Test on a Small Area? Preempting Potential Pitfalls
In the quest for seamless bonding, testing Gorilla Glue on a small area is paramount. This trial run allows for keen observation of any adverse reactions, preventing larger projects from suffering damage or undesirable discoloration.
Performing the Test: A Step-by-Step Guide to Bonding Bliss
Embark on the journey of testing Gorilla Glue on acrylic through meticulous steps:
- Begin by selecting an inconspicuous area on the acrylic surface.
- Ensure impeccable cleanliness by thoroughly cleansing the chosen spot.
- Apply a modest amount of Gorilla Glue using a toothpick or cotton swab.
- Exercise caution in applying just enough glue to avoid seepage and unwanted results.
- Adhere to manufacturer’s instructions and grant ample drying time for the glue.
Observing the Results: Decoding the Language of Bonding
With bated breath, scrutinize the test area for telltale signs:
- Evaluate for discoloration, warping, or damage to the acrylic surface.
- Gently peel back the glued area to test adhesion strength.
Interpreting the Results: A Gateway to Success or Alternate Paths
Positive results indicate compatibility between Gorilla Glue and your specific acrylic surface. Celebrate the harmony. However, if adverse reactions arise, explore alternative adhesives tailored for bonding acrylic.
ycLnwJ2Tfec” >
Conclusion
When it comes to bonding acrylic, many people wonder if Gorilla Glue is the right choice. Well, let me tell you this: using Gorilla Glue on acrylic can be a game-changer. This powerful adhesive has the strength and durability to create a long-lasting bond between these two materials.
Acrylic, with its smooth and glossy surface, may seem tricky to glue. But fear not. Gorilla Glue is up to the challenge. Its unique formula ensures a strong and secure bond that will hold up over time.
Imagine the possibilities. You can use Gorilla Glue to repair cracked acrylic items or even create new ones from scratch. Whether it’s a broken picture frame or a DIY project, this adhesive will be your trusty companion.
But wait, there’s more. Gorilla Glue not only bonds acrylic but also works wonders on other materials like wood, metal, fabric, and more. It’s like having a multi-purpose adhesive that can handle any task you throw at it.
So why settle for less when you can have the best? Choose Gorilla Glue for all your acrylic bonding needs. With its professional-grade quality and unbeatable performance, you won’t be disappointed.
In conclusion, yes, you can absolutely use Gorilla Glue on acrylic. It’s a reliable and versatile adhesive that will ensure your projects stand the test of time.