Ever wondered if glued flooring can be removed? Well, you’re in luck because we’re about to take a deep dive into the world of glued flooring removal.
Whether you’ve got an old carpet clinging for dear life to your wooden floor or a vinyl disaster that needs rescuing, we’ve got your back. But hold on a second, you might be thinking, “Can glued flooring really be removed without wrecking the subfloor?”
You better believe it. We’ll spill the beans on all the techniques and tools that professional contractors use to conquer this daunting task.
So whether you’re planning a flooring renovation or just curious about the process, stick around and find out how glued flooring can be safely and effectively banished from your space. Get ready for this wild ride through the world of floors.
Let’s go.
Benefits of Glued Flooring
Contents
When it comes to selecting the perfect flooring for your home, there are several factors to consider. Durability, sound insulation, ease of maintenance, and design flexibility all play a crucial role in making an informed decision. Glued flooring, also known as adhesive flooring, not only meets these criteria but also offers a range of benefits that make it a popular choice for residential and commercial spaces alike.
Unparalleled Durability:
Glued flooring is renowned for its exceptional durability. The powerful bond created by the adhesive between the flooring material and the subfloor ensures a long-lasting and stable floor. This makes it an ideal option for high-traffic areas or homes with active children or pets.
Sound Insulation Properties:
If you’re seeking to minimize noise transmission between floors, glued flooring is an excellent choice. The adhesive acts as a sound dampener, reducing noise levels and creating a quieter environment in multi-story buildings or apartments.
Seamless Appearance:
One of the standout features of glued flooring is its seamless appearance. Unlike other installation methods that may leave gaps or visible fasteners, glued flooring creates a smooth and uniform surface. This not only enhances the overall aesthetic appeal but also makes cleaning and maintenance easier.
Moisture Resistance:
Glued flooring provides superior moisture resistance compared to other types of installations. The adhesive acts as a barrier, preventing water or moisture from seeping through and causing damage to the subfloor or flooring material. This makes it an excellent choice for areas prone to moisture, such as bathrooms, kitchens, or basements.
Design Flexibility:
With glued flooring, you have the freedom to choose from a wide range of flooring materials including hardwood, laminate, vinyl, and tile. This versatility allows you to select the style and look that best suits your preferences and complements your existing decor.
Eco-Friendly Option:
If you’re conscious of your environmental footprint, glued flooring is a sustainable choice. Unlike traditional methods that require nails or staples, glued flooring generates minimal waste during installation and removal. The adhesives used in modern installations are often low in volatile organic compounds (VOCs), making them safer and more eco-friendly.
Easy Maintenance:
Maintaining glued flooring is a breeze. With no nails or fasteners to worry about, regular sweeping or vacuuming, along with periodic mopping, is usually sufficient to keep the floor looking clean and fresh. Additionally, any repairs or replacements can be done more conveniently as glued flooring can be easily removed and replaced without damaging the subfloor.
Challenges of Removing Glued Flooring
When it comes time to replace or update this type of flooring, the challenges of removing it can be quite daunting. In this blog post, we will explore the various obstacles that arise when removing glued flooring and provide insights on how to navigate these challenges effectively.
The Mighty Adhesive Bond:
The bond created by the adhesive used in glued flooring is both a blessing and a curse. While it ensures the longevity and durability of the flooring, it also makes removal a labor-intensive and time-consuming process. The adhesive’s tenacity requires careful and patient removal to prevent damage to the subfloor.
Potential Subfloor Damage:
Removing glued flooring can put your subfloor at risk. Stubborn adhesive residue or chunks may be left behind, requiring meticulous removal to avoid damaging the underlying surface. This challenge is particularly significant when dealing with delicate subfloors like hardwood or linoleum.
Hazardous Chemicals:
Certain adhesives used in glued flooring contain volatile organic compounds (VOCs) that can pose health risks during the removal process. It is crucial to take appropriate precautions, such as wearing protective gear and ensuring proper ventilation, to minimize exposure to these chemicals.
Flooring Material Matters:
Different types of glued flooring present varying levels of difficulty during removal. Vinyl or linoleum flooring is generally easier to remove compared to hardwood or ceramic tiles due to their flexibility and composition. Consider the specific characteristics of your flooring material when planning the removal process.
Wear and Tear Woes:
The age and usage of glued flooring can amplify the challenges of removal. Over time, the adhesive may have become even stronger, making it more difficult to detach the flooring from the subfloor. High-traffic areas are especially prone to increased wear and tear, adding an additional layer of complexity to the removal process.
Heat Gun Method for Removal
I’m here to introduce you to the heat gun method for removal. This technique is not only effective but also efficient, making your flooring removal process a breeze.
First things first, let’s gather our tools of the trade. To successfully execute this method, you’ll need a heat gun and a trusty putty knife or scraper. These tools will be your companions as you embark on this transformative journey.
Now that you have your arsenal ready, it’s time to dive right in. Turn on your heat gun and set it to a low temperature—safety is key here, folks. We want to avoid any potential damage to your flooring or safety hazards.
Once your heat gun is heated up and ready to go, hold it about six inches away from the glued flooring. Picture yourself as a conductor, orchestrating a symphony of change. Now comes the thrilling part – move the heat gun back and forth in a sweeping motion, like a master painter adding brushstrokes of warmth. The hot air blowing from the heat gun will gradually soften the adhesive, allowing it to release its grip on your old flooring.
As the glue starts to loosen its hold, use your trusty putty knife or scraper to gently lift up the edges of the flooring. Here’s where finesse becomes your greatest ally. Slow and steady wins the race – no need to apply excessive force and risk damaging those beautiful floors.
Continue heating and scraping in small sections until you’ve conquered every inch of that stubborn glue. Working in small sections ensures that the adhesive doesn’t have time to cool down and become obstinate in its resistance. And fear not if you encounter a particularly resilient area – just reheat it with the heat gun and witness that adhesive melt away like ice under a scorching sun.
Once you’ve triumphantly removed all the glued flooring, take a moment to revel in your accomplishment. But before you break out the confetti, there’s one more step – the clean-up. Use a commercial adhesive remover or create a mixture of warm water and mild detergent to dissolve and remove any remnants of glue that dare to linger.
While the heat gun method is a powerful force to be reckoned with, it’s important to note that not all flooring materials are suitable candidates for this method. Some materials may be more delicate and susceptible to damage from the high temperatures produced by the heat gun. So, it’s always wise to consult with a professional or refer to the manufacturer’s guidelines before embarking on any removal method.
Mechanical Methods for Removal
Say goodbye to that stubborn glued flooring once and for all. In this blog post, we will explore the exciting world of mechanical methods for removing glued flooring. Get ready to unleash your inner handyman and conquer that adhesive nightmare.
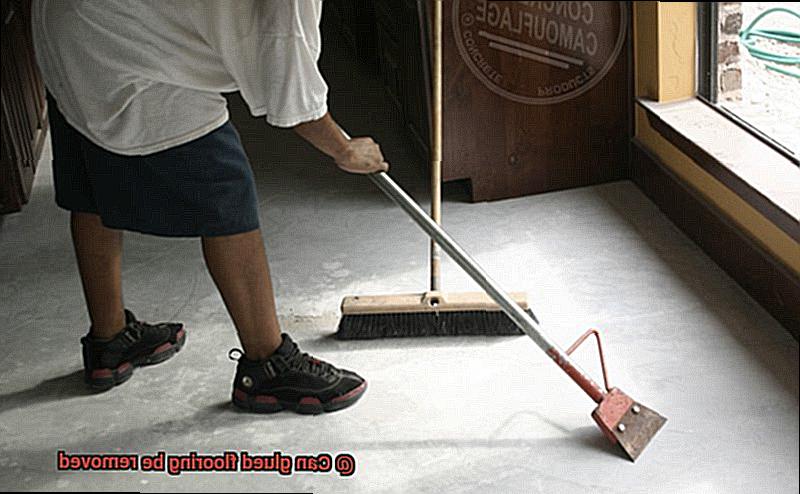
The Mighty Floor Scraper:
Our first hero in this epic battle against glued flooring is none other than the trusty floor scraper. With its sharp, flat blade, it’s like a secret weapon straight out of a superhero’s arsenal. Gently insert the scraper under the edges of the flooring and watch as it works its magic, prying up the glued mess. Remember to exercise patience and handle it with care to avoid any unwanted damage.
Heat Gun – The Hotshot Method:
Now, let’s bring on the heat. Enter the heat gun, your fiery sidekick in this quest for freedom from adhesive bonds. Point it at those stubborn areas, and let the hot air work its wonders. As the adhesive softens, grab your favorite floor scraper or putty knife and gently scrape away the loosened flooring. But beware, excessive heat can be dangerous, so use your powers wisely.
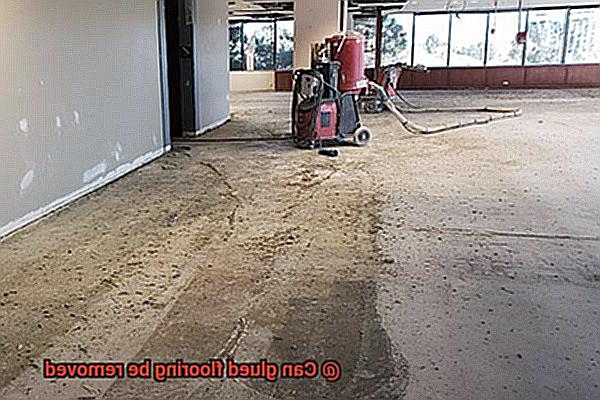
Powered Floor Scraper – The Heavyweight Champion:
For those larger areas or tougher adhesives that refuse to budge, it’s time to call in the big guns – the powered floor scraper. This mighty machine is like a superhero team-up between a jackhammer and a floor scraper. It rapidly removes glued flooring with ease, making it perfect for commercial spaces or larger projects. However, remember that even superheroes need training, so handle with caution.
Grinding and Sanding – The Final Showdown:
When all else fails, it’s time to go all out with grinding and sanding. Imagine yourself as a warrior armed with power tools equipped with abrasive attachments. This method is for the toughest of adhesives and when the subfloor needs a complete transformation. But beware, this battle creates quite a mess, so suit up with proper ventilation and protective gear.
Chemical Adhesive Remover Method
The chemical adhesive remover method is a powerful and effective technique for removing glued flooring. This method involves using a specially formulated liquid solution that breaks down the adhesive, making it easier to remove. With its ability to soften and dissolve the glue, the chemical adhesive remover is your secret weapon in the battle against adhesive forces.
To begin the removal process, gather your arsenal of tools and materials. You will need the magic potion itself – the chemical adhesive remover, a trusty scraper or putty knife, a sponge or cloth, and don’t forget your protective gear – gloves and goggles. Safety should always be a priority when working with strong chemicals.
Now, it’s time to unleash the power of the chemical adhesive remover. Apply this specially formulated liquid solution to a small section of the glued flooring and let it work its magic. The instructions provided by the manufacturer are crucial to achieving the best results, so make sure to follow them carefully.
As the adhesive softens under the spell of the remover, grab your scraper or putty knife and gently scrape away the glue. Starting at one edge, work your way towards the other side. Remember, a gentle touch is key to avoid damaging the underlying floor. Take your time and be patient – persistence is key in this battle against adhesive forces.
But what about those stubborn areas where the glue refuses to budge? Fear not, for you can reapply the adhesive remover and let it sit a little longer before attempting to scrape again. The power of this method lies in its ability to tackle even the toughest adhesive bonds.
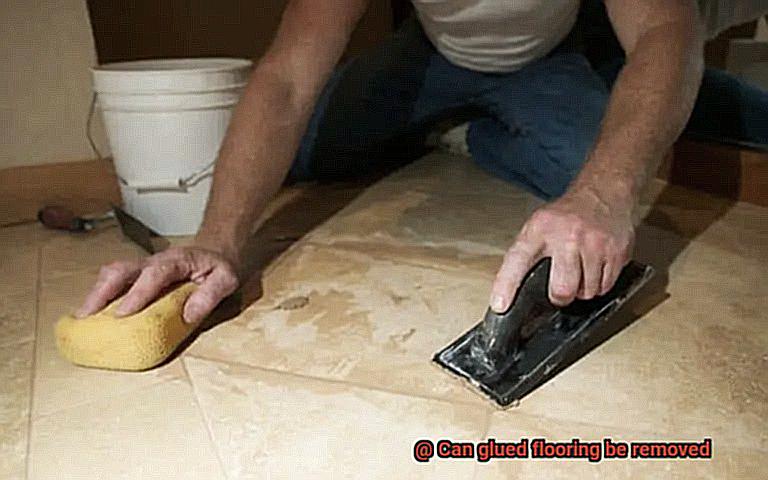
Once you’ve successfully removed as much glue as possible, it’s time for a victory clean-up. Grab your sponge or cloth soaked in warm soapy water and wipe away any residue left behind by the adhesive remover. Rinse with clean water and make sure to let it dry completely before moving on.
However, it is important to note that the chemical adhesive remover contains powerful chemicals that must be handled with care. Always read and follow the manufacturer’s instructions, wear your protective gear, and make sure you’re working in a well-ventilated area to keep those fumes at bay.
Factors Affecting Difficulty of Removal
When it comes to removing glued flooring, there are several factors that can make the task either a breeze or a nightmare. As an expert in the field, I have explored these factors extensively and can guide you through this sticky situation. So, grab a cup of coffee and let’s delve into the world of adhesives.
First and foremost, the type of adhesive used is a key factor in determining removal difficulty. Adhesives come in different strengths and properties. Solvent-based adhesives, for example, are notorious for their strength and resilience, making them more challenging to remove compared to water-based adhesives.
But it’s not just the adhesive that matters – the type of flooring material is also significant. Vinyl or linoleum flooring is typically installed with adhesives that allow for easier removal. However, hardwood or engineered wood flooring may require more effort and care to remove without causing damage.
The installation technique is another crucial factor to consider. If the adhesive was applied sparingly or unevenly during installation, it might be easier to remove than if it was well-bonded and evenly applied.
Moreover, the condition of the subfloor beneath the glued flooring plays a significant role. A smooth and undamaged subfloor makes removal easier, while an uneven or damaged subfloor can complicate things.
The age of the glued flooring should not be overlooked either. Over time, adhesives may become more brittle or deteriorate, making removal easier. However, older adhesives can also harden and become more stubborn.
Environmental factors like humidity and temperature can also impact removal difficulty. High humidity levels can soften adhesives, making them easier to remove. Conversely, low humidity can cause adhesives to harden and become more challenging.
Lastly, using the right tools and techniques can make all the difference in removing glued flooring. Floor scrapers, heat guns, and adhesive removers are essential tools that can make the process more efficient and less labor-intensive. Employing the right technique, such as gradually lifting the flooring or using heat to soften the adhesive, can minimize damage and facilitate easier removal.
Professional Assistance for Removal
Removing glued flooring can be a daunting task, one that requires careful consideration and expertise. If you’re a DIY enthusiast, it’s important to understand the benefits of seeking professional assistance. From specialized equipment to safety precautions, professionals have the tools and knowledge needed to make the removal process efficient and hassle-free.
- Specialized Equipment: When it comes to removing glued flooring, having the right tools is essential. Professional flooring removal companies are equipped with floor scrapers, adhesive removers, and heat guns specifically designed to soften and loosen adhesive materials. These tools not only make the removal process easier but also help prevent damage to the subfloor, ensuring a smooth transition to your new flooring.
- Safety Precautions: Glued flooring removal often involves working with potentially harmful chemicals and heat sources. Professionals are trained to handle these substances safely, minimizing health risks for both themselves and you. By hiring professionals, you can rest assured knowing that all safety precautions will be taken, allowing you to focus on other aspects of your renovation project.
When is Professional Help Necessary? While some DIY enthusiasts may be tempted to tackle glued flooring removal on their own, there are instances when professional help is an absolute must. If your glued flooring covers a large area or if it has been installed using industrial-grade adhesives, it’s best not to tackle the job alone. This ensures that the removal process is done efficiently and effectively without causing unnecessary frustration or potential damage.
If you’re determined to give glued flooring removal a shot yourself, here are a few tips to keep in mind:
- Research adhesive types and removal techniques specific to your flooring material.
- Invest in quality tools such as floor scrapers, adhesive removers, and heat guns.
- Protect yourself by wearing appropriate safety gear like gloves and goggles.
- Take your time and be patient; rushing can lead to mistakes and accidents.
- Test a small area first before committing to a full-scale removal.
However, if you’re feeling uneasy about taking on the task yourself, don’t worry. There are plenty of reliable and experienced professionals out there ready to lend a helping hand. When choosing a flooring removal company, be sure to request quotes, compare services and prices, and read customer reviews. This way, you can find a trustworthy team that will get the job done right.
Cost and Time Involved in Removal
Fear not, as we delve into the realm of adhesives and uncover the intricate web of costs and time associated with this sticky situation. Whether you’re an avid DIY enthusiast or prefer to call in the experts, we’ve got you covered.
Flooring Material:
The type of flooring material is a crucial factor that determines the removal process. Vinyl, carpet, or hardwood all require distinct techniques. For instance, vinyl may need the application of heat or solvents to soften the adhesive’s grip, while carpet calls for meticulous cutting and pulling. Understanding your specific flooring material will empower you to plan accordingly.
Adhesive Considerations:
Not all adhesives are created equal, and some can be more tenacious to remove than others. The older adhesives tend to cling stubbornly, demanding more time and effort for their liberation. Moreover, certain adhesives may leave behind residue that necessitates meticulous cleaning or scraping off the subfloor, adding to both the cost and time involved.
Subfloor Condition:
The condition of your subfloor is a vital factor when estimating cost and time requirements. If it’s in pristine shape, the removal process should be relatively straightforward. However, if there are damages or uneven areas present, additional work may be necessary before new flooring can be installed.
Professional Assistance:
Engaging professionals for glued flooring removal is often advisable for larger areas or complex removals. These experts possess the necessary expertise and specialized equipment to efficiently extract glued flooring while minimizing subfloor damage. Although this incurs an additional cost, it saves both time and ensures a proper removal process.
DIY vs. Professionals:
Embarking on a DIY removal journey is indeed possible, but it requires more time and effort. Extensive research into specific techniques and tools for your flooring and adhesive is crucial. DIY may be a cost-effective option for smaller areas or when budget constraints are present, but it is essential to consider the potential risks and challenges before taking the plunge.
Time Estimates:
The time involved in removing glued flooring varies depending on factors such as the size of the area, type of flooring, adhesive composition, and removal method employed. Allocating ample time for the process ensures thoroughness and prevents rushed work that could result in damage to the subfloor.
XDqzce5aGrw” >
Also Read: How To Remove Glue Down Linoleum?
Conclusion
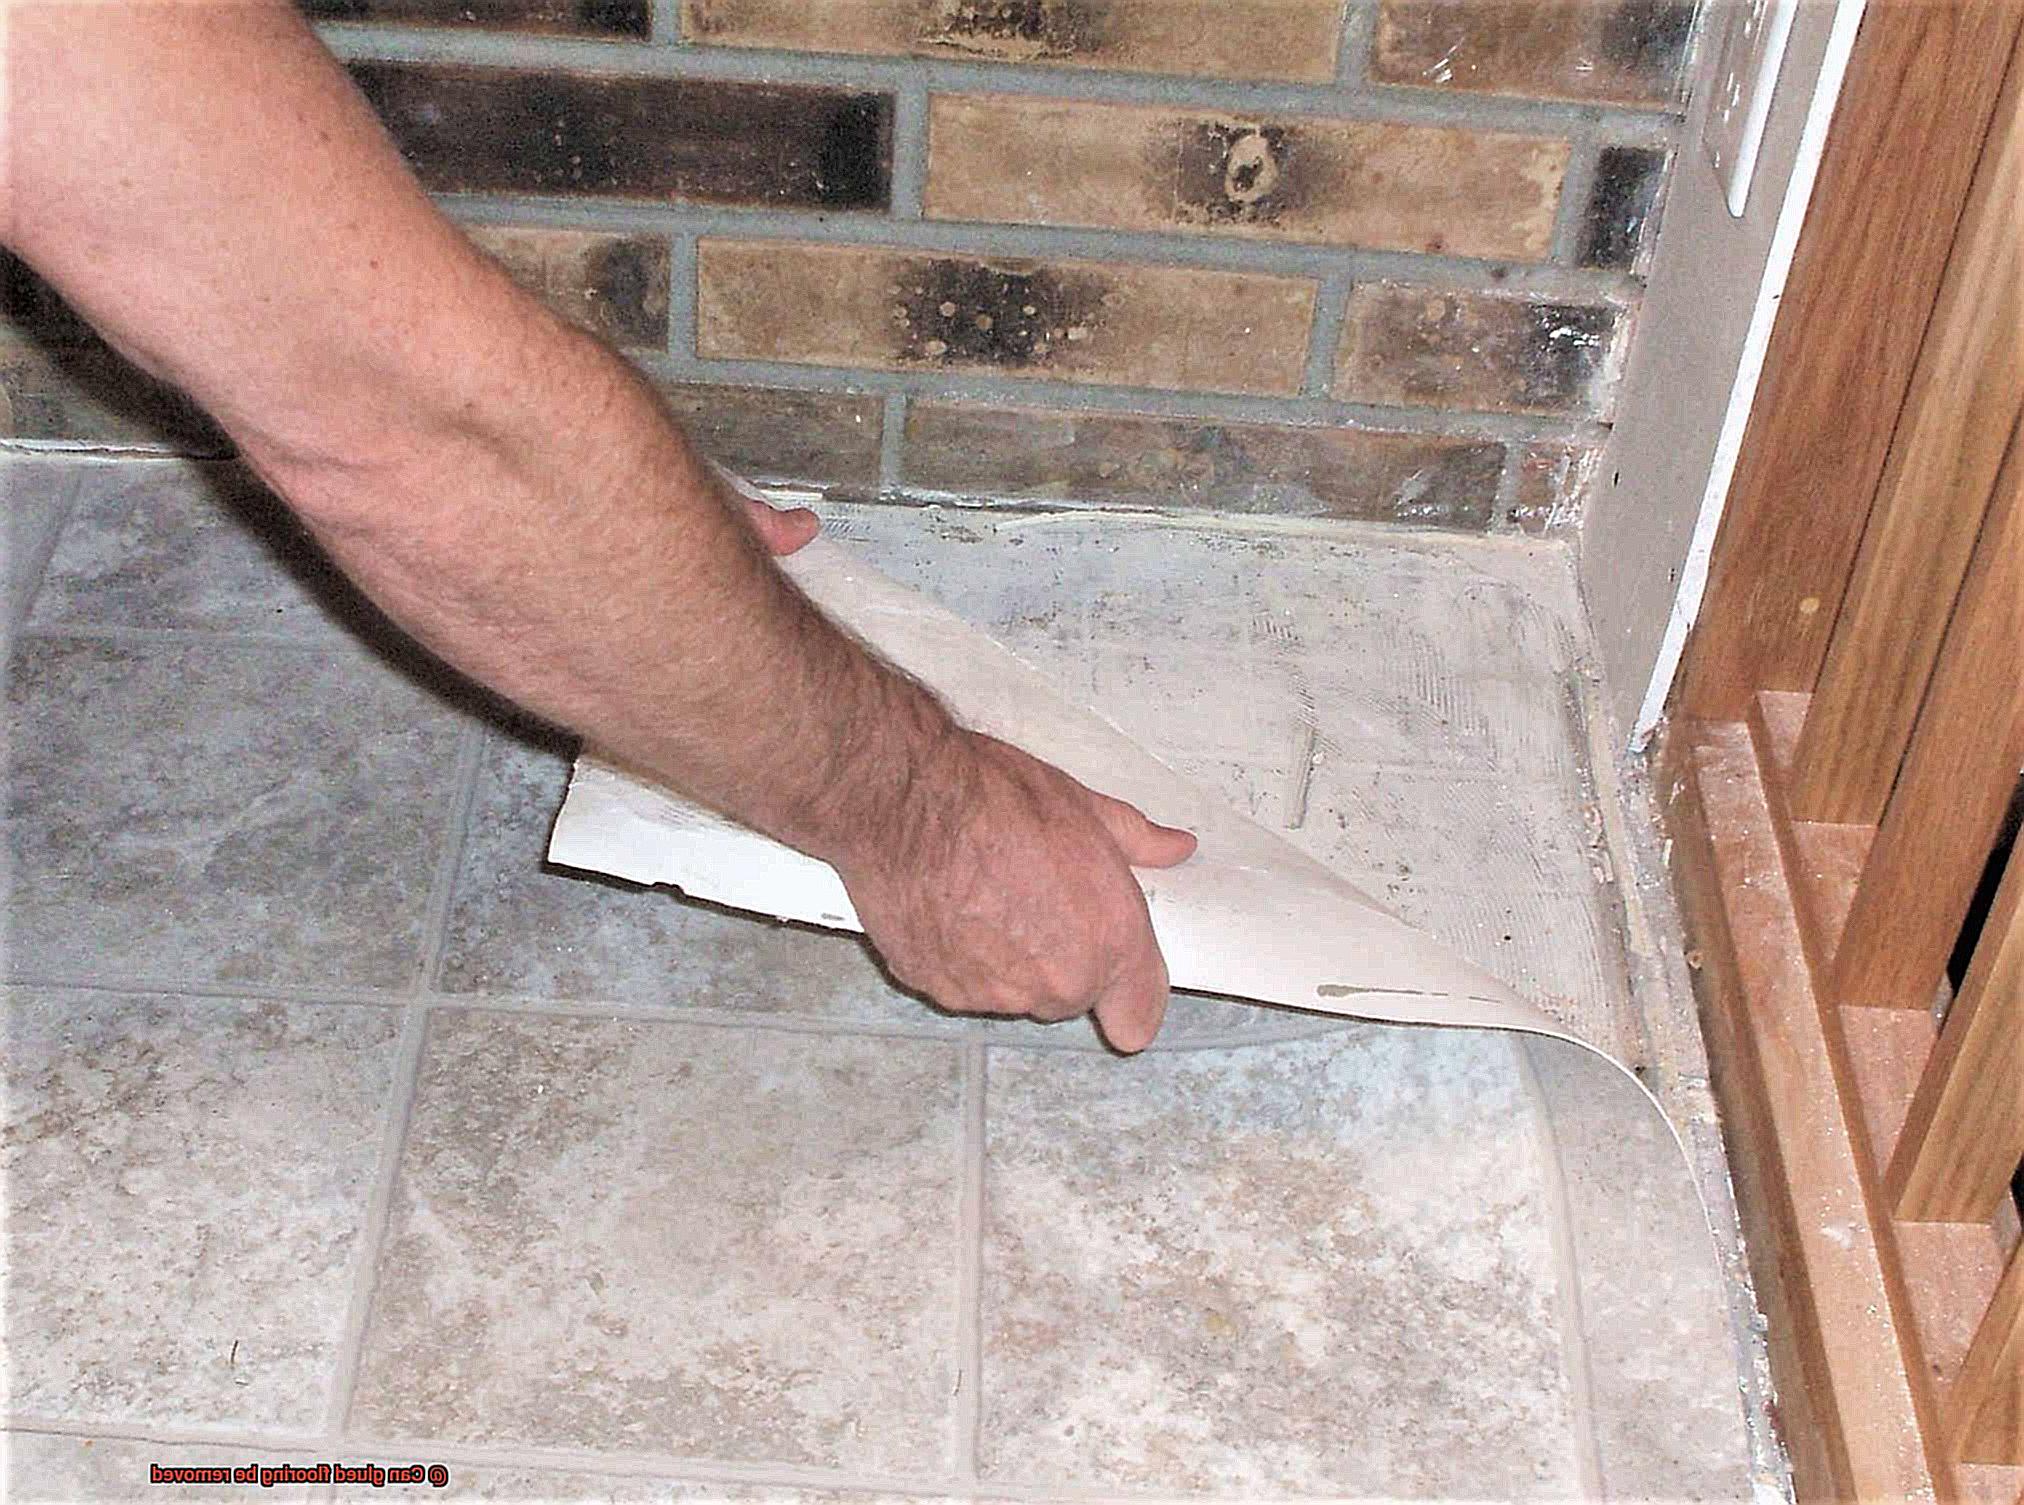
Yes, glued flooring can be removed. It may seem like a daunting task, but with the right tools and techniques, you can successfully remove glued flooring without causing excessive damage to your subfloor. Whether it’s vinyl, carpet, or hardwood flooring that has been glued down, there are several methods you can use to tackle this challenge.
One option is to use a heat gun to soften the adhesive and then carefully pry up the flooring using a putty knife or floor scraper. This method requires patience and precision, as you want to avoid damaging the subfloor underneath.
Another approach is to use a chemical adhesive remover specifically designed for removing flooring glue. These products work by breaking down the adhesive bond, making it easier to lift and remove the glued flooring. It’s important to follow the manufacturer’s instructions and take proper safety precautions when using these chemicals.
If you’re dealing with hardwood flooring that has been glued down, you may need to employ additional techniques such as sanding or refinishing after the glue has been removed. This will help restore the appearance of your hardwood floors and ensure they look their best once again.
In conclusion, while removing glued flooring may require some effort and patience, it is indeed possible. By using the right tools and techniques, you can successfully remove glued flooring without causing significant damage to your subfloor.