Picture this: you’re strolling along a sun-kissed beach, collecting exquisite seashells that were shaped by Mother Nature herself. Now imagine turning these treasures into stunning DIY crafts or breathtaking jewelry that captures the essence of the ocean. But here’s the challenge: how do you make sure these delicate seashells stay securely attached to their new homes?
Welcome to the enchanting world of gluing seashells, where the power of adhesives plays a vital role in preserving their ethereal beauty. In this captivating blog post, we’ll dive deep into the seashell bonding universe, unraveling the mysteries behind the magical glues that will help you create your very own underwater wonderland.
Hook:
Just like the intricate patterns etched on each fragile seashell, the search for the perfect glue can be equally fascinating. Whether you’re making coastal-inspired decorations, fixing broken seashell crafts, or transforming shells into stunning jewelry pieces, finding the best adhesive is crucial. Get ready to become an expert in this captivating world where shells and glues merge, creating a symphony of creativity and craftsmanship.
Main Points:
- Understanding Seashell Materials: Take a plunge into the diverse world of seashell types, each requiring its own specific adhesive approach. From porous shells like sand dollars and coral to non-porous shells like abalone or mother-of-pearl, knowing their composition is your first step towards success.
- Level of Bonding Strength: Discover a range of glue options available, from quick-drying instant adhesives to robust epoxy resins. Understanding the strength required for your project is key to ensuring your magnificent crafts withstand the test of time.
- Protecting Shell Integrities: Learn about important considerations for preserving the natural shine, color, and texture of your seashells during the bonding process. We’ll explore techniques to avoid discoloration and damage while achieving a seamless, professional finish.
- Safety and Environmental Considerations: Find out about adhesive options that are non-toxic, odorless, and eco-friendly. We’ll unveil the top choices that allow you to protect both your health and the precious ecosystems where these wondrous shells originate.
Types of Glue Suitable for Glueing Seashells
Contents
- 1 Types of Glue Suitable for Glueing Seashells
- 2 Epoxy Resin: The Best Choice for Sealing Seashells
- 3 Cyanoacrylate Glue (Super Glue): Fast and Reliable
- 4 Hot Glue: Ideal for Flexible Projects
- 5 Incompatible Glues: What to Avoid
- 6 Preparing the Shells Before Gluing
- 7 Testing the Adhesive on a Small Area
- 8 Conclusion
Transforming seashells into stunning crafts requires the use of the right adhesive. Due to their delicate and porous nature, seashells demand a specific type of glue that can provide a strong bond without causing any damage. In this article, we will explore five different types of glue suitable for gluing seashells, ensuring that your creations withstand the test of time.
Epoxy Resin: The Unyielding Force
Epoxy resin emerges as a superhero in the realm of seashell gluing. Comprising a resin and a hardener, this two-part adhesive forms an unyielding bond that can withstand moisture and temperature fluctuations.
Mixing the resin and hardener in the correct ratio and applying them evenly on the shell surfaces guarantees a durable connection. Once cured, epoxy resin ensures your seashell crafts remain intact for years to come.
Cyanoacrylate Glue: The Speedy Solution
When time is of the essence, cyanoacrylate adhesive, also known as super glue or instant glue, proves to be an excellent choice for gluing seashells. This fast-acting adhesive establishes a powerful bond within seconds, making it ideal for small-scale seashell crafts or quick repairs. To ensure proper adhesion, opt for a cyanoacrylate adhesive specifically formulated for porous materials. Applying a thin layer of glue on both surfaces and firmly holding them together until the glue sets guarantees a secure bond.
Silicone Adhesive: The Flexible Friend
For seashell crafts that may encounter water or require flexibility, clear silicone adhesive comes to the rescue. This versatile glue creates a waterproof and flexible bond, making it suitable for projects exposed to moisture or outdoor settings. To maintain the aesthetics of your seashells over time, select a clear silicone adhesive that does not yellow. Additionally, allowing sufficient curing time before handling or moving the glued seashells ensures a sturdy connection.
Hot Glue: The Swift Solution
If speed is your priority, hot glue guns offer a quick and strong bonding solution for gluing seashells. This adhesive enables immediate handling of your project, making it a popular choice among crafters. However, exercise caution when using hot glue with delicate seashells or projects exposed to high temperatures, as the adhesive can soften and compromise its bond.
Craft Glue: The Porous Material Pro
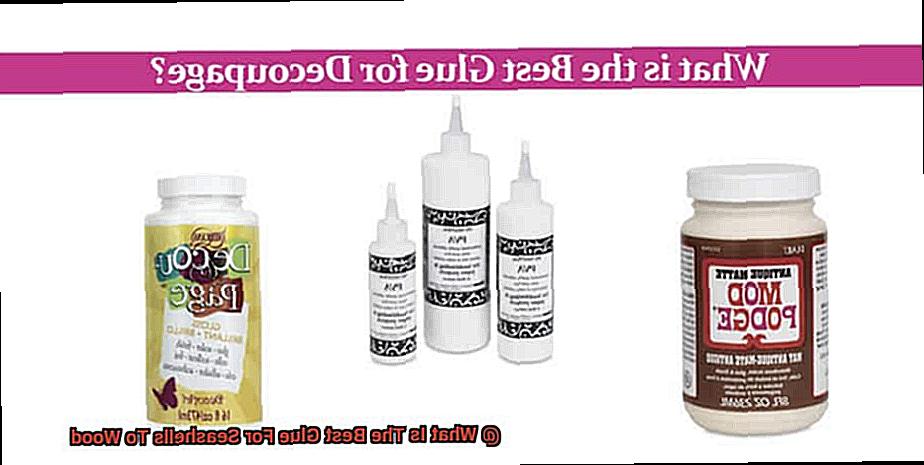
Craft glues designed specifically for porous materials can also be employed for gluing seashells. These water-based glues establish a robust bond on various surfaces, including shells. Non-toxic and safe for use, they are an excellent option for seashell crafts involving children.
Epoxy Resin: The Best Choice for Sealing Seashells
Seashells, treasures from the ocean, have forever enchanted our hearts. Whether collected as beach souvenirs or transformed into stunning crafts, preserving their beauty is paramount. Luckily, epoxy resin emerges as the superhero of seashell sealers, armed with unyielding adhesive powers and unmatched durability. As your expert guide, let’s explore why epoxy resin reigns supreme in sealing seashells.
A Bond of Epic Proportions:
Epoxy resin transcends ordinary glue, forming an unstoppable duo with its resin and hardener components. These partners ignite a chemical reaction that forges an impregnable bond. Seashells become firmly entrenched, resisting all attempts at detachment.
Defying Water’s Wrath:
The nightmare of watching your seashell creation dissolve from water damage is banished by epoxy resin’s exceptional resistance to moisture. Its protective barrier shields seashells from harm caused by water exposure or relentless humidity.
Transparent Brilliance:
Seashells are nature’s masterpieces, and epoxy resin understands their perfection. With crystal-clear properties, epoxy resin dries transparent, granting seashells an unobstructed stage to radiate their innate beauty. It’s akin to applying a glossy, protective coat that accentuates their charm.
Smooth as Seaglass:
Applying epoxy resin to seashells is effortless, like a gentle coastal breeze. Whether brushed or poured, this enchanting adhesive self-levels, creating a flawlessly smooth finish that elevates the aesthetic allure of seashells. Picture a polished makeover that captures attention and sparks envy among fellow beachcombers.
Sunlight’s Kryptonite:
Imagine showcasing your seashell masterpiece in a sun-soaked room only to witness its vibrant colors fade into oblivion. Fear not, for epoxy resin wields UV resistance superpowers, safeguarding seashells from the sun’s relentless onslaught.
Additional Considerations:
- Epoxy resin requires a well-ventilated workspace due to its potent fumes. Safety precautions, such as donning gloves and masks, are essential when working with this potent substance.
- Prior to applying epoxy resin, ensure seashells are meticulously cleaned and thoroughly dried. This guarantees proper adhesion and prevents any residue or debris from becoming trapped beneath the resin.
Cyanoacrylate Glue (Super Glue): Fast and Reliable
Seashells, nature’s exquisite treasures, deserve an adhesive that can match their beauty and withstand the test of time. Look no further than cyanoacrylate glue, the legendary super glue known for its lightning-fast speed and unyielding reliability. In this captivating exploration, we will unveil why cyanoacrylate glue is the ultimate choice for seashell bonding, along with expert tips to achieve flawless results. So, brace yourselves as we embark on a journey into the realm of cyanoacrylate glue and its captivating potential.
Speed of Light: Instant Bonding Magic
When dealing with seashells, every second counts. That’s where cyanoacrylate glue swoops in like a superhero, setting a new standard in rapid bonding. Unlike conventional adhesives that require tedious hours or days to dry, super glue works its magic in mere seconds. This means you can swiftly apply the adhesive, seamlessly moving from one shell to another without any frustrating delays. No more holding your breath as shells teeter on the brink of collapse – cyanoacrylate glue ensures a seamless, lightning-fast experience.
Unbreakable Ties: Strength That Defies All Odds
Cyanoacrylate glue is not just about speed; it boasts an unyielding strength that creates bonds to withstand the test of time. Its adhesive prowess forms an indomitable connection between seashells, ensuring their longevity and durability. The super glue’s remarkable properties create a bond that can brave the harshest conditions, including moisture-laden environments or high humidity levels. With cyanoacrylate glue as your ally, your precious seashells will remain unshakably attached for years to come.
Hot Glue: Ideal for Flexible Projects
In our previous section, we explored the magical world of cyanoacrylate glue and its incredible bonding powers. But today, we’re diving into another adhesive superhero: hot glue. Specifically, we’ll be discussing why hot glue is the ideal choice for all your flexible projects involving seashells. So grab your seashells and let’s get started.
Flexibility is key when it comes to working with seashells. These delicate beauties often have curved surfaces and varying thicknesses, making them a bit tricky to attach securely. But fear not, because hot glue is here to save the day. Hot glue remains pliable even after it has dried, allowing for some movement and flexibility in your finished project. This means that your seashells can adhere securely without causing any damage or stress to their fragile structure. It’s like a gentle hug that keeps everything in place.
Hot glue doesn’t just offer flexibility, it also provides a strong bond. When you’re creating projects like seashell jewelry or decorative items that will be handled frequently, you need an adhesive that can withstand the test of time. And hot glue delivers exactly that. Its durable and long-lasting bond ensures that your seashells will stay in place no matter how much you flaunt your fabulous creations. Say goodbye to loose shells and hello to worry-free crafting.
Now, let’s talk about ease of use. Hot glue is as user-friendly as it gets. It comes in the form of a solid stick that can be inserted into a hot glue gun. Once heated, the glue becomes viscous and easy to apply. The gun allows for precise application, giving you the freedom to attach seashells to specific areas or create intricate designs with ease. And the best part? Hot glue dries quickly, so you don’t have to wait around for ages to see the final result. Efficiency and convenience at their finest.
Incompatible Glues: What to Avoid
But wait. Before you start gluing those shells onto surfaces, it’s crucial to choose the right adhesive. In this blog post, we will explore the importance of selecting the correct glue for seashell crafts and highlight five types of glues to avoid. So let’s dive in and discover the sticky truth.
Water-Based Woes:
Water-based glues may seem like a convenient choice, but they spell disaster for seashell crafts. These glues simply can’t handle the natural oils and moisture present in seashells. Over time, they dissolve or weaken, leaving your once-beautiful creations in ruins. Don’t let your hard work wash away with the tide – steer clear of water-based glues when working with seashells.
Hot Glue Hazards:
Hot glue guns may promise quick and easy bonding, but they come with a hidden danger for delicate seashells. The intense heat of the glue can wreak havoc on your precious shells, causing cracks and discoloration that no amount of creativity can hide. Don’t let your seashell dreams melt away – avoid hot glue like the scorching sun.
Super Glue Slip-Ups:
Super glue may be known for its strength, but it’s not a match made in heaven for seashells. The chemical composition of super glue can react unfavorably with the moisture found in shells, resulting in unsightly discoloration or even complete disintegration. Don’t let your seashells become a sticky mess – keep super glue far away from your precious collection.
Epoxy Resin Regrets:
Epoxy resin is renowned for its durability, but it’s not the best option for attaching seashells directly onto surfaces. Its thick and heavy consistency makes it difficult to achieve a seamless bond, leaving unsightly gaps and unevenness in your crafts. And let’s not forget the time-consuming curing process and the painstaking removal of excess resin without damaging the shells. Don’t let epoxy resin be a sticky situation – find a better adhesive for your seashell projects.
Household Glue Gaffes:
Common household glues like white glue or wood glue may seem like a safe bet, but they simply can’t handle the smooth surface of seashells. These glues are designed for porous materials and lack the necessary adhesive properties to create a strong bond with seashells. Don’t let visible residue dull the beauty of your seashell crafts – leave household glues for other projects.
Preparing the Shells Before Gluing
Dive into the captivating world of seashell crafting. But before you embark on your gluing adventure, it’s crucial to give those seashells the royal treatment. Preparing them properly is the secret to creating durable and breathtaking creations that will stand the test of time. So, gather your seashells and let’s begin this enchanting journey.
Step 1: The Power of Cleanliness
First things first, let’s give those seashells a thorough cleanse. Immerse them in warm, soapy water and delicately scrub away any dirt, debris, or lingering algae. This meticulous cleaning session ensures a pristine surface for the glue to work its magic.
Step 2: Dry Them to Perfection
Now that your shells are sparkling clean, it’s time to dry them out completely. Gently place them on a soft towel or absorbent paper towel, allowing them to bask in the air’s embrace. Patience is key – for a bond as strong as the ocean’s current, ensure they’re bone dry before proceeding.
Step 3: Embrace Your Inner Smooth Operator
To create a surface that’s irresistible to glue, it’s time to work some sanding magic. With a gentle touch, caress those shells using a fine-grit sandpaper. Remember, we’re aiming for a rough surface – not an all-out assault on their delicate beauty.
Step 4: Dust Off the Past
After the sanding ritual, take a moment to whisk away any lingering dust or debris. A simple swipe with a cloth or tissue will do the trick. We want our shells to shine like stars in the night sky – clean and ready for their moment of glory.
Step 5: Extra Protection for the Conscientious Crafter
For those who crave an added layer of protection, consider applying a primer or shellac to your shells before diving into the gluing frenzy. This optional step seals and fortifies the shells, ensuring their resilience in the face of time’s relentless tides.
Step 6: Arrange and Organize, Let Creativity Materialize
Before the glue flows, let’s take a moment to plan the masterpiece that will grace your desired surface. Deliberately arrange and organize the shells, unleashing your artistic prowess. With this thoughtful approach, your creation will be a testament to the beauty of order.
Testing the Adhesive on a Small Area
To ensure our creations withstand the test of time, we must unlock the secret to perfect adhesion. Today, we embark on a thrilling journey of testing the adhesive on a small area, a crucial step in our quest for awe-inspiring seashell masterpieces. So let’s dive in and uncover the mysteries that lie beneath the surface.
Choosing the Right Adhesive:
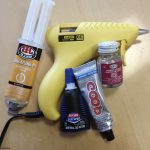
Before we set sail on our testing adventure, let’s gather an arsenal of adhesives commonly used by crafters. Epoxy resin, super glue, craft glue, and hot glue are our trusty companions on this quest. Each adhesive possesses its own magical powers and weaknesses, demanding individual examination.
Step 1: Selecting the Testing Oasis:
Prepare to make your mark. Choose a discreet area on the seashell where our adhesive will perform its magic. Opt for a spot that won’t steal the limelight once our masterpiece is complete. Remember, cleanliness reigns supreme, so cleanse the surface with utmost care and ensure it is dry before proceeding.
Step 2: Unleashing the Adhesive Spell:
With steady hands and unwavering focus, apply a small amount of adhesive to the chosen area of the seashell. Pay heed to the whispers of the manufacturer’s instructions for each enchanting adhesive brew. Allow patience to guide you as you wait for the glue to dry completely according to its recommended spellbinding time.
Step 3: Assessing the Bond’s Strength:
Behold, dear crafter, for now we put our creation to the ultimate test. Examine the bond between seashell and adhesive with a discerning eye. Seek out any signs of weakness or detachment. To ascertain its strength, gently attempt to pry the shell off using nimble fingers or a delicate tool. A robust bond is the elixir that ensures our creations endure.
Step 4: Unveiling Adhesion and Aesthetic Wonders:
Our journey nears its climax, but before we conclude our testing expedition, let us explore further. Take heed of how well the adhesive adheres to the seashell’s surface. Some potions may leave an undesirable residue or discoloration on certain shell species. Take note of these unexpected effects and consider if they align with your artistic vision.
-sLB36JU988″ >
Conclusion
In conclusion, when it comes to finding the best glue for seashells, there are a few options that stand out.
One of the top choices is epoxy resin adhesive. Its strong and durable bond ensures that your seashells will stay securely in place.
Another great option is cyanoacrylate glue, commonly known as super glue. This fast-drying adhesive forms an instant bond and works well with porous surfaces like seashells.
Additionally, if you prefer a more natural approach, marine-grade silicone adhesive can be an excellent choice. It is water-resistant and perfect for bonding seashells to various materials.
Ultimately, the best glue for your seashell projects will depend on your specific needs and preferences.

