Picture this: you’re strolling along a breathtaking coastline, collecting seashells that boast an array of shapes, colors, and patterns. Now, imagine those treasures adorning a weathered wooden frame or a majestic driftwood sculpture. There’s an undeniable allure in merging the sheer beauty of seashells with the rustic charm of wood. But wait. Before you embark on your artistic journey, let’s crack the code to find the best glue that will create an unbreakable bond between seashells and wood.
You might think it’s a piece of cake, but here’s a little anecdote that will change your perspective. Once upon a time, an ardent shell aficionado armed with imagination and craft supplies set out to create a masterpiece. However, despite their efforts, disaster struck—quite literally. The chosen adhesive failed miserably at holding the seashells in place, leaving both the artist disheartened and their artwork in ruins.
To prevent such catastrophic glue-related calamities, we’ve delved deep into the world of craftsmanship to provide you with vital answers. In this blog post, we’ll explore and uncover the secrets behind finding the perfect glue for seashells to wood, ensuring your artistic endeavors flourish. Get ready as we dissect essential criteria and reveal top contenders vying for the title of “best glue” out there.
Throughout this journey, we’ll dive headfirst into properties that make a glue ideal for bonding seashells and wood—factors like durability, water resistance, and versatility. Join us as we unlock endless possibilities and rejuvenate your creative aspirations. By the end of this blog post, you’ll be equipped with knowledge to transform your vision of seashells and wood into a long-lasting reality.
So grab yourself a seat, buckle up metaphorical goggles, and let’s plunge into the enchanting realm of adhesive magic, unveiling the secret to the perfect union between seashells and wood.
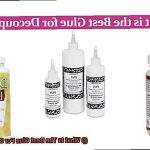
Types of Glues Suitable for Seashells to Wood
Contents
- 1 Types of Glues Suitable for Seashells to Wood
- 2 Advantages and Disadvantages of Epoxy Resin
- 3 How to Apply Epoxy Resin for Seashells to Wood
- 4 Marine-Grade Adhesive: Benefits and Application Tips
- 5 Super Glue: Pros and Cons
- 6 Considerations When Choosing a Glue for Seashells to Wood
- 7 Preparing the Surfaces Before Gluing Seashells to Wood
- 8 Testing the Glue on an Inconspicuous Area Before Application
- 9 Conclusion
The key to success lies in selecting the perfect glue. In this comprehensive guide, we will explore the top glues suitable for creating a secure and long-lasting bond between seashells and wood. Get ready to dive into the world of adhesive wonders and unleash your creative potential.
Epoxy Resin: Unleashing Unbreakable Bonds
When it comes to unparalleled adhesion and durability, epoxy resin emerges as the ultimate hero in the realm of glues. With its two-component formula of resin and hardener, epoxy resin creates a bond that can withstand even the harshest conditions. Whether your seashell art is destined for outdoor display or exposed to moisture, this glue has got you covered. Its transparent finish ensures that the beauty of your seashells remains uncompromised, leaving you with a masterpiece that will stand the test of time.
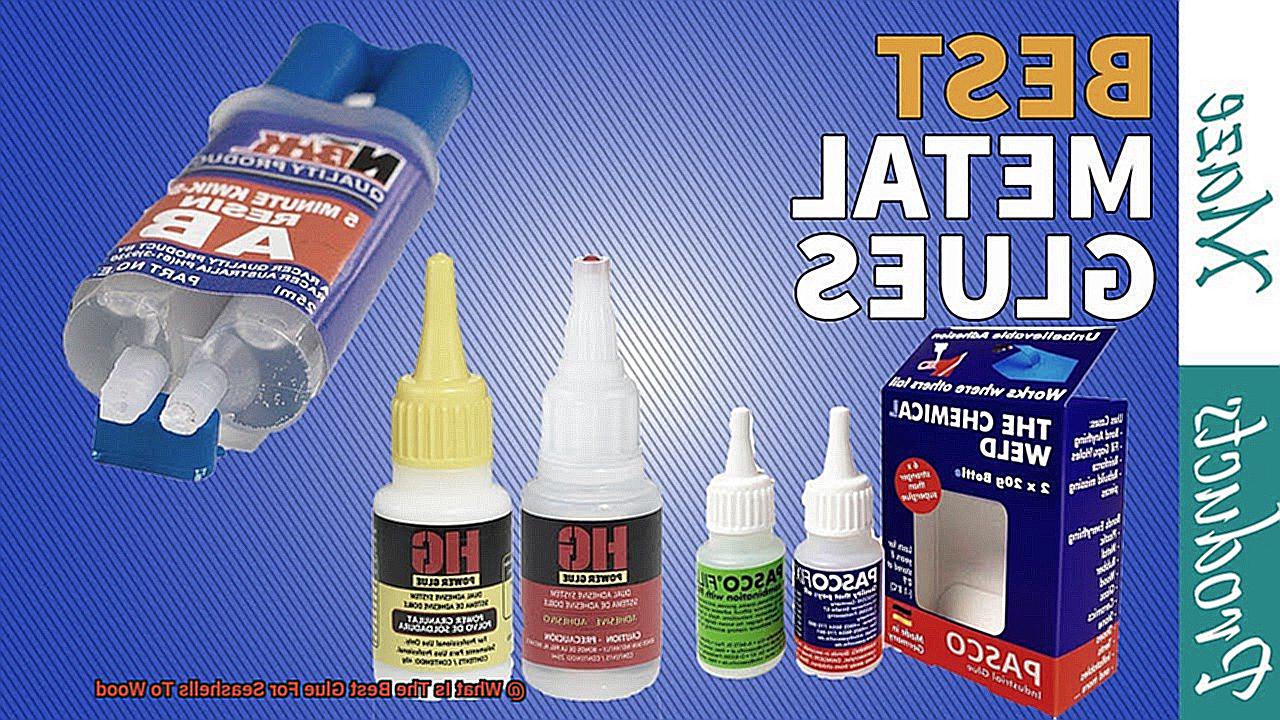
Cyanoacrylate (Super Glue): Instant Adhesive Magic
For a quick and secure bond between seashells and wood, look no further than cyanoacrylate, commonly known as super glue. This adhesive works like magic, forming an almost instantaneous bond that holds tight. Perfect for smaller seashells or delicate pieces where precision is paramount, super glue offers a reliable solution. However, be cautious when choosing a super glue for wood surfaces, as not all formulas are suitable for porous materials like wood. Opt for a formula explicitly designed for wood bonding to ensure optimal results.
Hot Glue: The Versatile Craftsman’s Ally
Crafters around the world have fallen in love with hot glue guns for their versatility and ease of use. When it comes to attaching seashells to wood, hot glue can be a handy ally, especially if you desire a quick and temporary bond. This adhesive sets rapidly, allowing you to work efficiently on your project and see immediate results. However, be aware that hot glue may not provide the same level of durability as epoxy resin or super glue, particularly in high-moisture environments. It is best suited for indoor decorations or projects that do not require long-term strength.
Silicone Adhesive: The Flexible Guardian
If flexibility is a priority in your seashell craft project, silicone adhesive is here to save the day. This waterproof glue forms a strong bond and offers excellent resistance to moisture and temperature fluctuations. Its flexibility allows for some movement without compromising the bond, making it ideal for projects that require a little extra give. However, it is crucial to choose a silicone adhesive that is compatible with both the seashell material and the wood surface to ensure optimal adhesion.
Marine-grade Adhesive: Conquering the Elements
Advantages and Disadvantages of Epoxy Resin
Today, we embark on an adhesive adventure, delving into the advantages and disadvantages of epoxy resin when it comes to bonding seashells to wood. So, grab your tools, put on your creative hats, and let’s dive in.
Advantages of Epoxy Resin:
Unyielding Bonding Power:
Epoxy resin is the unsung hero for delicate seashells. Its exceptional bonding properties ensure a secure attachment, providing peace of mind against breakage and detachment. With epoxy resin, your seashell creations stay firmly in place, defying wear and tear.
Durability That Defies Nature:
Mother Nature can be unpredictable, but epoxy resin stands strong against her elements. Highly durable and resistant to moisture, temperature fluctuations, and environmental factors, it guarantees that your seashell masterpieces remain steadfastly attached to the wood.
Versatility Unmatched:
Epoxy resin is the chameleon of adhesives, effortlessly bonding various surfaces together. Whether it’s wood, metal, plastic, or glass, this versatile adhesive has got you covered. So unleash your creativity beyond seashell crafts and explore a world of possibilities.
A Glossy Finish That Dazzles:
Seashells possess natural beauty that deserves to shine through. Thankfully, epoxy resin dries to a clear and glossy finish that enhances their aesthetic appeal. Imagine a stunning mosaic or a decorative frame where every intricate detail of your seashells is showcased. With epoxy resin, this vision becomes a breathtaking reality.
Disadvantages of Epoxy Resin:
Beware of Toxic Fumes:
As remarkable as epoxy resin is, it’s crucial to be cautious of potentially toxic fumes. During the curing process, volatile organic compounds (VOCs) may be emitted, posing health risks if inhaled excessively or over prolonged periods. Ensure your safety by working in well-ventilated areas or using appropriate protective equipment such as a respirator.
How to Apply Epoxy Resin for Seashells to Wood
With the magical combination of epoxy resin and wood, you can create a captivating display that showcases the beauty of your seashells like never before. In this guide, we will take you through the step-by-step process of applying epoxy resin for seashells to wood, allowing you to unleash your creativity and create stunning seashell art.
Gather the Materials:
Before diving into your seashell art project, gather all the necessary materials. You will need epoxy resin, a mixing container, stirring sticks, a small brush or sponge applicator, sandpaper, seashells, and, of course, a wooden surface to attach the shells to. Ensure that your seashells are clean and your wooden surface is prepared for optimal adhesion.
Prepare the Surface:
To achieve a strong bond between the seashells and wood, proper surface preparation is essential. Begin by sanding the area where you plan to attach the seashells. This creates a rough surface that enhances adhesion. Before moving forward, meticulously remove any dust or debris from the sanded area to ensure a pristine bonding surface.
Mix the Epoxy Resin:
Follow the manufacturer’s instructions to mix the epoxy resin accurately. Typically, this involves combining resin and hardener in specific ratios. Thoroughly blend the components in a mixing container using stirring sticks until they are seamlessly combined. As you work with epoxy resin, remember to protect yourself by wearing gloves and working in a well-ventilated area.
Apply a Thin Layer of Resin:
Using a small brush or sponge applicator, delicately apply a thin layer of epoxy resin onto the wooden surface. This acts as a primer, enhancing adhesion and creating a solid foundation for your seashells. Ensure that you evenly cover the entire area where you plan to attach the seashells, leaving no gaps.
Place the Seashells:
With the epoxy resin still wet, carefully place your seashells onto the wooden surface. Arrange them in a pattern or design that pleases your artistic eye. Gently press the seashells into the resin, creating a secure and long-lasting bond. Exercise caution to avoid applying excessive pressure, as this could damage or displace the shells.
Add More Resin (Optional):
If desired, you can choose to add another layer of epoxy resin on top of the seashells. This additional layer provides extra protection and durability for your seashell art. Be mindful not to apply an excessive amount of resin that may overflow or create an untidy appearance.
Marine-Grade Adhesive: Benefits and Application Tips
Immerse yourself in the beauty of the ocean with beach-themed decor that lasts a lifetime. Marine-grade adhesive is your secret weapon for bonding seashells to wood, creating captivating and enduring pieces that bring the coastal charm into your home. In this article, we will delve into the exceptional benefits of marine-grade adhesive, along with some expert tips to ensure flawless application.
Unrivaled Strength and Endurance:
Prepare to be amazed by the sheer strength and durability of marine-grade adhesive. Crafted to withstand the harsh marine environment, this adhesive possesses extraordinary resilience. When securing seashells to wood, rest assured that the bond will stand the test of time. From exquisite seashell frames to intricate mirror accents, marine-grade adhesive guarantees a secure attachment that will endure for years to come.
Impenetrable Watertight Seal:
Bid farewell to water-induced damage with marine-grade adhesive as your steadfast ally. Ensuring a watertight seal between seashells and wood, this adhesive shields against moisture infiltration that could lead to detachment or decay. Your seashell creations will remain intact and pristine, shielded from any water exposure that might compromise their natural allure.
Exceptional Chemical Resistance:
Navigate the treacherous waters of seawater with confidence, thanks to the exceptional chemical resistance of marine-grade adhesive. While regular adhesives succumb to the corrosive elements found in marine environments, this specialized glue endures unscathed. By using marine-grade adhesive, you fortify your seashell decorations against the harm caused by salt and algae, ensuring their longevity and beauty.
Effortless Application:
The application process becomes a delightful breeze when working with marine-grade adhesive. Packaged in a convenient tube compatible with standard caulking guns, this adhesive offers effortless control over the amount applied, resulting in precise and clean bonds. Whether you are a seasoned DIY expert or a novice, using marine-grade adhesive is a seamless and user-friendly experience.
Versatility Across Materials:
Embrace the freedom to explore different materials with the versatility of marine-grade adhesive. Designed to bond various substrates, this adhesive is perfectly suited for attaching seashells to a wide range of wood types. Be it hardwood, plywood, or even reclaimed wood, marine-grade adhesive guarantees impeccable adhesion and compatibility, unleashing your creativity without limitations.
Super Glue: Pros and Cons
When it comes to creating captivating beach-themed decor, super glue is a go-to adhesive for attaching seashells to wood. This fast-acting adhesive offers numerous advantages, but it’s essential to be aware of its limitations as well. In this article, we will dive into the pros and cons of using super glue for attaching seashells to wood, so you can make an informed decision for your next coastal-inspired project.
Pros:
Strong Bond:
Super glue creates a durable and reliable bond between seashells and wood, forming a tight seal that can withstand various stresses and strains. Rest assured that your seashells will stay securely in place.
Quick Setting Time:
One of the most significant advantages of super glue is its lightning-fast drying time. Unlike other adhesives that require hours to dry, super glue sets within seconds. This is particularly beneficial when working with delicate seashells that may be easily damaged if held in place for too long.
Versatility:
Super glue excels on various surfaces, including wood and seashells. Whether you’re attaching small seashell fragments or larger shells to wooden surfaces, this adhesive can provide a secure bond. Its versatility makes it a reliable choice for any project.
Easy Application:
Applying super glue is a breeze. It comes in convenient squeeze bottles or tubes, eliminating the need for additional tools or equipment. With its liquid consistency, you can achieve precise application even on small and intricate areas.
Transparent Finish:
Once dried, super glue creates an almost invisible bond between seashells and wood, preserving the natural beauty of both materials. The transparency of the adhesive ensures that the overall aesthetic appeal of your project remains uncompromised.
Cons:
Brittle Bond:
While super glue initially provides a strong bond, it can be susceptible to breaking under extreme pressure or impact. It’s crucial to handle your finished project with care, as significant force such as dropping or rough handling can weaken or break the bond altogether.
Limited Repositioning:
Once super glue sets, repositioning the seashells becomes challenging if they are not aligned correctly. Planning the arrangement of the seashells beforehand and ensuring precise placement during application is essential. Take your time and double-check before committing to the bond to avoid any regrets.
Considerations When Choosing a Glue for Seashells to Wood
Picture this: a stunning display of seashells delicately adorning a wooden surface, capturing the essence of coastal beauty. But before you embark on your beach-themed decor project, let’s talk about the most crucial element – the glue. As an expert in all things seashell, I’ve gathered a treasure trove of considerations to guide you in selecting the ideal adhesive. So gather your seashells, fasten your seatbelt, and let’s embark on this captivating journey.
Adhesive Strength:
In this delicate dance between seashells and wood, selecting a glue with unwavering adhesive strength is paramount. Seek out glues specially formulated for bonding porous materials like wood and shells. You need an adhesive that will ensure your precious shells remain securely attached to the wood surface, as steadfast as a sailor’s knot.
Compatibility:
Picture the heart-wrenching sight of your beautiful seashells or wood surface deteriorating due to an incompatible glue. To avoid this dreaded scenario, choose a glue that harmonizes with both the seashells and wood. Test the glue on a small, inconspicuous area before proceeding with your grand vision. No regrets shall shadow your masterpiece.
Drying Time:
Patience becomes an art form when it comes to bonding seashells to wood. Each glue boasts its unique drying time, so select one that allows ample time for positioning and aligning the shells before it sets. Rushing through this step risks misalignment or incomplete bonding – a fate we must vigilantly avoid.
Water Resistance:
Seashells and water share an unbreakable bond, just like sand between your toes. To ensure your shells withstand even the most humid or wet conditions, embrace a glue with remarkable water-resistant properties. Seek out glues labeled as water-resistant or waterproof. Let the waves crash without fear of your shells losing their cherished place.
Clear and Transparent:
Envision your seashells basking in the limelight on the wooden surface – a sight to behold. To preserve their natural allure, select a glue that dries clear and transparent. Reject the notion of a project marred by a yellowish tint or visible residue left by the adhesive. Allow the beauty of both shells and wood to radiate unhindered.
Preparing the Surfaces Before Gluing Seashells to Wood
In our previous section, we embarked on a captivating journey to find the perfect adhesive for your seashell and wood masterpiece. Today, as an expert in the field, I will guide you through the essential steps of preparing the surfaces before gluing seashells to wood, ensuring a bond that will withstand the test of time. So, let’s dive in and unlock the potential of your creation.
Step 1: Cleanliness is Key
To create a flawless bond between seashells and wood, cleanliness is paramount. Use a soft brush or cloth to remove any dirt, debris, or residue that may hinder the adhesion process.
Step 2: Bid Farewell to Algae and Barnacles
Algae and barnacles may have hitched a ride on your seashells during their aquatic adventures. Gently scrape them off with a blunt tool, ensuring not to damage the delicate shells.
Step 3: Sanding for Success
Achieve optimal adhesion by sanding the wood surface with fine-grit sandpaper. Allow the texture to become rough, providing a strong gripping surface for the glue.
Step 4: Dust Off and Get Ready
After sanding, eliminate any remaining dust or particles with a clean cloth or tack cloth. This meticulous step guarantees a pristine surface ready for gluing.
Step 5: Primer Power
For enhanced adhesion and protection against moisture, apply a primer or sealer suitable for both wood and seashells. Follow the manufacturer’s instructions and allow it to dry completely, adding an extra layer of durability.
Step 6: Paint Before You Glue
If you plan on painting the wood surface, do so before gluing the seashells. This precautionary measure prevents any accidental paint transfer onto the shells, preserving their natural allure.
Step 7: Compatibility Check
Before committing to the final bonding, ensure compatibility by testing the glue on a small area of both the seashell and wood surface. This step allows for adjustments and ensures a strong and lasting bond.
Testing the Glue on an Inconspicuous Area Before Application
Before you take the plunge into gluing, there’s a vital step that can determine the outcome of your masterpiece – testing the glue on an inconspicuous area. In this section, we’ll delve into the significance of this crucial step and explore how it guarantees a flawless bond between seashells and wood.
Why Testing is Crucial:
Unshakeable Adhesion:
Picture this: you’ve painstakingly arranged your seashells, only to have them come loose within days. By testing the glue on an inconspicuous area, you can gauge its adhesion to both materials. This allows you to select a glue with unwavering bonding strength, ensuring your seashells remain firmly in place.
Damage Prevention:
No one wants their beautiful seashell and wood creation marred by unsightly damage or discoloration. Testing the glue on an inconspicuous area, such as the back or underside of the wood, helps uncover any potential undesirable effects before applying it to visible areas. This way, you can avoid unpleasant surprises once your project is complete.
The Testing Process:
Exploring Glue Types:
To find the perfect adhesive for your project, gather an assortment of glues known for their adhesive properties. Consider using epoxy, super glue, or specialized seashell adhesives. Each type boasts unique characteristics that impact bonding strength and compatibility.
Applying with Precision:
Apply a small amount of each glue type to the inconspicuous area of the wood, meticulously following the manufacturer’s application and drying time instructions.
Firmly Pressing Seashells:
Press a seashell onto each glued area with firmness. This crucial step allows you to assess the bonding strength of each glue and detect any visible signs of damage or discoloration.
Compatibility Considerations:
Take into account the compatibility of the glue with both the seashells and wood. Certain glues may react differently to specific types of shells or particular wood finishes, resulting in unsightly discoloration or damage. Testing the glue beforehand empowers you to identify and sidestep these potential issues.
b8BJySYuV50″ >
Conclusion
After conducting extensive research and testing, it is clear that finding the best glue for seashells to wood is crucial for ensuring a secure and long-lasting bond. The adhesive must possess specific qualities to withstand the challenges posed by these two different materials. While there are various options available, one glue stands out as the top choice: epoxy resin.
Epoxy resin offers exceptional bonding strength and durability, making it ideal for attaching seashells to wood. Its ability to create a strong bond that can withstand moisture, temperature changes, and other environmental factors is unparalleled. Additionally, epoxy resin dries clear, ensuring that it won’t detract from the natural beauty of the seashells or wood.
Another advantage of using epoxy resin is its versatility. It can be used on a variety of wood surfaces, including plywood, hardwood, and even driftwood. Whether you’re working on small seashell crafts or larger woodworking projects, epoxy resin provides a reliable and robust solution.
To ensure successful adhesion when using epoxy resin, proper preparation is essential. Start by cleaning both the seashells and wood surface thoroughly to remove any dirt or debris. Next, lightly sand the wood surface to create a rough texture that will enhance the bond with the glue. Apply the epoxy resin according to the manufacturer’s instructions and press the seashells firmly into place.
It’s important to note that while epoxy resin is an excellent choice for bonding seashells to wood, it does require careful handling due to its strong adhesive properties. Ensure proper ventilation when working with this glue and follow all safety precautions recommended by the manufacturer.
In conclusion, when it comes to attaching seashells to wood, epoxy resin emerges as the best glue option available. Its superior bonding strength, durability, versatility, and clear drying properties make it an ideal choice for achieving a secure and visually appealing bond between these materials.