Today, we’re delving into the awesome world of Sugru moldable glue and its curing process. If you’ve ever needed a quick fix or wanted to get creative with your DIY projects, Sugru is about to become your new best friend.
This magical stuff combines the strength of silicone with the convenience of glue, making it a total game-changer. But here’s the burning question: how long does it take for Sugru to cure?
Whether you’re a seasoned DIYer or just starting out on your crafting journey, this is a query that deserves some attention. In this article, we’ll uncover all the secrets behind Sugru’s curing time, giving you all the deets you need to make the most of this incredible product.
So let’s dive in and find out exactly how long it takes for Sugru moldable glue to work its magic.
Understanding the Curing Process
Contents
- 1 Understanding the Curing Process
- 2 Factors Affecting Curing Time
- 3 Typical Curing Times for Sugru Moldable Glue
- 4 Accelerating or Slowing Down the Curing Process
- 5 Testing the Cured State
- 6 Common Mistakes or Challenges
- 7 Preparing Surfaces for Better Bonding
- 8 Tips and Tricks for Working with Sugru
- 9 Conclusion
Immerse yourself in the fascinating world of Sugru moldable glue, a remarkable adhesive that starts as a pliable substance and transforms into a solid and durable material. To truly harness the bonding power of this versatile glue, it is essential to comprehend the intricacies of its curing process. In this article, we will take a deep dive into the world of Sugru and unravel how it evolves from a flexible state to a robust and unyielding entity.
The Curing Process:
Once applied, Sugru embarks on a captivating journey known as the curing process, a chemical reaction that gradually hardens this moldable glue. During this metamorphosis, the molecular structure of Sugru undergoes a remarkable transformation, transitioning from a supple and malleable state to an inflexible and sturdy form. This extraordinary change allows Sugru to forge potent bonds with an array of surfaces, ensuring lasting durability.
Factors Affecting Curing Time:
Numerous factors can influence the curing time of Sugru moldable glue, including:
- Temperature: The temperature plays a pivotal role in the curing process. Higher temperatures act as catalysts, expediting the reaction and resulting in faster curing times. Conversely, colder temperatures impede progress, slowing down the transformation and prolonging the time required for Sugru to reach its full potential.
- Thickness of Application: The thickness of the applied layer also influences curing time. Thicker applications demand more time to cure completely compared to their thinner counterparts. To achieve optimal results, exercise patience and allow ample time for thicker layers to solidify fully.
- Humidity: Though humidity does not exert a significant impact on Sugru’s curing time, it is advisable to avoid applying it in excessively humid conditions. High humidity may potentially compromise the adhesive properties and bonding strength of this remarkable glue.
Typical Curing Times:
On average, Sugru takes approximately 24 hours to cure completely. However, it is worth noting that while the glue may feel solid after a few hours of application, it might not have reached its maximum strength until the full curing time has elapsed. Additionally, variations in curing times may exist based on different colors or formulations of Sugru.
Accelerating or Slowing Down the Curing Process:
When time is of the essence, there are techniques you can employ to expedite the curing process. Placing Sugru near a heat source or gently applying heat with a hairdryer can activate the reaction and accelerate solidification. However, it is crucial to exercise caution and avoid excessive haste, as this may compromise the quality of the bond. Refrain from subjecting Sugru to high heat or baking it in an oven, as this may cause it to lose its adhesive properties.
Factors Affecting Curing Time
Today, we embark on a thrilling journey into the captivating realm of curing time and its profound impact on the performance of Sugru moldable glue. Whether you’re a seasoned DIY aficionado or simply curious about the science behind glue, this article promises to unravel the mysteries behind the factors that shape the curing process. Brace yourselves for an enlightening exploration.
Temperature: The Heat is On.
Temperature takes center stage in the Sugru spectacle. Like a beautifully choreographed dance routine, higher temperatures accelerate curing, while lower temperatures slow it down. To discover the sweet spot, aim for an environment between 15°C to 25°C (59°F to 77°F). However, brace yourself for a touch more patience if you find yourself in colder climes, as the glue may take longer to reach maximum strength.
Thickness of the Layer: Thin is In.
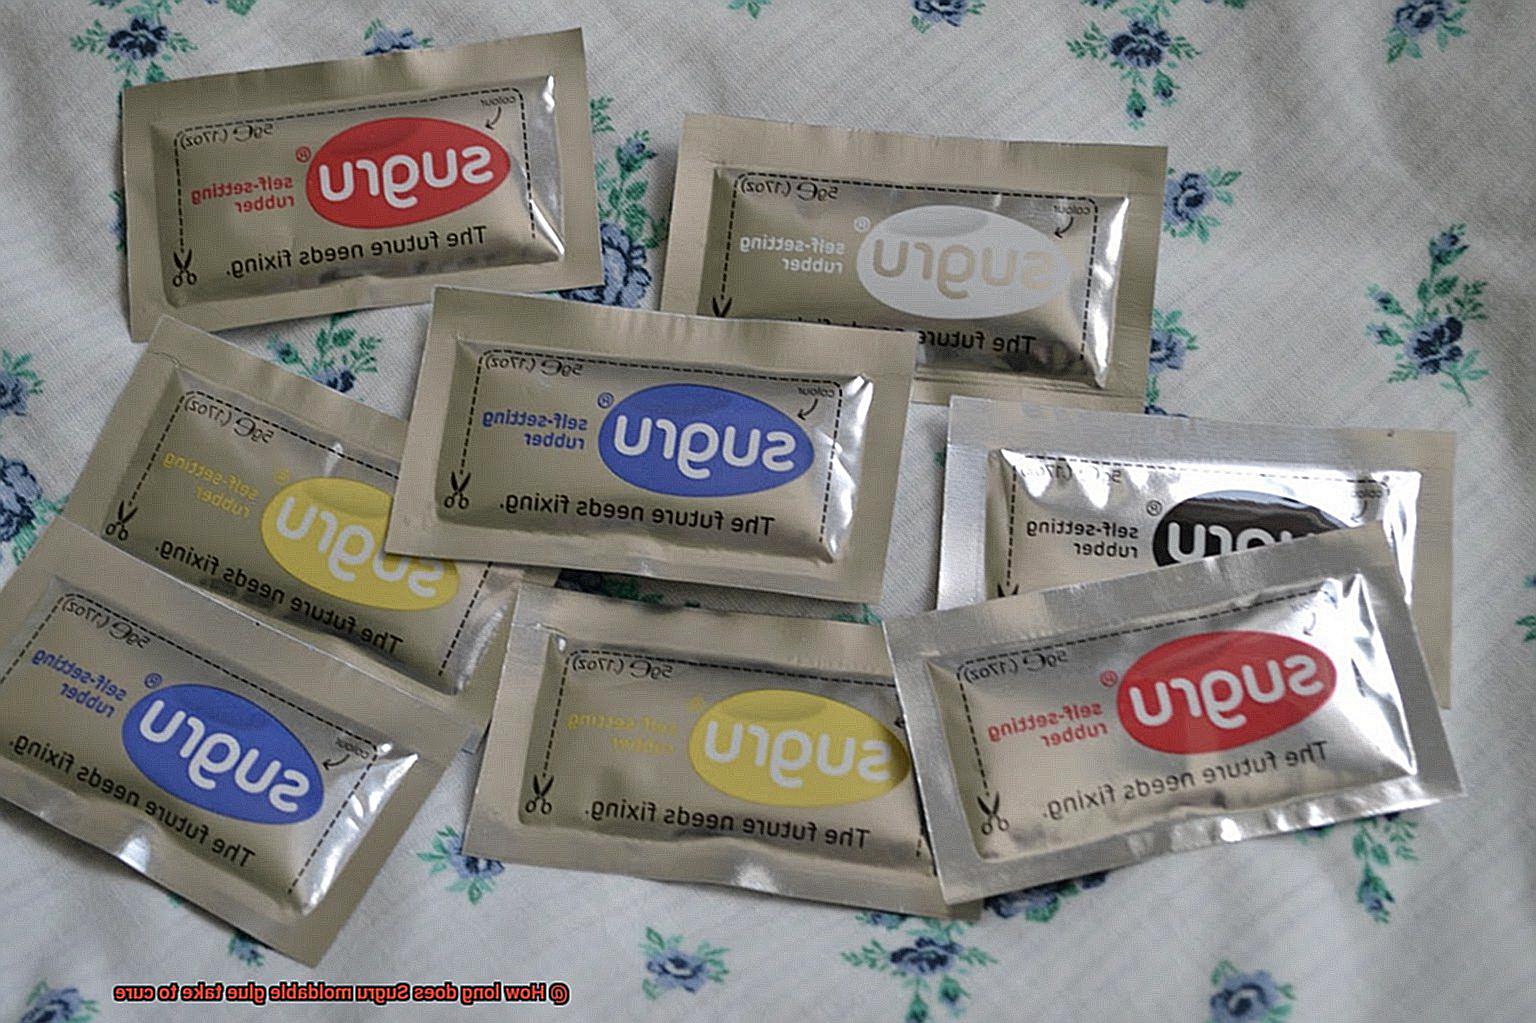
Imagine your Sugru application as a work of art. Thicker layers demand more time to cure since oxygen must penetrate through the entire layer for complete solidification. On the other hand, thin layers facilitate efficient oxygen penetration, resulting in a quicker curing process. Remember, the key to optimal results lies in applying Sugru in thin layers that allow for swift and effective curing.
Humidity: It’s Getting Steamy.
Humidity levels can throw an unexpected curveball into your Sugru game. In high humidity environments, excess moisture in the air can impede curing by interfering with the necessary chemical reactions. To avoid any hiccups in the process, shield uncured Sugru from high humidity conditions that may hamper its effectiveness.
Substrate Material: Material Matters.
The type of material you’re working with also exerts its influence on curing time. Porous materials like fabric or wood tend to absorb some moisture from the glue, resulting in slower curing times. In contrast, non-porous surfaces such as glass or metal allow for faster curing due to reduced moisture absorption. Understanding your substrate material will empower you to estimate curing time with precision.
Mixing and Application: The Art of the Blend.
To attain glue perfection, impeccable mixing and application techniques are the keys to success. Thoroughly knead Sugru before application to ensure a consistent distribution of its components, guaranteeing uniform curing. Applying Sugru evenly, without any gaps or air pockets, fosters efficient curing. A touch of finesse during these vital steps will set you up for triumph.
Typical Curing Times for Sugru Moldable Glue
In this exploration, we will delve into the enchanting topic of its typical curing times. Like a graceful ballet, the curing process is influenced by various factors that we will uncover together.
Factor 1: Thickness Matters:
Just as a prima ballerina’s delicate pirouette depends on balance, thinner layers of Sugru tend to cure faster than thicker ones. When working with a small repair or applying a petite amount, expect curing within 12-18 hours. However, if your project requires a substantial amount or a thick layer of Sugru, patience is key as it may take closer to the full 24 hours to achieve its desired strength.
Factor 2: Temperature’s Influence:
Temperature sets the stage for the Sugru ballet. Warmer temperatures accelerate curing, while colder ones slow it down. Aim for an ambient temperature around room temperature (20-25°C or 68-77°F) for optimal results. Remember, Sugru needs warmth to perform its magic.
Factor 3: Surface Symphony:
The type of surface you apply Sugru onto can affect its curing time. Smooth and non-porous surfaces create an ideal stage for rapid curing. However, rough or porous surfaces may prolong the process. So if you’re working on a textured or uneven surface, be patient and allow extra time for Sugru to fully bond.
Factor 4: Handling with Care:
During the curing process, Sugru may feel slightly sticky or soft to the touch. Don’t fret. It’s still in the midst of its transformation. However, avoid putting excessive stress on it until it reaches its full strength after 24 hours. Treat it delicately like a budding masterpiece.
Accelerating or Slowing Down the Curing Process
As you embark on your creative journey, it’s crucial to comprehend how temperature, humidity, and glue thickness can impact the curing process. In this article, we will explore a plethora of techniques to accelerate or decelerate the curing process, empowering you with full control over your projects.
Accelerating the Curing Process:
- Temperature: Like a warm embrace, increasing the temperature in your curing environment can expedite chemical reactions. Aim for a cozy range of 20-25°C (68-77°F) to optimize curing time. But beware. Too much heat can weaken the bond, so find that sweet spot.
- Thickness: Think of it as an elegant dance; thinner layers of Sugru glue cure faster. Spread it evenly and eschew excessive buildup to expedite the process. Your creations will be ready for action in no time.
Slowing Down the Curing Process:
- Temperature: Sometimes you need a little more time to perfect your masterpiece. Lowering the temperature in your curing environment can decelerate chemical reactions, granting you greater flexibility. Just be cautious not to chill it too much, as this may halt the curing process entirely.
- Humidity: Picture a gentle mist enveloping your project. Increasing humidity in the curing environment can extend working time and allow for better shaping and positioning. A damp cloth or humidifier can help create the ideal balance, but don’t overdo it – excessive humidity may hinder proper curing.
Testing the Cured State
In this article, we will guide you through the process of testing the cured state of Sugru, ensuring that your DIY projects or repairs are held together with a reliable and durable bond. Let’s dive in and discover the secrets to a rock-solid bond.
The Curing Time:
Sugru typically takes around 24 hours to fully cure. However, keep in mind that thicker applications and colder temperatures may require additional time. Remember, patience is key. Rushing the curing process can compromise the strength and longevity of the bond.
Physical Tests:
To test if Sugru has cured, start by gently touching the surface. If it feels firm and is no longer sticky, congratulations. You’re on the right track. For a deeper examination, press your fingernail into the surface. If there are no visible marks or indentations, your Sugru has hardened properly.
Stress and Load-Bearing Tests:
For ultimate confidence in the strength of your cured Sugru, apply slight pressure or tension to the glued area. Bend or flex the material where the glue has been applied. If it withstands without cracking or breaking, you can be confident in its solidity and durability.
Environmental Tests:
For a comprehensive assessment, subject the cured Sugru to different environmental conditions. Test its resistance to extreme temperatures or moisture to evaluate its suitability for specific applications. Will it hold up under pressure? Only thorough testing will reveal the true capabilities of your cured Sugru.
Conclusion:
By following these simple testing methods, you can accurately determine if your Sugru moldable glue has reached its fully cured state. Remember to consider factors such as curing time, temperature, and thickness during the testing process.
Common Mistakes or Challenges
However, like any product, there are common mistakes and challenges that can arise when it comes to curing Sugru. In this article, we will explore these obstacles and provide practical solutions to help you master the art of using Sugru with ease.
Timing is Everything:
One of the most common mistakes users make is not allowing enough time for proper curing. While it’s tempting to rush the process, Sugru requires patience. It needs time to fully cure and develop its maximum strength. To achieve perfect results, resist the urge to cut corners and give it the recommended curing duration.
Striking the Right Balance:
Using too much or too little glue can affect the quality of your bond. Applying an excessive amount can prolong the curing process or compromise adhesion. Conversely, using too little glue may result in weak bonding or inadequate coverage. To strike the perfect balance, follow the recommended guidelines and ensure optimal results.
Surface Preparation is Key:
Properly preparing the surface before applying Sugru is crucial for a successful bond. Ensure that the surface is clean, dry, and free from grease or debris. Neglecting this step can hinder adhesion and lead to disappointing results. Take the time to prepare the surface properly for a strong and durable bond.
Temperature’s Influence:
Extreme temperatures can impact the curing process of Sugru moldable glue. Both hot and cold conditions can affect its performance. Always check the recommended temperature range for proper curing and avoid exposing your glued object to extreme environments during this crucial period. Temperature control is essential for achieving optimal results.
Patience Rewarded:
Rushing through the curing process is a recipe for disaster. Be patient and allow ample time for Sugru moldable glue to fully cure. Premature handling or movement of the bonded object can result in weak bonds or even detachment. Remember, good things come to those who wait. Patience is a virtue when it comes to achieving perfect results.
Preparing Surfaces for Better Bonding
Look no further. In this article, we will explore the essential steps you need to take to prepare surfaces for better bonding with Sugru moldable glue. Whether you’re fixing a broken ceramic mug or creating a custom solution for your household needs, these tips will ensure a strong and durable bond that stands the test of time.
Step 1: Thoroughly Clean the Surface
To achieve optimal adhesion, we must start with a clean slate. Any dirt, dust, or grease can hinder the bonding process. Take a moment to envision a spotless surface before applying Sugru. Use a mild detergent or an alcohol-based cleaner to remove any contaminants. After cleaning, allow the surface to air dry completely before moving on.
Step 2: Roughen Smooth Surfaces
For exceptionally smooth or non-porous surfaces like glass or metal, we need a little roughening up. Think of it as creating tiny mountains and valleys for Sugru to grip onto. Use sandpaper or a wire brush to create a slightly rough texture. This simple step will provide more surface area for the Sugru to adhere to, enhancing the bond strength.
Step 3: Remove Loose Material
To ensure optimal adhesion, gently scrape or sand any loose or flaking material from the surface. Imagine clearing away debris from a path, allowing for smooth and uninterrupted travel. A smooth and debris-free surface will allow Sugru to form a strong bond that won’t let you down.
Step 4: Consider Using a Primer for Porous Surfaces
If you’re working with porous materials such as wood or fabric, applying a primer can greatly improve adhesion. Picture it as creating an adhesive foundation for Sugru to cling onto. A primer seals the pores and provides a smoother surface for Sugru to bond to. Choose a primer compatible with both the surface material and Sugru for optimal results.
Step 5: Apply Sugru
Now it’s time to bring your creation to life. Knead a small amount of Sugru until it becomes soft and pliable, like clay in your hands. Press it onto the prepared surface and shape it as desired. Picture yourself sculpting with Sugru, ensuring good contact between the moldable glue and the surface. Let your creativity shine.
Step 6: Allow Sufficient Curing Time
After application, give Sugru ample time to cure. Imagine it as a cocoon transforming into a butterfly. Though touch-dry within 30 minutes, the full curing process usually takes around 24 hours. Don’t rush this step. Leaving Sugru undisturbed during curing ensures a proper bond that will withstand the test of time. Refer to the specific instructions provided by Sugru for optimal curing times in different conditions.
Tips and Tricks for Working with Sugru
Sugru is a remarkable moldable glue that has the power to fix, modify, and create an array of objects. Whether you’re repairing broken belongings, customizing tools, or unleashing your creativity with DIY projects, Sugru is the ultimate solution. To ensure professional-looking results, here are some invaluable tips and tricks to follow.
Prep the Surface:
Before applying Sugru, it’s crucial to prepare the surface properly. Ensure that it is clean and dry, as this will guarantee better adhesion and a stronger bond. Rid the area of any dust, dirt, or grease to achieve optimal results.
Warm it Up:
To make Sugru more pliable and easier to work with, warm it up in your hands before using it. This simple step softens the material, making it akin to sculpting with warm clay. By doing so, you’ll have greater control over shaping and molding it exactly as desired.
Use Gloves:
Wearing gloves while working with Sugru has two significant benefits. Firstly, it prevents any sticky residue from getting on your hands, saving you from a messy cleanup process. Secondly, it enhances your ability to manipulate the Sugru without it sticking excessively to your skin.
Smooth it Out:
To achieve a truly professional finish, wet your fingertips with a small amount of water or use a damp cloth to smooth out the surface of Sugru. This simple technique allows you to effortlessly shape and mold it, leaving no visible marks behind. Your creations will look seamlessly flawless.
Support and Shape:
If you’re working on a vertical surface or need to hold Sugru in place while it cures, consider using masking tape or other support materials. This will keep the Sugru in position until it sets completely, ensuring that your project stays intact and achieves the desired shape.
Get Creative:
One of the most exciting aspects of working with Sugru is the freedom to explore and experiment with different shapes and patterns. Don’t be afraid to push the boundaries of your creativity. You can even use a mold or shaping tool to create more precise designs, enabling you to bring your unique ideas to life.
Remember, Sugru typically takes approximately 24 hours to fully cure, but keep in mind that this timeframe can vary based on temperature and the thickness of the application. It’s essential to allow enough time for it to set before subjecting it to stress or load-bearing situations.
bqUwljE45yg” >
Conclusion
The curing time of Sugru moldable glue is an important factor to consider when using this versatile adhesive. So, how long does it take for Sugru to fully cure? Well, you’ll be pleased to know that Sugru typically takes about 24 hours to fully cure and reach its maximum strength.
During this curing process, Sugru transforms from a soft and malleable substance into a durable and flexible rubber-like material. It’s fascinating to witness this transformation as the glue sets and hardens over time.
But don’t worry, you won’t have to wait around for a whole day before your project is ready. Sugru starts to set within 30 minutes of application, allowing you to make any necessary adjustments or fine-tune your creation during this initial stage.
Once the initial setting period is complete, Sugru continues to cure gradually over the next few hours until it reaches its full strength after approximately 24 hours. This gradual curing process ensures that the bond created by Sugru is strong and reliable.
So whether you’re repairing a broken item, customizing your belongings, or creating something entirely new, it’s important to plan ahead and allow enough time for Sugru to cure properly. Patience pays off when it comes to achieving the best results with this remarkable moldable glue.
Remember, once cured, Sugru offers excellent resistance against water, heat, cold temperatures, UV rays, and even some chemicals. This means your repaired or modified objects can withstand the test of time and continue serving their purpose for years to come.
In conclusion, if you’re looking for an adhesive that combines flexibility with strength and durability, then Sugru moldable glue is an excellent choice. With a curing time of approximately 24 hours, it may require some patience but rest assured that the end result will be well worth the wait.

