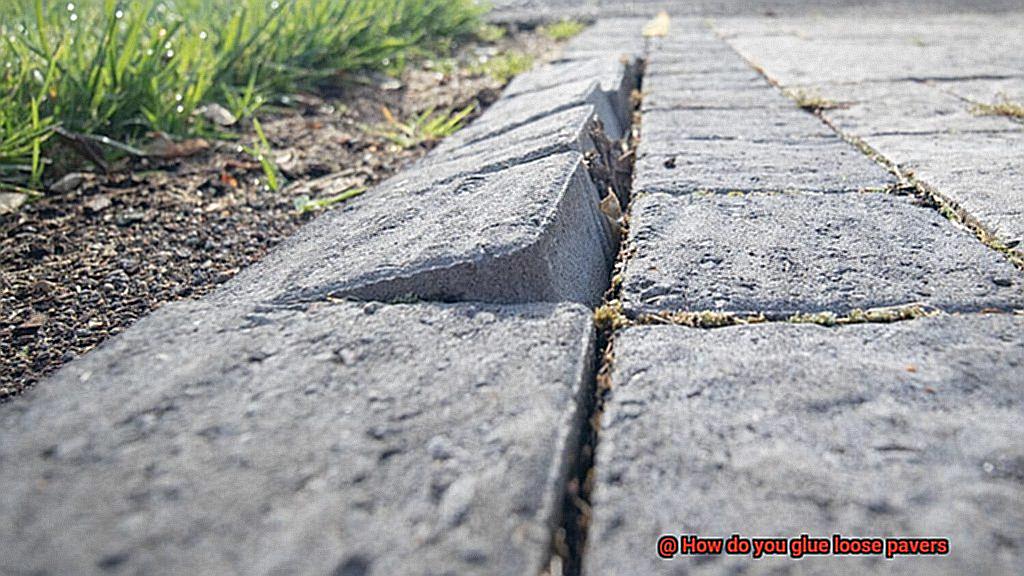
Picture this: a beautiful, well-structured paver pathway or patio that adds a touch of elegance and practicality to your outdoor space. But as time goes by, those once perfectly aligned pavers can start to loosen up, shift around, and just throw off the whole vibe.
Lucky for you, there’s no need to panic. With a little do-it-yourself magic, you can easily bring back the solid foundation and restore the charm of your loose pavers. In this blog post, we’re going to dive deep into the art of gluing loose pavers. It’s an affordable and efficient solution that will have your outdoor surfaces looking top-notch again in no time.
Whether you’re a seasoned DIY pro or just starting out on your home improvement journey, don’t worry – we’ve got your back. So roll up those sleeves, grab your trusty tools, and let’s jump right into this rewarding project of securing loose pavers like a total boss.
What is Paver Adhesive?
Contents
This comprehensive guide will provide you with all the information you need about paver adhesive and how it can effectively glue loose pavers together. Say goodbye to unsightly gaps and unstable surfaces.
Understanding Paver Adhesive
- Definition and purpose of paver adhesive
- Key characteristics: resistance to environmental conditions, ease of application, and weed prevention properties
Selecting the Right Adhesive
- Compatibility with specific paver materials (concrete, brick, or natural stone)
- Tips for choosing the right adhesive based on project requirements and environmental factors
Preparing the Surface
- Cleaning loose pavers and removing dirt, debris, and weeds
- Importance of a clean surface for proper adhesive bonding
Applying the Adhesive
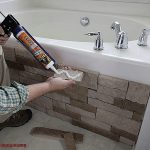
- Techniques for application using a trowel or caulking gun
- Spreading adhesive evenly for a strong bond
Securing and Curing
- Aligning and leveling loose pavers during gluing process
- Tapping with a rubber mallet to remove air bubbles and ensure secure bond
- Recommended curing time for full setting of adhesive
Sealing for Longevity
- Benefits of sealing glued pavers to protect against stains, water damage, and UV rays
- Types of sealants available and application process
Preparing the Loose Pavers for Glue Application
In this comprehensive guide, we will walk you through the steps to prepare loose pavers for glue application, ensuring a strong and long-lasting bond that will make your project the envy of the neighborhood.
First things first, let’s start with a clean slate. Grab a broom or a vacuum cleaner and give those loose pavers a good cleaning. Removing any dirt, debris, or loose particles from the surface is crucial for the glue to adhere effectively.
Next, inspect each paver for any signs of damage or cracks. It’s better to replace any damaged pavers with new ones before moving forward. Using damaged pavers can compromise the stability and appearance of your project, so it’s best to nip that problem in the bud.
Now that you have a clean and damage-free surface, it’s time to level the playing field. Ensure that the surface where the pavers will be placed is level and even. If there are any uneven areas, use a leveling compound or sand to create a smooth surface. This step will help in achieving a uniform look and prevent any movement or shifting of the pavers once they are glued.
Before diving into the gluing process, it’s essential to test fit the loose pavers in their intended positions. This step allows you to make any necessary adjustments or modifications before permanently attaching them with glue. Take your time to ensure that each paver fits correctly and aligns with adjacent ones.
Now that you have tested the fit, it’s time to plan the layout. Consider factors such as symmetry, patterns, and spacing between each paver. Having a well-thought-out layout will contribute to an aesthetically pleasing result.
To maintain alignment during the gluing process, mark reference lines on the surface where the pavers will be placed. These lines will serve as a guide when applying the glue and help in achieving a precise and consistent placement.
Gather all the necessary supplies before proceeding with the glue application. This may include a high-quality adhesive specifically designed for pavers, a trowel or putty knife for spreading the glue, and any additional tools required based on the specific product you are using.
Applying Paver Adhesive
In this comprehensive guide, we will take you through the essential steps of applying paver adhesive, ensuring that those pavers stay firmly in place for years to come.
To begin, it is crucial to thoroughly clean the surface of the pavers. Sweep away any dirt, debris, or unwelcome weeds that have managed to sneak their way between the pavers. For a more thorough cleaning, consider using a pressure washer. Remember, a pristine surface is fundamental for achieving proper adhesion.
Once the pavers are sparkling clean, exercise patience and allow them to dry completely. Moisture can impede the adhesive’s ability to bond effectively. So resist the temptation to rush ahead and give those pavers ample time to dry out.
Now, let’s get down to business. Grab a trusty trowel or opt for the convenience of a caulk gun. Apply the adhesive in a thin and even layer on the back of each paver. Pay heed to the manufacturer’s instructions – they possess the wisdom for your specific adhesive.
For an extra layer of security, consider applying adhesive to both the paver and the surface it will be adhered to. This double-sided approach will ensure an exceptionally strong bond, providing you with unparalleled peace of mind.
With the adhesive skillfully applied, gently press down each loose paver into its rightful place. Take your time and meticulously align them with adjacent pavers. Let no crooked lines mar your splendid project.
Uh-oh. Has some excess adhesive oozed out between the pavers? Not to worry. Swiftly wipe it away with a damp cloth or sponge before it has a chance to dry and harden.
Now comes the most challenging part – waiting. Allow sufficient time for the adhesive to cure and set before venturing onto your newly paved surface. Remember, the curing time can vary depending on the adhesive, so consult the manufacturer’s recommendations for precise guidance.
Keep in mind that regular maintenance is vital to preserving the secure bond of your pavers. Periodically inspect for any signs of loosening or cracks and promptly reapply adhesive as needed. This proactive approach will guarantee the longevity and stability of your beautifully paved area.
Securing the Pavers in Place
Imagine strolling along a magnificently paved patio or driveway, relishing the beauty around you, when suddenly, your foot sinks into a loose paver. It’s not only frustrating but also hazardous. Thankfully, with the right materials and techniques, you can secure those pavers in place, transforming your space into a stable and visually captivating oasis.
One highly effective method for securing pavers is by using polymeric sand. This remarkable sand acts as a binding agent when combined with water. Simply sweep it into the joints between the pavers and moisten it to activate the binding process. As it dries, this sand hardens, creating a solid foundation that effectively locks the pavers in place. It’s a simple and cost-effective solution that provides exceptional stability.
For those seeking an even stronger bond, consider using outdoor-specific construction adhesive. These adhesives are weather-resistant and firmly attach the pavers to the surface they rest upon. Apply the adhesive to the underside of each paver before laying them down, ensuring a secure attachment that will withstand the test of time.
To maximize stability, some individuals opt for a combination approach using both adhesive and polymeric sand. Apply adhesive to the edges of the pavers and fill the joints with polymeric sand. This double-layered technique prevents any movement or shifting of the pavers, guaranteeing unparalleled stability.
However, remember that proper surface preparation is crucial when using adhesives or polymeric sand. Ensure that the area where the pavers will be laid is immaculately clean, dry, and free of debris. This creates an ideal surface for a robust bond, eliminating any possibility of future loosening or shifting.
In certain cases, particularly when dealing with larger or heavier pavers, additional reinforcement may be necessary. This is where edge restraints come into play. By installing edge restraints or bordering materials around the perimeter of the paved area, you can firmly hold the pavers in place, preventing any movement or shifting over time. This extra step provides added stability and peace of mind.
Regular maintenance is essential to keep your pavers securely in place. Regularly inspect the paved area for any signs of movement or loosening, addressing any issues promptly. Additionally, keep the joints filled with polymeric sand and reapply adhesive as needed to maintain a secure installation.
Curing the Adhesive
But before you embark on this creative journey, let’s delve into the often underestimated yet vital step of curing. In this article, we will unravel the secrets behind the importance of proper curing in achieving flawless paver adhesion. Get ready to unlock the potential for a durable and long-lasting masterpiece.
Demystifying the Curing Process:
Behold, the enchanting moment when adhesive transcends into its full glory, bonding your loose pavers together. Imagine it as a dance of strength and resilience, where your glue flexes its muscles to create an unbreakable bond. However, remember that not all adhesives are made equal. To ensure success, consult the manufacturer’s instructions for specific curing times.
Embrace Patience as Your Ally:
Just like a tantalizing marinade elevates the flavor of a dish, proper curing time bestows a robust and enduring connection between your pavers. Give it at least 24 hours before venturing upon your creation or subjecting it to weight or pressure. Trust me, the wait will be worth it.
Handle With Tender Care:
Treat your glued pavers as delicate works of art during the curing process. No foot traffic or heavy loads should disrupt their bonding journey. Allow them some tranquility to solidify their connection and set the stage for a masterpiece that withstands the test of time.
Nature’s Hand in Curing:
Mother Nature herself plays a role in determining curing time. Temperature, humidity, and ventilation all influence how swiftly your adhesive sets. Watch these variables closely and adapt accordingly to ensure optimal results.
The Resilience Continues:
Even beyond the initial curing phase, your adhesive will continue to gain strength over time. Therefore, exercise patience and avoid subjecting the glued area to excessive use or stress for a few days or weeks. Your pavers will express their gratitude in the long run.
Sealing the Pavers
Sealing the pavers is like putting the finishing strokes on a masterpiece, adding that extra layer of protection and beauty to ensure they stand the test of time. But before we can delve into this process, we must first start with the basics – cleanliness.
Just like a painter prepares their canvas, you need to give your pavers a thorough scrub to remove any dirt, debris, or unsightly stains that may have accumulated over time.
A pressure washer is a powerful tool in this endeavor, as it can blast away stubborn grime and restore your pavers to their former glory.
However, tread lightly and avoid using excessive pressure that could potentially damage the integrity of the pavers themselves.
Once your pavers are squeaky clean, it’s crucial to let them dry completely. Moisture trapped within the pavers can hinder the sealant from adhering properly, so patience is key here. Allow nature to work its magic and ensure your pavers are bone dry before moving forward.
Now comes the exciting part – selecting the right sealant for your pavers. There are two main types to choose from – water-based and solvent-based. Water-based sealants are not only environmentally friendly but also easy to apply. They provide excellent protection against water damage and harmful UV rays. However, they may require more frequent reapplication compared to their solvent-based counterparts.
On the other hand, solvent-based sealants offer superior stain resistance and durability. They can withstand harsh weather conditions with ease and boast a longer lifespan. However, due to their chemical composition, these sealants require careful handling.
Before taking the plunge and applying the sealant, it’s always wise to conduct a small compatibility test in an inconspicuous area. This will ensure that the sealant reacts well with your specific pavers and helps you achieve the desired results.
Now it’s time to get down to business. Whether you prefer a brush, roller, or sprayer, the application method is up to you. The key is to apply the sealant evenly and in thin coats, avoiding puddling or streaking. A methodical approach is essential here to ensure a flawless finish. Depending on the porosity of your pavers, multiple coats may be necessary to achieve optimal protection.
After applying the sealant, it’s crucial to exercise patience once again. Allow the sealant to dry thoroughly before allowing foot traffic or placing any objects on your freshly sealed pavers. The drying time may vary depending on the product you’ve chosen, ranging from a few hours to a day. Remember, haste could ruin all your hard work and leave behind unwanted marks.
But sealing your pavers doesn’t mean you can neglect them. Regular maintenance is essential to keep them looking their best and maintaining their protective shield. This includes periodic cleaning and reapplication of the sealant as needed.
Cleaning Up Excess Adhesive
You’ve just finished gluing down your loose pavers and now it’s time to clean up the excess adhesive. Don’t fret, we’ve got you covered with this step-by-step guide that will help you achieve a clean and professional finish.
Timing is crucial when it comes to cleaning up excess adhesive. As soon as you’re done gluing, grab your cleaning tools and get to work. Cleaning up the excess adhesive while it’s still fresh and pliable will make the process much easier and more effective.
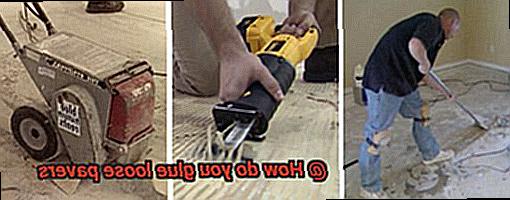
First, use the right tools for the job. Depending on the type of adhesive you used, different tools may be required for cleaning up the excess. For instance, if you used a construction adhesive, a trusty putty knife or scraper can work wonders in removing the excess. If you used a specific paver adhesive, there might even be specialized tools available for this task.
Next, carefully scrape off the excess adhesive using the appropriate tool. Be gentle to avoid damaging the pavers or surrounding areas. Start from the outer edges and work your way towards the center, ensuring that all excess adhesive is removed.
But what if there are stubborn adhesive residues left behind? Fear not. It’s time to bring in the big guns – solvents. Choose a solvent that is safe to use on both the pavers and the surface they are installed on. Apply it to the residue and let it sit for a few minutes before wiping it away with a clean cloth or sponge.
Before using any solvents or cleaning products, it’s always a good idea to test them on a small, inconspicuous area first. This will ensure that they don’t cause any damage or discoloration.
Remember to follow any specific cleaning instructions provided by the manufacturer of the adhesive. Different adhesives may have different requirements for proper cleaning, so it’s important to follow these instructions to ensure a thorough and safe cleaning process.
Once all the excess adhesive has been removed, it’s time to clean the entire area thoroughly. Use a mild detergent and water solution to remove any residue or particles that may have been left behind during the cleaning process. Rinse the area well to ensure a clean finish.
Consulting a Professional for Guidance
In this captivating blog post, we will explore the invaluable benefits of consulting a professional for guidance when it comes to gluing loose pavers. Our focus will be on the adhesive aspect, delving into tailored recommendations, expert advice, additional steps for a secure bond, and maintenance and care tips. Prepare to unlock the secrets to a flawless and long-lasting finish.
Tailored Recommendations:
A Customized Solution: Professionals possess the ability to assess your unique situation and offer personalized solutions. Drawing from their experience and expertise, they can evaluate your pavers, examine the surface they rest upon, and identify any underlying issues contributing to their looseness. Armed with this knowledge, they can recommend the most suitable adhesive for your specific project, ensuring a tailored approach.
Expert Advice:
In-Depth Knowledge: Consulting a professional grants you the opportunity to tap into their wealth of knowledge. They can elucidate the different adhesive options available, highlighting their pros and cons. Furthermore, they can guide you through proper application techniques, providing you with insider tricks for optimal results. With their expert advice, you will gain a profound understanding of the gluing process.
Additional Steps for a Secure Bond:
Pristine Preparation: Professionals can offer guidance on additional steps necessary to ensure a secure bond between your pavers and their foundation. They may suggest cleaning both surfaces meticulously, removing any dirt or debris that could compromise adhesion. Additionally, they may recommend using primers or sealers to enhance bonding and shield against environmental factors such as moisture.
Maintenance and Care:
- Expert Insights: Professionals provide invaluable insights into post-gluing maintenance and care. They can advise you on how to keep your pavers in pristine condition, troubleshoot potential issues that may arise, and impart tips to prolong their lifespan. With their guidance, you can enjoy long-term beauty and functionality.
- Unleash Long-Lasting Results: By seeking professional assistance, you unlock the key to a secure and enduring solution for your loose pavers. The expertise and tailored recommendations of professionals ensure accurate advice for your specific circumstances, offering you peace of mind and assurance of success.
3WL8omrqn6w” >
Also Read: How To Glue Rocks Together?
Conclusion
There is a simple solution: gluing them back in place. With just a few steps, you can have your pavers secure and stable once again.
Firstly, gather the necessary materials. You will need a high-quality construction adhesive specifically designed for outdoor use. Make sure to choose one that is weather-resistant and durable.
Next, prepare the area by cleaning it thoroughly. Remove any debris or dirt that may hinder the adhesive’s effectiveness. A clean surface is crucial for a strong bond.
Now comes the fun part – applying the adhesive. Start by applying a generous amount of adhesive to the underside of the loose paver. Be sure to spread it evenly and cover the entire surface.
Once you’ve applied the adhesive, carefully press the paver back into its original position. Apply firm pressure for a few seconds to ensure proper adhesion. You may want to use a rubber mallet or block of wood to help with this step.
Allow the adhesive to dry completely before walking or driving over the area. This typically takes around 24 hours, but check the product instructions for specific drying times.
And there you have it – your loose pavers are now securely glued in place. Enjoy peace of mind knowing that they won’t budge even under heavy foot traffic or harsh weather conditions.
Remember, when gluing loose pavers, always use caution and follow safety guidelines provided by the manufacturer. If you’re unsure about any step of the process, consult with a professional for expert advice.
So, don’t let loose pavers ruin your outdoor space any longer.