Marble, oh the epitome of elegance and beauty. It’s the material that adds a touch of sophistication to any space. But what happens when you need to stick or repair something on this luxurious surface?
In this blog post, we’ll delve into the best techniques, materials, and tools for successfully bonding something to marble.
Before we dive into the methods, let’s get acquainted with marble’s nature. This rock is famous for its smooth and non-porous surface, which poses quite a challenge when it comes to sticking things onto it. But fear not. With the right approach and a little know-how, you can achieve a bond that will stand the test of time.
How do you glue something to marble?
Contents
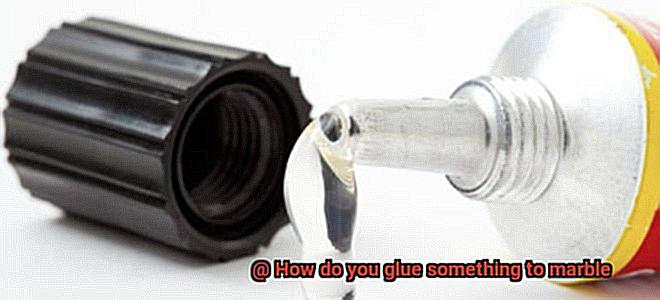
Method 1: Epoxy Adhesives
When it comes to reliability and durability in gluing to marble, epoxy adhesives take center stage. These two-part wonders create a chemical reaction when mixed together, resulting in an unbreakable bond. Just make sure you pick an epoxy specifically designed for stone or marble applications.
Method 2: Silicone Adhesives
For those projects that require flexibility or temporary bonding on marble surfaces, silicone adhesives are your go-to pals. They provide excellent adhesion while allowing some wiggle room—perfect for attaching hooks or small fixtures.
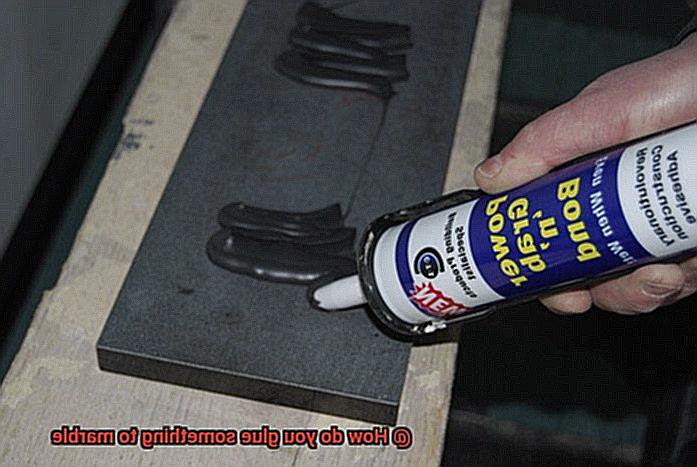
Method 3: Construction Adhesives
If you have bigger or heavier items yearning to be attached to marble, construction adhesives are your trusty companions. These tube-dwelling heroes are specially formulated to bond with various materials, including our beloved marble. Follow the manufacturer’s instructions for optimal results.
Regardless of which method tickles your fancy, proper surface preparation is key for success. Begin by giving that marble surface a thorough scrubbing with a non-abrasive cleaner—no grease, dust, or contaminants allowed. A light sanding can also work wonders for enhancing adhesion.
When it’s time to apply the adhesive, grab a small and precise application tool. Think toothpick or craft stick—something that gives you control and prevents excess adhesive from spreading onto the marble (a headache to remove, trust me).
In conclusion, gluing something to marble requires careful consideration and the right approach. Epoxy adhesives, silicone adhesives, and construction adhesives are all viable options, depending on your project’s size and weight. Remember
Types of Adhesives for Marble
Marble, with its timeless beauty and elegance, is a popular choice for various projects. However, finding the right adhesive to bond marble can be a challenge due to its smooth, non-porous surface. In this article, we will delve into the different types of adhesives used for marble and their unique properties. By understanding these options, you can make an informed decision for your next marble project.
Epoxy Resins: Unrivaled Strength and Durability
Epoxy resins are renowned for their exceptional bonding strength and durability. These two-component adhesives consist of a resin and a hardener, which are mixed together before application.
Epoxy resins form a secure bond between marble and various materials like metal, glass, ceramics, and even other pieces of marble. With resistance to moisture and high temperatures, epoxy adhesives are suitable for both indoor and outdoor applications. Their customizable colors also ensure a seamless blend with the natural beauty of marble.
Polyurethane Adhesives: Flexibility Meets Reliability
Polyurethane adhesives offer flexibility and versatility in bonding marble to materials such as wood, plastic, and concrete. These one-part adhesives do not require mixing before application, making them convenient to use.
Polyurethane adhesives have a longer open time, allowing adjustments to be made before complete curing. They exhibit good resistance to moisture, making them reliable choices for humid or wet conditions.
However, it’s important to note that they may dry with a yellowish hue which may affect the final aesthetic outcome.
Acrylic Adhesives: Quick and Transparent Bonds
Acrylic adhesives strike a balance between strength and flexibility when bonding metals, plastics, or glass to marble surfaces. These one-part adhesives cure quickly and deliver transparent bonds, ensuring minimal visibility of the adhesive.
Acrylic adhesives are resistant to moisture and sunlight exposure without yellowing or deteriorating, making them dependable choices for various indoor and outdoor applications. Their ease of use and fast curing time make them ideal for projects with time constraints.
Silicone Adhesives: Flexible Bonds in High Temperatures
Silicone adhesives are known for their flexibility and ability to withstand high temperatures.
When bonding materials like glass, ceramics, or metal to marble surfaces, silicone adhesives offer a fast curing time and a flexible bond that can withstand movement and vibration.
They are also resistant to moisture, making them suitable for both indoor and outdoor projects. However, it’s important to note that silicone adhesives may not provide the same level of strength as epoxy resins or polyurethane adhesives.
Conclusion:
Choosing the right adhesive is crucial for achieving a strong and durable bond when working with marble. Consider the specific requirements of your project, such as weight, environmental conditions, and desired appearance.
Surface Preparation
Surface preparation is a vital step in ensuring a successful and long-lasting bond when gluing something to marble. By properly preparing the surface, you can enhance the effectiveness of the adhesive and ensure a strong hold. So, let’s dive into the fascinating world of surface preparation for marble.
First and foremost, cleaning is key. Marble surfaces are prone to attracting dirt, dust, and grease, so it’s crucial to give them a thorough cleaning before gluing. Grab a damp cloth or sponge and use a mild detergent or stone cleaner specifically designed for marble. Avoid harsh chemicals that can damage the marble. Gently scrub the surface in circular motions, targeting any stains or grime. Rinse with clean water and dry thoroughly with a soft cloth.
Now comes the fun part – sanding. But remember, moderation is key here. Lightly sand the surface using fine-grit sandpaper or a polishing pad. The goal is to create a slightly rough texture that aids in adhesive adhesion. Avoid applying excessive pressure, as it may cause damage to the marble.
Once you’ve sanded, it’s essential to remove any dust or debris that may have accumulated on the surface. Wipe down the marble once again with a clean, damp cloth to ensure it’s free from particles. Allow the surface to dry completely before proceeding.
Now onto priming. Applying a primer can take your bond from good to great. Look for primers specifically made for natural stone surfaces, as they work wonders on marble. Follow the manufacturer’s instructions carefully, ensuring an even and thin layer covers the surface.
Keep in mind that different adhesives may have specific requirements for preparing marble surfaces. Read the instructions provided by the adhesive manufacturer diligently. Some adhesives may require additional steps like using a bonding agent or activating the adhesive with heat or moisture. Don’t skip these crucial steps.
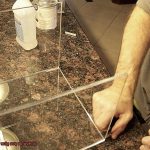
Applying the Adhesive
You’ve got a stunning marble surface and you’re eager to attach something to it. Whether it’s a decorative piece, a sign, or a broken fragment in need of some tender loving care, gluing something to marble requires a little know-how. But fear not, because I’m here to guide you through the process step by step.
The first order of business is adhesive selection. Marble is a porous material, which means you need an adhesive that can penetrate its surface and create a rock-solid bond. Your best bet? Epoxy adhesives. With their exceptional bonding strength and durability, they are tailor-made for holding your object firmly in place.
Now that you’ve armed yourself with epoxy adhesive, it’s time to prepare that marble surface. Cleaning is paramount. Any dirt, dust, or grease lingering on the surface can hinder the adhesive’s performance. Grab a mild detergent or stone cleaner, roll up your sleeves, and give that surface a thorough scrub. Rinse it off with water and ensure it dries completely.
Alright, now that your marble is squeaky clean, let’s dive into the application process. Follow the manufacturer’s instructions meticulously. For precise application, consider using a small brush or spatula. Remember: thin and even layers on both the marble surface and the object you’re gluing are key to success.
Once the adhesive is applied, it’s time to delicately align your object with its desired position on the marble surface. Gently press it into place, ensuring that the surfaces make solid contact. Hold it steadfast for a few minutes until the adhesive starts to set.
Now comes the waiting game. The adhesive needs sufficient time to fully bond, so patience is key. The curing time will vary depending on the type of adhesive used and the manufacturer’s instructions. During this period, avoid any movement or stress on the glued object.
Once the adhesive has fully cured, it’s time for a close examination. Check for any excess adhesive that may have squeezed out during the bonding process. If needed, tenderly remove it with a soft cloth or sponge dampened with an appropriate solvent recommended by the adhesive manufacturer.
One final note: always heed any additional recommendations or precautions provided by the adhesive manufacturer. They are the experts, after all, and their advice is worth heeding to ensure optimal results.
Positioning the Object to be Glued
Positioning the object to be glued is a crucial step in ensuring a secure and effective bond between the object and the marble surface. Before starting the gluing process, it is important to thoroughly clean both the object and the marble surface to remove any dirt, dust, or grease that may hinder adhesion.
To begin, gather all the necessary materials for gluing – a high-quality adhesive specifically designed for bonding marble or similar surfaces, clamps or weights (if needed), and any protective covering for the marble surface. These tools will help you achieve a strong and long-lasting bond.
Next, determine the exact position where you want to glue the object onto the marble. Consider factors such as aesthetics, functionality, and stability. Mark the desired position on both the object and the marble surface using a removable marker or tape. This will serve as a guide during the gluing process, ensuring accurate alignment.
Once you have marked the position, it’s time to apply the adhesive. Spread a thin layer of adhesive onto both the object and the corresponding area on the marble surface using a toothpick, small brush, or any other suitable applicator. Be cautious not to apply too much adhesive as it may squeeze out when pressure is applied during bonding.
After applying the adhesive, carefully position the object onto the marked spot on the marble surface. Take your time to make any necessary adjustments before allowing the adhesive to set. If additional support is required to hold the object in place while the adhesive sets, use clamps or weights strategically placed around or on top of the object.
Allow sufficient time for the adhesive to cure and bond properly according to the manufacturer’s instructions. During this curing period, avoid moving or disturbing the glued object to prevent any compromise in bond strength.
Once the adhesive has fully cured, inspect the glued area to ensure a secure and satisfactory bond. Gently remove any excess adhesive that may have squeezed out during the gluing process using a clean cloth or a plastic scraper. Take care not to scratch or damage the marble surface while removing the excess adhesive.
Allowing Time for Curing
In this blog post, we’ll explore the concept of allowing time for curing and discover why it’s crucial for achieving a strong and durable bond. So, let’s dive right in.
The Science Behind Curing:
Curing is the magical process in which the adhesive and the marble surface come together, forming a bond that is both resilient and long-lasting. It’s like the moment when two puzzle pieces finally fit perfectly into place. Research shows that allowing ample curing time is essential for achieving optimal bond strength. Each adhesive has its own recommended curing time, so it’s important to carefully follow the manufacturer’s instructions.
Factors Affecting Curing Time:
Just like a delicate dance, several factors can influence the curing time of adhesives. Temperature and humidity play a significant role in this intricate process. It’s crucial to consider the recommended conditions for optimal bonding. Rushing the curing process would be like trying to force a bud to bloom before its time – it may compromise the strength of the bond and lead to future failures.
The Importance of Undisturbed Curing:
During the curing process, it’s vital to treat the glued area with tender care, like a masterpiece that demands uninterrupted focus. Any movement or handling could disrupt the bonding process, resulting in a weaker bond. So, let the adhesive set and solidify its connection undisturbed – allowing it to create a bond as strong as the roots of an ancient tree.
Recommended Minimum Curing Time:
Most adhesives require at least 24 to 48 hours of curing time before subjecting them to stress or weight. However, for maximum bond strength and durability, it’s advisable to leave the glued object untouched for an extended period, even beyond the minimum curing time. This extra time will allow the bond to mature and become as solid as a mountain.
Testing the Bond:
Once the recommended curing time has passed, it’s time to put the bond to the test. Gently apply pressure or attempt to move the glued object. If it feels secure and shows no signs of detachment, congratulations. Your adhesive has successfully cured, creating a bond as unbreakable as a diamond.
Inspecting the Bond
In this captivating blog post, we will unlock the secrets behind achieving a bond that’s as sturdy as a fortress. Join us on this enchanting journey to discover the process of inspecting the bond between a glued object and marble.
The Crucial Role of Choosing the Right Adhesive:
The foundation of a strong bond lies in selecting the right adhesive. Different adhesives possess varying properties and strengths. To ensure a robust bond, it is crucial to choose a high-quality adhesive specifically designed for bonding objects to marble surfaces. This initial choice significantly impacts durability and minimizes the risk of detachment in the future.
Assessing Stability:
Once the adhesive has been applied and the object securely attached to the marble surface, it is essential to examine the bond closely. Gently but firmly test the object’s stability by applying slight pressure or attempting to wiggle it. A strong bond will show no signs of movement or give, indicating its durability.
Visual Examination:
Visually inspect the area where the object meets the marble surface. Look for any gaps, cracks, or visible signs of separation between the two surfaces. These could be indications that the adhesive did not fully adhere or that there may be underlying issues compromising the bond.
Factors Affecting Bond Integrity:
Consider external factors such as temperature changes, humidity levels, and exposure to moisture that can impact the bond’s strength over time. If subjected to these conditions, additional precautions like using waterproof adhesives or applying sealants may be necessary to maintain a strong bond.
Prompt Action for Weaknesses or Failures:
If weaknesses or failures are detected during inspection, take immediate action to address them. This may involve reapplying adhesive in weakened areas, reinforcing the bond with additional glue or adhesive, or seeking professional assistance if necessary.
Reapplying the Adhesive if Necessary
Embark on a captivating journey as we uncover the secrets to achieving an unbreakable bond between marble and glued objects. In this blog post, we will delve into the importance of reapplying adhesive if necessary. By exploring factors such as insufficient initial application, environmental conditions, and the weight and size of the object being glued, we will provide you with valuable insights to ensure a successful bond that stands the test of time.
Insufficient Initial Application:
When it comes to bonding objects to marble surfaces, insufficient initial application is a common reason for weak bonds. Uneven spreading or inadequate amounts of adhesive can compromise the strength of the bond.
To rectify this, it is crucial to remove the object from the marble surface, meticulously clean off any remaining adhesive residue, and apply a fresh layer of adhesive. Following the manufacturer’s instructions for curing times and application requirements is essential for enhancing the bond’s strength.
Environmental Conditions:
The impact of environmental conditions on adhesive bonds cannot be overlooked. Extreme temperatures, humidity levels, and sunlight exposure can gradually weaken the bond over time. To counteract these effects, periodic inspection is recommended. If there are any signs of weakening or failure, reapplying adhesive becomes necessary. This proactive approach ensures a strong and long-lasting bond between the object and the marble surface.
Weight and Size Considerations:
The weight and size of the object being glued play a crucial role in determining whether reapplication of adhesive is necessary. Heavy or large objects exert more stress on the bond, potentially causing it to weaken over time.
Regular inspection is key in identifying any signs of weakening or failure. If such indications are present, reinforcing the bond by reapplying adhesive becomes essential.
Proper Preparation for Reapplication:
Thorough preparation is vital for successful reapplication of adhesive. Both surfaces must be clean and free from debris or residue. Any remaining adhesive should be removed using suitable cleaning solvents or plastic scrapers. Once the surfaces are clean, follow the manufacturer’s instructions for applying the adhesive and allow it to cure properly before placing any weight or stress on the bond.
Also Read: How To Glue Marble Together? – Glue Things
Conclusion
When it comes to gluing something to marble, there are a few key steps you need to follow. First and foremost, you’ll want to make sure the surface of the marble is clean and free from any dust or debris. This can be done by wiping it down with a mild detergent and water solution, and then drying it thoroughly.
Next, you’ll need to choose the right adhesive for the job. Epoxy glue is often recommended for bonding objects to marble due to its strong and durable nature. It’s important to read the instructions on the adhesive carefully and ensure that it is suitable for use on marble surfaces.
Before applying the adhesive, it’s a good idea to do a test run on a small inconspicuous area of the marble. This will allow you to see how well the adhesive bonds and if any discoloration or damage occurs.
Once you’re ready to apply the glue, use a small amount and spread it evenly onto both the object you’re attaching and the marble surface. Press them together firmly but gently, making sure they are properly aligned.
To ensure a strong bond, it’s recommended to apply some pressure on the glued area for at least 24 hours. You can use clamps or weights to keep everything in place during this time.
Remember that different adhesives may have different curing times, so be sure to check the instructions for specific recommendations regarding drying and curing times.
In conclusion, gluing something to marble requires careful preparation, choosing an appropriate adhesive, proper application techniques, and allowing sufficient time for curing.