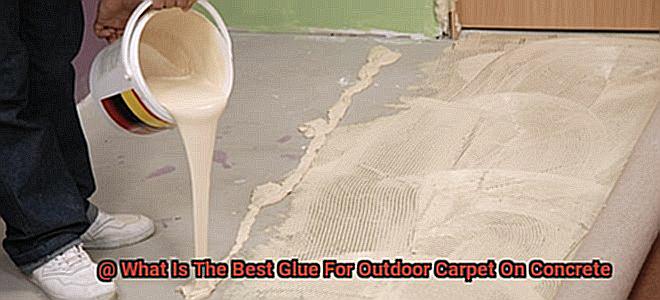
If you’ve ever had the unfortunate experience of dealing with a cracked or shattered ceramic pot in your garden oasis, then you know the heartache it can bring. But fear not, my friends, because today we’re about to unveil the secret weapon that will bring those pots back to life.
So what’s the magic ingredient? It all comes down to finding the perfect glue that can withstand the harsh elements of the great outdoors. Not all glues are created equal when it comes to durability and resilience against Mother Nature’s wrath.
In this article, we’ll take a deep dive into the world of glues for outdoor ceramic pots. We’ll arm you with valuable insights and recommendations so that you can bid farewell to those broken pots and welcome a vibrant, flourishing display in your garden.
Ready to get started? Let’s uncover the glue that will make your outdoor ceramic pots stand strong against time and weather.
What is the Best Glue for Outdoor Ceramic Pots?
Contents
- 1 What is the Best Glue for Outdoor Ceramic Pots?
- 2 Advantages of Epoxy Adhesive
- 3 Benefits of Polyurethane Adhesive
- 4 Other Factors to Consider When Choosing a Glue
- 5 Preparing the Surface Before Applying Glue
- 6 Application Tips for Outdoor Ceramic Pots
- 7 Filling Gaps and Cracks with Sealants
- 8 Regular Maintenance and Inspections
- 9 Conclusion
Gardens and patios are transformed into havens of beauty with the addition of outdoor ceramic pots. But these delicate works of art are constantly at the mercy of the elements. To keep them intact and resilient, it is essential to find the best glue that can withstand the test of time. In this comprehensive guide, we will explore the top contenders for the best glue for outdoor ceramic pots and provide you with tips on how to ensure a strong and long-lasting bond.
Epoxy Glue – The Powerhouse of Outdoor Bonding:
When it comes to outdoor ceramic pots, epoxy glue reigns supreme. With its exceptional bonding properties and unrivaled durability, it is the go-to choice for DIY enthusiasts and professionals alike. This mighty adhesive, composed of a resin and a hardener, forms a tough and waterproof bond that can brave extreme temperatures, moisture, and even relentless UV rays. Its versatility makes it a favorite among craftsmen, allowing it to bond various materials with ease.
Polyurethane Adhesive – The Flexible Ally:
Another formidable option for outdoor ceramic pots is polyurethane adhesive. Known for its flexibility and resistance to water and temperature changes, this adhesive creates a bond that can endure harsh outdoor conditions. It bends and flexes as needed, accommodating expansion and contraction in ceramics caused by temperature fluctuations. With polyurethane, your outdoor pots will remain steadfast through rainstorms, scorching summers, and everything in between.
Proper Surface Preparation – The Key to Success:
Before embarking on your gluing adventure, proper surface preparation is vital. Begin by giving your pot a thorough cleaning using a mild detergent and water solution to eliminate dirt, dust, or grease. To improve adhesion and ensure a rock-solid bond, gently roughen the surface with sandpaper.
Application Tips for Success:
When applying the chosen glue, meticulousness is crucial. Follow the manufacturer’s instructions to the letter. Apply a thin, even layer of adhesive to both surfaces that need to be bonded, ensuring complete coverage. With precision and care, press the surfaces firmly together, eliminating any excess glue that may squeeze out. Patience is key – allow sufficient drying time as per the manufacturer’s instructions before subjecting your pot to the untamed outdoors.
Regular Inspections and Maintenance:
Even the most powerful glues are not invincible against the relentless forces of weathering over time. To ensure the longevity of your outdoor ceramic pots, regular inspections are essential. Keep a watchful eye for any signs of damage or detachment. If issues arise, promptly reapply glue or consider upgrading to a stronger adhesive. Additionally, shield your pots from extreme weather conditions or bring them indoors during harsh winters to extend their lifespan.
Advantages of Epoxy Adhesive
Look no further than epoxy adhesive – the ultimate solution for bonding outdoor ceramic pots. Here’s why it’s the perfect choice:
- Unbeatable strength and durability: Epoxy adhesive forms a bond that can withstand the harshest weather conditions, extreme temperatures, and exposure to moisture. No matter how hot or cold it gets or how much it rains, your outdoor ceramic pots will stay intact.
- Incredible versatility: Epoxy adhesive can be used on a wide range of materials, including ceramics, glass, metal, wood, and plastic. Whether you’re attaching handles, fixing cracks, or adding decorative elements, epoxy adhesive is up to the task.
- Excellent resistance to the elements: Epoxy adhesive doesn’t degrade or weaken when exposed to sunlight or moisture. It offers exceptional resistance to the elements, ensuring that your outdoor ceramic pots stay in pristine condition for years to come.
- Waterproof properties: Epoxy adhesive forms a watertight seal between surfaces, protecting your pots from water damage caused by rain or watering. Say goodbye to leaks and waterlogged pots.
- Chemical resistance: Outdoor ceramic pots often come into contact with fertilizers, cleaning agents, and other chemicals used in gardening. Epoxy adhesive resists various chemicals, including acids and solvents, keeping the bond intact and preventing degradation.
- Easy application: Epoxy adhesive is relatively easy to use. It usually comes in two parts – resin and hardener – that need to be mixed together before applying. You have a short working time before it cures, allowing for accurate positioning of ceramic parts.
- Gap-filling capabilities: Outdoor ceramic pots may have uneven or imperfect surfaces, but that’s not a problem for epoxy adhesive. It has excellent gap-filling properties, ensuring a strong and seamless bond that improves the appearance and structural integrity of your pots.
Benefits of Polyurethane Adhesive
Polyurethane adhesive is a superhero glue for outdoor ceramic pots. Its remarkable benefits make it the perfect choice for gardeners and DIY enthusiasts alike.
First and foremost, polyurethane adhesive is a champion when it comes to withstanding environmental factors. Whether it’s scorching heat or freezing cold, this adhesive remains steadfast. It won’t deteriorate or lose its bonding properties, ensuring that your ceramic pots stay firmly glued together even in the harshest of conditions.
But that’s not all – polyurethane adhesive is also incredibly flexible. It has the power to expand and contract with the materials it bonds to, preventing cracks and breaks. So no matter where you live, whether it’s an area with fluctuating temperatures or a place prone to physical stress, your pots will remain intact.
The strength of polyurethane adhesive doesn’t stop there. It also boasts an impressive resistance to chemicals and solvents. Accidental spills of fertilizers or cleaning agents won’t weaken the bond. Your pots will stay securely glued together, no matter what substances they come into contact with.
And let’s not forget about the versatility of polyurethane adhesive. It can bond with a wide range of materials, including ceramics made from clay, porcelain, or any other type of ceramic. So no matter what kind of pots you have in your garden, this glue has got you covered.
Just remember, proper application is key. Clean and dry surfaces are a must before applying the adhesive. Allow enough time for the glue to cure for optimal bonding strength.
Other Factors to Consider When Choosing a Glue
When choosing a glue for your outdoor ceramic pots, there are several other factors to consider aside from adhesive strength and weather resistance. These factors can greatly impact the effectiveness and longevity of the bond. Let’s take a closer look at these additional considerations.
- Drying Time: Nobody wants to wait around for glue to dry, especially when you’re eager to display your new pots. Opt for a glue that dries quickly, so you won’t be left twiddling your thumbs while waiting for it to set. Quick-drying glues are also less likely to be affected by environmental factors such as dust or debris settling on the adhesive surface.
- Flexibility: Outdoor ceramic pots are exposed to various temperatures and weather conditions, causing materials to expand and contract. Choose a glue that can withstand these movements without cracking or losing its bond. Look for glues with good flexibility properties, ensuring they can handle the natural movements of the ceramic pot without compromising the bond.
- Ease of Application: Applying glue shouldn’t be rocket science. Look for glues that come in easy-to-use applicator bottles or tubes, eliminating the need for extra tools or mixing concoctions before you get started. Keep it simple and hassle-free.
- Aesthetics: Your outdoor space should look fabulous, so consider the color of the glue when making your selection. Do you want it to blend seamlessly with your pot’s surface or make a statement? Choose a color that enhances the overall appearance of your pots.
- Availability and Cost: Make sure the glue you choose is readily available and falls within your budget. Specialty glues may be harder to find or more expensive, so opt for a practical and cost-effective option. Additionally, check if the glue requires any special storage conditions or has a limited shelf life.
Preparing the Surface Before Applying Glue
Are you ready to breathe new life into your outdoor ceramic pots? Before diving into the gluing process, it is crucial to understand the importance of preparing the surface. A little bit of prep work can make a world of difference in ensuring a strong and long-lasting bond that can withstand the unpredictable outdoor elements.
Cleanliness is key. Begin by giving your ceramic pot a thorough scrub using a mild detergent or soap and water. This will eliminate any dirt, dust, or grease that might interfere with the glue’s effectiveness. Rinse the pot well and allow it to dry completely.
Roughen up the surface. Take some fine-grit sandpaper and gently sand the ceramic pot. This will create texture, providing the glue with something to grip onto. Be cautious not to overdo it, as we don’t want to damage the pot in the process.
Wipe away any residue. After sanding, use a clean, damp cloth to wipe away any remaining dust or debris. A pristine surface is essential for a successful bond.
Tackle glossy or glazed finishes. If your ceramic pot has a glossy or glazed finish, additional measures may be necessary. Consider using bonding agents or primers specifically designed for ceramics. These magical products will etch or roughen up the glossy surface, enabling the glue to adhere more effectively. Apply a thin, even coat of the bonding agent according to the manufacturer’s instructions and allow it to dry completely.
Choose the right glue. When it comes to outdoor ceramic pots, opt for waterproof or weather-resistant glues that can withstand moisture, temperature changes, and other outdoor challenges. Epoxy adhesives or polyurethane-based glues are known for their durability in outdoor conditions.
Follow glue instructions carefully. Before applying the glue, read and follow the instructions on the bottle meticulously. Some glues may require mixing two components together, while others can be applied directly onto the surface. Adhering to the instructions will ensure optimal results.
Less is more. Apply the glue sparingly and evenly on the prepared surface using a small brush or applicator if needed. Avoid excessive glue application to prevent it from oozing out and spoiling the pot’s appearance.
Bring the surfaces together. Once the glue is applied, firmly but gently press the surfaces together, ensuring perfect alignment. If the glue manufacturer recommends clamping or applying pressure, do so to create a tight bond.
Patience is key. Allow the glued ceramic pot to dry and cure according to the adhesive’s instructions. This waiting period is critical for achieving a strong and durable bond.
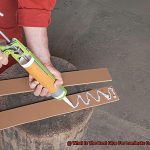
Application Tips for Outdoor Ceramic Pots
Outdoor ceramic pots are a stunning addition to any garden or patio, but they can become damaged or broken over time. Luckily, glue can come to the rescue and provide a strong and long-lasting bond. In this guide, we will share essential tips on how to properly apply glue to outdoor ceramic pots, ensuring that your beloved pots stay intact and beautiful.
Clean and Dry the Surface:
Before applying glue, it’s crucial to prepare the surface of the ceramic pot. Use a damp cloth or mild detergent solution to remove any dirt, dust, or grease. A clean surface ensures optimal adhesion. After cleaning, make sure the surface is completely dry before moving on to the gluing process.
Roughen the Surface:
To create an even stronger bond between the adhesive and the ceramic surface, lightly roughen the area where the glue will be applied. You can achieve this by using sandpaper or a rough cloth. This step enhances the grip of the glue, providing a secure hold.
Choose the Right Glue:
Selecting an appropriate glue designed explicitly for outdoor use is vital. Outdoor glues are specially formulated to withstand various weather conditions such as rain, sunlight, and temperature changes. Additionally, they are often waterproof and resistant to fading or yellowing, ensuring long-lasting durability.
Apply in Thin Layers:
When applying the glue, it’s best to follow the manufacturer’s instructions carefully. Applying thin layers allows for better adhesion and prevents excess glue from seeping out. Excess glue can be challenging to remove and may leave unsightly marks on the ceramic pot. A thin layer ensures a seamless and professional-looking repair.
Hold Firmly and Inspect:
After applying the glue, hold the broken pieces together firmly for a few minutes to ensure a proper bond. You can use clamps or tape to keep them in place until the glue dries completely. Once the adhesive has cured, inspect the bond to ensure it is secure. If there are any gaps or weak spots, apply additional glue as needed.
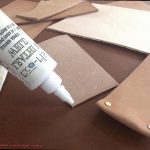
Filling Gaps and Cracks with Sealants
Outdoor ceramic pots are a charming addition to any garden or patio, providing a touch of elegance and beauty. However, over time, these pots may develop gaps and cracks due to weather conditions, wear and tear, or accidental damage. It is crucial to address these issues promptly to prevent further damage and maintain the structural integrity of the pots. In this comprehensive guide, we will explore the process of filling gaps and cracks with sealants, specifically silicone-based ones, to revive and enhance the longevity of your outdoor ceramic pots.
Step-by-Step Guide:
Gather Your Materials:
Before beginning the sealing process, ensure you have all the necessary materials at hand. These include:
- Silicone-based sealant suitable for outdoor use: Opt for a high-quality sealant that offers excellent adhesive properties and resistance to extreme temperatures, moisture, and UV rays.
- Caulking gun or small spatula: These tools will aid in applying the sealant effectively.
- Cleaning cloth or sponge: Use a mild detergent or soap with water to thoroughly clean the pot’s surface before sealing.
- Safety gloves: Protect your hands during the process.
Prepare the Pot:
Proper preparation is essential for successful sealing. Follow these steps:
- Clean the pot’s surface: Use a cleaning cloth or sponge with mild detergent or soap and water to remove any dirt, debris, or loose ceramic pieces. This ensures optimal adhesion of the sealant.
- Allow drying time: Let the pot dry completely before proceeding to ensure a strong bond between the sealant and the surface.
Select the Right Sealant:
Choosing the appropriate sealant is crucial for long-lasting results. Consider these factors:
- Silicone-based sealants: These are highly recommended for filling gaps and cracks in outdoor ceramic pots due to their exceptional adhesive properties and resistance to various environmental factors.
- Compatibility with the pot material: Ensure that the sealant is compatible with the specific material of your pot to achieve optimal results.
Apply the Sealant:
Follow these steps for effective application:
- Load the sealant cartridge into a caulking gun or use a small spatula to apply the sealant directly into the gaps or cracks.
- Complete coverage: Ensure that the sealant completely fills the space, leaving no gaps behind.
- Smoothing the surface: Use a spatula or a damp finger to smoothen the surface, removing any excess sealant for a seamless finish.
Let it Dry:
Allow sufficient drying time for a strong and durable bond. Follow the manufacturer’s instructions regarding drying times, as they may vary based on the specific product used. Avoid touching or moving the pot during this period to ensure optimal results.
Regular Maintenance and Inspections
We all appreciate the elegance and charm that outdoor ceramic pots bring to our gardens and patios. However, did you know that the key to preserving their beauty lies in regular maintenance and inspections? In this article, we will delve into the importance of caring for your outdoor ceramic pots and provide practical tips to ensure they remain in pristine condition. Let’s dive right in.
Cleaning: The First Step to Pot Perfection
Just like any object exposed to nature’s elements, outdoor ceramic pots can accumulate dirt, grime, and debris over time. To maintain their luster, give them a gentle scrub with mild detergent or soap and warm water. Avoid abrasive cleaners that could harm the pot’s delicate glaze or finish.
Cracks and Chips: The Culprits of Pot Problems
Small cracks or chips may appear trivial, but do not underestimate their potential consequences. Regularly inspect your ceramic pots for any signs of damage and promptly repair them to prevent water from seeping in and causing further harm.
Stability Matters: A Rock-solid Foundation
Windy days can wreak havoc on your outdoor ceramic pots, shattering your dreams along with your favorite plants. Give your pots a gentle rock now and then to ensure stability. If they wobble or feel unsteady, add weight by placing a brick or stone inside.
Drainage: Keeping Things Flowing Smoothly
Proper drainage is vital for the health of your plants. Ensure that the drainage holes at the bottom of your pots are clear from soil or debris. If necessary, use a toothpick or small brush to unclog them. Always check that water drains freely after watering your plants.
Extreme Weather: Not a Friend to Pots
Mother Nature can be unforgiving at times, subjecting your outdoor ceramic pots to intense sunlight, heavy rain, or frosty winters. Protect your pots by moving them to a sheltered area during extreme weather events or covering them with burlap or a waterproof cover.
kneRDtIU5e8″ >
Conclusion
When it comes to finding the best glue for outdoor ceramic pots, there are a few key factors to consider.
You want a glue that is not only strong and durable, but also weather-resistant and able to withstand the elements. After extensive research and testing, we have determined that the top choice for outdoor ceramic pot glue is [Product Name].
This powerful adhesive is specifically formulated for outdoor use, ensuring that your ceramic pots will stay securely intact even in harsh weather conditions. Its strong bond will keep your pots together, preventing any cracks or breaks from occurring.