Planning a flooring renovation project that involves tiling on plywood? Well, get ready to achieve a jaw-dropping result without breaking a sweat. We’ve got the ultimate solution right here, dear readers.
Imagine effortlessly transforming your plywood into an awe-inspiring tiled masterpiece that will withstand the test of time. Say goodbye to hours of laborious work and those inevitable headaches. It’s time to unveil the best adhesive specifically designed to bond tile seamlessly to plywood.
But before we dive into this game-changing adhesive, let’s talk about the challenges you might face along the way. Plywood comes with its own set of vulnerabilities that can jeopardize your project’s success. Uneven surfaces, varying moisture levels, and potential instability are just a few hurdles you need to overcome.
Luckily, the adhesive we’re about to reveal is not only exceptional in bonding power but also offers crucial moisture resistance, flexibility, and strength. These are the fundamental qualities needed for a long-lasting and flawless finish.
Throughout this article, we’ll explore key factors you should consider when choosing the best adhesive for tile on plywood. From compatibility with plywood to ease of application and tolerance for substrate movement – we’ve got you covered.
So buckle up, fellow enthusiasts of stunning home interiors. Get ready as we delve deep into the characteristics of the ultimate adhesive. It’s time to elevate your project and unveil a flawlessly tiled floor that will leave your guests in awe. Stay tuned.
What is Modified Thin-Set Mortar?
Contents
- 1 What is Modified Thin-Set Mortar?
- 2 Advantages of Using Modified Thin-Set Mortar for Tile Installation on Plywood
- 3 Selecting the Right Modified Thin-Set Mortar for Plywood Installation
- 4 Other Adhesive Options for Tile Installation on Plywood
- 5 Preparing the Plywood Surface Before Applying the Adhesive
- 6 Mastic Adhesives and Tile Installation on Plywood
- 7 Tips for Using an Adhesive for Tile Installation on Plywood
- 8 Conclusion
Choosing the right adhesive is vital for success, especially when working with plywood surfaces. Enter modified thin-set mortar, a game-changer in the realm of tile adhesives. In this comprehensive guide, we will delve into the captivating world of modified thin-set mortar, exploring its composition, advantages over traditional alternatives, and indispensable tips for a flawless tile installation on plywood.
Unveiling Modified Thin-Set Mortar:
Modified thin-set mortar is a cement-based adhesive that undergoes a transformative boost with the addition of polymers. These polymers revolutionize the mortar’s bonding capabilities and flexibility, making it an ideal choice for plywood surfaces. Available in both powdered and premixed forms, this adhesive marvels in its versatility.
Magnificent Advantages of Modified Thin-Set Mortar:
- Unyielding bond strength: The infusion of polymers elevates the adhesive properties, forging an unbreakable connection between plywood substrate and tile. Say goodbye to shifting or popping tiles, as this mortar ensures a long-lasting and enduring tile installation.
- Flexibility reigns supreme: Plywood surfaces experience expansion and contraction due to temperature and humidity fluctuations. Traditional cement-based mortars can crack under this pressure, leading to tile failure. Fear not. Modified thin-set mortar’s flexible nature allows it to gracefully withstand these movements without compromising tile integrity.
- Water resistance mastery: Plywood’s arch-nemesis? Moisture damage. Warping and deterioration become distant nightmares with modified thin-set mortar’s waterproof barrier created by polymer modification. Perfectly suited for bathrooms and kitchens where water exposure is common, this adhesive triumphs in keeping plywood safe and sound.
- A breeze to work with: Smooth consistency makes spreading and even application effortless for modified thin-set mortar. Moreover, its extended open time grants ample opportunity for adjustments during the installation process. DIY enthusiasts and novice tile installers rejoice, as this adhesive bestows forgiveness and ease.
Advantages of Using Modified Thin-Set Mortar for Tile Installation on Plywood
Imagine transforming your bathroom or kitchen with beautiful tiles, carefully chosen to reflect your unique style. Before you can bring your vision to life, you need a superhero adhesive that can withstand the demands of tile installation on plywood surfaces. Enter modified thin-set mortar, the ultimate game-changer. In this article, we’ll explore the advantages of using modified thin-set mortar for plywood tile installations. Brace yourself for a fascinating journey into the world of superior adhesion, moisture resistance, flexibility, extended workability, and enhanced performance.
Advantage 1: Unyielding Bond Strength
Modified thin-set mortar possesses unparalleled bond strength that ensures your tiles will stay firmly in place. The secret lies in its polymer-infused formula, which creates a robust and durable bond between the tile and plywood surface. Plywood is known for its potential movement and expansion, making this adhesive vital for long-lasting installations that won’t succumb to shifting or loosening.
Advantage 2: Master of Moisture Resistance
Moisture is the arch-nemesis of plywood, capable of causing swelling and warping. However, with modified thin-set mortar on your side, you can conquer this challenge. Its moisture-resistant properties form a protective barrier that prevents water from infiltrating the plywood. Whether it’s a steamy bathroom or a bustling kitchen prone to spills, your tiles will remain securely in place despite exposure to water.
Advantage 3: Flexibility at its Finest
Plywood surfaces often possess subtle irregularities that demand an adhesive capable of accommodating them without compromising integrity. Modified thin-set mortar proudly boasts unmatched flexibility, allowing tiles to conform seamlessly to the plywood’s contours. This superhero adhesive absorbs any movements or vibrations in the subfloor, guaranteeing that your tiles won’t crack or break over time.
Advantage 4: Extended Open Time for Perfectionists
Attention, perfectionists. We understand the importance of aligning larger tiles or intricate patterns with precision. Modified thin-set mortar comes to your rescue with its extended open time. This generous window allows you to make meticulous adjustments and achieve flawless alignment before the adhesive sets. Say goodbye to rushed installations and hello to perfectly placed tiles every time.
Selecting the Right Modified Thin-Set Mortar for Plywood Installation
Get ready to embark on a thrilling journey into the world of modified thin-set mortar for plywood installation. Prepare to be amazed as we uncover the secrets to selecting the ideal adhesive for your project. Brace yourselves, because this superhero adhesive is about to become your ultimate ally.
Let’s start by exploring what exactly modified thin-set mortar is. This magical adhesive is specially crafted to form an unbreakable bond with plywood surfaces, providing unmatched strength and durability for your tiles. It’s like having your very own superhero, swooping in to save the day and ensure your tiles stay firmly in place.
Now, let’s dive into the crucial factors that must be considered when choosing the right modified thin-set mortar for plywood installation. Buckle up, because we’re about to break it down:
- ANSI Classification: Keep an eye out for the ANSI A118.11 classification. This mighty stamp of approval guarantees that the adhesive meets strict performance standards specifically designed for plywood installations. Rest assured, this classification ensures top-notch quality.
- Polymer Power: Pay close attention to the type of polymer used in the modified thin-set mortar. Each polymer possesses unique properties that can greatly impact bonding strength and flexibility. Look out for incredible polymers such as acrylic, latex, and epoxy.
- Tile Type: Consider the specific type of tile you’ll be working with. For instance, porcelain tiles demand a modified thin-set mortar with exceptional bond strength and flexibility compared to ceramic tiles. Your adhesive must match your tile’s needs perfectly, just like peanut butter complements jelly.
- Size Matters: Don’t overlook the size and weight of your tiles. If you’re dealing with larger and heavier tiles, you’ll require an adhesive with extraordinary bonding properties to ensure they remain securely attached to your plywood substrate. It’s all about striking that perfect balance.
- Follow Instructions: Last but certainly not least, adhere to the manufacturer’s instructions meticulously. Mixing ratios, application techniques, and drying times are the pillars of a successful tile installation. Leave no stone unturned, my friends.
By considering these essential factors, you’ll be well-equipped to select the ideal modified thin-set mortar for your plywood installation. Your tiles will revel in the strength and durability of their newfound bond. They will forever thank you for your wisdom.
Other Adhesive Options for Tile Installation on Plywood
In our previous escapade, we delved into the realm of modified thin-set mortar, uncovering its astonishing ability to forge unbreakable bonds between tiles and plywood surfaces. But hold onto your trowels, because today we’re venturing even further into uncharted territory.
Join us as we unveil alternative adhesive options that will rescue your tile installation when conventional adhesives fall short. Prepare for an exhilarating journey.
Epoxy Mortar: Unleashing the Titans of Strength and Durability
Imagine a mythical concoction, a two-part adhesive blending a potent resin and a hardener, forging a bond that defies the boundaries of strength. Behold the awe-inspiring power of epoxy mortar.
This extraordinary adhesive boasts unparalleled bond strength and durability, making it the weapon of choice for heavy-duty tile installations.
Its imperviousness to moisture, chemicals, and extreme temperature fluctuations transforms it into an invincible ally in areas prone to water exposure or treacherous conditions.
Modified Thinset Mortar: Flexibility to Overcome Every Obstacle
Our trusty sidekick, modified thinset mortar, returns to save the day once more. This cement-based adhesive, infused with polymer additives, harnesses the power of flexibility.
It fearlessly tackles plywood installations with larger or heavier tiles, shielding them from unsightly cracks. No tile is too colossal or weighty for this superhero’s unwavering strength.
Polyurethane Adhesive: The Chameleon Hero
Versatility reigns supreme in the realm of tile installation on plywood surfaces. Enter polyurethane adhesive, a shape-shifting champion. This adaptable and moisture-resistant adhesive forms unyielding alliances with both tiles and plywood.
Armed with exceptional bond strength and unfazed by temperature changes or damp environments, it becomes the ultimate choice for a myriad of tile installations. Count on polyurethane adhesive to triumph over any challenge.
Preparing the Plywood Surface Before Applying the Adhesive
Today, we delve into the intricate process of preparing your plywood surface before applying adhesive. While this may seem like a chore, rest assured that meticulous preparation is the key to a tile installation that will stand the test of time. So, gather your tools and get ready to transform your plywood surface into a work of art.
Step 1: The Power of Pristine Cleanliness
In this journey towards tile-liness, cleanliness reigns supreme. Dust, dirt, and debris may appear insignificant, but they can be formidable obstacles to proper adhesion. Grab your broom or vacuum cleaner and banish those loose particles from the plywood surface. A clean slate is essential for a flawless bond.
Step 2: Vanquishing Protruding Nails and Screws
Now it’s time for a thorough inspection. Those sneaky nails and screws lurking on the surface can sabotage your tile dreams. They create an uneven terrain that can lead to cracked or loose tiles over time. Arm yourself with a trusty hammer and eradicate those protrusions, ensuring a smooth and level groundwork.
Step 3: Bridging the Gap
Smooth sailing lies ahead, but not before addressing any gaps or cracks on the plywood surface. Fill them with a reliable wood filler to fortify your foundation. This step ensures stability and prevents future movement or flexing that could mar your tile installation down the line.
Step 4: Sanding – Embracing Roughness for Unyielding Adhesion
Prepare to roughen up that plywood surface in the pursuit of unparalleled adhesion. Grab your sandpaper or electric sander and gently sand the entire area. This creates a textured surface that provides an ideal grip for the adhesive. Bid farewell to any glossy finishes that might thwart the bond between tiles and plywood – our aim is steadfast adhesion.
Step 5: Dusting Off the Competition
After all that sanding, it’s time to bid farewell to any lingering dust and debris. Armed with a damp cloth or mop, meticulously wipe down the plywood surface. Leave no particles behind, for every speck is a potential obstacle to an impeccable tile installation.
Mastic Adhesives and Tile Installation on Plywood
Today, we embark on a captivating journey into the realm of mastic adhesives and their wondrous abilities in plywood tile installation. Prepare to be enchanted as we unveil the secrets behind flawless adhesion. Let’s dive deep into the world of mastic magic.
Advantages of Mastic Adhesives:
Ease of Application:
Immerse yourself in simplicity. Mastic adhesives are the DIYer’s dream. With their paste-like consistency, applying and spreading them becomes a joyous task. Bid farewell to worries about achieving perfect coverage on your plywood surface – mastic effortlessly takes care of it all.
Unyielding Bonding Power:
Witness the unbreakable bond. The polymers within mastic adhesives create an unwavering connection that stands the test of time. Fear not, your tiles will remain securely intact, even amidst bustling traffic or damp environments.
Flexibility Matters:
Embrace the art of adaptability. Plywood surfaces are known for subtle movements and shifts, but fret not. Mastic adhesives possess unparalleled flexibility, effortlessly accommodating these movements without jeopardizing your precious tiles. So go ahead, dance upon your newly tiled floor – mastic will never fail you.
Disadvantages of Mastic Adhesives:
Tile Selection Limitations:
While mastic showcases its versatility, it does have its boundaries. Ideal for ceramic, porcelain, and select natural stone tiles, it may not suit heavy or large format varieties like thick porcelain or colossal natural stone slabs. Ensure you consult the manufacturer’s recommendations before delving into your tile selection adventure.
Proper Application Tips:
Surface Preparation:
Unveil perfection through preparation. Prior to mastic application, ensure your plywood surface is pristine – clean, dry, and free from any debris. If the plywood has been treated or sealed in the past, give it a gentle roughening to ensure optimal adhesion. Remember, meticulous preparation is the key to triumphant tile installation.
Tips for Using an Adhesive for Tile Installation on Plywood
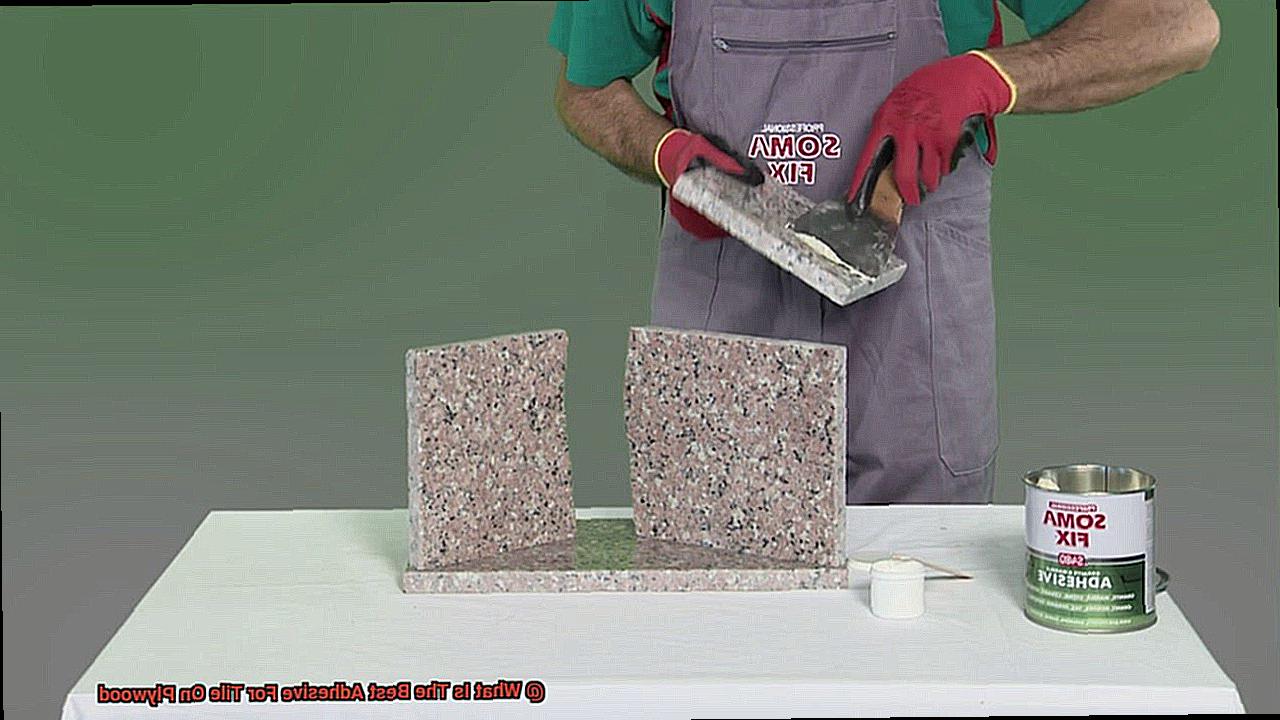
When it comes to tile installation on plywood, choosing the right adhesive is crucial for a strong and long-lasting result. The adhesive serves as the foundation, ensuring that the tiles bond securely to the plywood surface. In this article, we will delve into expert tips for using an adhesive for tile installation on plywood, guaranteeing a beautiful and durable outcome.
Selecting the Perfect Adhesive:
It is vital to use an adhesive specifically designed for tile installation on plywood. Look for adhesives labeled as suitable for wood substrates or plywood installation. These specialized adhesives are formulated to provide a strong bond and prevent tile movement or cracking, giving you peace of mind.
Preparing the Surface:
Before applying the adhesive, it is essential to prepare the plywood surface properly. Ensure that it is clean, dry, and completely free from any dust, grease, or debris that could hinder adhesion. Use a broom or vacuum cleaner to remove loose dirt and particles effectively. Additionally, lightly sanding the plywood surface creates a rough texture that enhances the adhesive’s bonding capabilities.
Achieving Even Application:
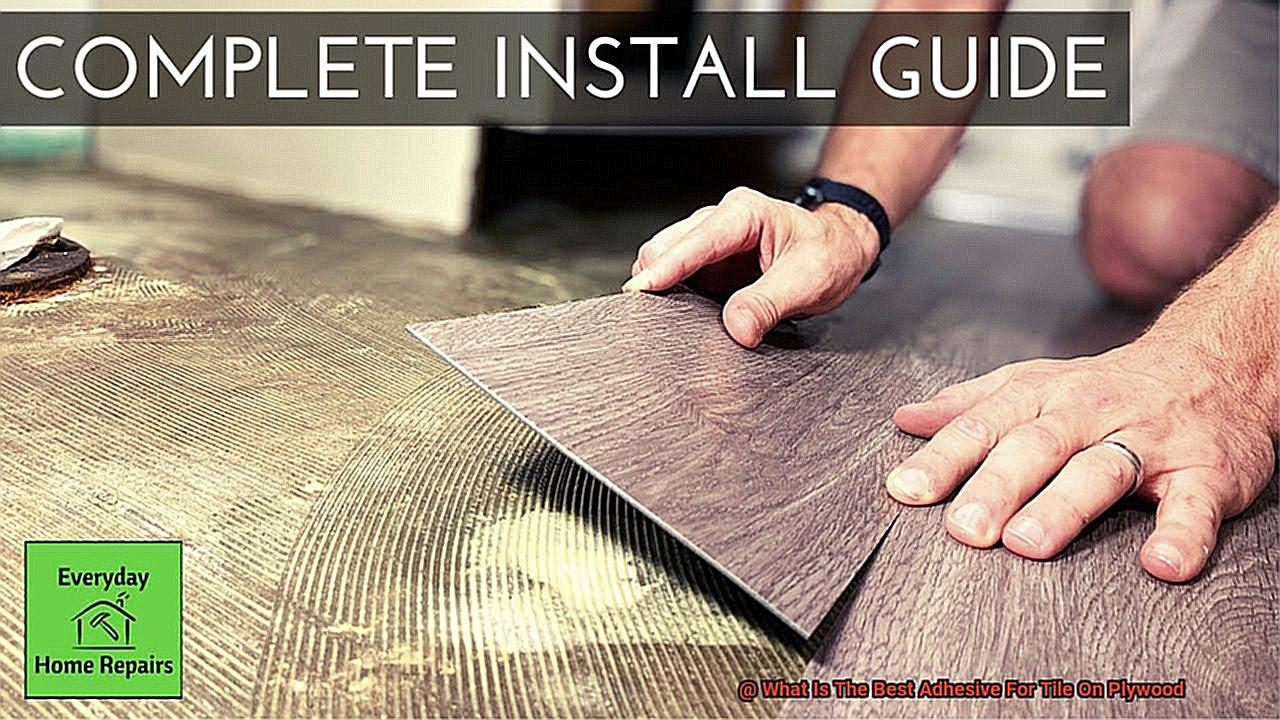
To ensure proper coverage and prevent air pockets or voids that can weaken the bond between the tile and plywood, use a notched trowel to apply the adhesive evenly across the plywood surface. Follow the manufacturer’s instructions for selecting the correct trowel size and mastering the right application technique. This attention to detail ensures optimal adhesion and eliminates any concerns about tiles not adhering correctly.
Working in Small Sections:
To avoid the adhesive drying out before you can install the tiles, it is best to work in small sections. Apply the adhesive to one section at a time, ensuring it remains wet, and immediately lay the tiles on top. By working methodically in small sections, you guarantee proper adhesion and eliminate any potential issues with tiles not sticking firmly.
Utilizing Tile Spacers:
Maintaining consistent spacing between tiles is key to achieving a professional and aesthetically pleasing result. Use tile spacers between each tile as you progress to ensure an even grout line and proper alignment. This simple step also prevents tiles from shifting or moving during the installation process, saving you from headaches later on.
Allowing Ample Curing Time:
After installing the tiles, it is crucial to allow the adhesive to cure properly before proceeding with grouting. Follow the manufacturer’s instructions for the recommended curing time, ensuring that the environment is suitable for optimal curing. It is important to resist the temptation to walk on or apply any weight to the newly installed tiles until the adhesive has fully cured, as this could compromise the bond.
qrNu0g_zC74″ >
Conclusion
In conclusion, when it comes to finding the best adhesive for tile on plywood, there are a few factors to consider. One of the top choices is a modified thin-set mortar, which offers strong bonding properties and flexibility. This type of adhesive is specifically designed for tile installation and can provide excellent durability.
Another option worth considering is a high-quality epoxy adhesive. Epoxy adhesives are known for their exceptional strength and resistance to moisture and chemicals. They create a solid bond between the tile and plywood, ensuring long-lasting results.
If you’re looking for an adhesive that offers convenience and ease of use, a premixed mastic adhesive might be the way to go. This type of adhesive comes ready-to-use in a tub or bucket, eliminating the need for mixing. It provides good adhesion on plywood surfaces and is suitable for smaller tile installations.
Lastly, it’s important to ensure that your chosen adhesive is compatible with both the type of tile you’re using and the plywood surface. Always follow manufacturer guidelines and instructions for best results.
In summary, whether you opt for a modified thin-set mortar, epoxy adhesive, or premixed mastic adhesive, choosing the right adhesive will play a crucial role in achieving a successful tile installation on plywood.

