Title: Unleashing the Power of Permanence: The Ultimate Guide to Super Strong Glue for Stone
Introduction:
Contents
- 1 Types of Super Strong Glues for Stone
- 2 Factors to Consider When Choosing a Glue for Stone
- 3 Preparing the Stone Surfaces Before Applying Adhesive
- 4 Applying the Adhesive to the Stone Surfaces
- 5 Curing and Drying Time for Adhesives
- 6 Benefits of Using Super Strong Glue for Stone
- 7 Common Mistakes When Bonding Stone with Adhesives
- 8 Tips and Tricks for Working with Super Strong Glue for Stone
- 9 Conclusion
Crafting, construction, and restoration projects all have one thing in common – the need for a glue that can withstand the test of time. When it comes to bonding stone, a material revered for its elegance and strength, only a super strong glue will do.
Whether you’re a DIY enthusiast or a seasoned stonemason, having the right adhesive on hand can make or break your project. That’s where super strong glue for stone comes into play. This game-changing solution offers unmatched strength and bonding capabilities.
But what makes this super glue so special? In this blog post, we’ll dive deep into the world of super strong glue for stone. We’ll explore its key features and benefits, giving you an insider’s look at its power and versatility. By the end of this article, you’ll be armed with the knowledge to tackle any stone project with confidence and precision. So let’s get started and uncover the secrets behind this extraordinary adhesive.
Types of Super Strong Glues for Stone
Stone is a magnificent material known for its strength and beauty, but it can be a challenge to work with. That’s where super strong glues come to the rescue. In this article, we’ll explore the different types of glues specifically designed for bonding stone surfaces.
Whether you’re a DIY enthusiast or a professional craftsman, understanding the properties and benefits of these glues will help you achieve long-lasting and sturdy bonds.
Epoxy-Based Glues: Unstoppable Strength
Epoxy glues are like superheroes when it comes to bonding stone. They consist of two parts – a resin and a hardener – that create a chemical reaction when mixed together. This reaction forms an incredibly strong bond that can withstand water, chemicals, and even extreme temperatures. Epoxy glues also have excellent gap-filling capabilities, ensuring a seamless finish for your stone projects.
When you need to bond stone surfaces that will bear heavy loads or face constant stress, epoxy-based glues are the go-to choice. Their unmatched strength and durability make them suitable for high-impact applications like stone countertops, structural repairs, or outdoor stone installations.
Moreover, epoxy glues come in various formulations tailored for specific stone types, such as granite, marble, or quartz. Always check the manufacturer’s recommendations to ensure you choose the right epoxy glue for your project.
Polyurethane Adhesives: Flexibility Meets Durability
Polyurethane glues are another popular choice for bonding stone surfaces. These one-part adhesives don’t require any mixing and offer the perfect blend of flexibility and durability. They can handle moisture, heat, and solvents with ease, making them ideal for both indoor and outdoor applications. With polyurethane glue, your stone creations will stay intact even in the face of harsh conditions.
What sets polyurethane adhesives apart is their ability to absorb stress and movement without compromising the bond. This makes them well-suited for bonding stone surfaces that may experience slight shifts or vibrations, such as stone sculptures, outdoor fountains, or paving stones.
Additionally, polyurethane glues are known for their excellent resistance to water, making them a reliable choice for bonding stone in wet environments like bathrooms or swimming pools.
Cyanoacrylate Glues: Instant Bonding Magic
If you need a quick fix or want to fill small cracks and gaps in your stone projects, cyanoacrylate glues (also known as super glue) are your go-to option. These single-component adhesives cure rapidly when exposed to moisture, creating an incredibly strong bond in seconds. While they may not be suitable for heavy-duty applications, cyanoacrylate glues work wonders for smaller stone pieces and repairs.
Cyanoacrylate glues are perfect for bonding delicate or intricate stone pieces where precision and speed are essential.
Factors to Consider When Choosing a Glue for Stone
When it comes to working with stone, selecting the right glue is crucial for ensuring a strong and durable bond. With so many options available on the market, it can be challenging to determine which glue is best suited for your specific project.
In this guide, we will explore the key factors that should be considered when choosing a glue for stone. By understanding these factors, you can make an informed decision and achieve professional results.
Adhesive Strength:
The strength of the glue is paramount when working with stone surfaces. Look for glues specifically designed for stone applications, as they are formulated to provide exceptional bonding capabilities. Consider the weight and movement of the stone to ensure that the adhesive can withstand these factors without compromising the bond.
Compatibility with Stone Type:
Different types of stones have unique properties, such as porosity and surface texture. It is essential to choose a glue that is compatible with the specific type of stone you are working with. Some glues may not adhere well to certain stones, leading to weak bonds or failure. Consult with experts or refer to product labels to ensure compatibility.
Waterproof and Weather Resistance:
Stones are often exposed to moisture, heat, and cold, making it crucial to select a waterproof and weather-resistant adhesive. This will protect the bond from water damage, expansion due to temperature changes, and other weather-related effects. Ensure that the glue can withstand the environmental conditions your project will be exposed to.
Flexibility:
Stone surfaces can experience slight movements or vibrations, especially in outdoor applications or high-traffic areas. To accommodate these movements without compromising the bond, choose a glue that offers flexibility. Flexible adhesives can withstand minor shifts in position without cracking or breaking, ensuring long-lasting adhesion.
Drying Time:
Consider the drying time of the glue when selecting one for your stone project. The drying time can vary depending on the adhesive type and brand. Choose a glue that allows enough time for proper positioning and adjustment before it sets completely. Additionally, consider the curing time required for the glue to achieve its maximum strength.
Ease of Use:
Opt for a glue that is user-friendly and provides clear instructions for application. Some glues may require additional tools or special techniques, so ensure that you are comfortable with the application process before making a choice. A glue that leaves behind minimal residue and requires easy cleanup will save you time and effort.
Safety and VOC Content:
Prioritize safety when working with any glue. Check the safety information provided by the manufacturer and ensure that the glue is non-toxic and suitable for indoor use if necessary. Consider choosing a low VOC glue, as they are more environmentally friendly and have less odor.
Preparing the Stone Surfaces Before Applying Adhesive
Achieving a strong and reliable bond when working with stone is essential for both structural integrity and aesthetic appeal. However, before applying adhesive, proper preparation of the stone surfaces is crucial. In this comprehensive guide, we will explore the step-by-step process of preparing stone surfaces for adhesive application. Let’s dive in and ensure your project stands the test of time.
Step 1: Thoroughly Clean the Surfaces
The first step in preparing stone surfaces is to ensure they are immaculately clean. Any dirt, dust, or debris can hinder the adhesive’s ability to bond effectively. Use a mild detergent or specialized stone cleaner to gently scrub away stains, grease, or grime using a soft brush or cloth. Rinse the surfaces thoroughly with clean water and allow them to dry completely before proceeding.
Step 2: Address Loose or Damaged Parts
Inspect the stone surfaces for any loose or damaged parts. If you come across any loose stones or pieces, carefully remove them and clean the area underneath. Repair any cracks, chips, or other damages using appropriate stone repair products or techniques. Smooth out any irregularities to create a flawless surface for optimal adhesive bonding.
Step 3: Create a Rough Texture
To enhance the adhesive’s bonding strength, it is essential to create a slightly rough texture on the stone surfaces. Use sandpaper or a wire brush to gently roughen the surfaces, ensuring not to damage or scratch the stone in the process. This roughened surface provides increased grip for the adhesive, promoting a stronger bond.
Step 4: Remove Existing Coatings
Before applying adhesive, it is crucial to remove any existing coatings on the stone surfaces, such as sealants or finishes. These coatings can interfere with the bonding process and compromise the effectiveness of the adhesive. Utilize solvents or stripping agents recommended for removing coatings from stone surfaces, ensuring a clean and receptive surface for the adhesive.
Step 5: Optimize Moisture Levels
Proper moisture levels are vital for successful adhesive bonding. Excessive moisture can result in poor adhesion, while insufficient moisture can hinder the adhesive’s curing process. Follow the manufacturer’s instructions regarding moisture levels and take appropriate measures to achieve the recommended range. This may involve allowing sufficient drying time after cleaning or utilizing moisture meters to accurately assess moisture content.
Step 6: Protect Adjacent Areas
Lastly, protect surrounding areas that should not come into contact with the adhesive. Cover adjacent surfaces or objects with masking tape or plastic sheets to prevent accidental spills or smudges. By doing so, you ensure a clean and professional finish once the adhesive is applied.
Applying the Adhesive to the Stone Surfaces
Are you ready to embark on a project that involves bonding stone surfaces? Whether you’re creating a magnificent mosaic, resurrecting a shattered statue, or constructing a breathtaking stone structure, knowing how to apply the adhesive correctly is paramount.
In this comprehensive step-by-step guide, we will walk you through the process of applying epoxy adhesive to stone surfaces, ensuring a bond that is not only strong but also enduring.
Step 1: Prepare the Surfaces
Before diving into the adhesive application, it is crucial to prepare the stone surfaces meticulously. Thoroughly cleanse them using a damp cloth or sponge to eliminate loose particles. For stubborn stains or residues, employ a mild detergent or specialized stone cleaner. Rinse the surfaces thoroughly and allow them to dry completely before proceeding.
Step 2: Choose the Right Adhesive
When it comes to bonding stone surfaces, epoxy-based adhesives reign supreme due to their exceptional strength and durability. Ensure that you select an epoxy adhesive specifically designed for bonding stone. Familiarize yourself with the manufacturer’s instructions and gather all the necessary components for mixing.
Step 3: Mix the Adhesive
In a disposable mixing container, combine the resin and hardener components of the epoxy adhesive as per the manufacturer’s instructions. Stir them vigorously until they are thoroughly blended. Remember, the correct ratio is vital for optimal adhesion.
Step 4: Apply the Adhesive
Armed with a suitable applicator like a brush or spatula, gently spread a thin layer of the mixed epoxy adhesive onto one of the stone surfaces. Ensure even coverage across the entire surface while being mindful not to go overboard and risk excessive squeeze-out when joining the surfaces together.
Step 5: Join the Surfaces
Swiftly position the second stone surface onto the adhesive-covered one, aligning them with precision. Apply gentle pressure to evenly distribute the adhesive between the two surfaces. Time is of the essence here, as epoxy adhesives have a limited working time before they start to cure.
Step 6: Secure the Bond
For a robust adhesion, use clamps or weights to secure the joined surfaces in place if necessary. However, exercise caution to avoid applying excessive force that could lead to shifting or cracking of the stones.
Step 7: Allow for Curing
Resist the urge to rush and grant the adhesive ample time to cure in accordance with the manufacturer’s instructions. The curing duration may vary depending on the type of epoxy adhesive and environmental conditions. Patience is key to ensuring the bond’s resilience against stress or load.
Curing and Drying Time for Adhesives
Today, we embark on a journey through the intricate world of adhesives, shining a spotlight on the crucial role that curing and drying time play in achieving rock-solid bonds for stone materials. Grab a steaming cup of coffee and join me as we dive into this adhesive adventure.
The Science Unveiled: Curing and Drying Time Demystified
Let’s begin at the foundation. Curing is the magical moment when an adhesive undergoes a chemical transformation upon exposure to air or moisture, resulting in the hardening and bonding of materials. Drying time, on the other hand, refers to the duration it takes for the liquid adhesive to solidify and reach its full potential.
The Dance of Adhesives: Types and Their Timing
Adhesives come in various forms, each with its own unique curing and drying times. Some boast lightning-fast readiness in just minutes, while others require hours or even days to reach their full strength. To ensure success, follow the manufacturer’s instructions diligently, honoring the adhesive’s need for time to work its enchantment.
Temperature and Humidity: The Puppeteers of Time
Prepare to be dazzled, my friends. Temperature and humidity hold sway over the realm of curing and drying time. High temperatures accelerate the process, urging adhesives to perform their magic swiftly. Conversely, lower temperatures slow things down, demanding patience from us mere mortals. Humidity levels can either be our allies or foes; high humidity prolongs drying like an endless story, while low humidity becomes our ally for swift results.
Patiently Waiting: A Virtue Worth Embracing
In our fast-paced world, patience is often overlooked as a virtue. However, when it comes to adhesives and bonding stone materials, patience becomes the key that unlocks a realm of strength and durability. Rushing the curing and drying process risks compromising the bond’s integrity. Take a deep breath, relax, and grant your adhesive the time it deserves.
Conclusion:
There you have it, glue aficionados. Understanding the profound significance of curing and drying time in adhesive bonding is paramount to achieving unyielding bonds for stone materials.
By meticulously considering factors such as temperature, humidity, and adhering to the manufacturer’s instructions, you guarantee a reliable and enduring bond for your precious stones. Now, venture forth with newfound confidence and embrace the art of adhesive mastery.
Benefits of Using Super Strong Glue for Stone
Welcome, fellow adhesive enthusiasts, to a thrilling expedition into the world of super strong glue for stone. Today, we delve into the mesmerizing benefits of this mighty adhesive that can transform your stone projects into unshakable masterpieces. Brace yourself for an adventure filled with bonding strength, versatility, and resilience as we uncover the secrets of this magical substance.
The Power of Permanence:
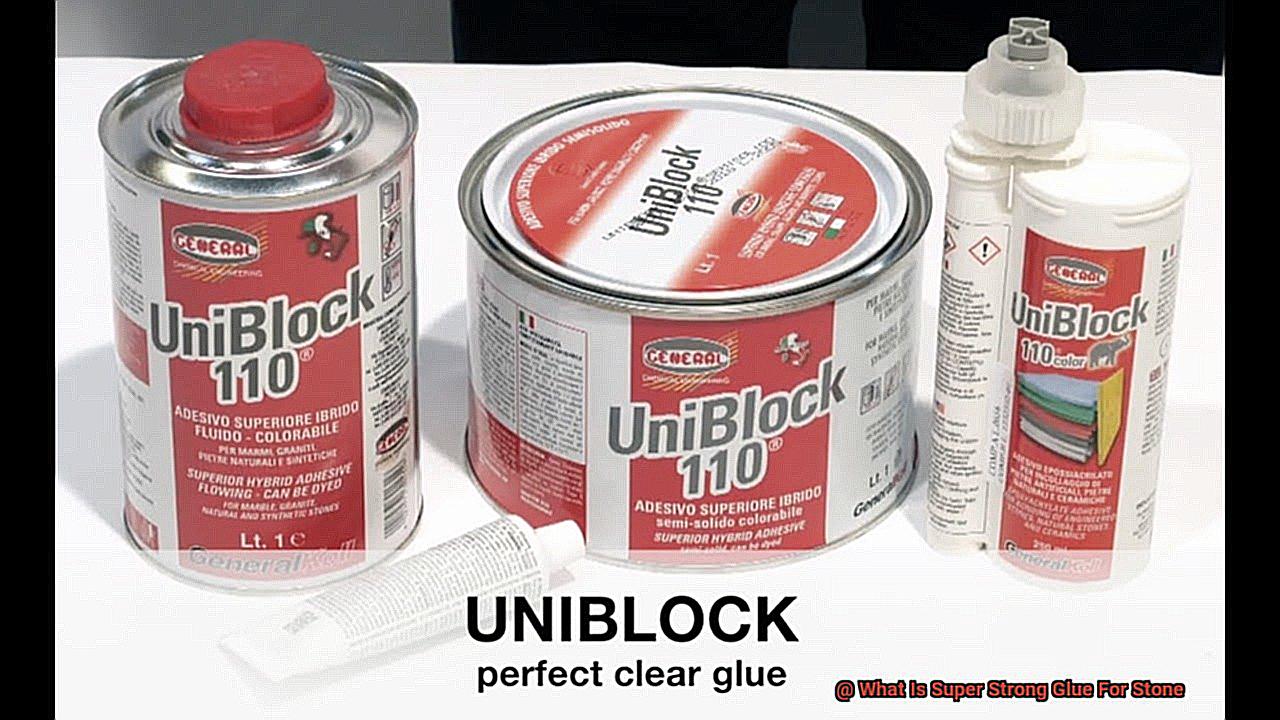
Unlike traditional glues that weaken over time or succumb to moisture, super strong glue for stone forms an unbreakable bond. With its unwavering strength and integrity, it defies the test of time and harsh environmental conditions. Whether you’re constructing awe-inspiring stone structures or restoring delicate sculptures, this adhesive guarantees a bond that lasts a lifetime.
Versatility at its Finest:
No stone is left unturned with this adhesive marvel. From granite to marble, quartzite to limestone, super strong glue for stone works its magic on a variety of stone materials. This versatility opens up a world of possibilities, from repairing broken countertops to securing decorative stones in your outdoor oasis.
Defying Temperature Extremes:
Mother Nature may throw her tantrums, but fear not. This glue laughs in the face of temperature fluctuations. With exceptional resistance to scorching heat and bone-chilling cold, it remains steadfast in its purpose. Whether your stone project basks under the summer sun or withstands frosty winters, this adhesive will hold your creation together with unwavering strength.
Battle-Tested Impact Resistance:
Stones may be tough, but they’re not invincible. Super strong glue for stone steps into the arena as a valiant protector against cracks and chips caused by force or pressure. Its remarkable ability to absorb and distribute impact ensures that your stones remain intact and unscathed, preserving their beauty for years to come.
A User-Friendly Companion:
Prepare for a stress-free bonding experience. This adhesive arrives in a handy squeeze tube or bottle with an applicator tip, granting you precise control over its application. Whether you’re a seasoned professional or a passionate DIYer, using this glue is as easy as pie. Say goodbye to messy and frustrating bonding attempts.
Beauty in Disguise:
We all appreciate aesthetics, right? Super strong glue for stone understands this desire and dries clear or with a color that harmonizes seamlessly with the natural shade of your stone. Bid farewell to unsightly adhesive remnants and revel in the seamless beauty of your stone creation.
Common Mistakes When Bonding Stone with Adhesives
Before you dive in, beware of common mistakes that can turn your solid stone project into a crumbling disaster. In this article, we’ll explore the pitfalls to avoid when bonding stone with adhesives, so you can achieve a bond that stands the test of time.
Choosing the Wrong Adhesive:
Not all adhesives are created equal for stone bonding. Using a weak adhesive or one not specifically designed for stone can spell trouble. Select an adhesive offering the strength and durability needed for your project.
Neglecting Surface Preparation:
Stone surfaces can be tricky – uneven, porous, contaminated with dust and oils. Failure to clean and prepare these surfaces before applying adhesive hinders the bonding process. Thoroughly clean and prepare surfaces for a strong and lasting bond.
Applying Too Much or Too Little Adhesive:
Finding the Goldilocks zone is crucial. Too much adhesive won’t necessarily strengthen the bond and leads to wastage and mess. Conversely, too little adhesive may not provide enough coverage for a secure bond. Follow the manufacturer’s instructions for recommended amounts.
Rushing the Curing Process:
Impatience is your worst enemy when bonding stone with adhesives. Adhesives require sufficient time to cure and reach maximum strength. Avoid handling or stressing bonded stones before full curing, as it weakens the bond and compromises its integrity.
Ignoring Environmental Factors:
Nature can be tough on adhesives. Temperature fluctuations, humidity, moisture, and UV radiation impact adhesive performance on stone surfaces. Consider these factors during and after bonding for a bond that withstands the elements.
Neglecting Maintenance:
Don’t forget about your bonded stone surfaces. Regular maintenance and care preserve the bond over time. Clean and maintain stone surfaces to prevent dirt, grime, or water damage that weakens the adhesive bond.
Tips and Tricks for Working with Super Strong Glue for Stone
Working with super strong glue for stone can be a challenging task, but with the right techniques and precautions, you can achieve professional-looking results. In this blog post, we will discuss the importance of proper preparation, application techniques, and following the manufacturer’s instructions when using super strong glue for stone. So let’s dive in.
Prepare the Surface: The Foundation of a Strong Bond
Before applying the adhesive, it is crucial to prepare the surface properly. Imagine trying to build a sturdy house without a solid foundation – the same principle applies here. Clean the stone thoroughly using a mild detergent and water solution to remove any dirt or debris that could hinder the adhesion. Ensure that the surface is completely dry before proceeding. Any moisture left on the stone can compromise the bond.
Additionally, roughening the surface slightly can enhance the adhesion of the glue. Use sandpaper or a wire brush to create a textured surface, being careful not to damage or scratch the stone. This extra step provides more surface area for the glue to grip onto, resulting in a stronger bond.
Choose the Right Glue: Strength and Compatibility
Selecting the appropriate type of glue for your stone is essential. Just like different tools are used for different jobs, different glues have varying strengths and weaknesses. Epoxy-based glues are known for their high strength and resistance to heat and moisture, making them suitable for outdoor applications or areas with high humidity. On the other hand, polyurethane adhesives offer flexibility and impact resistance, making them ideal for bonding stones that may experience slight movements or vibrations.
Consider factors such as the type of stone you are working with, the conditions it will be exposed to (such as temperature and moisture), and whether it requires flexibility or rigidity. Consult with experts or the manufacturer to ensure you choose the right glue for your specific project.
Follow Manufacturer’s Instructions: A Recipe for Success
Always read and follow the instructions provided by the manufacturer of the glue. Each product may have specific recommendations or precautions that need to be followed for optimal results. Deviating from these instructions may affect the strength and durability of the bond.
Pay attention to details such as the recommended application temperature, curing time, and any safety precautions. Some glues may require a specific temperature range for optimal bonding, while others may need longer curing times to achieve maximum strength. By following the manufacturer’s instructions, you can ensure that you are using the glue as intended, maximizing its effectiveness.
Apply Glue Effectively: Less is More
To apply the glue effectively, remember that less is more. Using too much glue can create a messy appearance and result in excess glue squeezing out from between the stones. This excess glue can be challenging to remove once it dries, detracting from the overall aesthetics of your project.
Also Read: How To Glue Metal To Granite?
Conclusion
When it comes to finding a super strong glue for stone, you need a solution that can withstand the test of time and hold those sturdy rocks in place. Look no further than epoxy adhesives. These powerful glues are specifically designed to bond stone surfaces together with incredible strength.
Epoxy adhesives are made up of two components – a resin and a hardener. When mixed together, they create a chemical reaction that forms an incredibly strong bond. This bond is resistant to temperature changes, moisture, and even vibrations, making it perfect for securing stones in various applications.
One of the key advantages of epoxy adhesives is their versatility. They can be used on a wide range of stone materials, including granite, marble, limestone, and more. Whether you’re working on a small DIY project or tackling a larger construction job, epoxy adhesives have got you covered.
In addition to their strength and compatibility with different types of stone, epoxy adhesives also offer excellent gap-filling capabilities. This means that even if there are slight imperfections or gaps between the stones you’re trying to bond, the adhesive will fill them in seamlessly.
To ensure the best results with epoxy adhesives for stone bonding, proper surface preparation is essential. Make sure the surfaces are clean and free from any dirt or debris before applying the adhesive. Additionally, follow the manufacturer’s instructions carefully regarding mixing ratios and curing times for optimal performance.
So if you’re looking for a super strong glue for stone that can handle heavy-duty applications and provide long-lasting durability, look no further than epoxy adhesives.

