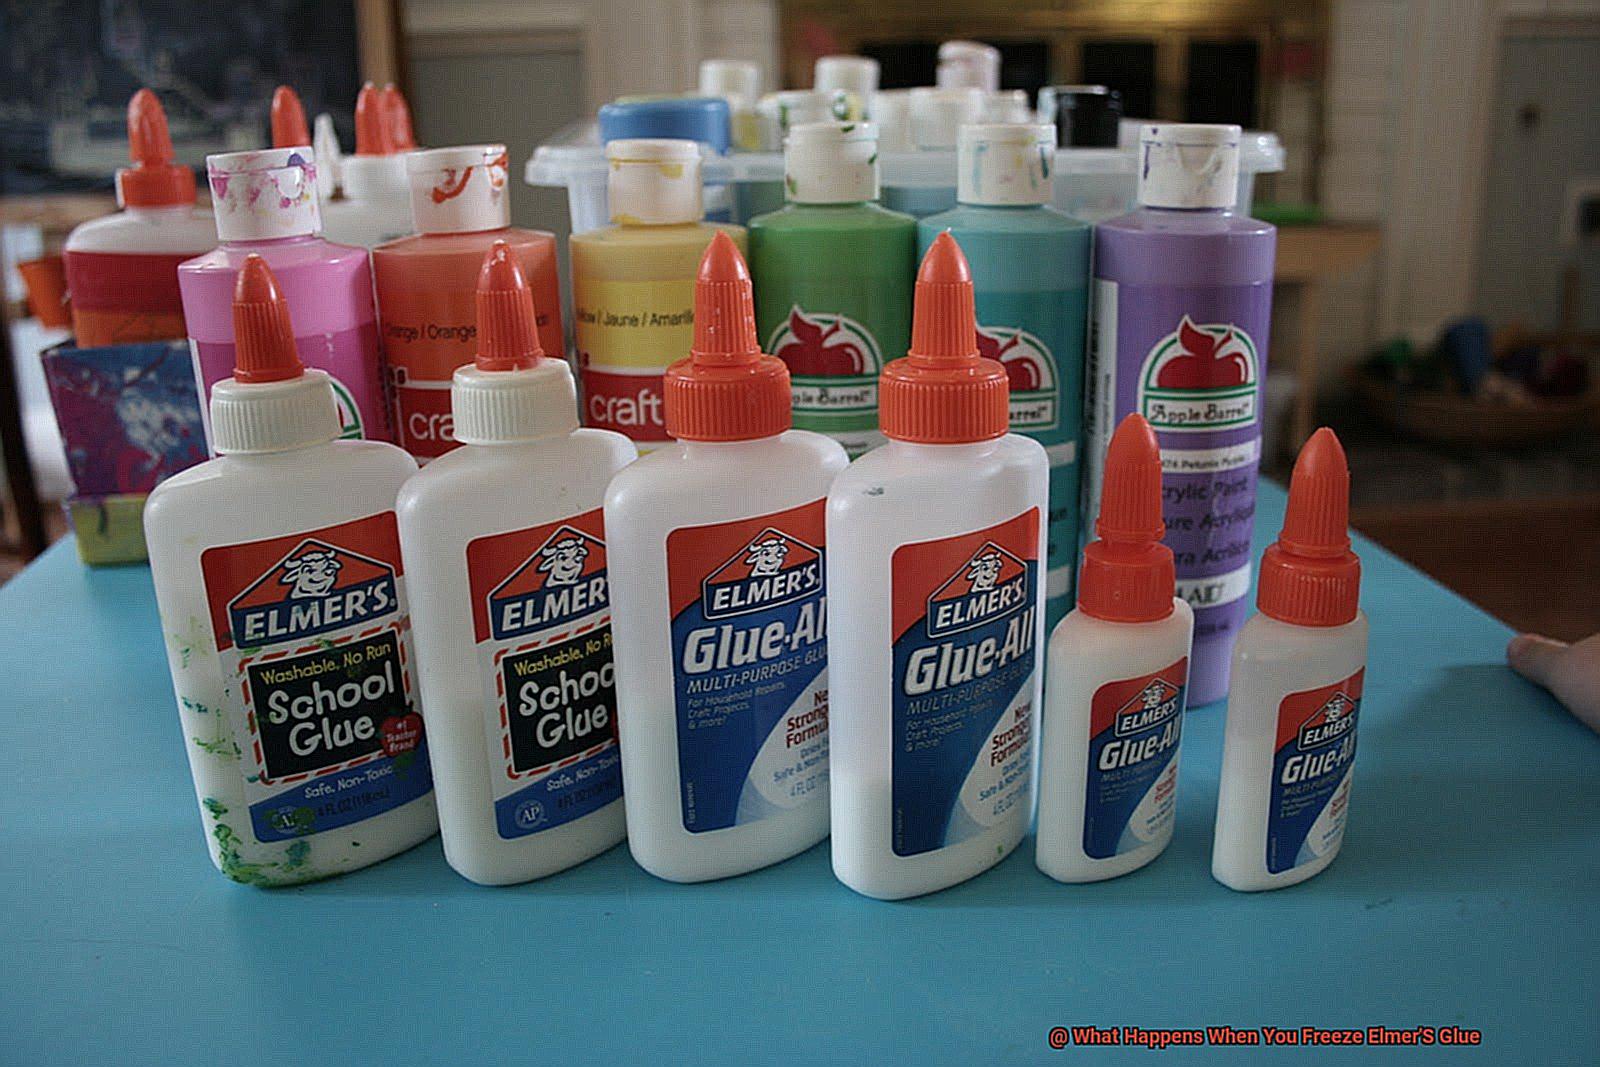
Picture this: you’re standing in front of a freezer, holding a bottle of good ol’ Elmer’s glue. As you stare at the frosty shelves, a thought crosses your mind – what happens when this sticky wonder encounters subzero temperatures? Well, my curious friend, get ready to embark on a chilly journey as we delve into the mesmerizing world of freezing Elmer’s glue.
Elmer’s glue has been our go-to adhesive for ages. It can fix broken toys, hold together school projects, and even create stunning crafts. But have you ever wondered how it reacts when faced with extreme cold? Does it become rock solid like an ice sculpture or transform into something entirely unexpected? Today, we’re going to unravel these frozen mysteries and discover what really happens when Elmer’s glue meets the icy embrace.
From changes in texture to potential alterations in bonding strength, this experiment promises to be an icy adventure like no other. So grab your lab coats (or maybe just a warm sweater) and join me as we uncover the chilling truth behind freezing Elmer’s glue. Get ready for some frozen magic that will leave you amazed and itching to try it out yourself.
What is Elmer’s Glue?
Contents
- 1 What is Elmer’s Glue?
- 2 What Happens When You Freeze Elmer’s Glue?
- 3 Physical Changes to the Glue
- 4 The Effects of Freezing on Adhesive Properties
- 5 Is it Recommended To Freeze Elmer’s Glue?
- 6 How To Thaw Frozen Elmer’s Glue?
- 7 Tips for Working with Elmer’s Glue in Cold Temperatures
- 8 Alternatives to Freezing Elmer’s Glue
- 9 Conclusion
Are you in search of the perfect glue for your arts and crafts projects? Look no further than Elmer’s Glue. This popular brand of adhesive is a favorite among crafters, students, and DIY enthusiasts for its strong bonding power and versatility.
Elmer’s Glue is made from a combination of water, polyvinyl acetate (PVA) resin, and various additives. The PVA resin is the star of the show, providing the glue with its stickiness and incredible bonding capabilities.
One of the standout features of Elmer’s Glue is its ability to dry clear. That means you can achieve a seamless finish on your projects without any unsightly residue. Its smooth consistency also makes it incredibly easy to apply and spread.
Elmer’s Glue comes in different forms to suit your needs. The liquid glue is the most common, packaged in plastic bottles or squeeze bottles with a narrow nozzle. If you prefer a mess-free option, glue sticks are a great choice. They’re solid sticks of adhesive that can be twisted up and down within a container. And if you’re worried about accidental spills or stains, washable school glue is designed to be easily washed off fabrics and surfaces.
This versatile glue can bond various materials together, including paper, cardboard, fabric, wood, and some plastics. It’s perfect for sticking paper together or attaching lightweight objects to surfaces. However, keep in mind that Elmer’s Glue may not be suitable for heavy-duty applications or materials exposed to excessive moisture or extreme temperatures.
Now that you know about Elmer’s Glue, let’s explore an interesting aspect – freezing it. When Elmer’s Glue is frozen, it undergoes a physical change and becomes solid. The water content in the glue turns into ice crystals, causing it to solidify. However, freezing can alter the glue’s texture, making it harder, more brittle, and less flexible.
Additionally, freezing Elmer’s Glue can impact its adhesive properties. Once thawed, the glue may not bond as effectively as before freezing. So, it’s generally recommended to avoid freezing the glue if possible. However, if you accidentally freeze it, make sure to let it thaw completely before using it again.
What Happens When You Freeze Elmer’s Glue?
Elmer’s glue is a staple in the crafting world, known for its strong adhesive properties and versatility. But have you ever wondered what happens when you freeze this trusty adhesive? In this article, we will delve into the science behind freezing Elmer’s glue, exploring how it affects its consistency and adhesive properties.
The Freezing Process:
When Elmer’s glue is exposed to freezing temperatures, a fascinating chemical change occurs. The water molecules within the glue begin to expand and form ice crystals. As a result, the glue undergoes a physical transformation, altering its texture and composition.
Separation of Layers:
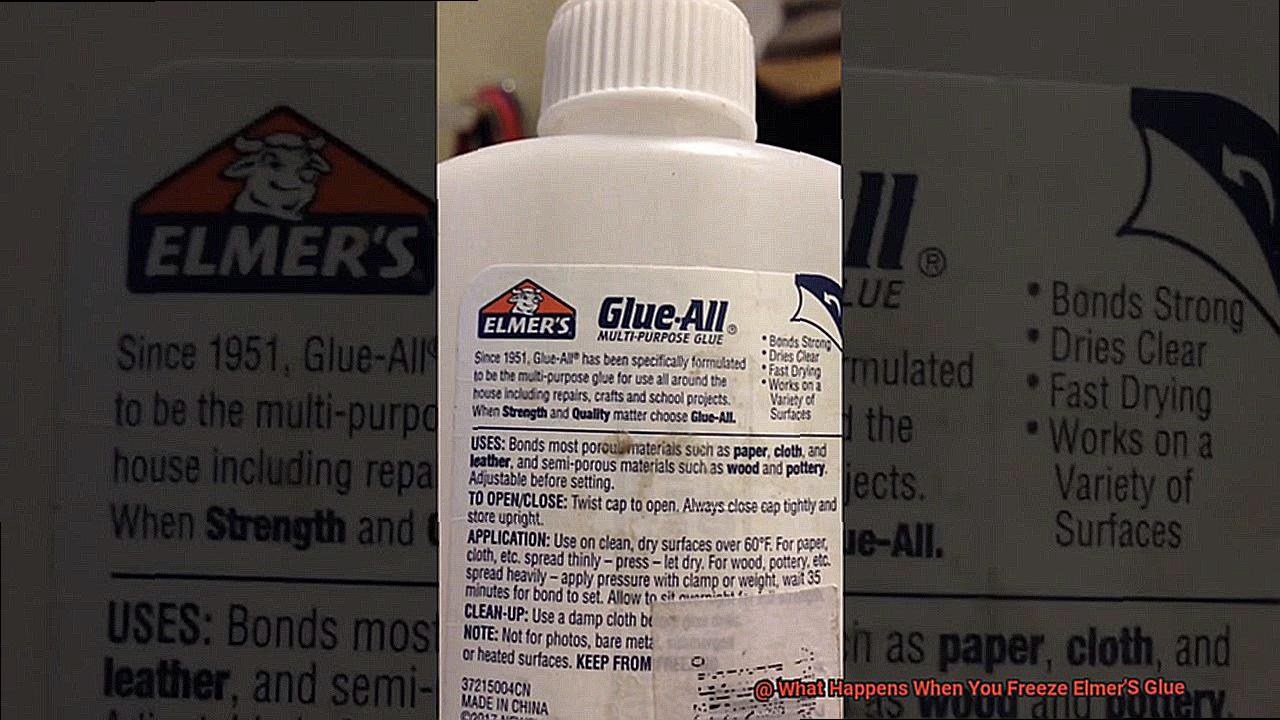
As the frozen glue starts to thaw, the ice crystals melt, causing an uneven distribution of water within the glue. This can lead to the separation of the glue into different layers. Typically, a watery layer forms on top, while a thicker, gel-like layer settles at the bottom. This separation can make it challenging to use the glue in its frozen state.
Altered Consistency and Adhesive Strength:
The separation of layers not only affects the appearance of the glue but also its consistency and adhesive properties. The expansion of water molecules during freezing weakens the glue, making it less effective in bonding materials together. Additionally, some users have reported that frozen Elmer’s glue takes longer to dry and may not provide as strong of a bond as fresh, unfrozen glue.
Restoring Frozen Glue:
If you accidentally freeze your Elmer’s glue, there are a few steps you can take to try to restore its original consistency. First, warm up the container slowly by placing it in a warm water bath or using gentle heat from a hairdryer. This process should help melt the ice crystals and allow for better mixing. However, keep in mind that even with these efforts, the thawed glue may not fully regain its original consistency and adhesive strength.
Physical Changes to the Glue
When Elmer’s glue takes a chilly plunge into the freezer, it undergoes a mesmerizing metamorphosis. Brace yourself as we dive headfirst into the captivating world of physical changes that occur when Elmer’s glue is frozen.
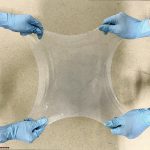
Let’s kick things off with a discussion about consistency. Picture this: Elmer’s glue in its natural state is a thick, gooey liquid that effortlessly flows like a tranquil river. But when the frosty fingers of the freezer embrace it, something extraordinary unfolds. Like a superhero donning its icy armor, the once-fluid glue morphs into a formidable solid. No longer can you spread or apply it with ease – it becomes stiff and unyielding, like a stubborn glacier refusing to budge.
But wait, there’s more. As the water content within Elmer’s glue succumbs to the freezing temperatures, cracks and separations dare to emerge. The icy grip of freeze causes the glue to crack and sometimes even split into distinct layers. It’s as if a frosty tundra has taken residence within your very own glue bottle – an enchanting sight that leaves you spellbound.
We mustn’t forget about color either. Those pure white variants of Elmer’s glue may experience an unexpected transformation when frozen. A subtle shift occurs, turning them into delicate shades of yellow or off-white. So not only does the texture change, but the appearance as well – an unexpected twist in this frozen tale.
Now let’s talk about stickiness, or lack thereof. Freezing Elmer’s glue can have a significant impact on its adhesive prowess. While there may still be remnants of its stickiness, it loses its effectiveness in bonding like it once did in its unfrozen state. So if you were hoping to rely on your frozen glue for your next creative endeavor, you might want to reconsider.
And here’s an essential nugget of wisdom: once Elmer’s glue thaws after its icy slumber, it cannot be resurrected for future projects. The physical changes that occur during freezing alter the properties of the glue, rendering it useless for any further creative exploits.
The Effects of Freezing on Adhesive Properties
While they may create a magical winter wonderland outside, they can have some not-so-magical effects on our beloved adhesives, like Elmer’s glue. So, let’s dive into the chilling world of freezing and its impact on adhesive properties.
When Elmer’s glue is exposed to freezing temperatures, it goes through some major changes. One of the key effects is the formation of ice crystals within the adhesive. As these crystals form, they expand and wreak havoc on the glue’s structure. It’s like a frozen army invading the glue, weakening its bond and making it less reliable than your favorite ice cream truck.
But that’s not all. Freezing can also make Elmer’s glue more brittle and less flexible. Just like standing outside in the cold without a warm coat, the glue becomes stiff and unable to handle stress or movement. So if you’re planning on using frozen Elmer’s glue for a project that requires flexibility, you might be in for a frosty surprise.
And let’s not forget about those pesky gaps and voids that freezing can create within the glue. These gaps reduce the contact area between the adhesive and the materials you’re trying to bond. Think of it as trying to connect two puzzle pieces with missing parts – it just doesn’t work. This means your bond may end up weaker than a snowflake in spring or, worst-case scenario, it could fail altogether.
But wait, there’s more. Freezing can also alter the viscosity of Elmer’s glue. It becomes thicker and harder to spread or apply evenly. Picture trying to frost a cake with rock-hard frosting – not exactly a piece of cake.
And here comes the sad part: once Elmer’s glue has been frozen and thawed, it’s pretty much game over. The damage caused by freezing is often irreversible, leaving you with a glue that’s as useful as a snowman in July.
So, before you toss that bottle of Elmer’s glue into the freezer, think twice. Extreme cold can transform your adhesive from a superhero into a frosty sidekick – one that’s not so reliable when it comes to sticking things together.
Is it Recommended To Freeze Elmer’s Glue?
When it comes to freezing Elmer’s glue, caution is advised. But why?
Freezing Elmer’s glue can have disastrous consequences on its consistency and performance. Picture this: frozen glue becomes thicker and more arduous to manipulate. Like trying to spread frozen butter on bread, the experience lacks the smoothness one desires.
Furthermore, freezing causes the glue to separate or clump, resulting in an uneven application and a weakened bond. This poses a significant problem when attempting to unite various materials such as paper, fabric, or wood. The compromised bond may falter over time, leading to project failures.
It is not just the glue that suffers when subjected to freezing temperatures; the container housing it can also sustain damage. The expansion of the frozen glue can wreak havoc on plastic bottles or tubes, leading to messy leaks and wasteful situations.
Granted, in some instances, certain Elmer’s glues (such as the School Glue variant) may exhibit minimal performance differences when frozen. Nevertheless, it is still advisable to store these glues at room temperature for optimal results.
To preserve the quality and extend the shelf life of your Elmer’s glue, ensure it resides in a cool and dry place away from extreme temperatures. By doing so, you guarantee that your glue remains at its prime and ready for your next creative endeavor.
How To Thaw Frozen Elmer’s Glue?
Picture this: you reach for your bottle of Elmer’s glue, only to find it frozen solid. Don’t panic – we’ve got you covered. In this step-by-step guide, we’ll show you how to thaw frozen Elmer’s glue and bring it back to its liquid glory. So, let’s dive in and learn how to rescue your glue from its icy prison.
Allow the glue to reach room temperature naturally:
The first step in thawing frozen Elmer’s glue is to let it defrost at its own pace. Resist the temptation to speed up the process with heat sources like microwaves or ovens: trust us, it’s a recipe for disaster. Just give the bottle some time to warm up on its own. Patience is key here.
Check the consistency:
Once the glue has reached room temperature, give it a gentle shake or stir to check its texture. Freezing can sometimes cause the glue to separate or become lumpy, but don’t fret. A few swirls with a stir stick should do the trick, bringing the glue back to its smooth and consistent state. Remember, easy does it: no need to whip up a frenzy and introduce air bubbles.
Thin out the glue if needed:
If the thawed glue is still a bit too thick for your liking, you can add a touch of warm water to thin it out. Be cautious though: start with just a few drops at a time and mix thoroughly before assessing the consistency. Too much water can compromise the adhesive properties of the glue, so tread lightly.
Test before use:
It’s important to keep in mind that freezing can alter Elmer’s glue’s adhesive prowess. After thawing, it may not have the same bonding strength as fresh glue. To avoid any sticky situations (pun intended), it’s wise to conduct a small test on an inconspicuous area before using it for important projects. Better safe than sorry.
Prevent freezing in the future:
To steer clear of future glue-sicles, store your Elmer’s glue in a temperature-controlled environment above freezing temperatures. This will ensure its consistency remains intact and it stays ready for action whenever you need it.
Tips for Working with Elmer’s Glue in Cold Temperatures
Elmer’s glue is a popular adhesive used for crafting and DIY projects. However, cold temperatures can affect its consistency and performance. To ensure optimal results when working with Elmer’s glue in the cold, follow these tips:
Warm up the glue before using it
In cold temperatures, Elmer’s glue becomes thick and less fluid, making it difficult to spread evenly. To counter this, warm up the glue by placing the bottle in a warm water bath for a few minutes. Avoid microwaving or exposing it to direct heat sources, as this can damage the adhesive properties.
Keep the project and glue at room temperature
Cold surfaces can also affect Elmer’s glue bonding strength. Ensure both the project and the glue are at room temperature before starting. If working outdoors in cold weather, bring the project indoors or find a warmer environment for proper adhesion.
Use a hairdryer on low heat
Gently warm up the surface before applying the glue using a hairdryer on a low heat setting. This helps improve adhesion even in cold temperatures. Keep the hairdryer at a safe distance from the glue to avoid overheating or damaging it.
Avoid extremely cold temperatures
Elmer’s glue is not recommended for use in freezing conditions. Prolonged exposure to freezing temperatures can irreversibly damage its adhesive properties. Store Elmer’s glue in a temperature-controlled environment and avoid subjecting it to freezing temperatures whenever possible.
Discard compromised glue
If the consistency of your Elmer’s glue has been compromised due to exposure to cold temperatures, discard it and use a fresh bottle for your project. Using compromised glue may result in weak or ineffective bonds, compromising the quality and durability of your project.
Alternatives to Freezing Elmer’s Glue
I have some exciting alternatives for you that will keep your crafting dreams alive and your glue ready for action.
Let’s start with the first alternative: storage. Extreme temperatures can wreak havoc on your glue, so it’s crucial to find a cool and dry place for it. Avoid leaving it in a scorching hot car or a freezing cold garage. Instead, seek out a stable environment where the temperature remains consistent. This simple step can go a long way in preserving the quality of your glue.
Now, let’s move on to the good stuff – preservatives. If you want to extend the life of your Elmer’s glue, there are commercial preservatives available that are specifically designed for adhesives like this. These little wonders work by inhibiting the growth of bacteria and mold, ensuring that your glue stays fresh for longer periods. Just follow the instructions on the package to ensure you’re using the right amount and voila. Your glue will be good to go.
But what if you don’t have access to a commercial preservative? Don’t worry. Mother Nature has got your back. You can add a small amount of white vinegar to your glue as a natural alternative. Vinegar possesses fantastic antimicrobial properties that can help prevent mold and bacterial growth. Just make sure to mix it well with the glue to distribute it evenly throughout.
If vinegar isn’t your thing, fear not. Another natural alternative is good old salt. Yes, that pantry staple can act as a preservative too. Simply add a small amount of salt to your glue and let it work its magic. Salt draws moisture out of the environment, inhibiting microbial growth and keeping your glue fresh. Remember to mix it thoroughly with the glue for maximum effectiveness.
Now, let’s talk containers. Storing your Elmer’s glue in an airtight container can do wonders for preserving its quality. Exposure to air can cause the glue to dry out or become thick and clumpy – not ideal for our crafting adventures. So seal it up tight and keep that precious air away from your glue.
Before we wrap it up, here’s a friendly reminder: while these alternatives are fantastic for extending the shelf life of Elmer’s glue, they may not be as effective as freezing for long-term storage. Freezing still reigns as the champion when it comes to keeping glue usable for an extended period.
1nEgFzKl60g” >
Conclusion
When you freeze Elmer’s glue, something fascinating occurs. The once smooth and flowing substance undergoes a remarkable transformation. It becomes rigid and solid, like a frozen moment in time. The molecules within the glue slow down, their movements restricted by the icy grip of the freezer. As a result, the glue loses its ability to adhere and bind materials together.
But that’s not all. When you thaw the frozen Elmer’s glue, it doesn’t return to its original state seamlessly. Instead, it undergoes irreversible changes. The texture becomes lumpy and grainy, no longer smooth and uniform. Its adhesive properties are compromised, rendering it less effective for sticking things together.
It’s truly mesmerizing to witness this metamorphosis firsthand. The once versatile and reliable Elmer’s glue is transformed into a fragile and altered version of itself. This experiment serves as a reminder of the delicate balance between temperature and chemical composition.