Have you ever wondered what would happen if you mixed sand and glue together? It may sound like an odd pairing, but the outcome can be quite remarkable. The combination of these two common household items can create a material with a range of uses and applications.
When sand and glue are blended, they produce a substance that is delightfully thick and textured. The sand particles are suspended in the glue, giving it a rough feel that can add depth to various settings. This mixture is perfect for creating tactile surfaces such as countertops or tables or as an artistic element in craft projects.
But that’s not all – the sand and glue concoction also has practical uses for DIY home improvement projects. Its strong bonding properties make it an excellent filler for cracks and gaps in walls and floors. Say goodbye to unsightly crevices with this versatile material.
Moreover, this unique mixture is not just limited to arts and crafts or home repairs; it’s also useful for scientific experimentation purposes. By exploring its physical properties like viscosity and elasticity, researchers can gain valuable insights into materials science.
In conclusion, mixing sand and glue may seem like an unconventional idea at first glance, but the possibilities are endless. With its distinctive texture, adhesive qualities, and versatility, this combination is ideal for any project that requires a little bit of creativity and ingenuity. Give it a try – you might be surprised by what you create.
What is Sand Glue?
Contents
Sand glue is a fascinating material that can be used for a variety of applications. It is created by combining sand and glue in a specific proportion, resulting in a powerful bonding agent that is ideal for construction, woodworking, and even art projects. Sand glue is typically composed of fine-grained sand mixed with water-based adhesive, such as PVA or white glue.
The sand in the mixture plays an essential role in boosting the bond’s strength and durability, making it an ideal solution for heavy-duty tasks. When combined with glue, sand particles stick together, creating a solid structure that can withstand tough conditions. Sand glue is often preferred over traditional cement or mortar-based adhesives because it is easier to work with and doesn’t require specialized tools or equipment.
Sand glue offers several advantages over other types of adhesives. One significant benefit is that it can be easily customized to meet specific project requirements. The amount of sand used in the mixture can be adjusted to create a stronger or weaker bond, depending on the project’s needs. Additionally, different types of sand can be used to achieve various textures or finishes, providing greater flexibility in design.

Let’s delve deeper into the uses of sand glue:
- Construction: Sand glue is widely used in construction projects to fill gaps or cracks in concrete walls and floors. It can also be used to create decorative finishes that add texture and depth to surfaces.
- Woodworking: In woodworking projects, sand glue can be used to fill gaps in wood joints, creating a stronger bond than traditional wood fillers. It can also be used to create decorative finishes on wood surfaces such as tabletops or bookcases.
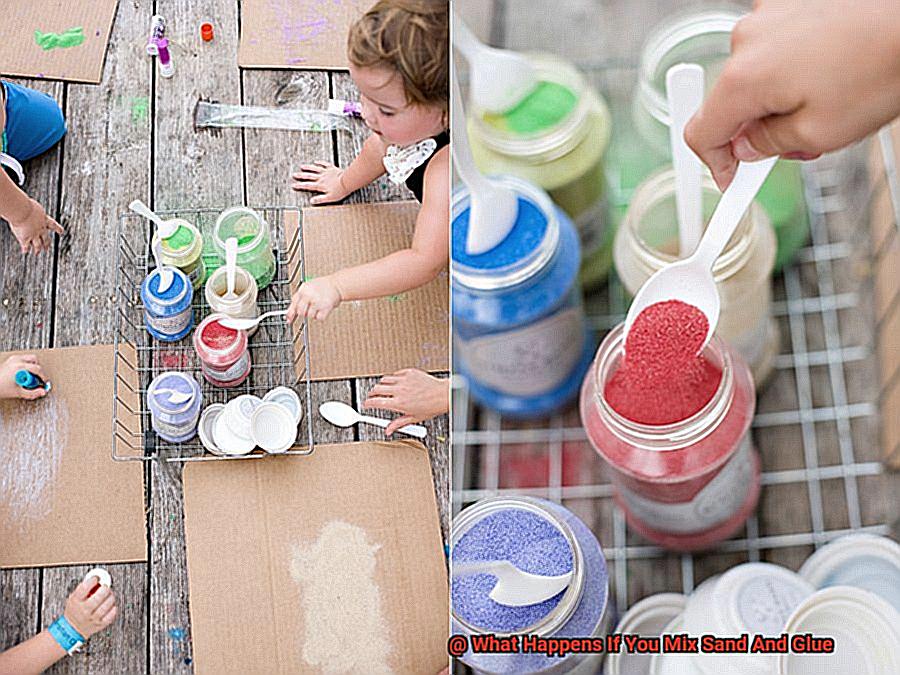
- Art Projects: Sand glue provides a sensory experience for children that encourages creativity and imagination. Children can use the mixture to create textured art projects or build sandcastles that will last longer than traditional sand structures.
To make sand glue, start by mixing the sand and glue in a specific proportion. The exact ratio will depend on the project’s requirements, but a 2:1 ratio of sand to glue is generally recommended. Once the mixture is ready, it can be applied to the project using a brush or spatula.
Uses of Sand Glue in Construction
Sand glue is a superhero in the construction industry. This versatile adhesive combines the strength of sand particles with the binding power of glue to create a solid structure that can withstand challenging conditions and provide greater flexibility in design.
Sand glue is a mixture of sand and adhesive glue used in various construction activities. It’s an effective alternative to traditional mortar or cement, making it an essential tool for any construction project.
So, what are the various uses of sand glue in construction? Let’s take a closer look:
Hardscaping Projects:
One of the primary uses of sand glue in construction is for hardscaping projects, such as paving stones. The mixture is used as a base layer between the pavers and the ground. This stabilizes the pavers and prevents them from shifting or settling over time. The adhesive properties of sand glue also keep the pavers in place during heavy rainfall or other weather events.
Masonry Projects:
Sand glue is commonly used in masonry projects for bonding bricks and blocks together. Applied between each layer of bricks or blocks, it creates a strong bond that holds the structure together. This type of bonding is particularly useful in areas that are prone to natural disasters such as earthquakes. Sand glue helps to prevent the structure from collapsing.
Concrete Repairs:
Another great use for sand glue in construction is for repairing cracks in concrete structures. The mixture can be applied to the cracks to fill them in and create a smooth surface. Once the mixture has dried, it can be sanded down to create a seamless finish that blends in with the surrounding concrete.
Uses of Sand Glue in Woodworking
That’s where sand glue comes in. This magical mixture of sawdust or sand and adhesive can be used for a variety of purposes in woodworking.
One common use of sand glue is for filling gaps and cracks in wood. Whether you’re working with natural wood or a pre-fabricated piece, you can easily fill these imperfections with sand glue to create a seamless surface that blends in with the surrounding wood. And the best part? Once dry, the mixture can be sanded down to create a smooth finish that looks like it was always there.
But sand glue isn’t just for fixing imperfections. It can also be used to add texture to your woodworking project. By mixing sand or sawdust into the adhesive, you can create a gritty surface that adds dimension and interest to surfaces such as tabletops or cabinets. This technique is particularly popular in rustic or coastal-themed designs where a weathered look is desired.
Another benefit of sand glue is that it can add weight to lightweight materials like balsa wood. By mixing sand into the adhesive, you can easily increase the weight of the piece without compromising its structural integrity. This is especially useful when working on projects that need to withstand wear and tear.
And if you want to get really creative, sand glue can also be used for decorative purposes. You can add colorants or stains to the sand or sawdust before mixing it with the adhesive to create a custom effect that perfectly complements your design.
Creative Uses of Sand Glue for Children
Get ready to unleash your child’s creativity with the exciting possibilities of sand glue. This simple mixture of sand and glue is a fantastic medium for children to explore and experiment with their artistic abilities. Here are some amazing uses of sand glue that your little ones will adore.
Painting with Sand Glue
Using sand glue as a painting medium is a creative and fun way for children to add texture and interest to their artwork. Mix sand and glue together to create a paste, then let your child’s imagination run wild as they apply the mixture onto paper or canvas with brushes or even their fingers. Once the glue dries, they can add color to their masterpiece with acrylic or watercolor paints.
Sculpting with Sand Glue
Unleash your child’s inner sculptor with sand glue. Mix equal parts of sand and glue to mold into different shapes and sizes. Your child can create anything from animals to buildings, adding other materials like beads or pipe cleaners for extra detail and interest. This is an excellent way for them to develop their fine motor skills while creating three-dimensional artwork.
Creating Textured Surfaces with Sand Glue
Sand glue is not just limited to painting and sculpting; it can also be used to create unique and tactile surfaces on various objects. Your child can apply the mixture to items such as picture frames or boxes, giving them a personalized touch.
They can even experiment by adding different colors of sand or glitter to make their creation sparkle.
Advantages of Using Sand Glue
If you’re looking for an adhesive that can handle anything, sand glue is the way to go. The mixture of sand and glue boasts numerous advantages over traditional adhesives. As an expert in the field, I’ve compiled some research notes highlighting the benefits of using sand glue. Let’s explore them together.
First and foremost, sand glue creates a strong bond between two surfaces. With the added grip from the sand, even rough or uneven surfaces will stay put. This makes it perfect for projects where durability is key.
But that’s not all. Sand glue is also water-resistant, making it a top choice for outdoor projects. Rain or shine, sand glue can withstand exposure to moisture without losing its adhesive properties.
Applying sand glue is a breeze too. You don’t need any special skills or equipment to use it. Simply choose a brush, roller, or trowel depending on your project requirements. Plus, you can adjust the mixture as needed to achieve the desired consistency.
And let’s not forget about cost-effectiveness. Sand glue requires fewer coats and less time to apply than other adhesives, making it an efficient and economical choice for large projects.
Finally, sand glue is versatile. You can use it to bond various materials such as wood, metal, concrete, and plastic. It’s also suitable for filling gaps and cracks in surfaces. With sand glue in your toolbox, you won’t need separate adhesives for different materials.
How to Make Your Own Sand Glue
Sand glue is an excellent material for bonding surfaces together, especially for non-structural applications. If you’re looking to embark on a DIY project that requires a strong and durable adhesive, sand glue could be the solution you need. Here’s how to make your own sand glue in six easy steps:
- Gather Your Materials: You’ll need sand, Portland cement, water, a mixing container, and a mixing tool. It’s recommended that you use coarse sand for better results.
- Mix Sand and Cement: Pour the sand into the mixing container. Add the same amount of Portland cement as sand (a 1:1 ratio). Use the mixing tool to mix the sand and cement thoroughly. This step is crucial as it ensures the consistency of the mixture.
- Add Water: Slowly add water to the mixture while stirring continuously. The amount of water needed will depend on the consistency you desire. If you want a thicker consistency, add less water, and if you want a thinner consistency, add more water.
- Achieve Desired Consistency: Ensure that you achieve the desired consistency before proceeding to use the sand glue. The mixture should be thick enough to hold its shape but not too thick that it becomes difficult to work with.
- Apply and Bond Surfaces: Apply the sand glue on the surface you want to bond and press the two surfaces together firmly. The bond should be strong and durable after drying completely.
- Use for Non-Structural Applications: It’s important to note that sand glue should only be used for non-structural applications as it’s not strong enough to hold heavy load-bearing objects or support weight over time. Also, avoid using it in areas exposed to constant moisture or water as it may weaken or deteriorate over time.
The Science Behind Mixing Sand and Glue
This incredible mixture is created by combining sand, Portland cement, and water to create a durable adhesive that can bond a variety of surfaces together. But what is the science behind this magical concoction?
When sand and glue are mixed together, a chemical reaction occurs, causing the glue to harden and bind the sand particles together. Instead of having loose sand grains that can easily be separated, you now have a solid and sturdy substance.
The glue used in this mixture is a key component that affects the final product’s properties. Different types of glue can impact the mixture’s strength, flexibility, and drying time. Elmer’s glue is a popular choice for sand glue because it dries clear and has a strong hold.
But the ratio of sand to glue is just as crucial. A higher proportion of sand can result in a coarser texture and lower strength. In contrast, too much glue can make the mixture too runny and difficult to work with.
Sand glue, also known as mortar, is commonly used in construction. It’s perfect for filling gaps between bricks or tiles, repairing damaged concrete surfaces, or even creating sculptures and other art projects.
Safety Tips When Working with Sand Glue
Working with sand glue is a great way to add texture and dimension to your projects. However, it’s important to prioritize safety to avoid accidents or injuries. Here are some safety tips to keep in mind when using sand glue:
Gear Up for Protection
Sand glue can be abrasive and harmful to the skin, eyes, and respiratory system. Therefore, wear protective gear such as gloves, safety glasses, and a dust mask to prevent any contact with the glue or sand particles. This is especially crucial if you have sensitive skin or respiratory problems.
Ventilation is Key
Ensure that you work in a well-ventilated area to prevent inhaling any fumes that may be produced from the glue. Poor ventilation can lead to respiratory issues or other health problems. Consider using a fan or opening windows to improve air circulation.
Keep Your Space Clean
Keeping the work area clean and tidy is essential to prevent any slips or falls. Spills should be cleaned up immediately using a damp cloth, and all tools and equipment should be stored away safely when not in use. A clutter-free workspace also helps with concentration and efficiency.
Follow the Instructions
It’s important to read and follow the manufacturer’s instructions carefully when using sand glue. Follow the guidelines on how to mix the glue with sand, the appropriate drying times, and any other safety precautions specific to the product. Ignoring these instructions can lead to unsatisfactory results or even accidents.
Store Properly
Finally, it’s crucial to store the sand glue mixture in a sealed container when not in use to prevent it from drying out or hardening prematurely. This will help ensure that your sand glue is ready for use when needed, and it will last for a longer period of time.
Conclusion
In conclusion, the combination of sand and glue may seem like an unusual pairing, but it opens up a world of possibilities. This simple mixture can be used in a variety of ways to create tactile surfaces, artistic elements, or even fill gaps in home improvement projects. The versatility of sand glue makes it an excellent choice for scientific experimentation as well.
Sand glue offers several advantages over other adhesives. Its strong bonding properties make it ideal for creating durable connections between surfaces. Additionally, its water-resistant properties make it a great choice for outdoor projects or items that may come into contact with moisture. With its cost-effectiveness and ease of application, sand glue is a practical option for any DIY project.
By adjusting the amount of sand used in the mixture, you can customize the strength of the bond to suit your needs. Whether you’re looking for a robust hold or a more delicate touch, sand glue has got you covered.
However, when working with this mixture, safety should always be top priority. Protective gear such as gloves, safety glasses, and dust masks should be worn to prevent any contact with harmful particles or fumes produced during the mixing process.
Overall, incorporating sand into your glue mixture is an innovative way to add texture and dimension to your projects while also providing strong bonding properties.