Welcome to our blog, where we’ll explore the wonderful world of scrapbooking glue. Whether you’re a seasoned scrapbooker or just starting out, finding the right glue is essential for preserving your memories and creating beautiful keepsakes.
Scrapbooking offers endless possibilities, and there are several types of glue that work wonders for different applications. For paper-based crafts like attaching photos or embellishments, you can’t go wrong with double-sided tape or a trusty glue stick. These options provide a strong bond without ruining your delicate pages.
If you’re working with heavier materials such as fabric, buttons, or chipboard, a liquid adhesive is your best bet. Look for a clear-drying, acid-free craft glue to ensure that your photos and paper won’t yellow or deteriorate over time. And don’t forget about precision. Opt for an adhesive with a fine brush applicator or precision tip for controlled application.
To avoid any sticky situations (pun intended), remember to use the glue sparingly and evenly. A little bit goes a long way, so resist the urge to go overboard. Testing on a small area first will also give you peace of mind before committing to the whole project.
When it comes to adding dimension and stability to your creations, foam adhesive dots or tape are your secret weapons. These nifty tools allow you to attach bulky or three-dimensional embellishments without the mess of liquid glues.
And let’s not forget about glitter. If you love adding some sparkle to your projects, using glitter glue is an absolute game-changer. It eliminates the need for separate glitter application and keeps things tidy. Just be mindful of drying time to prevent any smudging or smearing mishaps.
Armed with this knowledge of different scrapbooking adhesives, you’re now ready to choose the perfect glue for your projects. Remember to read product labels, test on scrap materials, and most importantly, have fun exploring all the possibilities that scrapbooking glue offers. Stay tuned for more tips and tricks to make your scrapbooking journey a joyous and creative one.
Types of Glue for Scrapbooking
Contents
- 1 Types of Glue for Scrapbooking
- 2 Liquid Adhesive for Scrapbooking
- 3 Double-Sided Tape for Scrapbooking
- 4 Glue Gun and Strong Liquid Adhesive for Heavier Embellishments
- 5 pH Level of the Glue You Choose
- 6 Testing the Glue on a Small Area First
- 7 How Does the Glue Dry?
- 8 Personal Preference in Choosing the Right Glue
- 9 Conclusion
Whether you’re a beginner or an experienced scrapbooker, choosing the right glue is crucial to ensure that your memories are preserved for years to come. In this article, we’ll explore the different types of glue commonly used in scrapbooking and discuss their unique advantages. So, grab your scissors and let’s dive in.
Acid-Free Glue – The Guardian of Memories:
When it comes to preserving your precious photos and delicate embellishments, acid-free glue is your best friend. This special adhesive is pH neutral, ensuring that it won’t turn yellow or damage your materials over time. Acid-free glue acts as a superhero, protecting your memories for years while keeping them as vibrant as the day you created them.
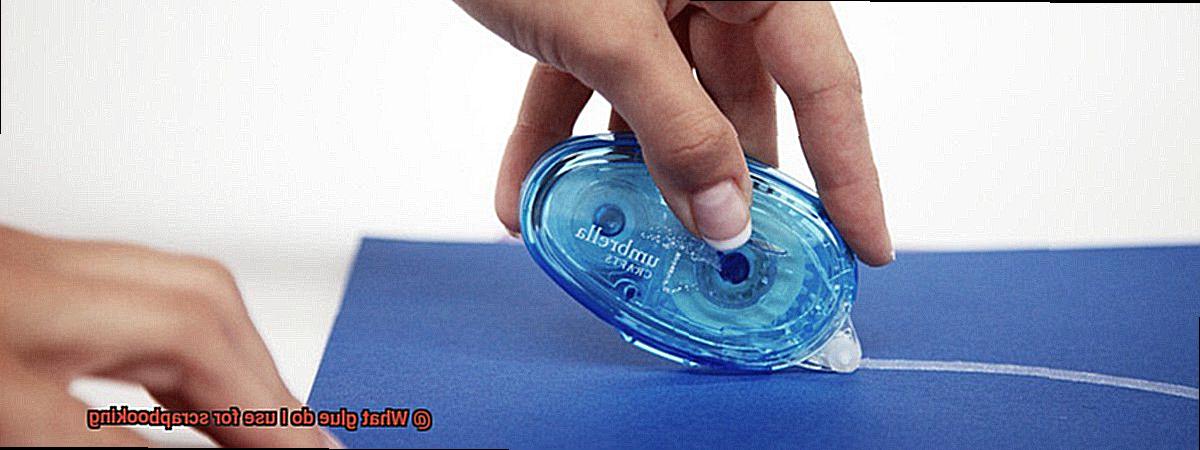
Double-Sided Tape – A Secret Weapon for Clean Application:
If you’re looking for a convenient and mess-free option, double-sided tape is here to save the day. With adhesive on both sides, this tape ensures a clean application without any lumps or bumps. It’s perfect for securing lightweight embellishments, photos, and paper cutouts, allowing you to create seamless and professional-looking scrapbook pages.
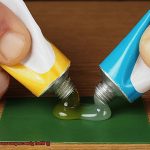
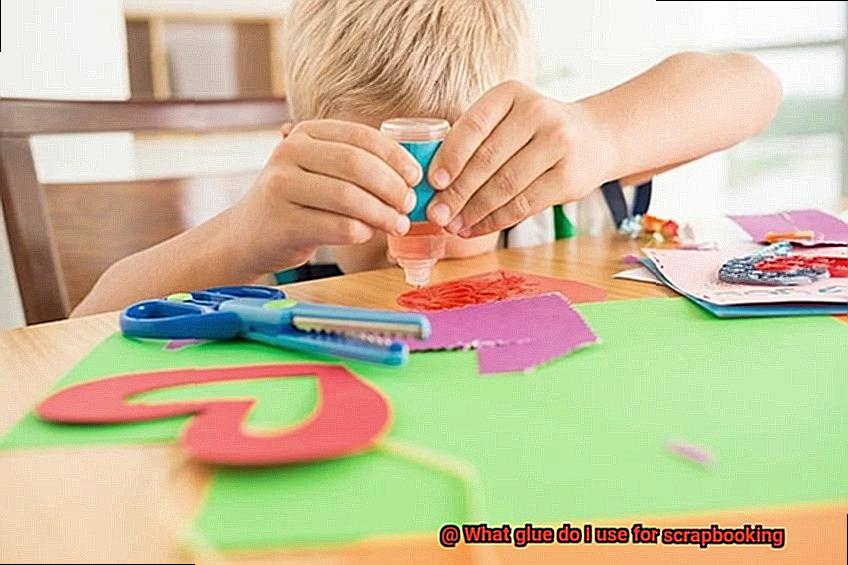
Liquid Glue – Versatility at Your Fingertips:
Liquid glue is like a chameleon that adapts to any situation in scrapbooking. Whether you need to attach transparent elements like vellum or heavy embellishments like buttons, liquid glue has you covered. With options like clear-drying or wet adhesive, you can choose the formula that suits your specific needs. Liquid glue is the ultimate multitasker in your glue collection.
Adhesive Dots – Small but Mighty:
When it comes to attaching small embellishments like sequins, rhinestones, or die cuts, adhesive dots are your secret weapon. These small, round adhesive pieces provide a strong bond without any mess. Just peel them off the roll or sheet and press them onto your scrapbook pages. Adhesive dots are the perfect solution for adding that extra sparkle to your projects.
Foam Tape – Adding Depth and Dimension:
If you want to take your scrapbook pages to the next level, foam tape is the way to go. This three-dimensional adhesive raises elements off the page, creating a layered effect that adds depth and dimension. With different thicknesses available, you can create varying levels of dimension on your layouts – from subtle to eye-catching.
Now that you’re armed with knowledge about the different types of glue for scrapbooking, you can confidently choose the right adhesive for your projects. Whether you need acid-free glue for long-lasting preservation, double-sided tape for clean application, liquid glue for versatility, adhesive dots for small embellishments, or foam tape for added dimension, there’s a glue option to suit every need.
Liquid Adhesive for Scrapbooking
Prepare to embark on a creative journey as we explore the diverse range of liquid adhesives available for your scrapbooking projects.
Let’s begin with the superhero of adhesives – clear-drying glue. This extraordinary adhesive is perfect for delicately attaching embellishments like rhinestones or sequins to your scrapbook pages. Its quick-drying formula ensures a clean and professional finish, leaving no visible residue behind.
Now, let’s dive into the realm of wet glue. This adhesive grants you the freedom to experiment and explore, thanks to its longer drying time. You can easily reposition elements before they fully adhere to the page, making it ideal for heavier items like chipboard or fabric. Embrace the joy of discovery as you find the perfect arrangement for your masterpiece.
But that’s not all – let’s talk about applicators. Some liquid adhesives come equipped with fine-tip applicators, allowing for precise application and unparalleled control over the amount used. Say goodbye to messy mishaps when working with small or intricate embellishments – these applicators are here to save the day.
As you embark on your adhesive adventure, don’t forget to consider the pH level of the glue. To preserve your precious memories, opt for acid-free or archival-quality adhesives that guarantee longevity. Additionally, be mindful of strong odors that may accompany certain adhesives. If you’re sensitive to smells, seek out odorless or low-odor options that won’t overpower your senses.
Before committing to a specific adhesive, always conduct a test run. Grab a scrap piece of paper or material and witness how the adhesive performs with your chosen materials. This precautionary step ensures smooth sailing and prevents any sticky situations (pun intended).
While liquid adhesives are truly magnificent, don’t overlook other options such as tape runners, double-sided tape, glue dots, and foam tape. Each alternative possesses its own unique benefits, catering to different projects or materials. Embrace the spirit of experimentation as you discover your personal adhesive ally.
Double-Sided Tape for Scrapbooking
If you’re looking for a versatile and easy-to-use adhesive, double-sided tape is a must-have tool in your scrapbooking arsenal. Let’s explore the benefits and considerations of using double-sided tape in your projects.
One of the standout features of double-sided tape is its versatility. It can attach photos, papers, and lightweight embellishments to your scrapbook pages with ease. You can find it in various widths, from narrow strips to wider rolls, allowing you to choose the perfect size for your specific application needs.
When selecting double-sided tape for your precious memories, make sure it’s acid-free and archival-safe. This ensures that your tape won’t yellow or damage your photographs and other materials over time, preserving the longevity of your scrapbook projects.
To keep your attachments securely in place, look for a double-sided tape with a strong adhesive bond. Nobody wants their carefully crafted elements falling off their pages.
Some double-sided tapes have removable backing, which is a game-changer for scrapbookers who like to play around with their layouts. This feature makes it a breeze to position and reposition elements on your scrapbook pages before permanently adhering them.
Get creative with double-sided tape by using it to create interactive elements in your scrapbook. Think flip-up photo flaps or pull-out tags – the possibilities are endless. This adds an extra touch of fun and interactivity to your pages.
When applying double-sided tape, remember to do so evenly and avoid overlapping it with other elements on your page to prevent a bulky appearance. It’s also a good idea to test it out on a small area before committing to the whole project, especially if you’re working with delicate materials or textured surfaces.
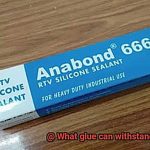
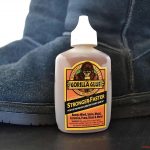
Glue Gun and Strong Liquid Adhesive for Heavier Embellishments
When working on a scrapbooking project that involves heavier embellishments, it’s important to choose the right adhesive for the job. Two popular options are glue guns and strong liquid adhesives. Let’s compare and contrast these choices, looking at their pros and cons, as well as some recommended materials.
First, let’s talk about glue guns. These versatile tools are a favorite among scrapbookers who need a strong bond for their projects. Glue guns can adhere a wide variety of materials, including fabric, wood, metal, and plastic. It’s important to choose the right type of glue sticks for your project. High-temperature glue sticks are ideal for heavier materials, while low-temperature glue sticks work well for delicate items.
One of the main advantages of using a glue gun is the quick drying time. The hot melted glue sets rapidly, allowing you to continue working without pause. However, it’s essential to exercise caution when using a glue gun. The high heat can cause burns if it comes into contact with your skin. Always use the glue gun on a heat-resistant surface and keep it away from children and pets.
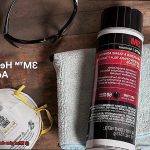
On the other hand, strong liquid adhesives offer a more permanent bond compared to glue guns. These specially designed adhesives come in bottles with precision applicators, making it easy to apply them accurately without making a mess. They are perfect for securing heavy embellishments like metal charms and large beads.
To get the best results with strong liquid adhesives, follow the manufacturer’s instructions carefully. Some adhesives require applying them to both surfaces and allowing them to dry before pressing them together. It’s also recommended to test the adhesive on a small area or scrap piece of paper before applying it to your actual project. This will ensure compatibility and help you avoid any visible residue or damage.
Ultimately, the choice between a glue gun and strong liquid adhesive depends on your specific project and personal preference. Glue guns provide a quick and strong bond, while strong liquid adhesives offer a more permanent hold. Whichever option you choose, remember to follow instructions carefully and work in a well-ventilated area.
pH Level of the Glue You Choose
Then you know that every aspect of your beloved hobby is crucial, including the pH level of the glue you choose. But why should you care about the acidity or alkalinity of your adhesive? Well, let me tell you, it can make all the difference in preserving your precious memories for years to come.
So what exactly does pH level mean? It’s a scale that measures how acidic or alkaline a substance is, ranging from 0 to 1Seven is neutral, anything below that is acidic, and anything above is alkaline. Acidic substances have a notorious reputation for causing yellowing, fading, and discoloration over time. And trust me, those are things we definitely don’t want for our beautiful scrapbook pages.
That’s where choosing a glue with a neutral or slightly alkaline pH level comes into play. It ensures that your photos, papers, and embellishments stay protected from potential damage caused by acidity. And believe me when I say this, you don’t want all your hard work and cherished memories to be ruined by an ill-chosen adhesive.
But how can you determine the pH level of your glue? Fear not. You can easily use pH testing strips or a pH meter to get an accurate reading. Look for glues that fall between 7 and 9 on the pH scale – this range is considered safe for scrapbooking purposes.
Now you might be thinking, “How do I know which glues have the right pH level?” Great question. Many reputable glue manufacturers provide information about the pH level on their product labels or websites. So before making a purchase, take a moment to check if the glue falls within the safe range.
But wait, there’s more to consider when selecting the perfect adhesive for your scrapbooking projects. You’ll also want to ensure that it’s strong enough to hold your materials in place but flexible enough to allow for adjustments if needed. Nobody likes a glue that dries too fast and leaves no room for error, right?
And let’s not forget about the dreaded residue and marks. Nobody wants those showing up on their pages. Look for glues that dry clear and won’t leave behind any visible traces. After all, we want our beautiful creations to be the star of the show, not the adhesive.
Lastly, pay attention to the type of materials you’ll be working with. Different glues are designed for different materials – paper, fabric, wood, you name it. So make sure to choose a glue that is compatible with the specific materials you’ll be using in your scrapbooking projects. It’s all about finding that perfect match.
Testing the Glue on a Small Area First
Scrapbooking is an art form that allows us to capture and cherish our most treasured memories. Whether you’re an experienced scrapbooker or just starting out, one thing is certain: selecting the right adhesive is crucial. With countless glue options available, it’s essential to test the adhesive on a small area before embarking on your scrapbooking project. In this article, we will explore why testing the glue on a small area is essential and how it can help you achieve picture-perfect results in your scrapbook layouts.
Compatibility with Materials:
Different types of paper, embellishments, and adhesives may not always work harmoniously together. By testing the glue on a small area, you can ensure that it adheres properly without causing any damage or discoloration to your materials. Preserving your cherished memories requires being cautious rather than regretful.
Simple Testing Process:
The testing process is quick and straightforward. Grab a small scrap piece of paper or cardstock similar to what you’ll be using in your project. Apply a small amount of the glue onto the scrap piece, following the instructions on the packaging. Spread the glue evenly, ensuring it covers the entire test area. Allow it to dry completely, then examine it closely.
Signs to Look for:
During your examination, be vigilant for signs of discoloration, warping, or damage to the paper. These warning signs indicate that the glue may not be suitable for your project. Additionally, gently touch the glued area to check its security and resistance to lifting or peeling off. A well-adhered test area is a positive indicator that the glue will perform well in your scrapbooking project.
Selecting the Right Glue:
Testing different glues allows you to find the one that best suits your specific materials and techniques. Some glues excel at adhering delicate embellishments like ribbons and lace, while others are better suited for heavier items such as chipboard or metal charms. By experimenting with different options, you can make an informed choice and achieve professional-looking results.
How Does the Glue Dry?
Glue, the magical substance that bonds materials together, undergoes a fascinating drying process. It’s a combination of evaporation, solidification, and even chemical reactions that bring about the transformation from sticky liquid to strong bond. The knowledge of how glue dries is essential for selecting the right adhesive for your scrapbooking projects, ensuring that your creations stand the test of time.
When you apply glue to a surface, the drying process commences. Glue typically consists of two main components: a liquid adhesive and a solvent. The liquid adhesive creates the bond between materials, while the solvent keeps the adhesive in a liquid state until it’s applied.
The moment you apply the glue, the solvent begins its great escape into the air. Evaporation is the key to glue drying and forming a solid bond. The rate of evaporation depends on factors such as temperature, humidity, and the type of glue used. Higher temperatures and lower humidity levels speed up drying times, making your glue dry in a jiffy in warm and dry conditions. Conversely, cold and humid spaces can slow down the drying process.
As the solvent evaporates, the remaining liquid adhesive starts to solidify. This solidification occurs when polymer chains within the adhesive link together, forming a sturdy bond. Different types of glues have varying drying times, ranging from minutes to hours or even overnight.
Not all glues dry solely through evaporation; some go through chemical reactions to cure and harden. Epoxy or cyanoacrylate (super glue) fall into this category. These glues come in two parts that need to be mixed before application. Once mixed, a chemical reaction takes place between the components, resulting in an unbreakable bond. The curing time for these glues varies depending on the specific product.
Absorption is another method by which certain glues dry. Glue sticks or glue dots exemplify this process. Initially in a solid state, they become tacky when pressure is applied. As they are pressed onto a surface, the adhesive absorbs into the material, creating a bond as it cools and solidifies.
It’s important to note that different glues have different properties when dry. Some dry clear, becoming nearly invisible, while others may have a slight yellowish tint. Additionally, certain glues remain flexible even after drying, allowing for movement or flexibility in the adhered materials.
Personal Preference in Choosing the Right Glue
When it comes to personal projects, such as scrapbooking or crafting, choosing the right glue is crucial for success. With a wide variety of options available, each with its own unique characteristics, personal preference plays a significant role in selecting the perfect adhesive. By considering factors such as adhesive strength, drying time, consistency, compatibility with materials, and crafting style, you can find the glue that aligns perfectly with your creative vision.
Adhesive Strength:
The first factor to consider when choosing glue is its adhesive strength. If your project involves heavy materials or three-dimensional elements, opt for a glue that provides a strong bond. On the other hand, if you’re working with delicate items or lightweight paper, a more gentle adhesive will prevent damage and ensure the longevity of your project.
Drying Time:
Time is of the essence in today’s fast-paced world. Consider the drying time of the glue you choose. Quick-drying adhesives save valuable minutes and allow you to move forward efficiently. However, if you prefer more flexibility and the ability to reposition your elements before they set in place, a slower drying glue may be more suitable for your artistic process.
Consistency:
Precision is key when adhering small details or creating intricate designs. The consistency of the glue plays a vital role in achieving this level of precision. Some individuals prefer thicker glues that offer better control and precise application. Others find thinner glues easier to work with as they can be applied smoothly and evenly across larger areas. Experimenting with different consistencies will help you find the perfect fit for your personal crafting style.
Compatibility with Materials:
Different adhesives work best with specific materials. Consider the materials you frequently use in your projects. If paper is your go-to material, choose a glue stick or liquid adhesive formulated specifically for paper projects. On the other hand, if fabric or ribbon is your preferred medium, opt for a fabric glue or a strong adhesive tape. Ensuring compatibility between the glue and materials will result in optimal results and longevity for your projects.
Crafting Style:
Lastly, personal preference is paramount when selecting the right glue for your creative projects. Your crafting style is unique, and finding the glue that aligns with your preferences will elevate your creativity. Some crafters prefer the convenience of a glue pen or a tape runner, while others enjoy the precision and control offered by a fine-tip glue applicator. Experimenting with different types of glues and application methods will help you discover what works best for you.
XtnlW7AAaTk” >
Conclusion
There are various types of glue that can be used for scrapbooking, each with its own unique properties and benefits. When choosing a glue for your scrapbooking projects, it is important to consider factors such as the type of materials you will be working with, the level of permanence desired, and the overall aesthetic you wish to achieve.
One popular option for scrapbooking is acid-free glue. Acid-free glue is specially formulated to ensure that it does not contain any acidic components that could potentially damage or deteriorate your photos or other delicate materials over time. This type of glue is ideal for preserving your memories and ensuring that your scrapbook pages stand the test of time.
Another commonly used adhesive in scrapbooking is double-sided tape. Double-sided tape provides a clean and seamless look to your projects, as it eliminates the need for visible adhesive lines. It is particularly useful when adhering lightweight embellishments or attaching papers together without any mess or residue.
For more intricate and detailed elements in your scrapbook layouts, liquid glues with fine tips are a great choice. These glues allow for precise application and control, ensuring that even the tiniest pieces stay securely in place. They are perfect for attaching small gems, beads, or delicate die cuts.
If you prefer a stronger bond or need to adhere heavier items like chipboard or fabric to your pages, a strong adhesive such as a glue gun may be necessary. Glue guns provide an instant and durable bond, making them well-suited for more heavy-duty applications.
In addition to these options, there are also specialized glues available specifically designed for certain materials or effects. For example, there are glues designed specifically for adhering glitter or creating dimensional effects on your projects.
Ultimately, the best glue for your scrapbooking needs will depend on the specific requirements of your project and personal preferences. It may be helpful to experiment with different types of adhesives to find what works best for you. Remember to always test a small area first and allow sufficient drying time to ensure the desired results.
In conclusion, choosing the right glue for your scrapbooking projects is crucial to achieving professional-looking and long-lasting results. Consider the materials you will be working with, the level of permanence desired, and the overall aesthetic you wish to achieve. With a wide variety of options available, there is sure to be a perfect adhesive for every scrapbooking endeavor.