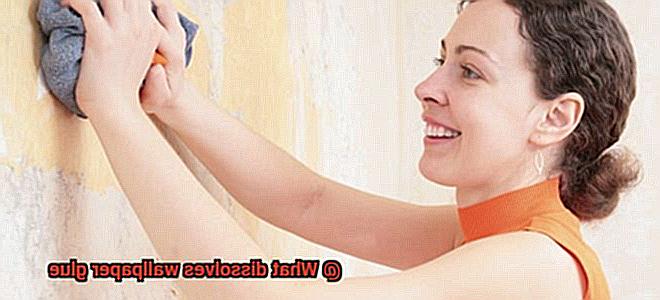
Ready to bid farewell to that outdated wallpaper in your home?
Time for a fresh change and a new lease on life for your walls. But first, we’ve got to tackle the not-so-fun task of removing that stubborn wallpaper glue.
Don’t worry, my friends, I’m here to guide you through this sticky situation. In this blog post, we’ll dive into the fascinating world of dissolving wallpaper glue.
So grab your trusty scraper and let’s embark on this adventure of glue removal.
Methods for Removing Wallpaper Glue
Contents
- 1 Methods for Removing Wallpaper Glue
- 2 Hot Water Method
- 3 Commercial Wallpaper Removers
- 4 Vinegar Solution Method
- 5 Stronger Solvents: Denatured Alcohol and Acetone
- 6 Tips and Tricks for Removing Stubborn Wallpaper Glue
- 7 Considerations for Different Types of Wallpaper
- 8 Safety Precautions When Working with Wallpaper Glue Dissolvers
- 9 Conclusion
Don’t let the daunting task of removing wallpaper glue discourage you from giving your space a fresh new look. Fear not. In this comprehensive guide, we’ll explore various methods for removing stubborn wallpaper glue and help you choose the best one for your specific needs.
Method 1: Wallpaper Steamer
One of the most popular and efficient methods is using a wallpaper steamer. By applying steam to the wallpaper, the glue softens, making it easier to remove. Renting or purchasing a wallpaper steamer is a worthwhile investment for larger projects.
Method 2: Wallpaper Removal Solution
Commercially available wallpaper removal solutions are specifically designed to dissolve wallpaper glue. Simply apply the solution with a sponge or sprayer, allowing it to penetrate and loosen the glue. These solutions can be found at your local home improvement store.
Method 3: DIY Solution – Hot Water and Vinegar
For those who prefer a natural approach, mix equal parts hot water and vinegar. Apply this DIY solution to the wallpaper with a sponge or spray bottle. The hot water softens the glue, while vinegar acts as a natural solvent.
Method 4: Sanding
When other methods fail, sanding may be required. Exercise caution and only sand walls in good condition that can withstand the process without damage. Sand carefully to avoid any mishaps.
Method 5: Professional Assistance
When all else fails, don’t hesitate to seek professional help. Professionals have specialized tools and techniques that ensure efficient and damage-free removal of wallpaper glue.
Hot Water Method
I am here to share with you the secret weapon of wallpaper removal – the hot water method.
Now, I know what you’re thinking – hot water? That doesn’t sound very exciting or revolutionary. But trust me, this method is a game-changer. It’s simple, effective, and best of all, it doesn’t require any harsh chemicals.
So grab your bucket, fill it up with hot water, and let’s get started.
Step 1: Gather your supplies
You’ll need a large bucket or basin, hot water (the hotter the better), a sponge or cloth, and a scraper or putty knife.
Don’t worry, these are all things you probably already have lying around the house.
Step 2: Soak that wallpaper
Dunk your sponge or cloth into the hot water and wring out any excess moisture. Then, apply the hot water directly to a small section of the wallpaper. Focus on areas where the glue is particularly stubborn. Let the hot water work its magic for a few minutes as it softens and loosens the glue.
Step 3: Scrape away.
Armed with your scraper or putty knife, start at an edge or corner and gently scrape away the wallpaper. Apply light pressure and work your way across the wall. Be careful not to damage the wall surface underneath – we want a clean removal here.
Step 4: Keep it wet
As you continue scraping, reapply hot water to keep the glue soft and pliable. This will make it easier to remove larger sections of wallpaper at once. And don’t worry if some sections require more soaking and scraping than others – patience is key.
Step 5: The final touch
Once you’ve removed all the wallpaper, use a clean sponge or cloth dipped in warm water to wipe away any remaining glue residue. Rinse and wring out your sponge or cloth frequently to avoid spreading the glue around.
Step 6: Let it dry
Finally, give your wall some time to dry completely before moving on to the next steps. This will ensure a smooth and clean surface for your desired finish, whether it’s painting, applying new wallpaper, or just reveling in the glory of your newly bare walls.
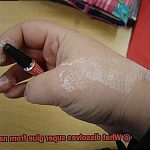
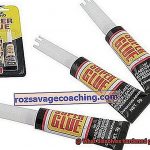
Commercial Wallpaper Removers
Commercial wallpaper removers are like the superheroes of the wallpaper removal world. They swoop in, dissolve the glue, and make your life so much easier. And the best part? They come in various forms to suit your preferences and needs.
First up, we have the classic liquid form. These bad boys contain solvents like alcohol, acetone, or mineral spirits that break down the adhesive properties of wallpaper glue. Just pour some onto a sponge or brush and apply it directly to the wallpaper surface. Let it work its magic for a bit, and then get ready to scrape off that old wallpaper like a pro.
Next on the list is the gel form. These removers are thicker in consistency, which means they cling to the wallpaper better and provide a more controlled application. Gel removers are great for vertical surfaces or tricky areas where you need a little extra oomph to dissolve that stubborn glue.
Last but not least, we have the spray form. These removers come in convenient spray bottles, allowing you to evenly distribute the product over large areas. Just spritz it on, let it sit for a bit, and watch as the glue loosens its grip on your walls.
Now, before you go all Hulk on your wallpaper, remember to read and follow the instructions provided by the manufacturer. Some removers may require a specific amount of time to work their magic, while others may need multiple applications for thick or multiple layers of wallpaper.
One more thing – be prepared for some strong odors or fumes with certain commercial wallpaper removers. So crack open a window or turn on a fan to keep that fresh air flowing during your DIY project.
Vinegar Solution Method
In this guide, we will introduce you to the Vinegar Solution Method, a natural and non-toxic way to dissolve wallpaper glue. Say goodbye to harsh chemicals and hello to an environmentally friendly alternative that won’t break the bank.
Step 1: Gather your materials
Before embarking on this transformative journey, make sure you have everything you need. Arm yourself with white distilled vinegar, warm water, a trusty spray bottle, a scraper or putty knife for precision, and a soft sponge or cloth to wipe away the remnants of the past.
Step 2: Mix the vinegar solution
In your spray bottle, create a harmonious blend by mixing equal parts of white distilled vinegar and warm water. Shake vigorously, allowing the enchanting alchemy of these ingredients to take place.
Step 3: Spray and wait
Unleash the power of the vinegar solution onto a small section of the wallpaper. As it gracefully cascades down the surface, let it sit for a few minutes, its acidic properties delicately penetrating the glue. Watch as it works its magic, loosening the stubborn adhesive bond.
Step 4: Scrape away
Now comes the moment you’ve been waiting for. Armed with your scraper or putty knife, gently begin to peel back the layers of time. Starting from one corner or edge, feel the satisfaction as the wallpaper surrenders to your determined efforts.
Caution is advised, for you must tread lightly to avoid any harm to the underlying wall surface. Encounter a stubborn patch? Fear not. Simply reapply the vinegar solution, granting it more time to work its wonders before attempting to scrape again.
Step 5: Wipe off residue
As the last remnants of the wallpaper fall away, it is time to bid farewell to the glue residue that lingers. Dip your sponge or cloth into the vinegar solution, allowing it to soak up the liquid gold. With gentle strokes, wipe away any traces of the past, as the vinegar dissolves and removes the adhesive with ease.
Stronger Solvents: Denatured Alcohol and Acetone
In our quest to conquer stubborn wallpaper glue, we’ve explored the enchanting power of the Vinegar Solution Method. But what if you’re seeking something with a little more muscle? Fear not, my brave warriors in the battle against glue, for we have two formidable solvents at our disposal – denatured alcohol and acetone.
Let’s begin with denatured alcohol. This potent elixir is a blend of ethanol and other chemicals that render it unsuitable for consumption (sorry, no shots here). You’ll find denatured alcohol in paint thinners, cleaning products, and even as fuel for those fancy alcohol burners. But its true strength lies in its ability to dissolve wallpaper glue.
Now, before diving headfirst into this adventure, safety must come first. Denatured alcohol is highly flammable, so make sure you’re in a well-ventilated area. And let’s not forget gloves and eye protection – we don’t want any direct contact with this potent substance.
To use denatured alcohol for removing wallpaper glue, grab a clean cloth or sponge and apply a small amount of the solvent. Gently rub the affected area, focusing on those stubborn spots where the glue seems invincible. Let the denatured alcohol work its magic and allow it to sit on the glue for a few minutes to soften it up before attempting to remove it.
Now, let’s move on to our second superhero solvent – acetone. You might recognize this mighty warrior from your trusty nail polish remover or paint thinner. Acetone is a solvency powerhouse that can break down adhesives like wallpaper glue in no time.
But hold your horses. Before unleashing acetone on your beloved wallpaper, conduct a test on a small, inconspicuous area first. We don’t want any unintended damage or discoloration ruining the party. If all looks good, proceed with caution.
Just like denatured alcohol, acetone is flammable and requires proper ventilation. Gloves are a must, my friends. Apply a small amount of acetone onto a clean cloth or sponge and gently rub the affected area. Allow the acetone to work its magic for a few minutes, softening the adhesive and making it easier to remove.
Now, a word of caution – both denatured alcohol and acetone can have adverse effects on certain types of wallpaper or wall surfaces. Always test these solvents on a small, hidden area before going all in.
And remember, after using denatured alcohol or acetone to dissolve wallpaper glue, give the area a good clean with water and mild detergent to remove any residue left behind. You want a fresh canvas for your next wallpapering or painting adventure.
Tips and Tricks for Removing Stubborn Wallpaper Glue
Say goodbye to stubborn wallpaper glue with these tips and tricks that will make your removal process smooth and efficient. Whether you’re redecorating or repairing damaged walls, removing that sticky residue is crucial for achieving a fresh and updated look. By following these methods, you’ll have those walls looking brand new in no time.
Prepare for Success:
To begin, ensure that you have everything you need at hand before diving into the glue removal process. Protect your floors and furniture with drop cloths or plastic sheets. Gather your tools, including a scraper or putty knife, a sponge or cloth, warm water, and any adhesive remover solutions you plan to use.
Properly preparing your workspace will make the process smoother and more efficient.
Hot Water and Vinegar Solution:
One of the most effective ways to tackle stubborn wallpaper glue is by using a hot water and vinegar solution. Create a magical concoction by mixing equal parts hot water and white vinegar in a spray bottle. Spray the solution onto the glue-covered areas and let it sit for a few minutes.
Allow the solution to penetrate the adhesive, softening the glue for easier removal with a scraper or putty knife.
Fabric Softener Magic:
Did you know that fabric softener can work wonders in removing wallpaper glue? Harness its power by mixing one part fabric softener with three parts hot water in a spray bottle. Spray the solution onto the stubborn glue and let it soak for approximately 15 minutes. The fabric softener will break down the adhesive, making it easier to scrape off with a scraper or sponge.
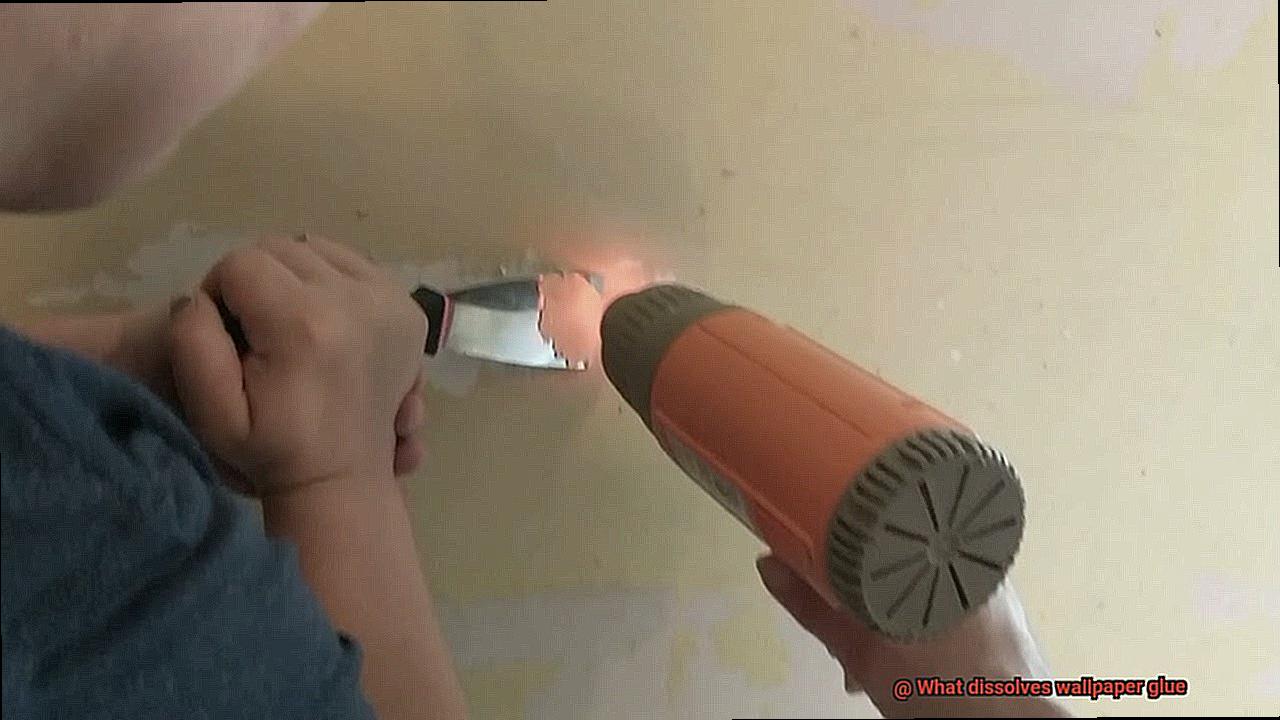
Steam Away the Troubles:
For particularly tough wallpaper glue, consider using steam as your secret weapon. Unleash its power by utilizing a handheld steamer or renting a wallpaper steamer. Hold the steamer against the glue for a few seconds, allowing it to soften. Then, with finesse, use a scraper or putty knife to gently remove the softened glue.
Commercial Adhesive Removers:
If all else fails, turn to commercial adhesive removers specially designed for wallpaper glue removal. These products come in various forms, such as sprays or gels, and can be found at most home improvement stores. Follow the instructions carefully and ensure proper ventilation and use of gloves when working with these chemicals.
Patience and Persistence:
Removing stubborn wallpaper glue may require multiple attempts and some elbow grease. Be patient and persistent, repeating the process if necessary, especially for thick layers of glue.
Remember to test any method on a small inconspicuous area first to ensure it doesn’t damage your walls or paint.
Considerations for Different Types of Wallpaper
When it comes to choosing wallpaper, there are various types available to suit different preferences and needs. Each type of wallpaper has its own unique characteristics and considerations when it comes to installation and removal.
Here, we will explore the key factors to consider for different types of wallpaper, including vinyl, fabric-backed, non-woven, pre-pasted, wallpaper borders, textured, and delicate surface wallpapers.
Vinyl Wallpaper:
Vinyl wallpaper is known for its durability and water resistance, making it a popular choice for high-moisture areas such as bathrooms and kitchens. When selecting vinyl wallpaper, consider the level of moisture in the room and whether it requires additional protection against mold or mildew.
Vinyl wallpaper is also easy to clean, which is an important consideration for areas prone to stains or dirt.
Fabric-Backed Wallpaper:
Fabric-backed wallpaper adds a touch of elegance and texture to any space. However, it requires extra care during installation and removal due to its delicate fabric layer. When choosing fabric-backed wallpaper, consider the level of maintenance required to keep it looking its best. It may be necessary to avoid excessive moisture or harsh cleaning products that can damage the fabric.
Non-Woven Wallpaper:
Non-woven wallpaper is a versatile option that is easy to install and remove. It is often used in high-traffic areas due to its durability and resistance to tearing. When selecting non-woven wallpaper, consider the ease of maintenance and whether it can be wiped clean without causing damage or discoloration.
Pre-Pasted Wallpaper:
Pre-pasted wallpaper comes with adhesive already applied to the back, eliminating the need for additional glue or paste during installation. When choosing pre-pasted wallpaper, consider the ease of application and whether it is suitable for DIY projects. It is also important to ensure that the pre-pasted adhesive is compatible with the wall surface and will provide a long-lasting bond.
Wallpaper Borders:
Wallpaper borders are decorative elements used to add visual interest and define different areas in a room. When selecting wallpaper borders, consider the design and style that complements the overall decor. It is also important to consider whether the borders can be easily removed without damaging the surrounding wallpaper or wall surface.
Safety Precautions When Working with Wallpaper Glue Dissolvers
Transforming your space by removing old wallpaper can be a satisfying project. However, it’s essential to prioritize safety when using wallpaper glue dissolvers. In this comprehensive guide, we will explore the necessary precautions to ensure a smooth and accident-free experience while working with these powerful products.
Familiarize Yourself with the Instructions:
Before embarking on any project, carefully read and comprehend the manufacturer’s instructions that accompany the wallpaper glue dissolver. These instructions provide invaluable insights into proper usage, safety precautions, and potential risks associated with the product.
Don Protective Gear:
Invest in personal protective equipment (PPE) to shield yourself from potential harm. Wear sturdy gloves to protect your hands from chemical exposure, goggles to safeguard your eyes from splashes or fumes, and a mask to prevent inhalation of harmful vapors.
Prioritize Adequate Ventilation:
Ensure proper ventilation in your workspace by opening windows and doors. This simple step allows fresh air to circulate and prevents the concentration of potentially harmful fumes, safeguarding you against respiratory issues.
Create a Safe Zone for Children and Pets:
To avoid accidents or exposure to toxic substances, keep children and pets away from the work area. Store wallpaper glue dissolvers in a secure location that is out of their reach.
Exercise Care during Application:
When applying the wallpaper glue dissolver onto walls, proceed with caution to avoid splashing or spilling. Unintentional spills can damage surrounding surfaces or lead to accidents. Take your time and work methodically for precise application.
Be Prepared for Emergencies:
Always have a first aid kit nearby in case of accidents or emergencies. In case of accidental contact with skin or eyes, rinse immediately with plenty of water and seek medical attention if necessary. Prompt action can minimize potential harm.
Responsible Disposal:
Dispose of empty containers and any unused product responsibly according to local regulations. Do not pour the solution down the drain or throw it in regular trash bins. Follow environmentally-friendly disposal practices to protect the ecosystem.
4N6CesmfOTk” >
Conclusion
When it comes to removing wallpaper, dealing with stubborn wallpaper glue can be a real headache. But fear not. There are several effective solutions that can dissolve wallpaper glue and make your job a whole lot easier. Whether you’re tackling a small patch or an entire room, these methods will have your walls looking fresh and ready for a new coat of paint in no time.
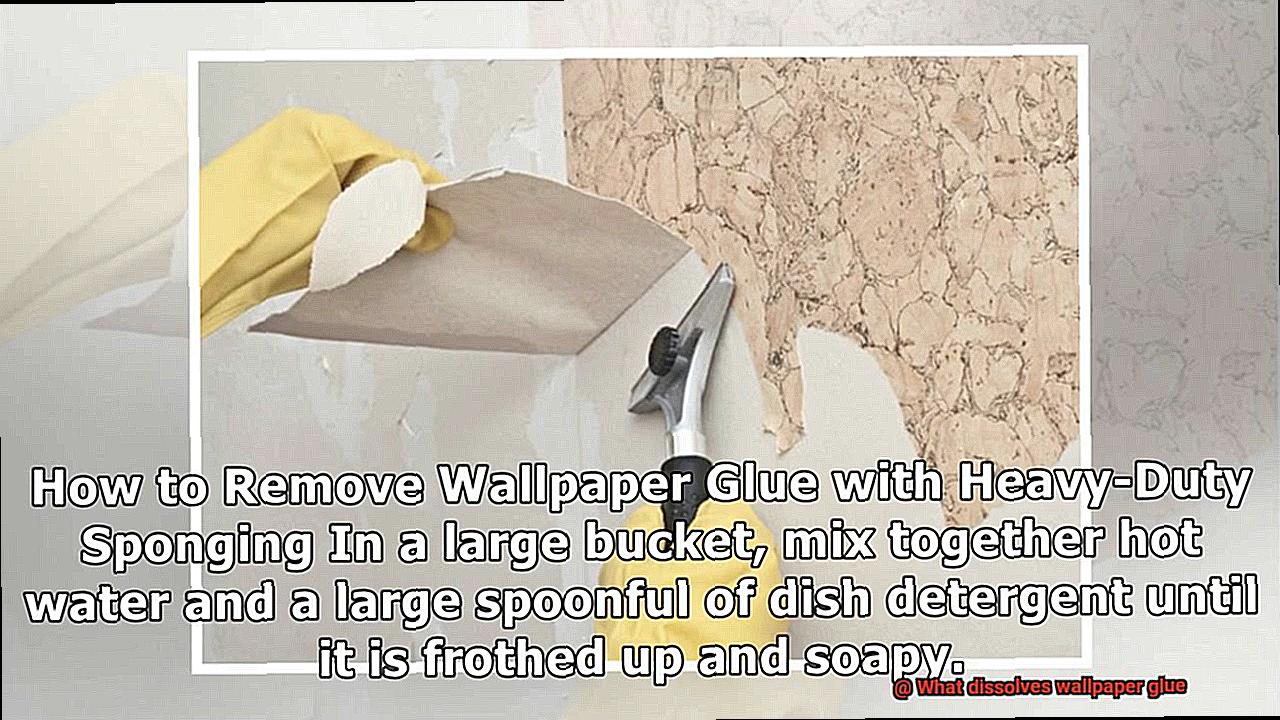
One option is to use hot water and dish soap. This powerful combination works wonders at breaking down the adhesive properties of wallpaper glue. Simply mix equal parts hot water and dish soap in a bucket or spray bottle, then apply it generously to the affected areas. Let it sit for a few minutes to allow the solution to penetrate the glue, then gently scrape it off using a putty knife or scraper.
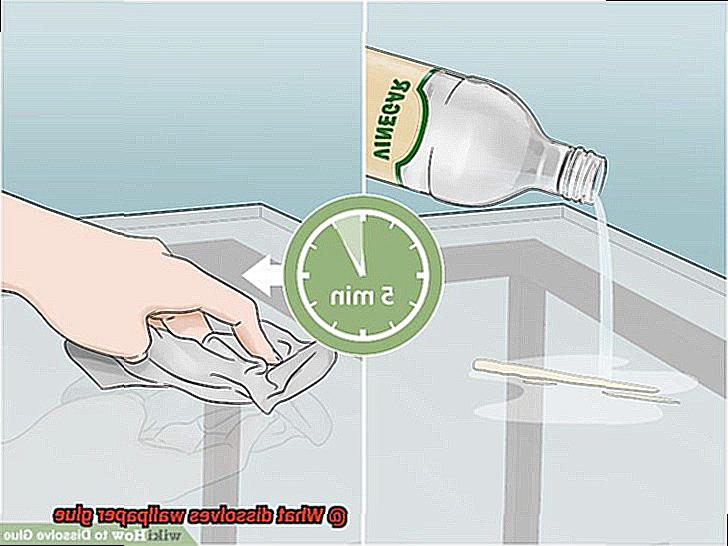
Another effective method is to use vinegar. This household staple is not only great for cooking and cleaning, but also for dissolving wallpaper glue. Mix equal parts vinegar and warm water in a bucket or spray bottle, then apply it generously to the glue-covered surface. Allow it to soak for about 15-20 minutes, then use a scraper or putty knife to remove the softened glue.
For those dealing with particularly stubborn wallpaper glue, there are commercial adhesive removers available on the market. These specialized products are specifically designed to dissolve tough adhesives like wallpaper glue. Simply follow the instructions on the packaging, apply the remover to the affected areas, and let it work its magic.
In addition to these methods, steamers can also be incredibly effective at dissolving wallpaper glue. The high heat from the steamer helps loosen the adhesive properties of the glue, making it easier to remove. Simply hold the steamer against the wall for a few seconds, then use a scraper or putty knife to peel away the softened glue.
In conclusion, removing wallpaper glue doesn’t have to be an arduous task. With hot water and dish soap, vinegar, commercial adhesive removers, or steamers, you can easily dissolve wallpaper glue and prepare your walls for a fresh new look.