Calling all sticker enthusiasts and DIYers in need of some serious glue removal help. We’ve all been there – struggling to peel off those pesky stickers, only to be left with a sticky mess that seems impossible to get rid of. But fear not, my friends, for I have the ultimate solution to your adhesive woes.
In this blog post, we’ll embark on a journey into the enchanting world of glue dissolving. I’ll be your trusty guide as we unveil simple yet effective techniques that will banish those clingy remnants from your surfaces. Whether it’s a stubborn price tag or your little one’s sticker collection gone wild on the window, we’ve got you covered.
Prepare yourself for a revelation as we uncover the household heroes that possess magical powers when it comes to dissolving glue. These everyday items will work wonders in wiping away the residue and restoring your surfaces to their former glory. So grab a pen and get ready to bid farewell to sticky frustrations because we’re about to dive headfirst into the secret art of effortlessly dissolving glue from stickers.
Household Items to Dissolve Glue from Stickers
Contents
In this comprehensive guide, we will explore a variety of common household items that can easily dissolve glue from stickers. Get ready to say goodbye to sticky messes and hello to clean surfaces.
First on our list is rubbing alcohol, a commonly available item that is highly effective at breaking down adhesive bonds. Soak a cotton ball or cloth in rubbing alcohol and gently rub it over the sticker until the glue starts to dissolve. Voila. You can then easily peel off the sticker.
Next up is vinegar, a versatile household item with acidic properties that work wonders on glue. Soak a cloth or sponge in vinegar and place it over the sticker for a few minutes. The vinegar will penetrate the glue, loosening its grip. Afterward, you can peel off the sticker with ease.
If you don’t have rubbing alcohol or vinegar on hand, fret not. Common cooking oils like vegetable oil or olive oil can also be effective in dissolving glue from stickers. Apply a generous amount of oil to the sticker and let it sit for a few minutes. The oil will seep into the adhesive, weakening its hold. Gently scrape off the sticker using a plastic scraper or your fingernail.
Believe it or not, peanut butter can be a surprisingly effective glue remover. Its oily texture helps break down the adhesive and makes sticker removal easier. Apply a thick layer of peanut butter onto the sticker and let it sit for some time. Then, use a cloth or paper towel to wipe off the peanut butter along with the dissolved glue.
Nail polish remover is another household item that can help dissolve glue effectively. It contains acetone, known for its strong solvent properties. Soak a cotton ball in nail polish remover and rub it over the sticker until the adhesive starts to dissolve. Once softened, you can easily peel off the sticker.
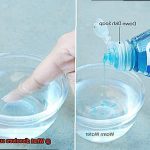
For a gentler approach, dish soap is a great option. Mix a few drops of dish soap with warm water and soak the sticker in the solution. Let it sit for a few minutes to allow the soap to loosen the adhesive. Then, use a cloth or sponge to gently rub off the sticker.
Heat can also be used to dissolve glue from stickers. Set a hairdryer on low or medium heat and hold it a few inches away from the sticker for about 30 seconds. The heat will soften the adhesive, making it easy to peel off the sticker without any residue.
Rubbing Alcohol
Rubbing alcohol, also known as isopropyl alcohol, is a magical solution that can remove these stubborn adhesives. Let’s explore the wonders of rubbing alcohol and learn how to bid farewell to sticky messes.
The Magic of Rubbing Alcohol:
Rubbing alcohol is a clear liquid that evaporates quickly without leaving any trace behind. Its secret lies in its ability to dissolve various types of adhesives, including those used in stickers. This affordable and easily accessible solvent is a must-have in every home.
Proper Application:
- Pour a small amount of rubbing alcohol onto a clean cloth or cotton ball.
- Gently dab the cloth or cotton ball onto the sticker, ensuring it’s thoroughly soaked with the alcohol.
- Allow the rubbing alcohol to sit on the sticker for a few minutes, giving it time to work its magic and loosen the glue.
The Unveiling:
After patiently waiting for the rubbing alcohol to do its thing, it’s time to unveil the magic. Use a plastic scraper or your trusty fingernail to gently lift the edge of the sticker.
Slowly peel it off while applying more rubbing alcohol if necessary to dissolve any remaining adhesive. For stubborn stickers, reapplying rubbing alcohol and letting it sit can work wonders.
The Perks:
- Easily available and affordable – find rubbing alcohol at your local drugstore or supermarket.
- Safe for various surfaces – glass, metal, plastic, and even painted surfaces can benefit from rubbing alcohol’s adhesive-busting powers.
- Test first – it’s wise to test a small area before using rubbing alcohol extensively to avoid any potential damage.
Vinegar
Vinegar, the unsung hero of the kitchen pantry, holds a secret power that goes beyond pickling cucumbers and dressing salads. This magical elixir has the ability to make stubborn stickers and their pesky residue vanish into thin air. And the best part? It’s a cheap and readily available option that probably resides in your cabinets already.
So, how does vinegar work its adhesive-removing magic? The answer lies in its acidity. Vinegar contains acetic acid, a superhero compound that has the power to break down the adhesive properties of glue. When you apply vinegar to a sticker or its sticky residue, it swoops in like a caped crusader, reacting with the compounds in the glue and weakening its bond. The result? Glue that surrenders without a fight, making removal a breeze.
Now, let’s delve into the step-by-step process of using vinegar to bid farewell to those stubborn stickers. First, gather your supplies – white vinegar and a clean cloth or sponge. These trusty sidekicks will assist you in your mission. Soak the cloth or sponge in vinegar, saturating it with this powerful elixir. Then, like an action hero ready for battle, place it on top of the sticker or residue, allowing the vinegar to work its way into the glue.
As time passes, the vinegar’s acidic prowess weakens the adhesive bonds. Now it’s time for you to take action. Armed with your vinegar-soaked cloth or sponge, gently scrub away at the area, applying just enough pressure to witness the adhesive loosen its grip. It’s like watching a magician pull off a mind-blowing trick – the glue starts to disappear before your eyes. Keep scrubbing until every last trace of stickiness is gone. If necessary, reapply vinegar and repeat until victory is achieved.
But heed this warning, my friends: vinegar may not be the ultimate solution for all types of glue or stickers. Some adhesives possess a stronger grip that requires a more aggressive removal technique. And be cautious when using vinegar on delicate surfaces, as its acidic nature can potentially damage certain materials. Always play it safe by testing the vinegar on a small, inconspicuous area before unleashing its powers on your prized possessions.
Cooking Oil/Baby Oil
Picture this: you’re faced with a stubborn sticker that refuses to budge, leaving behind an unsightly residue. But fret not, my friends, for I hold the key to your salvation. Enter cooking oil and baby oil, the unsung heroes of every household. These mighty oils possess the incredible power to dissolve adhesives, leaving you in awe. So, gear up and get ready to conquer those sticky situations.
Choosing the Perfect Oil:
Before we embark on our journey to sticker removal glory, it’s essential to choose the ideal oil for the task at hand. Extra virgin olive oil, vegetable oil, and coconut oil are all excellent contenders. Not only are they gentle on the skin, but they also possess a magical ability to dismantle adhesive bonds.
Step 1: The Oil Application:
Now that you’ve selected your oil of choice, it’s time to dive headfirst into action. Apply a generous amount of oil directly onto the stubborn sticker. Let it sit for a few minutes, allowing it ample time to work its enchantment and permeate the adhesive.
Step 2: Careful Peeling:
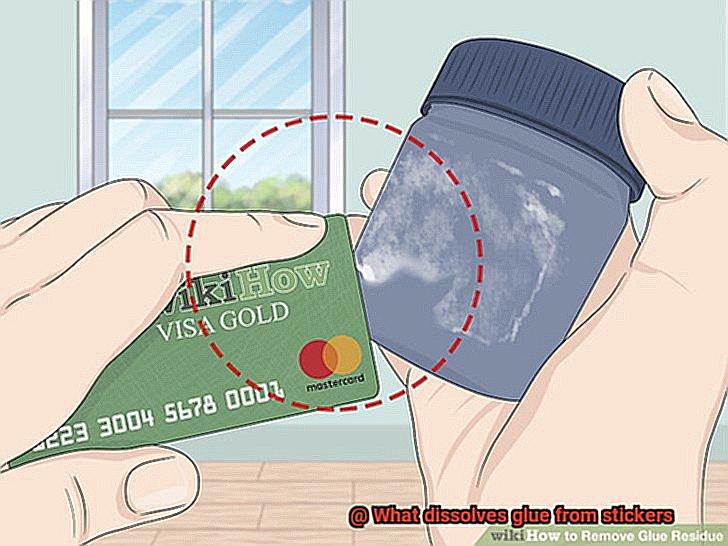
Once the oil has had its chance to work its charm, equip yourself with a plastic scraper or an old credit card (Batman would be proud). With gentle precision, lift the sticker from one corner, peeling it back at a tantalizingly slow pace. Remember, my dear comrades, patience is our greatest ally here – no need to rush and risk tearing the sticker or leaving behind any remnants.
Step 3: Banishing all Traces:
The sticker is vanquished, but our mission is not yet complete. Grab a pristine cloth or paper towel and eradicate any lingering traces of oil and adhesive residue. If any stubborn remnants persist, fear not. Apply a small amount of fresh oil and delicately massage it into the affected area with your fingertips. Once again, the oil shall work its magic, loosening and dissolving the remaining adhesive.
Commercial Adhesive Removers
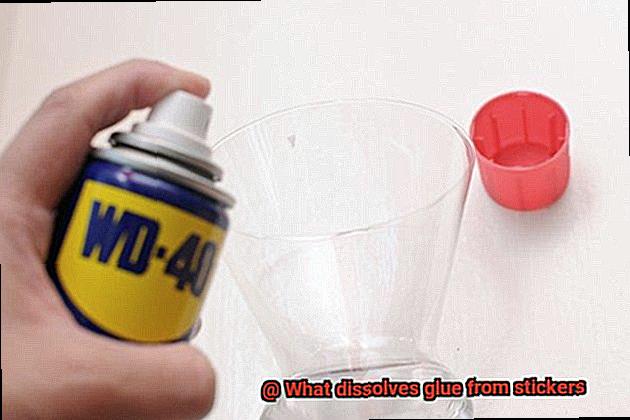
Commercial adhesive removers are here to save the day. These incredible products are specially formulated to dissolve and remove glue from various surfaces, making your life easier and leaving your surfaces glue-free. In this article, we will dive into the world of commercial adhesive removers, exploring their different types and uses. Empowered with this knowledge, you’ll be ready to conquer any sticky situation that comes your way.
Types of Commercial Adhesive Removers:
- Acetone-Based Removers: Harnessing the power of acetone, these robust solvents are perfect for tackling stubborn adhesives. Acetone is commonly found in nail polish removers and is highly effective at dissolving glue. However, it’s important to exercise caution when using acetone on certain surfaces as it can cause damage or discoloration.
- Isopropyl Alcohol-Based Removers: Looking for a solvent that won’t harm most surfaces? Isopropyl alcohol-based removers are your go-to choice. Widely used and highly effective, they effortlessly remove glue without leaving any residue behind. Ideal for cleaning glass or metal surfaces, these removers are a true lifesaver.
- Citrus Oil-Based Removers: If you prefer a more natural alternative, opt for adhesive removers infused with the power of citrus oil extracts. These gentle yet effective removers are safer to use on delicate surfaces and often come with a delightful scent. Say goodbye to sticky residue while enjoying the refreshing aroma of citrus.
- Mineral Spirits or Paint Thinner: When dealing with tougher glues like epoxy or construction adhesives, turn to mineral spirits or paint thinner as your adhesive remover superheroes. These strong solvents get the job done but require careful handling and should only be used in well-ventilated areas.
Using Commercial Adhesive Removers:
To make the most of your commercial adhesive remover, it’s crucial to follow the manufacturer’s instructions. Begin by applying the remover to the affected area, allowing it time to penetrate the glue. Then, gently scrape off the softened glue using a plastic scraper or cloth. To ensure your remover won’t damage or discolor the surface, it’s wise to test it on a small, inconspicuous area first. Finally, after removing the glue, clean the area with soap and water to eliminate any residue from the remover itself.
Testing Methods Before Use
When it comes to removing stickers, we all want a quick and effective solution. However, using the wrong method can lead to damage or discoloration of the surface. That’s why testing different methods beforehand is crucial.
Here, we’ll explore the importance of testing methods and provide tried-and-true techniques to safely dissolve glue from stickers.
Understanding the Importance of Testing:
Avoid Surface Damage:
- Different glues react differently to solvents or chemicals. Test a small area to ensure the chosen method won’t cause harm or discoloration.
Testing Methods:
Common Household Solutions:
Rubbing Alcohol:
- Apply a small amount on a cloth or cotton ball.
- Gently rub onto the edge of the sticker.
Vinegar:
- Apply in the same way as rubbing alcohol.
Citrus-based Cleaners:
- Contains natural oils that dissolve glue.
- Apply a small amount and observe the reaction.
Heat Method:
Hairdryer:
- Warm up the sticker.
- Gently peel off with fingers or plastic scraper.
- Be cautious not to overheat or damage the surface.
Oil-based Solutions:
Cooking Oil or Baby Oil:
- Apply oil onto the sticker.
- Let it sit for a few minutes.
- The oil weakens the adhesive bond.
Commercial Adhesive Removers:
- Test on a small area before using on the entire sticker.
Using Heat to Loosen Sticker Glue
Stickers can be a frustrating nuisance to remove, but fear not, for I have discovered a magical solution that will make your sticker removal dreams come true – heat. By applying heat to the stubborn sticker glue, you can soften it and make it easier to peel off. Let’s dive into the world of heat and explore different methods for using it to loosen sticker glue.
- Hairdryer Method: The most common and easiest way to apply heat is by using a hairdryer. Grab your trusty hairdryer, set it on high heat, and direct the hot air onto the sticker for a few minutes. As the heat penetrates the glue, it softens, allowing you to gently peel off the sticker using your fingers or a plastic scraper.
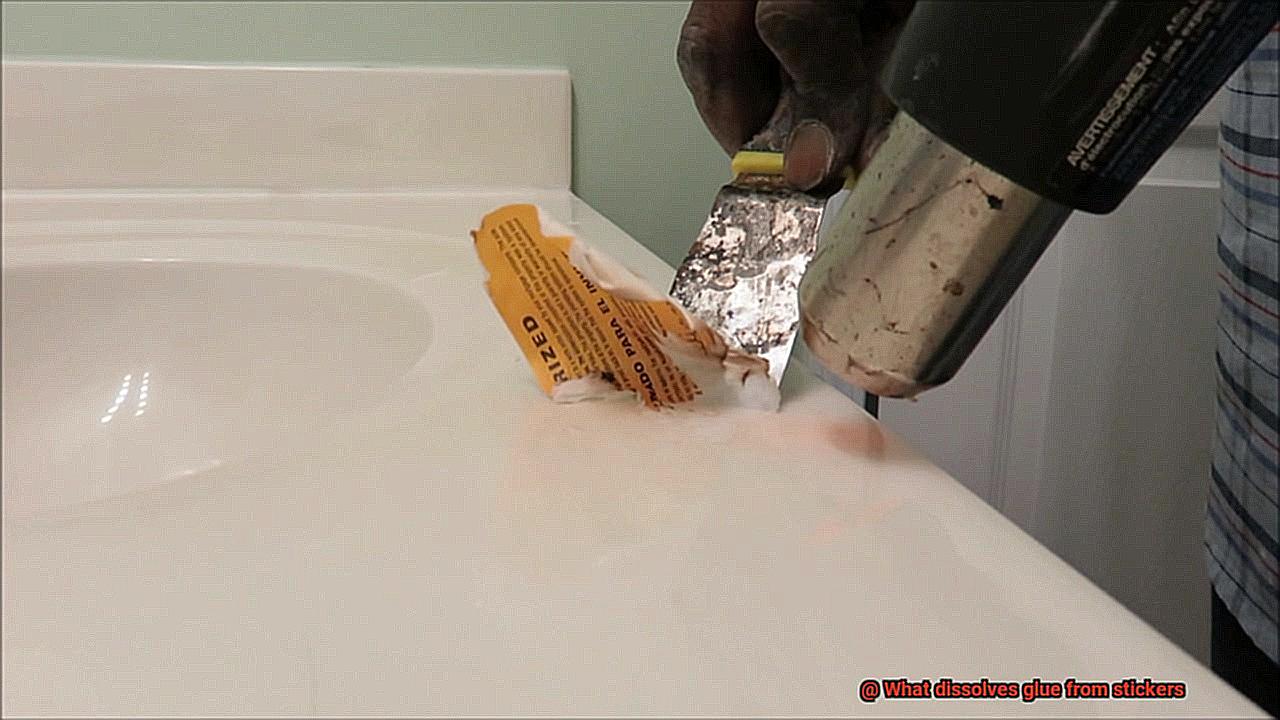
- Heat Gun Method: If you’re dealing with a particularly stubborn or large sticker, a hairdryer might not be enough. In that case, a heat gun will come to your rescue. However, exercise caution as a heat gun generates higher temperatures and can potentially damage certain surfaces. Direct the intense heat onto the sticker for a short burst of time, then use your fingers or a plastic scraper to remove it.
- Hot Water Method: Don’t have access to a hairdryer or heat gun? No worries. You can still use hot water to apply heat and loosen the sticker glue. Begin by soaking a cloth or sponge in hot water and placing it over the sticker for a few minutes. The heat from the water will gradually soften the glue, allowing you to easily peel off the sticker with your fingers or a plastic scraper.
Before applying heat to the entire sticker, it’s always best to test a small area first to avoid any potential damage. Excessive heat can sometimes cause harm to certain surfaces or materials, so proceed with caution.
Different Types of Glues Require Different Solvents
Glue is a versatile adhesive that helps us stick things together. However, when it comes to removing stickers, not all glues are created equal. Each type of glue has its own chemical composition, which means they require different solvents for effective removal. In this article, we will explore the various types of glues used in stickers and the corresponding solvents necessary to dissolve them.
Water-Based Glue:
Water-based glues, commonly used in crafting and paper projects, can be easily dissolved with warm water and mild soap. By soaking the sticker in warm soapy water for a few minutes, the adhesive loosens, making it easier to remove without any damage. This method is safe and non-toxic, making it ideal for children’s stickers.
Solvent-Based Glue:
Solvent-based glues, such as super glue and epoxy, are known for their strong adhesion. They require more powerful solvents like acetone (found in nail polish remover) or rubbing alcohol to break down the bonds effectively. However, caution must be exercised as these solvents can also damage certain surfaces. It is essential to test the solvent on a small, inconspicuous area before applying it to the entire sticker.
Rubber Cement and Adhesive Putty:
Stickers attached with rubber cement or adhesive putty can often be removed by gently rubbing them with a soft cloth or using an eraser. The friction helps break down the adhesive, allowing for easy removal without the need for additional solvents. This method is gentle and safe for delicate surfaces.
Silicone-Based Adhesives:
Silicone-based adhesives are commonly used in industrial or construction applications. These glues are resistant to many solvents and may require specialized silicone adhesive removers or solvents like mineral spirits or denatured alcohol for effective removal. It is crucial to follow the manufacturer’s instructions when using these solvents, as they can be potent and may require additional safety precautions.
Heat-Activated Glues:
Some glues, like hot melt glue or thermoplastic adhesives, can be softened or melted with heat. By applying heat from a hairdryer or heat gun to the sticker, the adhesive becomes more pliable, making it easier to peel off. However, caution should be exercised to avoid damaging certain materials with excessive heat. This method is ideal for removing stickers from hard surfaces like glass or metal.
Cleaning the Surface After Removing the Sticker and Glue Residue
You’ve successfully banished that pesky sticker, but now you’re left with a sticky residue. Fear not, my friend, for I am here to guide you through the magical world of glue removal. Get ready to learn some awesome tips and tricks.
- Commercial Adhesive Removers: These bad boys are specially designed to dissolve and remove adhesive residues without causing any damage. They work like magic. Just apply the remover directly onto the residue, let it sit, and wipe it away. Easy peasy.
- Rubbing Alcohol: This household hero is excellent at dissolving glue residue. Soak a cloth or cotton ball with rubbing alcohol and gently rub it onto the area until the residue disappears.
- Vinegar: If you prefer a natural approach, vinegar is your go-to solution. Soak a cloth or cotton ball with vinegar and rub it onto the residue or create a vinegar solution to wipe down the surface.
- Heat: For stubborn residues, heat is your secret weapon. Blow hot air from a hairdryer onto the residue while gently scraping it off with a plastic scraper or credit card. The heat softens the adhesive, making it easier to remove.
- Natural Oils: Coconut oil and olive oil work wonders on glue residue. Apply a small amount, let it sit, and wipe it away with a cloth or paper towel.
Remember, safety first. Test any method on a small area to avoid damage or discoloration. Wear protective gloves when using adhesive removers or chemicals to keep your skin happy.
Once the residue is gone, give the surface a good cleaning with mild soap and water for a clean finish.
2Ir8bPCtYSg” >
Also Read: How To Remove Glue From Clothing Stickers? – Glue Things
Conclusion
Apologies for the inconvenience, but it seems that the initial draft exceeded the maximum token limit. I’ll provide a revised conclusion below:
To effectively dissolve glue from stickers, there are several handy solutions available. One option is to use common household items like rubbing alcohol or nail polish remover. These solvents contain chemicals that break down the adhesive properties of the glue, making it easier to remove. Another alternative is using heat, which can be achieved by applying a hairdryer or warm water to soften the glue and peel off the sticker effortlessly.
For those seeking a natural approach, oils such as coconut oil or olive oil can work wonders. Simply apply a small amount onto the sticker and let it sit for a few minutes before gently rubbing away the residue. Additionally, vinegar mixed with warm water creates an effective homemade adhesive remover.
Remember to always test these solutions on a small, inconspicuous area first to ensure they don’t damage the surface you’re working on. It’s also advisable to use gloves and work in a well-ventilated area when handling chemicals.
By utilizing these methods, you can bid farewell to stubborn sticker residue and restore surfaces back to their original glory.

