Welcome to our blog post all about Liquid Nails, the adhesive that’s got everyone sticking with it.
If you’ve ever tackled a DIY project or found yourself in need of some serious bonding power, chances are you’ve crossed paths with this popular brand. Today, we’re diving deep into a question that often pops up when talking about this glue: what color is Liquid Nails?
So whether you’re a seasoned DIY pro or just curious about the magic of adhesives, keep reading to uncover the real deal on Liquid Nails’ color and how it adds to its extraordinary abilities.
What is Liquid Nails?
Contents
In the world of construction, where strength and versatility are paramount, one adhesive stands above the rest – Liquid Nails. This exceptional brand of construction adhesive has earned a reputation for its formidable bonding capabilities and its ability to tackle a wide array of applications. Whether you’re a seasoned contractor or a DIY enthusiast, Liquid Nails is the go-to glue for all your projects, big or small.
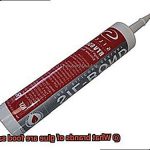
First and foremost, let’s talk about the color of Liquid Nails. As you squeeze it out of the tube or cartridge, you’ll notice its light tan or beige hue. This practical color choice serves a crucial purpose – it allows for easy visibility during application, ensuring that you achieve proper coverage while minimizing wastage. The off-white shade resembles traditional glue, making it familiar and effortless to work with.
But here’s where Liquid Nails truly shines: once it dries or cures, its color transforms slightly. It becomes transparent or translucent (depending on the formulation), blending seamlessly with the bonded materials. So, whether you’re working on a project that demands a flawless finish or adding an adhesive touch-up to your creation, rest assured that Liquid Nails won’t compromise aesthetics.
Now, let’s delve into the versatility and strength that Liquid Nails brings to the table. This adhesive is specially formulated to bond an extensive range of materials – wood, metal, concrete, drywall – you name it. Whether you’re installing elegant molding and paneling, fixing loose tiles with precision, securing heavy countertops, or constructing sturdy furniture pieces, Liquid Nails is more than up to the task.
To cater to diverse needs and surfaces, Liquid Nails offers a variety of formulations. The Original Liquid Nails is your trusted companion for general-purpose bonding. When tackling heavy-duty applications that demand unyielding strength, Heavy Duty Liquid Nails steps up to the plate. And for those who crave efficiency and need a quick-drying formula, Fast Grab Liquid Nails has got you covered.
What sets Liquid Nails apart from the competition is its unparalleled bonding strength and durability. Once applied and dried, it forms a rock-solid bond that can withstand the harshest stresses and strains. Your projects will remain intact for years to come, providing you with peace of mind and confidence in the longevity of your work.
However, to unlock the full potential of Liquid Nails, it’s crucial to follow the manufacturer’s instructions diligently. Prepare the surfaces meticulously, apply the adhesive evenly, and allow ample curing time for the bond to fully develop. By doing so, you’ll maximize the effectiveness of Liquid Nails and ensure long-lasting, dependable results that will stand the test of time.
The Color of Liquid Nails
Liquid Nails, the trusted name in construction adhesives, offers an array of colors that cater to every adhesive need. Have you ever wondered about the color of this versatile glue? Prepare to be amazed as we dive into the range of colors available and explore their purpose.
The most common color of Liquid Nails is a light tan or beige. This natural hue effortlessly blends with various surfaces and materials, ensuring a discreet and professional finish. Wood, metal, or concrete – no matter the material, Liquid Nails delivers seamless integration.
But wait, there’s more. Liquid Nails unveils a captivating selection of specialized colors. Darker gray or black variations are formulated specifically for marble or granite bonding. These adhesives not only boast optimal bonding strength but also expertly match the color of the materials being bonded.
Yet, Liquid Nails doesn’t stop at functionality alone. Imagine attaching molding or trim with an adhesive that harmonizes flawlessly with your décor. Colored Liquid Nails offer not just a strong bond but also a visually stunning finish. Let your imagination run wild as you explore the vibrant world of decorative adhesives.
It’s important to note that the color of Liquid Nails may undergo slight changes after application due to factors like drying time and exposure to light and air. However, rest assured that these alterations do not compromise its exceptional bonding strength or performance.
Common Variations of Color
Liquid Nails, the construction adhesive known for its exceptional bonding properties, offers a captivating array of colors that can transform your projects into visual masterpieces. In this blog post, we will dive into the world of Liquid Nails and explore the different variations of color it offers, guiding you on how to choose the right color for your specific needs.
The Original Formula: Beige or Light Tan
The regular or original formula of Liquid Nails typically comes in a beige or light tan color. This carefully chosen shade seamlessly blends with most building materials and surfaces, ensuring that the adhesive remains inconspicuous once applied. It also helps to camouflage any excess adhesive that may squeeze out during application.
Different Colors for Different Formulations
Liquid Nails products are formulated for various applications, and as a result, their colors may vary. For instance, heavy-duty adhesives designed for concrete or masonry bonding often come in a darker gray color, indicating their suitability for such projects. These variations in color make it easier for users to identify and select the right adhesive for their specific needs.
Pigments and Dyes for Branding and Functionality
Some Liquid Nails formulations may have added pigments or dyes for branding purposes or to indicate specific features. A high-temperature resistant adhesive, for example, may have a striking red hue, while an adhesive designed for underwater applications may boast a vibrant blue color. These colors not only enhance the aesthetics but also provide visual cues to users, making it easier to choose the appropriate adhesive.
Aesthetics vs. Performance
While the color of Liquid Nails can vary, it’s important to note that it does not impact the adhesive’s performance or strength. The color is primarily a matter of aesthetics and functionality, allowing users to achieve visually pleasing finishes on their projects. Whether you opt for the original beige, a dark gray, or a bold red or blue, rest assured that the adhesive’s reliability remains unchanged.
Does the Color Affect Performance?
The color of an environment can have a profound impact on our emotions, mood, and overall perception. But does it also affect our performance? This question has been the subject of much research and debate.
Numerous studies have been conducted to determine whether color has any influence on performance, particularly in educational and workplace settings. The findings have been both fascinating and contradictory.
One study found that the color red enhances attention to detail and improves performance on tasks requiring focus and accuracy. Another study discovered that blue stimulates creativity and innovation, making it ideal for brainstorming sessions. Green, on the other hand, has been shown to improve concentration and reduce mental fatigue.
However, it is important to note that the impact of color on performance is not universal. Factors such as personal preference, cultural background, and individual differences can all play a role in how we respond to colors.
Furthermore, the effect of color on performance is not limited to the visual sense alone. Research has shown that certain colors can also have physiological effects on our body. For example, exposure to the color red has been found to increase heart rate and blood pressure, while blue has a calming effect and can lower stress levels.
In addition to color itself, factors such as lighting and contrast can also influence performance. Brightly lit environments have been shown to improve alertness and productivity, while low lighting levels can lead to drowsiness and reduced performance. Similarly, high contrast between text and background can enhance readability and comprehension.
Availability and Consistency of Liquid Nails
In the world of DIY projects and professional craftsmanship, having a reliable adhesive at your disposal is paramount. Enter Liquid Nails, the go-to glue that has garnered a stellar reputation for its remarkable availability and unwavering consistency.
What sets Liquid Nails apart, first and foremost, is its unparalleled accessibility. This adhesive powerhouse can be found on the shelves of almost every hardware store, home improvement center, and even online retailers. Gone are the days of frantic scavenging for the right glue; Liquid Nails is the beacon of convenience, always within reach when you need it most.
But availability alone does not define Liquid Nails. Its consistency is an equally enchanting aspect deserving of attention. With a wide array of formulations tailored to specific applications, Liquid Nails offers a spectrum of consistencies to satisfy every project requirement. Whether you crave a dense, paste-like texture or a more fluid viscosity that effortlessly glides across surfaces, Liquid Nails has a product that caters to your distinct needs. Such versatility ensures a robust and enduring bond between materials, solidifying your work with confidence.
Moreover, Liquid Nails’ versatility extends beyond consistency; it even boasts an assortment of colors. Most Liquid Nails products exhibit a pristine white or off-white hue upon application, seamlessly blending into diverse surfaces with ease. And should you desire to paint over your adhesive masterpiece, fear not – Liquid Nails accommodates your creative aspirations flawlessly.
However, specialized formulations add an extra touch of finesse to this adhesive realm. For those seeking to bond mirrors or glass surfaces, Liquid Nails offers transparent or clear-colored variants that cater specifically to such requirements. This bespoke range empowers users with the flexibility necessary to conquer any project with unparalleled precision.
With its widespread accessibility and diverse palette of consistencies and colors, it comes as no surprise that Liquid Nails reigns supreme among DIY enthusiasts and professionals alike. Whether you find yourself bonding wood, metal, tile, or any other material under the sun, Liquid Nails stands as the adhesive paragon, an unwavering ally ready to fortify your creations.
How to Apply Liquid Nails Properly
Liquid Nails is a versatile and powerful adhesive that is commonly used in construction projects. Whether you are bonding wood, metal, concrete, or other materials, Liquid Nails can provide a strong and durable bond. However, it’s important to know how to apply Liquid Nails properly to ensure the best results. Here are some key steps to follow:
First, prepare the surface that you will be bonding. Clean the surface thoroughly to remove any dirt, dust, or grease. This will ensure a clean and solid foundation for the adhesive to adhere to.
Next, cut the tip of the Liquid Nails tube at a 45-degree angle. The size of the opening will depend on the size of your project and the amount of adhesive needed. Start with a small opening and increase it if necessary.
Load the tube into a caulk gun for easier application. Squeeze the trigger gently to dispense a small bead of Liquid Nails onto the surface. Start from one end and work your way towards the other, applying an even and consistent line of adhesive.
For larger projects, you may need to apply multiple beads of Liquid Nails. Make sure to leave enough space between the beads to allow for expansion and contraction of materials. This will prevent any cracking or damage in the future.
Once you have applied the adhesive, firmly press the two surfaces together. Use clamps or weights if necessary to hold them in place while the glue dries. It’s important to follow the manufacturer’s instructions regarding drying time.
After the adhesive has dried completely, you can remove any excess or squeezed-out adhesive using a putty knife or a similar tool. Be careful not to damage the bonded surfaces while removing the excess adhesive.
It’s worth noting that Liquid Nails is not recommended for use on certain materials such as polyethylene, polypropylene, and certain types of plastics. Always check the manufacturer’s instructions and product labels for compatibility information before using Liquid Nails on any specific material.
Tips for Using Liquid Nails Effectively
Liquid Nails is a versatile adhesive that can be used for various construction and DIY projects. One aspect that often raises questions is the color of Liquid Nails. In this article, we will explore the color, along with other important tips, to help you use Liquid Nails effectively for your projects.
The Color of Liquid Nails:
The color of Liquid Nails can vary depending on the specific product and formulation. Most commonly, it is found in a light tan or beige color. This neutral hue allows it to blend in with most surfaces, providing a seamless finish once dried. However, it’s important to note that the color does not indicate its performance or strength. Instead, focus on its chemical composition and bonding capabilities.
When selecting Liquid Nails for your project, consider the type of material you are working with, as well as the specific application requirements. While the color may not be a significant factor in terms of performance, choosing a color that closely matches your surface can create a more visually appealing result.
Surface Preparation:
To ensure optimal results, prepare the surface properly before applying Liquid Nails. Clean the surface thoroughly, ensuring it is dry and free from dust, grease, or loose particles. Use a brush or cloth to remove any debris and wipe down the surface with a mild detergent if necessary. This will help achieve better adhesion and long-lasting results.
In addition to cleaning, it may also be necessary to roughen up smooth surfaces to improve bonding. This can be done by sanding or scuffing the surface with sandpaper or a wire brush. By creating a slightly rough texture, you provide more surface area for the adhesive to grip onto.
Application Method:
Liquid Nails comes in both tube and canister forms. For small projects or precise applications, use the tube with a caulking gun. This allows for better control and accuracy when applying the adhesive. For larger projects, opt for the canister with an adhesive gun for faster and more efficient application.
Before using the adhesive, cut the nozzle of the tube or open the canister and attach the appropriate applicator tip. This will ensure a smooth and consistent flow of adhesive during application. It is also helpful to have a putty knife or similar tool on hand to spread and smooth the adhesive if needed.
Generous but Not Excessive:
When applying Liquid Nails, use enough adhesive to create a strong bond between the surfaces. Apply in a zigzag pattern or dots at regular intervals, ensuring that you cover the entire surface area. Avoid using excessive amounts as it can lead to messiness and adhesive squeezing out from the sides when pressure is applied.
WSoaX4kgMeg” >
Conclusion
In conclusion, Liquid Nails is an adhesive powerhouse that adapts to any situation with its range of colors. The most common hue is a light tan or beige, effortlessly blending into any surface or material. This practical choice not only makes application a breeze but also minimizes waste.
But don’t let the neutral shade fool you – Liquid Nails goes beyond the basics. For specialized bonding needs, darker gray or black variations step up to the plate, matching the color of marble or granite for seamless integration. And for those looking to add a touch of flair, colored options are available, allowing for eye-catching finishes on your projects.
Keep in mind that slight changes in color may occur after application due to drying time and exposure to light and air. However, rest assured that these alterations do not compromise the adhesive’s exceptional strength and performance.
To ensure proper application, it’s crucial to prepare the surface diligently by cleaning away dirt and debris. Applying Liquid Nails evenly using a caulking gun or adhesive gun will guarantee full coverage without going overboard. And of course, following the manufacturer’s instructions on drying time and curing will maximize effectiveness and provide long-lasting results.
In summary, Liquid Nails is every DIY enthusiast and professional’s dream come true – readily available, consistently reliable, and offering a rainbow of color options with unmatched bonding strength.